Save and read later -
Flickering films from film projectors are a thing of the past, and the best modern models can turn a room almost into a real cinema hall. If you decide that it's time to get such a device, we will help you make a choice in a situation where it is wider than ever, and prices for the best models are temporarily reduced.
The urgency further complicates the issue, as if there wasn't enough confusion due to different types and technologies. In such conditions, choosing the best option is not easy.
Therefore, it is worth taking a few minutes to review the basic concepts. Sit back, grab some popcorn and immerse yourself in the magical world of projectors.
Selecting a Projector Type
First of all, let's understand the different types of projectors. In most cases, it will be one of two models: DLP (digital light processing) or LCD (liquid crystal display).
In an LCD projector, three liquid crystal matrices, each of which is responsible for creating an image of a primary color, create three pictures - red, green and blue. Using a glass prism, they are combined, giving a full visible spectrum, and in this form they are transmitted to the screen.
A DLP projector uses a single chip made up of millions of microscopic mirrors. Each can be rotated to direct its light toward or past the projection screen, so that each mirror essentially acts as a TV pixel. A rotating color wheel is located in front of the light source and determines what color image is currently being projected. Three-chip DLP models are also available, in which the light is split into three components and recombined, just like in LCD projectors, which eliminates the need for a color wheel.
In addition, there is a projection system LCoS, which stands for “liquid crystal on a semiconductor” and it works almost like DLP - only instead of mirrors, liquid crystals are used to control the light. This method is used by Sony and JVC under the names SXRD and D-ILA, respectively.
All of these technologies have their advantages and disadvantages. DLP generally has better brightness and clarity, but it tends to have a "rainbow effect" (red, green and blue colors do not mix but appear separately) when monochrome images are not perfectly combined. LCD projectors are cheaper and don't suffer from this effect, but they do have problems conveying motion and the blacks are less deep than other types of projectors.
In turn, LCoS does not have the rainbow effect, like DLP, and the tendency to burn out matrices, like LCD. However, it is more difficult for them to create deep blacks than DLP models. In addition, they are usually more bulky and expensive.
With all the differences between technologies, when choosing a new projector, you should not rely only on their characteristics. It is best to read the reviews of the model you like and make a decision taking them into account.
Review of the BenQ W1075 projector
This is an inexpensive and feature-rich projector. Customer reviews indicate that the model supports various formats. Its sound level is 45 dB. In this case, the contrast ratio is 2300:1. The minimum image diagonal is 1.3 meters. The model has a progressive scanning function. The horizontal frequency is a maximum of 120 kHz.
The optimal focal length for installation is 22 meters. The model does not have a distortion correction function. The lamp in this case is used from the NN series. It is also important to mention PAP technology. You can buy a projector in a specialized store for 25 thousand rubles.
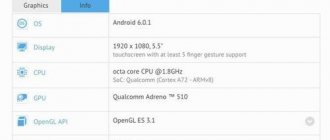
4K or Full HD: which resolution to prefer?
While buying an HDTV seems like a weird fad these days, a 1080p projector makes perfect sense, especially if you're on a budget. There are many decent options on the market; our favorite is the Epson EH-TW650.
Projectors in the price category 100,000 - 300,000 rubles. allow you to count on 4K resolution - four times more than HD. It's not true 4K, but it still uses 4.15 million pixels (or slightly less) - half of Ultra HD's eight million. With pixel shifting, which quickly and alternately displays two lower-resolution images to create a final high-resolution image, projector manufacturers can claim 4K support and receive certification from the Consumer Technology Association (CTA) in the US.
The upper end of the price spectrum is occupied by devices with true 4K resolution. Their prices start from 450,000 rubles, but they guarantee that the image will be as clear as possible, as intended, without any tricks. The best picture we've ever seen was produced by the excellent JVC DLA-Z1, which costs an impressive amount of money.
Ultimately, the price and size of the projector will determine the resolution you can expect; All that remains is to choose the best option from the available ones.
Reviews of the BenQ MX525 model
These BenQ projectors have a lot of advantages. First of all, buyers choose this device for its high image quality. In this case, PAP technology is provided. It is also important to note that the device supports 3D images. The maximum diagonal of the picture is 3.2 meters. The projector is great for educational institutions.
If necessary, you can connect several external media to it. The level of electricity consumption is 24 W. The horizontal scanning frequency is a minimum of 15 kHz. The optimal focal length of the projector is 22 meters. The model's scaling factor is 1.1. You can connect the BenQ projector to the network only through the power supply included in the kit. A user can buy a model for 23 thousand rubles.
Is it possible to get HDR at the same time?
Today, only a crazy person would buy a 4K TV without HDR (high dynamic range) support. With projectors everything is much more complicated.
Most often, HD projectors do not support HDR. Many inexpensive 4K projectors can handle HDR10 (the standard version of HDR) from Blu-ray discs or streaming services, but can't reproduce the full range of colors.
For example, the BenQ W1700 model, according to the words, however, reproduces only 96% of the Rec.709 palette. The five-star Optoma UHD40 projector does much the same thing.
Of course, having the ability to receive a signal in HDR is better than not having it; However, you can also find a projector with full HDR support - you'll just have to pay a lot more for it. The Award-winning Sony VPL-VW260ES is a decent starting point for decent HDR10 pictures, and the more you're willing to spend, the better the picture you'll get.
Review of the BenQ MX535 projector
This projector is known not only for its high-quality lens, but also for its compactness. It is great for displaying 3D images. It is also important to note that the model uses a high-quality matrix. PAP technology is supported by the device. The noise level of the projector is 35 dB. The horizontal scanning frequency is at 15 kHz.
The projector's scaling factor is 1.2. Also worth mentioning is the high brightness level. Many buyers claim that the picture looks realistic. The matrix resolution is 820 by 650 pixels. BenQ projectors can only be repaired at service centers. The price for this model fluctuates around 28 thousand rubles.
Setting up the projector
Both large and small projectors require adjustments equally. The first thing you should think about is the projection ratio, which determines how far away from the screen the device must be to produce a picture of the required size.
You can find it in the user manual of the selected model (or, which is much faster, on the manufacturer’s website). Look for a combination of a number, a colon and another number. For example, if this indicator is “1.15:1”, then an image with a width of 1 meter can be obtained from a distance of 1.15 meters, for a two-meter image the projector must be located 2.3 meters from it, and so on.
Most projectors are long throw and should be mounted far enough from the screen; short throw models can be placed quite close to the wall and result in a large image. The choice between a short-throw and long-throw projector must be made first - it is much easier to buy another model than a home theater room!
It is worth considering purchasing a special screen. Without it, your new projector won't be able to show off all that it can do. Of course, in a pinch you can do without it, but the higher reflectivity of the screen makes the image clearer and more colorful compared to a picture on a regular wall.
And the black frame around the image also significantly visually increases its contrast.
Review of the BenQ MS508 projector
These BenQ projectors stand out among other models due to their high-quality lenses. The minimum focal length is 13 meters. According to experts, this projector is not afraid of dust. The device's contrast ratio is 1300:1. PAP technology is provided in the presented projector.
According to the owners, the brightness of the images is excellent. In illuminated rooms the model displays acceptable. The power consumption parameter is 22 W. The horizontal sweep frequency is at least 13 kHz. The scaling factor of the model is at the level of 1.2. The lamp in this case is standardly used in the NN series. A user can buy a projector in a store for 26 thousand rubles.
Accommodation
The location of the projector is equally important. If possible, it should be mounted at the height of the center of the screen to minimize geometric distortion. Ideally, the device should stand on a horizontal surface; Most models come with adjustable feet for leveling.
If you need to adjust the position of the projector, place it in the desired location and then unscrew the legs until the image is level.
By this point it should already be close to what you want. Many projectors are equipped with rotary controls (and more expensive ones with electronically adjustable remote controls) to zoom in and out of the image to fit the size of the screen.
If you have to install the projector too high or low so that the picture appears skewed, you can use the keystone correction feature.
It stretches the picture horizontally or vertically, turning the trapezoid into an even rectangle. This feature can be useful, but any scaling affects image quality, so leave it as a last resort. The less distortion, including when setting up the projector, the better the result.
BenQ Projectors: Instructions for Use
First of all, the device should be connected to the power supply. After this, the start button is pressed. There is a special connector on the side panel for external media. To adjust video or photo parameters, go to the menu. To open a file, use the “Start” button. An automatic shutdown system is not provided in all modifications. Upon completion of work, you must press the “Stop” button and then turn off the device.
To set up the stand, you must first familiarize yourself with the model parameters. The minimum image diagonal is always indicated in the device documentation. On average, this parameter fluctuates around 1.5 meters. The focal length is no more than 25 meters. It is also important to pay attention to the preparation of the room. In the absence of lighting, images appear more contrasty and vibrant.
Focus
Now you can start focusing. The best way to do this is to take frames of letters - for example, the end credits of any movie - and adjust the focus on the projector, placing one of your friends near the screen so that they can see the individual pixels.
Slowly turn the focus dial back and forth until the letters are as clear as possible and your friend confirms that the pixels are not blurred.
Some projectors may require you to crank up the sharpness a couple of notches via the menu, but don't overdo it or the image will become too sharp.
Wired connection
Wired connection of a laptop to the device is the most reliable connection method. The signal remains more stable, and the likelihood of technical problems is minimized.
Before you connect the projector to your laptop, you need to find a connection connector on the case. If they match on both devices, then the connection diagram is simple: you only need a connecting cable.
The projector can be connected to a computer using four interfaces:
- VGA – analog video interface. On older devices this will most likely be the only option. If the connection to the device is via VGA, you will have to output sound from the laptop to the speaker using an additional mini jack cable.
- DVI has several varieties. Most often it is used to connect a monitor to a computer. This is less common on modern laptops.
- HDMI – digital interface. It has the highest transmission speed and allows you to reproduce sound on the projector. It is recommended to play video from a computer via HDMI.
- Component connector - consists of three plugs that transmit audio and video signals.
Important! If the connectors do not match, you will have to buy an adapter. For example, when you need to connect via VGA to an HDMI port. Such an adapter will cost about 800 rubles.
How to connect a projector to a laptop:
- Both devices should be turned off.
- The wire is connected to the appropriate inputs on the projector and laptop. If there are latches, you need to tighten them for secure fastening. It happens that the laptop does not see the device due to an outgoing cable.
- Turn on the projector.
- Turn on the laptop. Log in to the operating system.
- If multiple sources are being output, you can switch them using the Source button.
How to turn on the projector:
- Connecting the video projector to the connectors is complete. The device needs to be powered up again. The LED on the case should light up.
- Press the power button and remember to remove the lens cap. The LED will flash and the projection lamp will begin to heat up.
- While the lamp is heating up, the fan will turn on and a screensaver will begin to be projected on the screen.
- When the device warms up completely, the screensaver will become brighter and the LED will change color. The video projector will begin connecting to the source.
Perfect picture
Most of the time, the projector's factory settings will be fine, but we recommend turning on the Standard or Cinema mode and then adjusting the brightness and contrast to your liking. Don't forget to stock up on a couple of good and proven films.
To adjust contrast, stop playback on a frame with cumulus clouds; Set the contrast to maximum and reduce it until you can see details instead of all white spots. To adjust the brightness, there must be something dark on the screen - for example, a coat or shirt. Lower the brightness until the folds and fasteners begin to disappear into shadow.
The color palette usually does not require adjustment; otherwise, choose a scene with bright colors and raise the level if you lack energy, or lower it if the colors seem overheated. A scene depicting human faces will allow you to appreciate the realism of flesh tones.
Please note that the projector's fan may be quieter in Eco mode, but will result in a less energetic image. Most projectors have this mode; find it in settings and disable it.
Features of the BenQ MS512 model
These BenQ projectors are quite in demand these days. First of all, experts note the high quality of the lens. In this case, the details in the images are clearly visible. At the same time, the colors are bright. The minimum focal length of the device is 14 meters.
The model is quite simple to install. The maximum vertical scanning frequency is 120 kHz. The model does not support 3D images. It is also important to note that the minimum diagonal of the picture is 1.5 meters. The noise level of the projector is 33 dB. You can buy a model on the market for 24 thousand rubles.
DIY ceiling bracket for a projector
A simple budget version of the holder can be made with your own hands. Its design will not have systems for adjusting the angles and height of the suspension, but the ceiling suspension will be durable, reliable, and most importantly - cheap.
To build the bracket you will need:
- Aluminum pipe;
- Galvanized corner;
- Mounting perforated plate to fit the projector;
- Fasteners, bolts and screws.
The diagram of the ceiling holder is shown in the photo.
For hanging from the ceiling, two corners are bolted to the top of the stand.
The pipe is connected to the plate in a similar way. If the lower pair of corners is secured to wing nuts, it will be possible to adjust the angle of inclination of the device. The presence of perforations on the plate ensures reliable and efficient removal of warm air from the video projector, so the operating time of the device is almost unlimited.
The most difficult part of the assembly is to accurately align the axis of the stand with the center of mass of the projector. You have to select the attachment point experimentally. The optimal height of the stand is 60-70 cm. Since there are no recommendations for installation, the length of the ceiling rod for a homemade bracket also has to be selected empirically.
The network wire and cable from the computer are laid inside the pipe and led through a corrugated hose to the corner of the room. In general, the ceiling system cost a little more than 500 rubles.
Displaying content in the required mode
Having figured out how to connect a laptop to a projector, all that remains is to configure the image output. Experience shows that the launch occurs automatically or by pressing just one button.
Important! Most laptops have a hotkey for projecting the Windows screen. It is pressed using the combination Fn + one of the keys in the F1 – F12 row.
How to manually configure the projector on different OS versions:
- Windows 7. Connecting a projector is similar to connecting a monitor to a laptop. On the desktop, right-click and select “Screen Resolution”. A window will pop up showing the projector and connected monitors. In the “Screen” list, select the device, and in the “Multiple screens” list, select the “Duplicate these screens” mode.
- Windows 8. You can duplicate the screen in the same way as in Windows 7, but there are faster methods. You can drag your mouse across the right side of the screen. A menu will pop up, select “Devices”, then “Transfer to screen”, “Duplicate” mode. The same can be done by pressing the Windows key + P.
- Windows 10: Open Action Center. It's a message icon in the bottom right corner. In the panel that opens, select “Project” - “Repeating”. If the projector is not connected, you should select "Connect to a wireless display." The system will find it automatically.
- To a Windows XP laptop. Right-click on the desktop, click “Properties” - “Display”. Next, a window will open, go to the “Options” tab. Select the projector in the “Display” tab, and check the “Extend desktop to monitor” checkbox.
Where is the best place to place the screen?
To begin with, you must choose the best location for your screen. It all depends on the layout of the room in which your home theater will be located. The most important rule is the following: choose a wall that does not receive direct rays of light, otherwise the image will end up blurry and you will not get pleasure from viewing it. If, however, there are no other options and the wall on which direct light falls will be intended for watching movies, you will have to buy a projector screen that will reflect diffused lighting. Also, if you are painting a screen on the wall yourself, use a special paint that reflects diffused light. You can buy it at hardware stores. Another option is thick curtains for windows that block out the sun's rays.
A museum in the USA has found an ingenious way to hold an exhibition during quarantine
A wooden block in the hands of a carpenter turned into a folding stool without nails
On “First” they showed a restored version of the war film “Liberation”
Projector Ceiling Mount Manufacturers
The highest quality hangers for projection equipment are produced in Germany, they are expensive, very reliable and durable. On average, the price is 15% higher than that of the nearest European manufacturers.
Good reviews about ceiling holders, models of the same type with “Sunne” are 15-20% cheaper, and the quality and reliability of the holder are almost the same.
The original model of the ceiling bracket can be easily distinguished from a cheap fake by the quality of the paint. Most holders are painted with powder paints and special antistatic enamels. Products made in Southeast Asia are almost always painted with alkyd enamel.
Key selection criteria
The most important stage of installation is the choice of fasteners. Typically, such installations are made of metal, although both plastic and metal products are available on sale. A typical ceiling projector mount consists of the following elements:
- Panel. This is a plate that is mounted to the ceiling. The stand is attached through it.
- Cylinder rod with telescopic capabilities. Adjusts the height of equipment from the ceiling plane. Thanks to it, the projection of the image onto the projector screen can change its location.
- Platform. The equipment is located on it. There are both universal platforms and mounts tailored for a specific brand. Some models allow you to change the angle of the platform.
When purchasing a universal ceiling mount, be sure to check how much your equipment weighs. The stand must correspond to this parameter.
It is also necessary to pay attention to the height of the bracket, it can be fixed or variable
The next parameter to be guided by when choosing is the correspondence of the holes to the gaps on the platform. Even if the misalignment is 3-4mm, it may not be possible to install the projector on a ceiling.
We pay attention to such a parameter as the length of the rod when the platform is raised. In rooms with very low ceilings, it may be difficult or impossible for the projector to project images onto the screen.
In this regard, experienced craftsmen have one proven method. To calculate the exact length, measure the height of the room and subtract the distance from the floor to the screen from the resulting value. The error should not be more than 10 centimeters.
When installing a projector bracket on the ceiling, it is necessary to take into account such an important indicator as the surface of the ceiling covering. The standard projector mount is designed for a horizontal plane. If the top arch has a slope, an additional adapter must be purchased before installing the projector. By the way, it allows you to mount the ceiling projector not only on an inclined vault, but also on a beam.