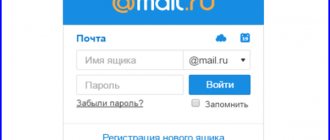
Mail.ru mail
To register in this search engine, you need a browser on your Android. Which one doesn’t matter, from Chrome to Opera and others. So, we enter the browser:
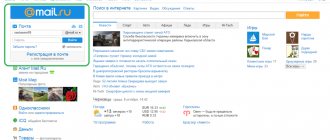
- In the address bar of the browser, enter mail.ru and tap on the button in the search;
- A new window opens for us, where we need to click on the “Registration” button;
- Then, we need to enter personal information: first and last name, your gender, what date you were born. After this, you need to come up with a login that you like. Please pay attention to the password. It must have both capital letters and simple letters, numbers and special letters. symbols. In this case, it is advisable to use the password generator again by checking the boxes above these commands. The level of security of your address will directly depend on how complex your password is;
- You must enter a valid smartphone number, since we will need it if we decide to recover the password. To complete the process, you need to click on the “Register” button.
As you can see, we have completed registration. We will be informed about this by a message on the phone display. There is one stroke left, you need to enter a captcha, and your email is created!
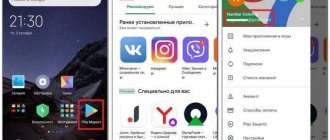
Android
Method No. 1: Mail clients
Owners of Android devices can find a variety of email clients in the official Google Play application market. Some of them are specialized for one email service (for example, only for Gmail), while others support any email. In addition, in certain programs you can not only log in to a previously registered account, but also create an email on your phone, as they say, “from scratch.” That is, create a brand new account.
Well, let's get to know them. During the review process, you will figure out “xy from xy” (who is who) of these products and will certainly install the client you like into the device system.
Gmail
A very powerful tool for working with e-mail correspondence and at the same time very easy to use. It provides a quick start for beginners - install, log in, receive/send letters.
Judging by the name, you probably already understand that the client is designed to use a Google mail profile. Yes it is. But along with its main specialization, it also supports working with other e-mails (Outlook, Yandex, etc.).
The Gmail application can sort mail: place letters in special sections depending on the recipient and their content (advertising mailings, notifications, news, etc.). It reliably protects the user from spam and viral messages. Plus, it provides free access to remote file storage. Google generously allocates 15 GB for each account.
To use Gmail, do the following: 1. On the display of your device (mobile), tap the Google Play icon.
2. On the application market website, type gmail in the search bar.
3. In the search results, select panels with the same name.
4. On the client page, tap the “Install” button.
5. Wait a little while the application is downloaded and installed.
6. Allow access to data: in the panel with the list of permissions, select “Accept”.
7. After launch, you can use the previously created and connected Google profile in the device or set up another account.
To do this, tap, respectively, your profile login or the “Add another address” option.
When connecting a new e-mail, you must do the following:
1. Select the service you want to use (Yandex, Yahoo).
Attention! If the list does not contain the name of the service that you need to install, tap “Other” and then specify its name. The client will attempt to automatically create network settings for its connection.
2. Specify the login and password of the account being connected.
Yandex. Mail
The application contains almost the same set of functions as the web version of Yandex mail:
- monitoring of incoming messages;
- opening attachments;
- registration and sending of letters;
- setting up automatic notifications;
- grouping, searching, filtering by correspondence tags;
- the ability to work with the Domain version of Yandex mailboxes.
Installing and launching the client comes down to the following operations:
1. Find the Yandex.Mail application on Google Play.
2. Install it on your device and launch it.
3. When logging into the client, enter the authorization data of an existing account.
And if you want to create a profile directly in the client, in the login form, tap the “Registration” link. Next, provide the service with all the necessary data (address, password, address, phone number).
4. Upon completion of authorization/profile creation, open the settings panel to go to the required section (Inbox, Outbox, Sent, etc.).
Mail.ru
A branded client from the creators of the popular web portal of the same name on the Runet. Convenient, quick to use. Able to simultaneously work with several profiles, including third-party services (Rambler, Gmail, Yandex). Performs absolutely all essential functions: sending letters, files. It has notification settings and a scrupulous spam filter.
The client also has many advantages. Here are some of them:
- synchronization of account data on all devices;
- displaying avatars and logos of recipients;
- convenient list of contacts (address hints when typing);
- instant search for a letter in your profile;
- push notifications;
- caching and filtering of messages;
- Protecting access to a folder with letters with a password.
Note. The performance of this application has been tested on Sony Xperia Series, HTC One, Samsung Galaxy devices.
If you want to install Mail.ru: 1. Go to the Android market to the page for downloading the client. Click Install.
2. When you launch it for the first time, the client will ask you to indicate the email (name of the service) that you are going to connect.
3. Next, enter your account information (login, password).
You can also activate the Google profile used on your phone in the application panel. To do this, you need to touch the inscription “Click here to sign in,” which is located at the bottom of the window (above the Gmail address).
If you close the panel asking you to connect your Google account, the “Create mail…” link will open at the bottom of the screen. Tap it if you need to register a new account on Mail.ru.
In the form that appears, enter your data (first and last name, gender, date of birth, address and password for the mailbox). Check the box “I accept the terms...” and click “Next”.
Blue Mail
An ideal option for those who simultaneously work with a large number of mailboxes that are registered with various services. It will be easier to talk about what this client can’t do and what options it doesn’t have, than to describe its extensive functionality. However, we will reveal its main advantages in this article:
- management of an unlimited number of accounts;
- support for a huge number of services: including popular (Gmail, iCloud, Yandex) and rarely used (Web.de, ymail, Hushmail);
- 100% compatibility with all current protocols (POP3, IMAP, EWS, ActiveSync);
- synchronization of all mailboxes in one interface;
- advanced notification settings (sound selection, quiet hours, vibration, flash);
- a set of tools for designing letters (fonts, signatures, logos);
- “intelligent” sorting of incoming correspondence;
- hack-resistant protection and encryption of user data.
Blue Mail is downloaded and installed in the same way as previous clients.
After launching it, in the panel that opens, select the account type: “Add... Google” or “... another account.”
If you select the second item, an additional service selection menu will open in front of you.
Tap the required option.
Method No. 2: standard device resources
Perhaps, after familiarizing yourself with the software described above, you have doubts about whether clients are worth using. Well, a completely logical question: is it possible to come up with something simpler for using e-mail?
We answer. As an alternative method, you can use the mobile settings and the procedure used to register on a PC. As for the ease of their use, this is certainly a controversial issue. It all depends on the tasks assigned. Perhaps, if you just need one e-mail profile, and even then for the sake of performing some one-time operation, for example, registering on some site, then these instructions will do just fine.
Options
1. Tap the Settings icon (Gear icon) on your home screen.
2. In the Account section, go to the “Add account” subsection.
3. Select the account type (Google, Yandex, Mail.ru).
Browser
- Open any installed browser on your device (for example, Google Chrome).
- Go to the website of the required mail service.
- Register or log in (enter your mailbox address and password).
Next, you can also log in to your mail profile via a web browser.
How to create an email on Mail.ru for an Android smartphone
If you have not yet registered with any mail service, we recommend creating mail on Mail.ru as the easiest and fastest option. There is nothing superfluous in it, it works perfectly with other services. At the same time, you can also receive free space for your files on Mail.ru servers along with the mailbox.
Cloud Mail.ru
The popular service “Mail.ru Questions” and more will be available.
You can register your email in the web version of the site, through a mobile browser, or by downloading the application on Google Play:
- Write “Mail.ru Mail” in the search and select the service in the results;
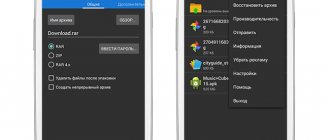
- On the main site, click on the “Registration” button; Click on the “Registration” button on the Mail.ru website
- Next, fill out the standard registration form, indicating the name of the box; Enter registration details
- Enter your phone number or captcha and click on the register button.
A mailbox can be used as a service for sending and storing letters. It is reliably protected from spam and viruses. Users have the opportunity to get up to 100 gigabytes of space on the Mail.ru cloud on an Android phone. As well as transferring mail and collecting letters from all other mailboxes and mail services. There is a built-in calendar. And for developers it is possible to access the API.
If you need to delete your mailbox, read this article.
iOS
On devices running the iOS operating system - iPhone and iPad - just like on Android, you can use the standard application or install any email client you like from the official AppStore. Let's take a closer look at both methods of setting up e-mail.
Method number 1: standard iOS program
1. On your device, tap: Settings → Mail → New account.
2. In the list, tap the name of the required service.
If you do not find the service you are using in the proposed list, click the very last item “Other” for manual configuration.
Next, the connection procedure is performed depending on the selected scenario:
Automatic (select a supported email provider)
- Enter your mailbox login and password.
- Click Next.
- After successful account verification, the standard Mail application will perform synchronization.
- Click "Save" and go to your profile.
Manually (if the service is not in the list)
- Tap “Add an account...”.
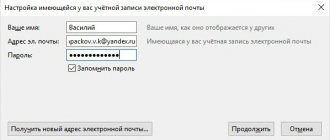
- Enter your personal data: name, login and password, account description (arbitrary label for ease of search, identification of the profile in the client).
- Click Next.
The email client will analyze your data, verify and configure the network connection to the service. If you see a message that the Mail.ru application cannot create settings for using the e-mail you specified, additionally follow these steps:
1. Select the mail server type: POP or IMAP.
Note. If you find it difficult to choose a type, consult the technical support of the mail service.
2. Enter the required data in the “Incoming mail server” and “...outgoing...” lines.
3. After successfully checking the specified parameters, you will be able to work with mail.
Method number 2: third-party applications
The same clients are available in the AppStore as in Google Play for Android - Gmail, Mail.ru, Yandex, Blue Mail. The developers are porting them for iOS. The procedure for searching, downloading, installing and registering application data is practically no different on Apple devices (that is, all actions are performed by analogy).
Also, in addition to cross-platform clients, the AppStore has solutions specifically created for the iOS system. Among them:
Spark
Multifunctional manager of correspondence received by e-mail. Automatically sorts emails by content (notifications, news, mailings, invitations).
Equipped with the “Quick Reply” function, with which you can quickly reply to a letter with a bright symbol or type text under dictation. Works stably and reliably with popular cloud storage services (OneDrive, Box, OneNote, Dropbox).
All! This concludes our short review. Note that there are other, no less convenient and effective, applications for using e-mail. Install, try, get acquainted. With experience, you can choose the best option for yourself from a variety of clients and methods.