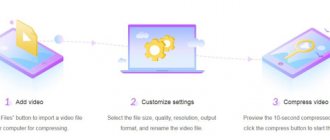
Phone as access point
This mode consists of certain settings that are made automatically when this function is activated. This allows you to use the phone as a mobile 2G and 3G modem. Of course, any modern smartphone can act as a Wi-Fi access point, but it happens that for some reason this option is not suitable. So, how to connect Android as a modem?
Connection modes
First, it’s worth looking at the question of what a modem is. This is a device that allows you to connect to local and global networks. It uses signal modulation, which allows digital data to be transmitted over an analog link.
It is worth noting that the smartphone can be used as a modem in two connection modes:
- Via USB.
- Via Bluetooth connection.
This means you can connect your phone via cable or over the air. Each method has its own advantages and disadvantages. For example, wireless communications have fairly strict limitations on data transfer speeds. Depending on the Bluetooth version, the actual connection speed will vary from 720 kbps to 3 Mbps.
At the same time, the USB connection, although it boasts a higher information transfer speed, limits your movements. If the phone is connected to the computer via cable, if necessary (at the time of a call, etc.) you will not be able to move freely. So, let's take a closer look at these two connection options.
Entering AT commands via PuTTy
To change imei on a Huawei modem, you will have to do the following:
- connect a 3G modem to your computer (laptop);
- go to device manager and find new devices;
- Pay special attention to the added port, remembering its number;
- open the task manager, find in it the processes associated with the modem (usually there are 2 of them), disable it;
- the next step is to download Explorer (PuTTy) and open it;
- a connection to the previously discovered port is configured in Explorer;
- the port is indicated in the “serial line” column;
- connection type 4 is selected;
- the “terminal” tab opens;
- and “local echo” is turned on.
This completes the preparatory phase, and users can move on to collecting the information they will need to make changes. So, to use the program you will need a special OEM code to unlock the modem. To receive the mentioned code, you will need to have a USB router.
How to view/clear browser history on Honor and Huawei phones
Smartphone as a Bluetooth modem
As you may have guessed, this function works similarly to a Wi-Fi hotspot. To use Bluetooth tethering mode on Android, follow these steps:
- Turn on the Bluetooth module on your laptop and phone. Enable device discovery. This is done in the module settings. On your computer, find the Bluetooth icon in the system tray (bottom right corner of your desktop). Right-click on it and select “Open Settings”.
In the “Settings” tab, check the “Allow devices to find this computer” checkbox.
On your smartphone, go to the Bluetooth settings and check the box “Allow discovery” or “Visible to all devices...”.
- At this stage we need to pair the devices. To do this, on your computer, right-click on the Bluetooth icon in the tray again. In the menu that appears, select “Add device”.
After this, a window will open in which the system will display a list of equipment available for connection. Select your smartphone and click "Next".
The system has now generated a PIN code. It must be the same on both devices. All you have to do is confirm the pairing. To do this, click “Ok” on your smartphone and computer. The system will now install the necessary software and drivers.
- Turn on mobile Internet or Wi-Fi on your phone (mobile data transfer).
- Now go to the smartphone settings and select “Other networks”, then select “Modem and access point”.
On older versions, follow this path: “Settings” - “Wireless networks” - “Modem and access point”. Here you just need to check the “Bluetooth modem” box.
- Let's go to the computer. Click the Bluetooth icon in the system tray again and select Show devices.
In the window that opens, you will see all the devices paired with this PC (tablets, phones, smartphones, printers, and so on).
- Right-click on the desired device. We need the “Connect via” item and then select “Access Point”.
After this, on your PC you will have access to the mobile Internet via Bluetooth. As you can see, there is nothing complicated. It is only important to follow the sequence of actions. In this case, pairing only needs to be done once.
For further connections, you just need to turn on the wireless module on your PC and phone and follow the steps starting from the third point.
Remember that this mode significantly reduces the battery life of your mobile phone. Take this into account when traveling and in cases where there is no outlet for charging at hand.
How to restore, change IMEI on a 3G USB modem
Restoring\changing IMEI using the example of a HUAWEI
First you need to download QPST
.
Download:
QPST 2.7 Build323
1.
Install
QPST
.
2.
Launch
QPST Configuration
:
Start
-
All Programs
-
QPST
-
QPST Configuration
3.
Device Manager
->
Ports (COM and LPT)
Find the port number (for
Huawei-3G Application Interface
)
4.
If there is no port number, click the “
New
Port
” button
5.
Here you select
the COM port
that corresponds to
the 3G Application Interface
6.
This is how your modem should appear
7.
Click “
Start Clients
” at the top
8.
Select “
RF NV Item Manager
”
9.
A window like this will appear
10.
Click
Setting
-
Comport
-
Select a port
11.
Next, click “
File
-
Read From Phome
”
12.
The process of reading/processing
NV item
from the modem will start. In the displayed result, we will not see the item we need (
NV_UE_IMEI_I
)
13.
Click “
File
” again and select “
Read Supported RF NV Items
”
Now all NVs
points
14.
Select (
NV_UE_IMEI_I
) I have it at number
550
15.
Here you will see
9
empty fields on the right side (if you do not have
IMEI
)
16.
We put a tick in the “
Hex
” box and write the new
IMEI
.
But you must write not in the original format (this is not possible 3 44 30 40 85 11 33 67
), but in Hex format (this is necessary
8 3A 44 03 4 58 11 33 76
)
Important:
In the first field, be sure to enter the value -
8
In the second field, the first digit of your IMEI in this form is
3A
In the fifth window, enter one digit of the value (in the original
IMEI
this is the 4th set of characters, usually tens (
10,20...80,90
) In the rest in the windows, the numbers are entered in a mirror image.Example: the real IMEI is
3 23 54 30 15 61 53 37
, which must be entered -
8 3A 32 45 3 51 16 35 73
17.
IMEI entered, click “
File
” again and select “
Write Only Listed NV Item To Phone
”
All IMEI
installed.
Important: write the IMEI correctly and very carefully the first time, there will be only one attempt, the second time the IMEI will be write-protected.
You can try this with ZTE MF
.
IMEI
on Huawei modems using
AT commands
and terminal programs. How it's done and the commands.
1.
The modem must be connected to the computer and all drivers must be installed on it.
2.
First, we give the following command to the modem
at^datalock=”code”
with quotes and press the “
Enter
” button, the answer should be
OK
, where instead of the word code you write the unlock code for your modem using its native IMEI. This command removes the ban on writing to the modem memory.
3.
Then, without turning off the modem, we give the command to change IMEI
at^cimei=”new imei”
with quotes and press the “
Enter
” button, the answer should be
OK
, where instead of new
IMEI
write the one you need.
ATTENTION!!! You do all actions at your own peril and risk. The site administration does not bear any responsibility for your actions. Changing IMEI is not entirely legal! (no proofs). By following the recommendations from this topic, you take full responsibility for the consequences.
Connection via USB cable
Each smartphone comes with a special USB/microUSB cable. With it, you can connect the device to a PC to copy files, as well as for firmware and work with the phone. This cable can also be used to use Android as a USB modem.
To do this, connect your phone to your PC via USB. On your smartphone, turn on mobile Internet. Next, go to settings and select “Other networks” (on earlier versions – the “More” section). Enter the "Modem and Access Point" category. All that remains is to check the “USB modem” box.
As you can see, this option is even simpler. Moreover, in both the first and second cases, you can use not only a mobile network, but also a Wi-Fi connection to access the Internet. This way you can connect to the Internet a desktop computer that does not have wireless communication modules, as well as laptops that are not equipped with a Wi-Fi adapter.
It is worth noting that, unlike the first option, when connected via USB, the battery of your mobile phone will be constantly charged, thanks to which the equipment can operate for an unlimited amount of time. But this affects battery wear. If you regularly use your phone in this mode, the battery capacity will noticeably decrease within a month.
How to set up an access point on Android
The first method is used to work with the latest models of devices that have the ability to distribute the Internet via cable (not lower than Android 4.0). In this case, installation of additional software is not required. Our actions should look like this:
Through “Settings”, click the “More” button to open the “Wireless Networks” tab. There we select “Modem mode”, click on the Wi-Fi access point:
Now select “Set up a Wi-Fi access point” and, using the keyboard, enter the password and click “Save”. Then we return to “Modem Mode”, the button will become active, click it:
It should be taken into account that the names may be slightly different on different device models, but the meaning and actions will remain the same in any case.
Now our smartphone (or tablet) is ready to work as a modem, all that remains is to connect to the PC using a USB cable, after which the computer should detect the network itself, and to connect to it you will need to enter the password that was set on Android.
The second method is suitable not only for using your old battle friend as a modem (below Android 2.1), but also more advanced gadgets will find a lot of useful things for themselves.
Here we will use a special application. Download and install the PdaNet+ application on your device
Now you need to enable USB Debugging mode:
- Through “Settings” go to “Applications”.
- Open "Development" and enable debugging.
Now you need to download and install a special client on your computer, after which a phone icon will be displayed in the tray (the panel at the bottom of the display on a PC).
All that remains is to connect your Android phone (or tablet) via a USB cable to the laptop, then launch PdaNet+ on the device and select “Enable USB Tether” in the main application menu.
The system may ask you to install drivers; of course, this needs to be done.
Find the icon of the desktop version of PdaNet+ in the tray, click and in the window that opens, select the “Connect Internet” option:
WiFi
Find out how to enable an access point on your smartphone here:
The instructions are valid for Android no lower than version 4:
- Go to Settings and click More.
- In the Wireless Networks section, select Tethering Mode.
- Activate Internet distribution via Wi-Fi.
- Go to the access point configuration settings.
- Enter its name (SSID), traffic encryption algorithm and password to protect the connection.
- Save the configuration and activate the access point.
Now you can work on the global network from your computer. But remember that it consumes more traffic when navigating through a browser than a gadget (it can quickly waste the entire data package, or the speed on a slow connection will be uncomfortable for navigation).
How to extend your phone's operating time in modem mode
To increase the life of your smartphone in modem mode, you can use the tips listed below.
First tip - turn off location feature
The most energy-consuming option in an Android gadget is location determination, which can also be called geolocation or navigation. Therefore, when you turn on the modem mode, you need to turn it off. To do this, you need to open the gadget settings, then select the “Location” item there and move the slider there to the off position.
Second tip - turn on power saving mode
This mode allows you to extend the operating time of your Android gadget. Many modern smartphones have several energy saving modes, so the user can choose the one that is more optimal for themselves. Moreover, the standard energy saving mode does not affect the speed of the device and software; it only slightly limits the screen brightness, processor frequency and background operation of resource-intensive applications. Basically, these changes are almost invisible, but at the same time they increase the operating time of the phone by a couple of hours. True, this will be immediately noticeable in games.
The third tip is to reduce the brightness of the display
The smartphone battery also drains quickly due to the maximum brightness of the display. Therefore, if you are not outdoors, you can reduce the screen brightness. It is best to set the brightness automatically if the gadget provides this function. To do this, you need to open the device settings and select the “Display” tab there, and then set the desired brightness level there.
In addition, you can reduce the backlight timeout to a minimum. This is the time after which the display turns off. As a result of these actions, you can extend the battery life of the gadget for another 30 - 60 minutes.
Fourth tip - disable the auto-sync function with Google services
By default, all Android gadgets automatically synchronize data with Google services (Google Drive, Youtube, Gmail, etc.). Therefore, it is better to turn it off while using the phone as a modem.
In addition, in addition to consuming battery power, automatic synchronization consumes Internet traffic, as a result of which the monthly Internet package is consumed faster, and in roaming this often leads to significant expenses.
To deactivate the synchronization function, you need to open the “Accounts” tab in the device settings and disable auto-sync there.
Fifth tip - turn off animation effects
Animation and other interface effects also actively consume the gadget’s battery power. This “beauty” constantly loads the processor and also slows down switching between open programs.
To set up animation, you need to open the “For Developers” or “Developer Options” item in the device settings, where you need to find three functions “Window Animation”, “Transition Animation”, “Animation Speed” (or “Animation Scale”) and check the box there - "No animation."
If the phone is in an apartment or house, then you just need to put it on charge. True, sometimes in this case it also discharges, well, that’s a separate topic.