When downloading Windows 10 images, especially pre-release builds, you may end up with an ESD file instead of the usual ISO image. An ESD (Electronic Software Download) file is an encrypted and compressed image of Windows (although it may contain individual components or system updates).
If you need to install Windows 10 from an ESD file, you can easily convert it to ISO and then use a regular image to burn to a flash drive or disk. Find out how to convert ESD to ISO in this instruction.
There are many free programs that allow you to perform the conversion. I will focus on two of them that seem to me to be the best for these purposes.
Adguard Decrypt
Adguard Decrypt by WZT is my preferred method for converting ESD to ISO (but for a novice user, the following method may be easier).
The steps for conversion will generally be as follows:
- Download the Adguard Decrypt kit from the official website https://rg-adguard.net/decrypt-multi-release/ and unpack it (you will need an archiver that works with 7z files).
- Run the decrypt-ESD.cmd file from the unpacked archive.
- Provide the path to the ESD file on your computer and press Enter.
- Choose whether to convert all revisions or select individual revisions present in the image.
- Select the ISO file creation mode (you can also create a WIM file); if you don’t know what to choose, choose the first or second option.
- Wait for the ESD decryption to complete and the ISO image to be created.
The Windows 10 ISO image will be created in the Adguard Decrypt folder.
Convert ESD to ISO in Dism++
Dism++ is a simple and free utility in Russian for working with DISM (and not only) in a graphical interface, offering many options for customizing and optimizing Windows. Including one that allows you to convert ESD to ISO.
- Download Dism++ from the official website https://www.chuyu.me/en/index.html and run the utility in the required bitness (according to the bitness of the installed system).
- In the “Tools” section, select “Advanced” and then “ESD to ISO” (this item can also be found in the program’s “File” menu).
- Specify the path to the ESD file and to the future ISO image. Click the "Done" button.
- Wait for the image conversion to complete.
I think one of the methods will be enough. If not, another good option is ESD Decrypter (ESD-Toolkit), available for download at github.com/gus33000/ESD-Decrypter/releases
Moreover, in the specified utility, version Preview 2 (from July 2016) has, among other things, a graphical interface for conversion (it was removed in newer versions).
And maybe this will be interesting:
Why not subscribe?
Distribution of new, sometimes interesting and useful, materials from the site remontka.pro. No advertising and free computer help for subscribers from the author. Other subscription methods (VK, Odnoklassniki, Telegram, Facebook, Twitter, Youtube, Yandex.Zen)
03/13/2019 at 12:07
The section "Converting ESD to ISO in Dism++" does not cover details in case the ESD file contains multiple revisions. Dism++ does not offer a choice if only one specific edition is needed. An attempt to install a system from a boot image created using Dism++ failed. The first option is simpler and seems reliable.
03/13/2019 at 13:02
Adguard Decrypt is a great tool. Everything is brilliantly simple, just like in the good old days - menu, choice, action. Nothing extra. The conversion and subsequent installation was successful. Thanks to the authors for this valuable resource. Thank you
Note: Once you submit a comment, it does not appear on the page immediately. Everything is fine - your message has been received. Replies to comments and their publication are carried out every day, sometimes more often. Come back.
When updating a Windows 10 build through the Windows update system, the installation image of the new preliminary (insider) build of Windows is downloaded to the user’s computer in a specially new image format - ESD ( Electronic Software Download ). ESD is an encrypted and compressed .WIM ( Windows Imaging Format ) image of Windows.
This image distribution format was first used in Windows 8.1 for online operating system updates. Unlike a WIM file, an ESD image cannot be mounted or modified. Microsoft plans to widely use this format for system deployment. Compared to a WIM file, the size of an .ESD file is approximately 30% smaller, which is a big advantage when distributing it over the Internet.
In this article, we will show you how to decrypt and convert the Windows 10 ESD image into a familiar Windows installation image, which can be burned to a DVD or USB drive and used for a clean installation of Windows 10 or performing an update.
File format
The ESD file format is a distribution technology for Microsoft. This distribution occurs electronically . Programs that have the ESD extension in their name are automatically compressed and have a certain appearance . For example, when you download a compressed operating system, it will be approximately 35 percent smaller than a regular one.
This type is distributed only to users who have specialized lines to the company. Ordinary people are not given this privilege. The official website has several programs with general access . The problem is that they are almost impossible to download.
Most often, Windows 10 owners already have ESD format programs , so they do not have to download it separately through the official website. To correctly decrypt and open a package, it is enough to install certain format-expanding applications.
Using NET Framework 3.5 and 4.5 on Windows 10
The archive is unpacked as an administrator. When the script appears, the conversion begins. All you have to do is wait until the next step is displayed - the installation itself. After this, the user has every right to use the programs without harm to his computer.
How to get an ESD file with a Windows 10 image
Let's figure out where you can get ESD file ? When you upgrade Windows 8 to Windows 8.1, the install.esd file is downloaded in the background from the Microsoft repository and saved to the C :Windows SoftwareDistribution Download <some ID > .
get the Install.ESD with the latest build of Windows 10 by going to Start -> Settings -> Updates and Security ( Start -> PC Settings -> Update and recovery -> Preview builds) . If a new build is available for your Windows 10, you will be prompted to download and install the new image.
Run a system update for the new build, but do not overload your computer. During the update process, Windows will download the files necessary to perform the system version update. Once the download is complete, open File Explorer and go to the C :$Windows .
BT Sources . Install .ESD file in this directory (it is hidden) and copy it to any other directory. This is an .ESD file with a compressed image of the latest build of Windows 10.
To get information about which Windows images are inside the ESD file, you can use the standard DISM utility:
DISM /Get-WimInfo /WimFile:"C:isoinstall.esd"
Deployment Image Servicing and Management tool Version: 10.0.17134.1 Details for image : C:isoinstall.esd Index : 1 Name : Windows 10 Home Description : Windows 10 Home Size : 15,439,030,656 bytes Index : 2 Name : Windows 10 Home single language Description : Windows 10 Home single language Size: 15,439,078,082 bytes Index: 3 Name: Windows 10 for Education Description: Windows 10 for Education Size: 15,662,641,239 bytes Index: 4 Name: Windows 10 Pro Description: Windows 10 Pro Size: 15,662,520,267 bytes The operation completed successfully.
In our example, there are several system images inside the install.esd archive. For example, Windows 10 Pro has an index of 4.
Knowing the ordinal index of the Windows image in the ESD file, you can export it to a WIM file using the command:
dism /export-image /SourceImageFile:c:isoinstall.esd /SourceIndex:4 /DestinationImageFile: c:isowin10pro.wim /Compress:max /CheckIntegrity
The resulting WIM file can be converted to an ISO image using third-party utilities.
ESD Decrypter utility
To convert an ESD image to an ISO file, we will use the command line utility ESD Decrypter (ESD ToolKit ) , which can be downloaded from GitHub: https://github.com/gus33000/ESD-Decrypter/releases/. The ESD Decrypter utility is written in PowerShell, so you can easily view its source code (the cdimage.exe utility is used to generate an ISO image from a WIM file).
- Unpack the archive 4.0.0.0.fbl_prerelease.gustavem.160815-0800.zip into a random directory.
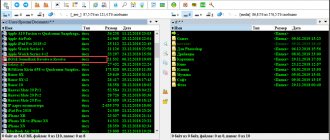
- Run the ESDISO.bat file with administrator rights.
- The wizard will ask you to specify the path to the CryptoKeys file with the keys for decrypting the ESD image and the path to the directory where you want to place the final ISO file (I did not specify these parameters, choosing N both times).
- Next, enter the path to your ESD file and press Enter twice.
- Start the process of converting an image in ESD format to an ISO file. Depending on the performance of your system, the process will take between 20 and 30 minutes.
- After the script has finished running, check that an installation ISO file with a Windows 10 image has appeared in the directory with the utility, which you can burn to DVD or create a bootable USB flash drive based on it.
Creating an ESD image for the deployment system
Shop/auction/FPR/ donate
/ services / RSS / print / login
[August 15, 2020 | August 23, 2020 | September 1, 2017]
Under normal circumstances, a WIM file is used to create the deployment image. It can be created using different methods, but it was a wim image and remains a wim image. The same file is used not only for network installation, but also for recording onto a bootable USB flash drive to install the operating system with all the necessary software. But recently I was preparing an image for an office that uses Windows 10 LTSB. I didn’t notice the catch right away, since I was using a computer on which the reference system was already installed. The system was prepared to work using WDS (Windows Deployment Services) and everything went as planned. But when I started preparing a bootable USB flash drive for offline installation of the operating system, that’s when the rake dancing began. install.wim file in the right place in the ISO image
.
But in its place the file install.esd
. As it turns out, Microsoft has developed a new file image format in order to increase the compression ratio and support the ability to download the image via the Internet. To do this, we had to increase the compression ratio. WIM images also support compression, but it is believed that the ESD image can have extremely strong compression and this will allow you to download an operating system update via the Internet.
I was wondering how much different WIM and ESD compression is, but now I won't waste time on such trifles. Let's take the developers' word for it.
So, what should we do if a disk with an ESD image was used? Yes, in fact, you won’t have to do anything new. On the disk used to download the imagex.exe
.
To work with the ESD image, you can use the DISM.exe
from the Windows ADK for Windows 10, do not confuse it with the Windows AIK. Windows AIK also has DISM, but it can only work with WIM images.
The entire creation procedure is similar to creating a disk with a WIM image:
- Create a bootable flash drive
- install Windows
- install the necessary software,
- copy the required data,
- prepare the OS using Sysprep
, - then boot from LiveCD or over the network,
- create an ESD image,
- replace the install.esd
on the flash drive with the created image.
Of all these operations, only the creation of an ESD image is unusual. To create an image, you need to copy the DISM.exe
from the Windows ADK for Windows 10.
Go to the directory with DISM.exe
and give the command:
Dism.exe /Capture-Image /ImageFile:D:\install.esd /CaptureDir:D:\ /Name:OrcinusCapture
Let me explain what is responsible for what: Dism.exe - launch the executable file, /Capture-Image - image creation command, /ImageFile: D:\install.esd
— the file into which the image will be packaged, /CaptureDir:
D:\
— the disk on which the installed OS is located, /Name:OrcinusCapture — the name of the image, you can write whatever you want.
You can save the image to the disk from which the image is made. Or immediately copy it to a bootable USB flash drive. This is not important.
That's it, now you need to copy the resulting ESD image to a bootable USB flash drive and you have your own distribution ready for installation.
• Go to archive or previous page
This site uses cookies to make it easier for you to navigate the site, offer only information that interests you, and make it easier to fill out forms. I assume that if you continue to use my site, you agree to my use of cookies. You can delete and/or prohibit their use at any time by changing the settings of your Internet browser.
Please notify me of any bugs you find at: [email protected]
.
All wishes and advice will be taken into account in the further design of the site. I am ready to cooperate with everyone. In some cases, the author's opinion may not coincide with the author's opinion! Phone:
+7-902-924-70-49.
Dism++ utility for converting install.esd file
To convert an ESD image to an ISO file, you can use the simple and convenient graphical utility Dism ++ (https://www.chuyu.me/en/index.html), which does the same thing as the ESD Decrypter script, but has more convenient graphical interface.
- Download and unpack the archive with the Dism++ utility.
- Run the Dism++ executable file depending on the bitness of your OS (on Windows 10 x64 you need to run Dism++x64.exe).
- Accept the user agreement.
- Open the File menu and select the Esd -> ISO menu item.
- Provide the path to your ESD file that you saved earlier. Then specify the directory and name of the ISO file that should be obtained.
- Click the Finish button and wait for the conversion to complete (takes 10-15 minutes).
But WinReducerWimConverter works just as well, have you tried it? Then this created install.wim can be put into the Recovery section, right?
No, I haven't tried it. But judging by the description, the program does the same thing, only the output is a regular wim file with a system image. Which can be used to install/restore the system
Hello, using dism I converted install.wim to install.esd (Windows 7) while leaving one home premium edition, and using the method indicated in this topic I wanted to make an image, but it says that the index is not defined or I didn’t remember the wrong index, please tell me Is it possible to make an image from install.esd of Win 7 with one edition and if so, how. Thank you.
How to create an ISO image on Windows 10 from the Install.ESD file
Would you like to install the latest builds of Windows 10 using the ISO format? This guide will help you convert install.ESD and install the latest versions of the operating system using a familiar format.
When you need to perform a full installation or upgrade of Windows 10—as is the case with previous versions of the OS—Microsoft provides you with an installation file with an ESD (Electronic Software Delivery) extension. This is a new file image format delivered to the user, usually through the Update Center.
This 3 GB file, containing all the components necessary for installation, is best known as install.ESD. By default, Update Center downloads this image to the hidden $WINDOWS folder.
The advantages of Install.ESD over the Install.WIM image are that this format is encrypted and, as a result, compressed, which makes its download more secure, and installing updates does not require much time.
However, despite the fact that Microsoft makes installation files publicly available, the company completely bypasses ISO images of the files. However, you can use existing ESD files to create an ISO, thereby installing all the necessary Windows 10 updates in the future in the most convenient option for you.
In this Windows 10 guide, we will show you in detail how to convert an encrypted file image to ISO format.
First step: Download the update and download the ESDtoISO utility
- Make sure the update is available and downloaded to your computer. Open the Start menu and go to Settings, then open the Updates and Security tab. If the next version of the system has already been downloaded, a message will appear asking you to install it.
- Now download the latest version of the ESDtoISO program. You can download it here . By the way, another program - NTLite - can cope with a similar task perfectly.
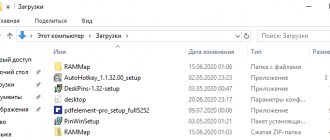
- Having selected any disk partition, create a directory there with the name ESD (for example C:ESD ). Extract the downloaded archive with the ESDtoISO utility to this folder.
- Now copy the downloaded update with the new system build to the created directory: C:ESDESDtoISO.
In our case, we took the update with build number 10166. It was located in the following directory: C:WindowsSoftwareDistributionDownloac31932a53b8bd06aedcff39a19. In this folder there was a file whose name was as follows: 10166.0.150703-1818.fbl_impressive_CLIENTPRO_RET_x64fre_ru-ru.esd .
In other updates, with assemblies of other versions, they could be located in other directories, for example:
So, if you need a different assembly than the one described in this article, you will have to look for the required file. It is best to use System Search.
By the way, the update file can be renamed to any other convenient name; install.esd .
Editing a Windows 10 ISO Image
Now it’s time to start creating the version of the OS image we need. To do this, take the distribution kit downloaded earlier from the Microsoft website and copy its contents into a folder that we create on a portable disk where our file is already located. Let's name the folder "10".
After copying is complete, in the “sources” subfolder you can see a file with the same name as the source computer file we created when creating the OS image. Our task is to replace this file with our own. To do this, copy our “Install.esd” file.
Then we paste it into the “sources” folder of the Windows 10 distribution.
It is necessary to replace the original file with ours.
Second step: Launch ESDtoISO
- We need to launch a command prompt with administrator rights at this path: D:ESDESDtoISO . To do this, go to this folder through Explorer. Then, in the window, open the “File” menu and then launch a command prompt with administrator rights.
- In a terminal window you need to run the following command:
- Next we need to determine the type of image obtained as an output after converting our update. To do this, enter the number appropriate for the desired item.
In this case, if you select the first option, a file with a volume of 3931455488 bytes will be released. And if we choose the second option, then we will end up with a file of 3177324544 bytes.
When the conversion is complete, the finished image will be located in this path: D:ESDESDtoISO. Both files will be suitable for a normal, classic installation of the Windows 10 operating system. In any case, the output will be a regular ISO image, from which you can make a boot disk or flash drive.
The difference in the size of the final files is due to different compression methods. If you choose the second option, then during the installation process you will need to spend more time unpacking the data, as a result of which the installation itself may take ten minutes longer.
Installing Windows 10 OS
If you have already installed this version of the OS, you are familiar with the procedure. There are no differences when using a self-created distribution. In extreme cases, the installation process will take a little longer.
After completion, you will have a computer on which all the necessary software is already installed. The only thing left to do is install the device drivers for this computer.
This assembly is convenient if you need to transfer the system to another computer. If you need to install the OS on several computers, then this distribution can be used as a basic configuration with an integrated set of necessary software.