BIOS Settings
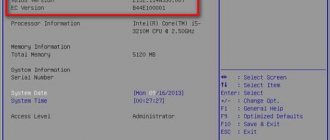
Many of the famous laptop manufacturers such as Asus, Acer, HP, Lenovo, Samsung have made it possible to control the laptop cooler from the input/output system or “BIOS”. This method is good because it does not require installing third-party programs, all that is required is:
- Enter Bios and open the “Power” section.
- Next, enter the “HW Monitor Configuration” settings, this is where you configure the fan.
- Find the option with the value “Fan Speed” and select the fan rotation speed, it is indicated as a percentage.
- Then save the settings and leave the BIOS.
I would like to draw your attention to the fact that the settings may have slight differences depending on your Bios version. Don't be alarmed, the overall scheme is identical.
Overclocking a cooler via BIOS
All modern motherboards allow you to monitor and control the operation of the cooling system. This is done using special drivers that come with the laptop. If the motherboard installed on your PC is equipped with this function, you can overclock the fan through the BIOS. This is done as follows:
- Enter the BIOS environment. To do this, when loading the OS, press Del on the keyboard. The BIOS entry key may be different (for example, F12 or F9). It all depends on the motherboard manufacturer.
- Open the Power section and go to Hardware Monitor.
- Set the required cooler speed (indicated as a percentage of the maximum power) or select the intelligent operating mode of the cooling system.
- Save changes and exit BIOS.
The appearance of the Hardware Monitor subsection may differ slightly in different BIOS versions. However, if you know what to look for, you will have no problem completing the required settings:
- fan speed is set in the line CPU Min.FAN speed (CPU FAN speed or CPU FAN Control);
- activation of the intelligent operation of the cooling system is started by the CPU Q-Fan Control item (you need to set the value to Enable);
- The CPU Fan Profile line is responsible for selecting the intelligent mode. Here you can choose one of four modes: Silent (preference is given to silent operation of the cooler), Standard (the fan will operate at 50% of its power), Turbo or Performance (overclocking to maximum power);
- The CPU Temperature line indicates the processor temperature that the cooling system will try to maintain.
SpeedFan program
A well-known utility, it can be used to control a laptop fan, regulate speed at certain temperatures, and monitor the status of the hard drive. A few more big pluses are that it’s free, a simple and clear interface and support for the Russian language, so feel free to use it.
So, let's look in more detail at how to configure the cooler on a laptop using SpeedFan:
- First of all, download, install and launch the application.
- After launch, in the “Readings” tab, on the left we see information about the fan rotation speed, on the right the temperature of the main components is displayed.
- To adjust the cooler, go to the “Configure” section.
- Open the “Temperatures” tab and click on the required component, for example the “GPU” video card.
- And in the line below, in the “Desired” option, set the temperature mode (within 40-44 degrees) that the cooling system will have to support, and click “OK”.
Also in the “Speeds” tab you can set additional parameters for changing the speed of rotation of the blades. There are only two options here; by changing them, you can easily change the lower and upper speed limits.
Ways to overclock a cooler on a laptop
If a modern desktop computer has three fans installed (for the processor, video card and built-in storage), then laptops usually use only one. Although a high-power video card can also be equipped with a cooler. In this case, it is possible to overclock both one or both cooling devices.
You can control the fan speed in two ways:
- through the basic input/output environment (BIOS);
- by installing additional software.
Before increasing the speed of the cooler on a laptop in one way or another, it is necessary to disassemble the PC and clean the fan blades and all elements of the motherboard from dust, because dust impairs heat transfer, thereby increasing the temperature of the system.
It is recommended to perform such cleaning at least once every six months.
Riva Tuner program
Another small but very convenient application designed to control and monitor the operation of the fan. It is also completely free and suitable for any version of Windows.
Changing the cooler rotation speed with its help is quite easy, for this you need:
- Install and run the application.
- Go to advanced settings, then to the “Fan” section.
- You can control the cooler speed by moving special sliders (also in percentage terms).
- After adjusting them, click “OK” to apply the settings.
After this, the laptop fan should start running constantly and at the specified speed.
Tips for resolving laptop overheating
To prevent your laptop from overheating, follow simple operating rules and monitor temperature readings. For example, a laptop placed on a table with a heavy “toy” running can heat up in the same way as when placed on a bed with a TV series running.
In the first case: the cooler copes well, the ventilation is not closed, the computer heats up when performing complex tasks.
In the second case: the cooler cannot cope, since the ventilation is covered with fabric (or other material) and the laptop heats up even during minor tasks.
Everything must be done to ensure that nothing interferes with air circulation. If the cooler cannot cope with cooling, then there are only two scenarios for quickly solving the problem: increase the rotation speed of the blades or refuse to perform a complex computer task.
MSI Afterburner
A professional free utility designed primarily for overlocking (overclocking) cards from MSI, suitable for both AMD and Intel. It provides us with quite a lot of possibilities, from monitoring the state of the board and adjusting the voltage on the GPU to controlling the cooler.
I would like to note that all the settings are on the first screen, which in my opinion is very convenient. In order to change the speed of the cooling system, you need to move the slider to the right in the “Fan Speed” section.
For automatic adjustment, a separate “Auto” button is provided; after pressing it, the speed of revolutions will change depending on the load on the laptop’s video card.
In what cases can you not increase the cooler speed?
Many BIOS versions will not allow you to manually change the fan speed settings. For clarification, you should read the documentation of your PC (laptop).
If in the BIOS Setup settings the “Speed Fan” item is set to “Auto”, you need to try changing it to “Manual”, that is, manual, then press “F10” and save the settings.
In the “Speed Fan” item, change the “Auto” value to “Manual”, that is, manual, press “F10”
It happens that some laptops offer different options for setting up coolers:
- normal;
- silent (Silense);
- manual (Manual);
- and other settings.
List of options for setting up a laptop cooler in BIOS
You should be very careful about cooling your laptop, since several devices can fail at once, which will make repairs pointless, due to its high cost, and as a result you will have to purchase a new computer.
AMD OverDrive Program
I can’t ignore the fairly well-known utility from AMD, which offers us a number of features, including controlling fan speed, thereby increasing the performance of the entire laptop.
It is only necessary:
- Install and run the utility.
- After opening, in the first window go to the “Fan Control” section, then to the “Performance Control” tab.
- To change the speed you need to move the sliders.
- All that remains is to click “OK” for the changes made to be saved.
Now you know how a fan should work, how to configure it correctly, control it, and you can do it yourself.
Starting the fan using BIOS
So, let's start by considering the issue of forcing the fan to start using the BIOS system. In practice, when starting a device, regardless of its model or brand, the cooling process first starts, which can be easily confirmed by the presence of corresponding noise.
Enabling the fan using BIOS
It is worth noting that in some cases the fan may be installed incorrectly due to polarity connection problems. This can be checked again by starting the cooling system when turning on the laptop. Hold a thread or piece of paper near the vent and watch for the object to vibrate. In this case, the system works correctly. Otherwise, the object will stick to the hole, which will confirm cooling problems.
The ability to control fan functions using commands in the BIOS is quite common.
- To enter the settings mode, depending on the device model, you will need to press the “Delete”, “Escape” or “F2” keys when starting the system.
Keys to enter BIOS
- Find the "Power" tab.
Go to the “Power” tab
- Use the arrows to move to the “Hardware Monitor” section, press “Enter”.
Go and open the “Hardware Monitor” section
- In it we will need the “CPU Q-Fan Control” and “CPU Fan Profile” options.
- The “CPU Q-Fan Control” option must be enabled, press “Enter” on it, change the value to “Enabled”.
Go to the “CPU Q-Fan Control” option, click “Enter”, select the “Enabled” mode, press “Enter”
- The second option “CPU Fan Profile” will be responsible for the fan operating profile used:
- Silent (maximum noise insulation and efficiency);
- Standard (fan speed will directly depend on the load on the system (program or game);
- Turbo (constant high-speed fan operation).
In the “CPU Fan Profile” option, select “Standard” as the optimal solution, press “Enter”
Press the “F10” button, then “OK”
Obviously, for better cooling of the laptop you will need to enable Turbo mode. However, you should also understand that the wear resistance of the fan itself will be significantly reduced during constant operation and can lead to failure.
On a note! Not all laptops have the ability to configure the fan using the BIOS, so in some cases you have to use special programs, which will be discussed below.
