If you have two or more operating systems installed on your computer, then when you turn it on, the selection of the required operating system will automatically start. For example, you may have both Windows and Linux installed. The situation is standard, but if you turned on the computer and immediately went about your business, then, firstly, the first operating system installed by default will be loaded, that is, quite possibly not the one you need, and secondly , usually you have 30 seconds to select an OS. It seems to be not very convenient, because each time you have to select the operating system. But in fact, this function can be easily disabled. I will show you how to do this using Windows 7 as an example.
Windows 7. First method
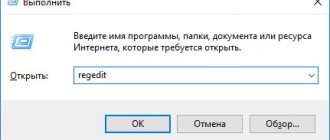
After loading the OS, go to the “Start” menu and in the “Search programs and files” line, type the word msconfig, then press the Enter key. Or simply press the WIN+R key combination, the “Run” window will appear, where you should also type the word msconfig.
The system configuration window has opened in front of you. Go to the “Download” tab, where you will see a choice of operating system, as well as additional boot options. Select the desired OS and click OK. I only have one OS, so there’s really nothing to choose from.
How to remove the choice of operating systems when booting your computer
A message prompting you to select an OS usually begins to appear when 2 or more Windows XPs are installed on your computer. During the first 10 starts, the user obediently selects the desired OS and continues working, but for those who are tired of this, I suggest you familiarize yourself with two ways to disable this inconvenience.
Option one
– suitable for everyone and especially for inexperienced users.
Right click on My Computer
->
Properties
->
Advanced
-> Boot and recovery - “
Options
” button The OS boot settings window will open. Actually, here is everything we need. The first is a list of operating systems installed on your computer in the same order in which they appear when you turn on the computer.
If one of your systems is not in working condition, then you should be careful when choosing.
For example, I do the following: first I select the system that should boot by default, set the time in the operating system selection display to 2 seconds and reboot. If the OS was selected correctly and it loaded without user intervention, then you can now completely uncheck the box next to the “Display list of operating systems” item. In this way, we will insure ourselves against selection errors. Actually, that's all.
Second option
for advanced users - editing the boot.ini file
This file contains information for loading the OS and is located in the root of the disk on which the system is installed. To open it for editing, click the “Edit” button in the same “Download and Restore” window from the first option.
Example of a working file with one OS
: timeout=30 default=multi(0)disk(0)rdisk(0)partition(1)WINDOWS [operating systems]multi(0)disk(0)rdisk(0)partition(1)WINDOWS=”Microsoft Windows XP Professional RU» /execute /fastdetect
With two
: timeout=30 default=multi(0)disk(0)rdisk(0)partition(1)WINDOWS multi(0)disk(0)rdisk(0)partition(1)WINDOWS=» Microsoft Windows XP Professional RU» /fastdetect multi(0)disk(0)rdisk(0)partition(2) WINDOWS=”Microsoft Windows XP Professional RU” /fastdetect
And here are the explanations for its contents:
timeout — time in seconds given to the user to select download options. default - OS installed by default. Will be selected after 30 seconds. multi(0) — adapter number from which loading is carried out. (multi(*) or scsi(*) or signature(*)). disk(0) - usually equal to 0 (in case of using multi(*)). rdisk(n) — the number of the hard drive from which the boot is made. From 0 to 3. partition(n) — number of the hard disk partition from which the OS boots. Always starts from 1.
Windows 7. Second method
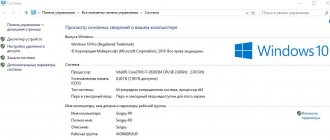
There is another way to disable loading the operating system. You need to find the “Computer” icon on your desktop (it’s also in the “Start” menu), right-click on it and select “Properties.” A window with system parameters will open in front of you. On the right side of the window there will be a section “Advanced system settings”, which you will need to click on.
The system properties window opens. In the “Advanced” tab, find the “Boot and Recovery” section, then click on “Options”.
Select the OS that will boot by default and click OK.
Of course, you need to understand that using these methods you can only disable OS selection; the systems themselves will not be deleted.
Editing the boot of multiple Windows operating systems
It will not be possible to run from one operating system to another for a long time if there are two of them installed on the computer. After carefully studying both, sooner or later you will have to choose only one of them - the main one, with which the work will be carried out primarily. If for the most part only one Windows system is used, its other versions or editions located on other disk partitions do not need to be deleted. Of course, provided that the hard drive space is not limited in size.
The ability to work in the future with other computer systems can be left, but for convenience, it is possible to simplify the entrance to the main one by removing temporarily unused ones from the boot. In this case, starting the computer will be simplified by automatically loading only the required operating system. Another option to make it easier to get started with your computer is not to remove the window for choosing to boot all systems, but to designate the desired version of Windows as the default boot one and reduce the time it takes to select other options in the boot loader window.
How to edit the boot process of several Windows operating systems installed on one computer - more on this below.
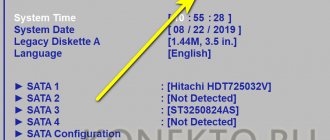
So, in our case, we have a computer with installed versions of Windows 7 and 8.1. When you turn on the computer, you see a bootloader window with a list of systems to select.
Every time you boot your computer, you can get to the desired system by making the appropriate selection. Otherwise, after a certain time has elapsed - and by default it is 30 seconds - Windows, which is first in the list, will automatically load. In our case, this is Windows 7, since it is the last one installed on the computer, and it is its bootloader, as we see, that greets us after the computer starts.
Well, let's change that. Let's set up automatic loading of the main system - Windows 8.1. To do this, of course, you need to enter it.
We need the System , and in Windows 8.1 you can get to it using the context menu on the Start .
In the system window, select additional parameters .
get to the “System” in Windows 7 using the context menu, but called up from the “Computer” in Explorer. Among the commands, you must select “Properties” .
In Windows 7 we also select advanced options .
The further steps in both systems are identical.
In the system properties window that appears, in the “Advanced” , click the settings button in the last section “Boot and Recovery” .
Now you can start editing the boot of multiple systems. Change the default Windows boot from the options in the drop-down list. In our case, we change the pre-installed Windows 7 to Windows 8.1.
As mentioned, by default the Windows boot loader waits half a minute for the user to select an operating system.
If most of the work is carried out in only one system, there is no point in leaving half a minute waiting for it to automatically load. Another operating system may not be prevented from starting, but the preset time for selecting boot options may be reduced. In displaying the list of bootable systems, in our case, we will set a 5-second wait before automatically loading the main Windows 8.1 system. This time will be more than enough to make a choice if you ever need to log into Windows 7.
To completely remove another system from the boot list, you need to uncheck the option to display a list of systems. In this case, only the system selected for booting by default will boot without any time delay.
If you ever need a second operating system, you can log in to it by making this option active again.
After making changes, click “Ok” at the bottom of this window, as well as at the bottom of the system properties window.
That's it - the list of loading operating systems has been edited.
Above we looked at editing the boot of existing operating systems. But often, when starting a computer, we can see a list of operating systems that are no . This is a natural development of events after the second operating system was removed by simply formatting a disk partition or manually destroying system files, but the entry about the possibility of loading it in the system configuration was not removed. The boot loader may also display the option to start a defunct main Windows after the system has been reinstalled. This, by the way, is not the main one, but one of the reasons why system specialists advise performing a so-called clean installation of Windows - without saving the files of the previous system and formatting the disk partition.
It is better to completely remove a non-existent operating system from the boot options so that it does not delay the process of starting the main Windows.
In the main system, call the command “Run” . In Windows 8.1, quick access to it is provided in the context menu on the Start .
We need a system configuration section . Enter the value in the command field:
msconfig
Click "Ok" .
In Windows 7, you can launch the system configuration window more easily by entering a key query in the search field of the Start .
The system configuration window will appear, go to the “Download” . Select the entry about loading a non-existent system and delete it.
In our case, the download list contained different versions of Windows, and it was obviously not difficult for us to decide on the “Seven” to remove. But if the download list contains entries for two identical versions of Windows, the system descriptions will help you orient yourself with the one you want to remove. The Windows we are actually in will be designated as current.
Save the changes made with the “Apply” . After clicking “Ok” the system will prompt you to reboot.
After restarting the computer, we can observe immediate startup of the main system.