An SD card, like any other storage device, can fail completely suddenly, thereby failing its user at the most unexpected moment. Of course, the data on it often has much more value than it seems at first glance. These could be photographs that are dear to us with loved ones, personal notes, or just our favorite music. Regardless of the type of missing files, most users always strive to recover what they lost. But what can cause a drive to fail unexpectedly?
- Formatting
- SDFormatter program
- CHKDSK utility
Reasons for losing files
Before you learn how to recover files from a damaged flash drive, you should first understand what causes the damage. Prevention is better than cure, moreover, this knowledge will help you learn more about how to repair a damaged flash drive.
Why are the files damaged on the flash drive?
Reasons for failure and loss of files from a flash drive:
- Improper removal of the flash drive may damage it. Most often, people neglect safe extraction. Often, it is incorrect completion of work with a flash drive that leads to its damage.
- Incomplete file transfer process when you remove the drive before the download is complete. Such a file will be damaged and unusable. Ultimately, this can lead to damage to the flash drive itself.
- A virus is another common cause of flash drive failure. For those who do not use an antivirus program on their computer, this is not an uncommon occurrence. Of course, installing an antivirus program will not guarantee you 100% protection against file loss, however, it will protect you from risks.
Virus shortcuts on a flash drive
- Accidental deletion.
These reasons are the most common, but in addition to them there are others, less common, such as wear of a flash drive. Repeated cycles of writing and reading, downloading and deleting can damage the flash drive. One way or another, you don’t have to worry about this, since it’s extremely difficult to use the drive until it wears out. There are more serious factors that worsen the condition of flash drives, these are increased temperature and humidity.
How to recover data
Recovering deleted information is possible using a computer and appropriate programs. This is possible due to the fact that erased files are not destroyed immediately after deletion. The space occupied by such data is marked in the system as available for writing. Therefore, as long as no new information is written to the media, in most cases the data is easy to recover . However, some large files are not completely saved during the recovery process, for example archives, movies or PSD files.
A smartphone (or tablet) running Android OS can also recover files from MicroSD and USB storage, but only if you have root rights. If you have an Android device, the necessary software and a description of its capabilities, then read the material on how to recover deleted files on Android or recover photos on Android.
Next, we will consider current programs for recovering data from a flash drive via a desktop computer or laptop.
Important! When restoring data, save the information to another medium. Saving data to the same drive may result in data being overwritten or extracted files being lost.
Recover accidentally deleted or damaged files
Unlike deleting documents from the computer desktop, when deleting documents from flash cards, they do not go into the trash, but are deleted permanently. You can recover such files using a special USB data recovery program.
Recovering damaged files on a flash drive
Important! Remember that such software only recovers deleted files that have not yet been overwritten.
To understand this, you need to know how a flash drive works. When you delete a file, it is not erased from the drive itself, but remains on it, but when you download new files, they take the place of the previous ones. Therefore, if you accidentally deleted an important file, try not to use the flash card temporarily to avoid overwriting.
The same method is also suitable for recovering data lost after a quick format or after an unsuccessful copy. Like deletion, it does not erase data, but only makes it possible to overwrite it. Again, the sooner you begin recovery, the more data you can get back.
Programs for recovering damaged files on a flash drive
| Program | Description |
| Piriform Recuva | The main advantage of this program is the many ways it can be used. For users who feel like they need help using the software, there is a wizard on hand that provides scanning and recovery guidance. |
The program is available in two versions: a free version with limited features and a professional version for $19.95
Wise Data RecoveryPerhaps this is the simplest program in terms of its use. She doesn't have any hints on how to use them, she doesn't need them. To recover files, you only need to take two simple steps EaseUS Data Recovery Finding recoverable data with EaseUS Data Recovery is very simple: select the disk that contained the lost or damaged file, run a scan and select from the found files those that you need to recover.It is important to note that the available free version of the program allows you to recover up to 2 GB of data
PhotoRecPhotoRec is software designed exclusively for recovering lost documents. It is available in two versions: as a command line and as a full-fledged GUI program for less confident users. It is highly effective, but may not be as easy to use as other similar programs.PhotoRec is a cross-platform program that can also be launched from a flash card
Undelete 360 – the most stylish
A small, nice program that captivates with its original design. Plus, it's absolutely free. Created by a small team of New York enthusiasts. It is updated very rarely, it only works under Windows OS (and it has not yet been adapted for Windows 8). At the same time, it supports quite decent Russian. And – it has a beautiful interface from a visual point of view. With icons that light up in different colors and beautiful pastel colors. Even some bugs with text layering do not interfere with the aesthetic appeal of Undelete 360. In addition, this small program has a very detailed table with file data and a wonderful filter by type of information. With their help, searching for new data becomes a matter of a couple of seconds. The program works very quickly, it is responsive and is great for older PCs.
The utility is able to work with Windows 2000/XP/Vista/7 and server variations. In addition to FAT32 and FA16, it also supports FAT12. You can't expect first-class recovery here, but the program offers a fresh look at the situation, it's pleasant to work with, and if you have lost a lot of data, of which you only need to return a small part, Undelete 360 filters will be the most functional.
When starting to work with the Undelete 360 interface in Russian, please note that files and folders here are restored using the “Save” button. The icon and its name can be misleading. Still, the team working on the program is very small, and they were unable to produce a perfect translation.
The program can be upgraded to the pro version to be able to use an even more advanced filter file and open the preview function, which is relevant when working with pictures.
Recovery methods
How to recover damaged files from a flash drive? In most cases, this can be done completely or partially.
Usually, when files appear to be deleted, they remain in their place, and the path to them becomes inaccessible.
This situation persists until new entries are made to the flash drive, which can erase the previous information. Therefore, new recording attempts must be excluded. Formatting the USB drive will make the problem even worse.
If you have problems opening it on a flash drive, first of all you need to restart your computer. If there is no effect, you need to sequentially resort to the following methods to recover data:
- In-system disk troubleshooter;
- eliminating the consequences of a virus attack;
- specialized programs.
Piriform Recuva – completely free
Perhaps the most popular utility for returning erased data. Mainly because it's free. It was created by , responsible for other very common PC maintenance programs: CCleaner and Defraggler. Recuva is the simplest and most convenient application on this list. Here you don’t need to think about hex code, set filters, analyze disks (although such functionality is available here, albeit in a reduced form). The main thing is that Recuva has made an excellent “Recovery Wizard” that helps beginners. You select answers from the proposed list, and as a result, the program itself analyzes them. You arrive at the right file and the right method. A list of the files you are looking for from the flash drive appears; all you have to do is select the checkboxes you need and click on the “Recover” button.
The program pleases with a huge number of languages to support. There are almost a hundred of them here. It can be added to the Recycle Bin and Explorer interface, if necessary. You don't have to run it separately; the Recuva shortcut doesn't require space on your desktop. It has a browsing mode, although it doesn’t work nearly as efficiently as Handy Recovery, and you can’t easily sort files by type here. The utility is well suited for batch data recovery if you remember exactly in which folder of the flash drive it was located.
The program works on Windows XP, Windows 7, Windows 8, as well as older versions of this OS. It can be downloaded in two versions: in addition to standard Recuva, there is also Recuva Portable, which does not require installation and can be launched from portable media. And if you can't wait to part with the cash, you can grab the fully featured version of Recuva Professional for €19.95.
In-system tool
Windows' ability to check and automatically correct simple disk faults can also be used for a USB drive. To do this, you need to perform the following steps sequentially:
- In the “Computer” window of the desktop, right-click on the flash drive icon;
- In the list that appears, click “Properties”;
- In the new window, select the “Service” tab and click “Run check”;
- Check the box “Scan for and repair bad sectors” and click “Run”.
Eliminating the consequences of a virus attack
For reliable system operation, some important system files are assigned the “Hidden” attribute. Thus, they become invisible and protected from careless user actions.
In some cases, viruses that have entered the system do the same with files on a USB drive, hiding them in the same way as system ones. To check you will need to do the following:
- Click “Start” and go to “Control Panel” -> “Folder Options”;
- Go to the “View” tab;
- Uncheck the box “Hide protected system files”;
- Select “Show hidden files, folders and drives” and click OK.
If, after opening the flash drive icon in the Computer window, translucent icons of previously invisible files become visible, then you should get rid of viruses. If after this the restoration does not occur and the icons do not take their normal appearance, then you need to manually remove the “Hidden” attribute. To do this, on the same icon:
- Select all lines with similar files;
- Right-click on them and click “Properties”;
- In the window that appears, uncheck the “Hidden” box.
- At the end of this verification method, in order to avoid system troubles, you need to restore the previous folder settings.
Recuva program
If previous manipulations were unsuccessful, then you will have to resort to the help of specialized programs. As an example, consider the free Recuva utility from Piriform (known for its popular CCleaner program). The sequence of actions after installation is as follows:
- Run the program;
- In the window that appears, to restore damaged data in dialog mode, it is recommended to click “Next”; For experienced users, there is a “Do not open the wizard at startup” mode;
- In the next window you need to select the type of files to be restored;
- Then click “Browse” and specify the flash drive as the location;
- In the next window, before clicking “Start”, it is recommended to check the “Enable in-depth analysis” checkbox: in this case, recovery will take more time, but the results will be better.
- When finished, the scan results will be displayed in color. In most cases, media information is recovered better than others. A green circle indicates that the file can be fully recovered, and a red circle indicates that it is hopeless. A file marked with a yellow icon can be partially recovered. For text documents this is an acceptable option.
- After this, all you have to do is check the boxes next to the files, specify the recording location (any location except a flash drive!) and click “Recover.”
Recuva
The utility allows you to retrieve data from the drive if it is deleted or the memory card fails. All popular storage media are supported, including SD, MicroSD and USB flash drives.
Instructions
Launch the program, select the type of data you want to recover. Or check search for all files.
Start the program.
To find files of all types, select all files; otherwise, specify a specific type.
Proposal to create a disk image. You don't have to create it.
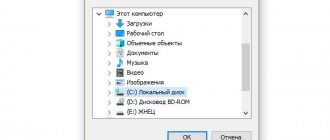
In the next window, specify the drive where the search will be performed.
The disk where you want to scan.
Confirm the action to start searching for data.
Confirmation of search for deleted files.
Files are being searched.
When the search is complete, a window with a list of found files will automatically pop up. Select the files you want to keep, and then click the “Recover” button.
All found files. Select all or just some to restore.
To finish, specify a folder to save the data.
Assign a new letter to the USB flash drive
If the computer cannot recognize the USB flash drive, you can try assigning a new letter to it. This method helps many people. Plus, you don't need third-party programs to recover files.
1. Insert the USB flash drive into your computer. Then right-click on the My Computer shortcut and select the Manage option.
2. From the menu on the left, select the option called Disk Management.
3. Here you will see all available hard drives, as well as the connected USB flash drive. Right-click on the flash drive and select the “Change drive letters or drive path” option.
4. Next, click “Change”, select any letter from the drop-down list, then click the “OK” button.
That's all! You have assigned a new letter to the USB flash drive on your computer. Now you can try to open it and check the files. If this method does not help, read on to see how you can recover files on a damaged USB flash drive.
Reinstall the drivers.
One possible reason why your "USB drive"
still not working may be due to corrupt or outdated drivers that were not reinstalled for some reason and may be conflicting with your operating system.
To make sure that your drivers are not damaged and are working properly, and there are no problems on this side, it makes sense for you to reinstall them.
You can perform the procedure for reinstalling the necessary drivers using the Device Manager application.
.
There are many different ways to open this application in the Windows We will show you four possible methods, and you can choose any method that is most convenient for you to call the application.
Method one
: Open the
Computer Management
“This PC”
shortcut on the desktop and select the
“Manage”
).
In the left pane of the window, go to the following address to access the required application: “Computer Management (local)”
-
“Utilities”
-
“Device Manager”
.
Method two
: Click the
"Search"
located on
the "Taskbar"
and open the search bar.
"Device Manager"
into the search box .
Select the app you're looking for from the list of results under Best Match
.
Method three
: Right-click on the
“Start”
or press the keyboard shortcut
“Windows + X”
and bring up the pop-up menu.
In the list of available applications, select the "Device Manager"
.
Method four
“Run”
dialog box (press the
“Windows + R”
).
In the Open
of the dialog box, enter the command
"devmgmt.msc"
, press the
Enter
or the
OK
and instantly open the
Device Manager
.
After launching the application, find and click the “Disk devices”
to expand the submenu. You will see a list of all drives currently connected to your computer.
If in the "Disk devices"
If you find a device marked with a yellow exclamation mark, it means that the
Windows
is actually experiencing certain problems with the driver of this device. If there is no such icon next to the device, reinstall the drivers for that device anyway.
Right-click the name of the memory device you are trying to fix and select the "Uninstall device"
.
Next, you need to remove your external drive from your computer and restart your operating system. When the computer startup process is complete, plug the drive back in. Windows system
should automatically detect a new connected device and install new drivers for it.
You should now be able to access your data on the external drive. If this does not happen, then proceed to the next step.
Recover files on a USB flash drive using CMD
1. First of all, insert the USB flash drive into your computer. Next, click Start (or the Windows key on your keyboard), and type “CMD.” Now right-click the Command Prompt program and select Run as Administrator.
2. Now type the following command “Chkdsk h: /f” (without quotes), where “H” is the letter of your USB flash drive. This command will start checking files and folders on the flash drive.
3. After the process is completed, you will see the verification result as in the image below.
4. The screenshot above says that my USB flash drive is working fine and no damaged files were found.
By the way, if you don't see the files on the USB flash drive, you can try entering "." (dot without quotes) in the search field in the upper right corner, and press Enter.
Handy Recovery – convenient and versatile
A simple program that can recover files from any digital media connected to a PC. It supports NTFS, NTFS5, FAT12, FAT16, FAT32 file systems. Works with flash drives, memory cards, hard drives. The utility eliminates the consequences of virus attacks, software failures, and emergency power outages. Recovers data from deleted folders or formatted drives. It can even return information from the Recycle Bin if you accidentally emptied it and there was something important left there. Of course, the utility does not work one hundred percent, but it gives a good chance, and considering that during the test period you can use it for free, you definitely have nothing to lose.
The program is nice because in it we can browse directories in the same way as in regular Windows Explorer. Here we immediately see all the files and folders that can be recovered. Through Handy Recovery you can also look into the trash – it will immediately be clear which files were last deleted. The data type, time of deletion, name, size are shown. The required file is quite easy to find thanks to sorting. The probability of successful recovery is also displayed here: “bad”, “average” or “good”. For neighboring files deleted at the same time, it can be completely different, and this makes it easier for us to determine which data should be allocated to return system resources.
For images with a “good” recovery probability, preview works. The utility has a simple, pleasant interface, but the percentage of data it returns is relatively low. If you can’t get your files back using Handy Recovery, you should try one of the following programs on the list.
Test trial period – 30 days. One official copy of the utility costs 1,950 rubles. Available for Windows XP/2000/NT/2003/Vista/7.
Recover files on a USB flash drive using EaseUS Data Recovery
EASEUS Data Recovery Wizard Free Edition is a free program for recovering data on digital camera memory cards. You can also use it to recover deleted, damaged or formatted files on any kind of memory cards, including USB flash drives.
1. Download and install EaseUS Data Recovery on your Windows computer. Launch the program.
2. Now you need to select the file types you want to recover, such as photos, documents, etc. Click "Next".
3. Select the drive on which you want to recover files (in our case, it is a USB flash drive), and click the “Scan” button.
4. Once the scan is complete, you will see all the files that can be recovered. Click the "Recover" button to get your lost or damaged files back.
That's all! Using one of these methods, you can recover files from a damaged USB flash drive. I hope you liked our article. If you have any questions, write in the comments below.
R-Studio - the best functionality
This is a very powerful utility, for which recovering files from flash drives and cards is only a small part of the functionality. If Handy Recovery is good for a private user who has had an emergency, then R-Studio is more suitable for professionals. The probability of correct data return here is very high; the utility has twelve versions tailored to specific circumstances. True, the keys to each of them will have to be purchased separately, and the program is not cheap, from $50 to $850. There is a free version, but it only recovers files up to 256 kilobytes. You won't get far with this.
R-Studio's capabilities are very wide. It supports all major file systems, including exFAT, and runs on Mac, Windows and Linux. Returns information from bad sectors and formatted hard drives. Can search files by signatures. Recover information via the network, copy disks, create image files for them. And its boot version can work even on a computer that has stopped booting.
True, we don’t really need all this to return files from a flash drive. But for the average user, R-Studio has two big disadvantages: high price and complex interface. Finding the right file here is much more difficult; we are given a lot of “bonus” (in this case, extra) information. There is no preview for images; instead, there is a HEX code that does not tell anything to those who are encountering data recovery for the first time. If you do not have any special requests for returning Word or Excel files from a flash drive, if you are not going to become an expert in this area, there are programs that are much more convenient and cheaper than R-Studio.