The Xbox 360 gaming console is compatible with various TV models. Connection will only take a few minutes, the same amount of time is required for setup. The article describes how to connect an Xbox 360 to a TV, how to activate the game console, possible connection problems and how to fix them.
What TVs can you connect to?
All models of TV equipment have ports designed to connect additional equipment. There are usually no problems with video set-top box synchronization. The console is perfectly compatible with TVs:
As well as other models that are not included in this list, but have the necessary ports for synchronization. Just choose the appropriate method and follow the instructions.
Ways to connect Xbox 360 to TV
The console can be connected in different ways. This makes it universal, suitable for connecting any equipment. The quality of the transmitted image depends on the TV model.
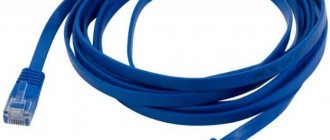
The HDMI cable provides the highest quality picture and sound transmission. This interface is supported by all modern TVs and monitors with high image quality. The connection algorithm is as follows:
- Disconnect the power from the equipment by removing the plug from the outlet.
- Plug the cable into the HDMI port located on the back of the TV.
- Connect the other end of the cord to the console.
- Turn on both devices.
Component HD AV cable
The method is a little more complicated than the previous one using a component wire; it is also suitable for Full HD screens. The algorithm of actions is as follows:
- Connect the white, red and yellow wires to their corresponding color sockets and plugs located on the back panel of the equipment. On a Full HD TV you will not need to connect the yellow tulip.
- Connect the wires whose sockets have the same markings.
VGA HD AV cable
To connect the set-top box to an old TV, you should buy a special VGA HD AV cable. The next steps are:
- Connect the wire first to the set-top box, then to the TV through the A/V port.
- Make sure there is a signal on the screen confirming the connection is successful.
S-Video AV cable for Xbox 360
The method is suitable for connecting the set-top box to an older model TV, which lacks other ports except the S-video channel. The connection is made using a composite cable:
- De-energize the equipment.
- Connect the set-top box via cable.
- Install the plugs supplied with the wire.
SCART adapter
Scart is a special adapter and must be purchased separately. Significantly simplifies the connection of Xbox 360 to old TV equipment. The connection is made as follows:
- Unplug the equipment.
- Insert one end of the receiver cable into the port.
- Turn on the equipment.
Xbox 360 connection problems
Above we described how to connect the console to Philips, Samsung, Sony, etc. Most often, problems appear when connecting equipment via a VGA HD AV cable - the TV may not see the set-top box, or the transmitted image is of low quality. Press the wires firmly into the ports. The reason is weak contacts. It is also necessary to consider each of the problems in more detail.
- After turning on the TV and set-top box, nothing changed. If the Xbox 360 menu doesn't appear after you've connected everything, you'll need to change the video input settings on your TV. To do this, press the [Source] or [Input] button on the remote control, go to the source selection menu, and select the port to which the console is connected.
- By default, the console sets the image quality to automatic. To improve the image quality on the gamepad, press the [ Guide ] button. Next, go to [ Settings ] – [ System Settings ] – [ Console Settings ] – [ Display ]. Set the appropriate resolution and other settings for your TV.
Reading NAND
After you have soldered the Super Nand Flasher, insert the power cable into the console (you do not need to start the console itself) and connect it to the computer.
Launch AutoGG on your computer and select the programmer:
For Corona 4GB you must specify MMC/SD.
Then under Nandpro version select NandPro 2.0b or 2.0b ArmV3
To read the NAND contents, press the READ button:
A request will appear on the screen: how much volume needs to be counted. For Corona 16 MB, enter 16; if you have a set-top box with 4 GB of internal memory, enter 48 MB.
Reading must be done at least 2 times. If the program gives an error, you need to repeat the process until you get 2 identical copies of the NAND of your set-top box.
Now create a Xell (click Create) and write it to the console (Flash button):
After this, Super Nand Flasher can be unsoldered from the console
In conclusion
Xbox360 connects in different ways. The user himself chooses which one to prefer, depending on the type of home screen with which the connection will be established and its capabilities. It is better to connect the game console with modern TV equipment of the new generation. If you don’t have a smart generation TV with HDR support, then connecting a video set-top box to the old model will not be difficult - you just need to strictly follow the instructions.
Many people are familiar with the set-top box from Microsoft and how much fun you can get by connecting it to a TV panel. However, users probably faced a difficult choice: how to connect it, what connectors and cables to use. It should be noted that the large number of ports through which connections can be made can confuse anyone. Let's take a closer look at all the problems of connecting the set-top box.
How to flash Xbox 360
We will consider the process of flashing Freeboot and IXtreme LT 3.0 for Xbox 360.
Dashboard update
To protect yourself from a console ban, we recommend downloading updates from a flash drive or external drive. To get the latest version of Dashboard, go to the official Microsoft website and download the update to a USB flash drive. Next is required:
- unzip the downloaded file to a flash drive;
- insert the USB drive into the Xbox 360;
- Restart your console and updates will be installed automatically.
Before installation, do not forget to format the flash drive. It is important that the USB drive uses the FAT file system.
Required Tools
The procedure will require the following tools:
- screwdriver to unscrew the top cover of the console;
- SATA cable for communication between PC and console;
- Personal Computer;
- Jungle Flasher program ;
- USB connector.
Determining the drive version
Before flashing an Xbox 360 at home, you need to determine the drive model. You need to move the top cover of the console and carefully remove it. There should be a sticker on the case with detailed information . It is necessary to highlight the manufacturer's description. Four companies were used on the Xbox 360:
Connection difference between Xbox 360 and Xbox One
Many users, before purchasing an X-Box console, ask the question: “What is the difference in connecting the Xbox 360 and Xbox One, and how do the devices themselves differ?” The main difference is in the gamepad: the position of the buttons, response to pressing, operating time without wires, ergonomics and more. To date, it is the Xbox 360 console that has proven itself to be the best. But with the Xbox One, the manufacturer made about 40 different changes to the overall design. The convenience of the new joystick cannot be compared with the old one. It looks minimalistic and is much more comfortable to use. When it comes to gaming, the Xbox 360 can't handle modern graphics and is inferior to its successor.
It is easier to flash the Xbox 360, because so far no one has been able to hack the modern console. They are practically the same in cost. But the realism that the new console conveys allows you to completely immerse yourself in the world of the game. In addition, the new console supports 4K resolution. It also features recording of game moments, which can then be reviewed and analyzed. Xbox One plays all modern games, so it is a priority when choosing gamers. And most importantly, connecting it is as easy as its predecessor.
It would seem that it’s difficult to properly connect a game console to a TV. But even those who in childhood connected their Sony Playstation 1 without problems, have difficulties when looking at modern consoles. Therefore, we will figure out how to connect an Xbox (One, X, 360) to a TV or other more or less technologically advanced console.
There are many different ports on both the set-top box and the TV receiver, which applies equally to the Xbox 360, Van and Van X. If you want to achieve good quality like 4k, it is important to know how to properly connect the Xbox 360 to your TV and set up the connection . Understanding this, you can achieve comfort and optimal operation of the equipment. Do not forget that for the best result you need to connect the 360 Xbox to a modern, technologically advanced TV receiver like Samsung, Sony, LG.
In the instructions you can find all the necessary information on how to connect and how to configure.
Connection
When purchasing a gaming console, users often wonder: is it possible to connect an Xbox 360 to a TV? Why to the TV and not to the monitor? In general, the first option is many times more popular than the others. The TV gives a brighter picture, often larger, with more contrast. It has better sound, especially if you have a home theater connection and good acoustics. All this significantly affects the maximum immersion in gameplay.
The monitor is less popular, although it is also used by gamers. Not all home buyers have a large 50-inch TV. Some people may have a computer display that is much better and larger.
But since the question of how to connect an Xbox 360 to a TV is the most popular one, we will further consider all existing methods.
HDMI – nothing could be easier!
This is the easiest way and will take approximately 2 minutes.
All you need to do:
- Turn off all equipment (it is recommended to remove the plug from the socket).
- Remove the plastic plugs from the cable.
- Insert the wire into the corresponding port on the rear panels of the equipment. Connecting all this is no more difficult than a joystick.
- All you have to do is turn on both devices, and a signal should appear immediately. If it doesn’t work, you need to use the television remote control (Sourse button) to switch the image source.
Elementary. But there is one thing: this method is only suitable for modern TV. It is impossible to connect an Xbox to a regular (non-LCD) via HDMI simply because such a TV does not have a port of this type.
What about quality? It is high - the HDMI cable allows you to transmit the entire palette and speed of image and sound. At least, this usually happens with fairly modern TV. A definite plus is that you don’t need to configure anything using the remote control or gamepad, everything works fine the way it is.
Most popular versions
Today there are four popular firmwares. Each of them has its own advantages and disadvantages, so let’s take a closer look at each version separately.
Xkey is the most expensive way to get free games, requiring the purchase of additional software. In order to implement the firmware, you will need XK3Y - a set of tools, the main component of which is the branded x360key motherboard. Additionally, for convenience, you can purchase:
- Control panel , which allows you to control some processes.
- Xk3y WiFi Dongle is a proprietary tool in the form of a USB adapter. With its help, ISO images are launched using a special interface.
- Xk3y Gecko is an adapter that allows you to create ISO images of licensed video games on a USB or hard drive.
The operating principle of Xkey is quite simple. The user is presented with a DVD drive emulation function. With it, you can run games from a flash drive or gray disk. The main advantage of Xkey is that gamers still have access to the Xbox-Live service . Thanks to this, you can fully enjoy online on the Xbox 360. It is worth noting some disadvantages:
- Xkey is the most expensive on the market.
- Not all devices support Xkey. For example, models released after 2012 will not be able to be flashed using this method.
Freeboot
Freeboot is the most popular custom firmware for the Xbox 360. From a technical point of view, Freeboot offers a modification of the standard control interface - Dashboard. The main advantage of Freeboot is the ability to record games on a hard drive , flash drive or third-party HDD or SDD drive. Using Freeboot opens the right to run video games without a licensed disc. Using Freeboot 3.0 you won't need it at all. Now let's highlight the disadvantages of the firmware:
- New interface (DashLaunch and XeX Menu) that you need to get used to.
- Inability to use official Xbox Live online services, otherwise you will be banned. The problem is partially solved by the presence of unofficial LiNK servers.
Dual Nand
Dual Nand is not a particularly popular type of Xbox 360 firmware, since it requires the user to have knowledge in electronics. Probably, the complexity of the procedure and the high probability of damaging the console are the main disadvantages. In addition, for flashing you will have to buy an additional chip (for example, Squirt Dual NAND).
One of the trump cards of Dual Nand is its versatility. Gamers receive two systems: a modified Freeboot and licensed software. This opens up the opportunity to use Live services with impunity by running any pirated software.
IXtreme LT 3.0
IXtreme LT 3.0 for Xbox 360 involves flashing the drive , which gives access to the use of not only licensed discs, but also pirated fakes, images downloaded from the Internet, as well as simple discs recorded on blanks. Consoles with the latest version of IXtreme LT 3.0 have support for Xbox Live without the risk of a ban.
IXtreme LT 3.0 allows you to play video games that were not originally available in your home region. IXtreme LT will perform especially well among fans of Japanese exclusives. Among the shortcomings, we can note the inability to play arcade games in the company store.
Important information ! Microsoft has a revision of the Xbox 360E console called "Winchester". Unfortunately, at the moment these models are not susceptible to any hacking .
Connection via HD AV cable tulip
If you want to get Full HD, then you should connect the set-top box via a component cable. This method is quite difficult to use, but nothing is impossible. What is the main difficulty? Perhaps the abundance of HD-AV cable connectors. However, if you look carefully, there is nothing to worry about.
To connect the device to the TV, you need:
- Select kit version. This will be either TV - for screens that do not reach 480p, or HDTV - for more modern and advanced devices.
- Based on the color of the TV plugs and sockets, you need to insert the former into the corresponding connectors. For old devices, red and white, as well as yellow plugs are used, but the latter is not used for new TVs with Hi-Tech resolution.
- All that remains is to connect the tulips to the console, where there is a socket with the corresponding marking.
What distinguishes this method from the previous one? The ability to connect the set-top box to an old TV receiver, which is definitely a plus. The signal quality is no worse, and allows you to enjoy all the colors and dynamics of video games.
Console firmware methods for various drives
Samsung
For Samsung devices:
- check that the disk is successfully connected to the utility;
- go to the tab called “ MTK Flash ”;
- By clicking on the “ Sammy Unlock ” button, unlocking the drive is activated.
When installing the firmware for the first time, click on “ OK ”. A window will open with a standard form, which will tell you that all actions are performed at your own peril and risk. Follow the launcher commands.
Once the unlocking is complete, you will return to “ MTK Flash 32 ”. Here you need to click on “ Read ” for the application to start reading the firmware. The program will offer to make a backup copy of the proprietary OS. Don't skip this step so you can return to the default settings in the future.
As soon as the program reads the firmware, an option will open that allows you to write modified firmware . To start the process, click “ Write ” and in the window that opens, select the folder where it is located.
Having received a message about successful recording, the user is required to press the “ Outro ATA Reset ” button. This procedure will allow you to correctly stop the firmware process.
ATTENTION! If you forget to press this button, then when you start the console you will automatically receive a ban!!!
BenQ
For the Benq manufacturer, first connect the drive, open “ MTK Flash ” and select the partition where the drive name is.
After this, all actions are carried out by analogy with drives from Samsung:
- click on “ Read ”;
- save a backup copy and installation key on your PC;
- use “ Write ” (in Explorer, select the location where the firmware is saved);
- followed by the “ Outro Ata Reset ” button, which will launch the installation;
- disconnect the drive from the computer and connect it to the set-top box.
Hitachi
Owners of a console with a Hitachi drive need to know not only the manufacturer’s brand, but also the serial number of the device. If the serial number begins with the numbers 78 or 79, then the user will have to burn an additional disc with the serial number. This procedure is necessary to unlock the drive. The Jungle Flash utility has a tab with the name of the Hitachi drive. You need to open it and click on the “ Insert 79 Audio CD ” column. A direct link to download the recording file will open. After downloading, you need to burn it to a CD-R disc.
In the window, click on the “ Send Mode-B ” command and follow the installation instructions. When exiting “ Mode B ”, the user needs to insert a disc with a previously recorded file. If the drive is number 79, use the “ 79 Unlock ” command. Next, disk reading will start. After a couple of seconds, you can pick up the disk (the drive will open on its own). After this, the standard flashing method will open using the “ MTK Flash ” command.
10 most popular smartphones of all time
Lite-On
The most problematic drive is Lite-On. Please note that only newer drive models sync seamlessly with Jungle Flash. If the utility does not synchronize, you will have to disassemble the drive . Right down to the printed circuit board. The task is to find a point on the board called MPX01 . The location of the point is indicated in the image below. You need to make sure that the point found is correct, since they are tightly located. It is extremely easy to make a mistake and confuse the numbering.
You will need to bring a probe or probe to point MPX01 until the firmware is written. To make a probe, we take a sharp object and solder (or screw) a mass (ground) to it from the device to which the drive power is connected (computer power supply, or set-top box). Such actions are a necessity. Otherwise, the drive will automatically block the installation of the modified OS. Now let's move directly to the firmware process:
- Open the utility in the “ MTK Flash ” section by clicking on the button with the name of the drive.
- In the new window, find the “ PhatKey ” command.
- Wait while the utility processes the information . Don't close the windows. Wait for the keys on the toolbar to become active again.
- Upon completion of the process, the following will be displayed on the screen in the properties window of the optical drive: “ MTK Vendor Intro failed ” - a sign that the user can start using the probe on the drive.
- Turn on the probe, and then touch it to point MPX01 . After a couple of seconds, release it.
- If everything was done correctly, a message will appear in the utility that will allow you to start the process.
- Click " OK " and restart the drive.
- Resyncing will greet the user with a message telling them to save the new product key.
- Now the task is to select the directory where it will be written.
- After completing the recording, go to the “ Firmware Tool ” panel, where you need to press the “ Manual Spoofing ” button. The button will be clickable, recognizing the newly connected device.
- Afterwards, the “ Load key bin ” window will open, where the user needs to select the location where the key is saved. As a result, the modified firmware will use a working product key.
- In the main menu, go to the section called " MTK Flash ".
- Click on the “ Read ” key to start the process of reading the firmware from the file.
- During installation, the utility will require a product key . Specify it using Explorer.
- By clicking “ Write ” the recording process will start (the procedure itself will take a quarter of an hour).
- Finally use the “ Outro ATA Reset ” command. The inscription “ Verified ” is a notification that the operation was successful.
Via VGA HD AV
And using such an interface you can connect an Xbox. The obvious disadvantage of this option is that you will have to purchase the wire separately. However, compared to the console itself or good plasma, it costs a penny. Additionally, if your output device does not have a corresponding port, you will have to purchase an adapter.
The connection itself is not difficult at all and does not require one minute.
- Connect the wire to the game console via the A/V port (as in the previous case), and then to the TV receiver using an adapter or to an existing port.
- Audio wires must be connected. Their nests are red and white.
- All you have to do is turn on the devices and it should work.
If suddenly the TV does not see the Xbox 360, there may be no good contact and it is necessary to connect the equipment more tightly together. Although this is far from the most convenient method, it allows you to achieve a good result - 1080p.
Actions when the console freezes
Welcome screen on your gaming device
If any problems arise during the game, you can force a restart of the video gadget. To do this, you need to hold down the power button on the device panel and hold it for about 10 seconds.
Also, in an emergency, you can pull out the power cord. This method is undesirable and may result in the loss of game progress saves or other information on the device. It is prohibited to unplug the power cord from the network in only one case - during the installation of system updates and software.
S-Video
If the TV does not support other options, then this one will do, along with connecting with a composite cable. S-video, also known as VHS, is typical for both old and new receivers, since the connector is standard. Yes, the quality will not exceed 480p, which, however, will suit many.
- Turn off the power.
- One end goes to the receiver, and the other (AV) goes to the set-top box.
- It remains to connect the two plugs responsible for audio, which are included with the cable.
The connection should work immediately. A good option for retro connoisseurs and those who cannot afford more. Of course, if nothing but this method is possible, there is almost no point in purchasing a new generation model.
How is SCART used?
This adapter is sold separately. However, the advantages of this method are serious: firstly, it is almost impossible to make a mistake in connecting, and secondly, the process is extremely simple. This is a great option for connecting the console to old equipment.
Scart connection instructions:
- The equipment must be turned off.
- Insert one connector of the only cable that transmits both picture and sound into the desired input on the TV receiver.
- Turn on the devices, after which everything will work instantly without any settings.
This format is supported by both new and old television devices, as well as equipment with a kinescope. Video signal transmission will be at a decent level. And it is simply impossible to insert something incorrectly.
Using SCART
It is worth understanding that this is not a regular SCART cable, but a slightly different RGB Scart Cable. This option will also help you solve the question of how to connect the Xbox 360 to a Samsung TV. It transmits images in 1080p resolution.
Questions in this regard should not arise either. We just find the familiar AV connector on the console, and a special SCART IN on the TV. In principle, this port is signed, but if anything, look for a small rectangle with 20 holes. When connecting devices, remember that both must be unplugged.
Differences between Xbox One and X connections
It must be said that all of the above methods are also relevant for the new model from Microsoft. Of course, to experience all the capabilities of the new generation, it is better to purchase a modern TV for Xbox One. This version really differs from older Xbox models in its quality for the better, so if you can’t purchase a decent TV, there’s probably no point in buying something like this. You can clearly see the difference between the old and new output devices on YouTube.