The most common causes of breakdowns
The keyboard on a mobile PC has approximately the same structure as on a personal PC. It, like any device, is very sensitive to all kinds of dirt, animal hair, crumbs, and especially liquid spilled on it. After a certain time of using the keyboard, the buttons on the mobile PC fail or simply fall off.
Also, the cause of breakage of buttons on a mobile PC can be a simple banal cleaning of the keyboard using a vacuum cleaner for this purpose. Or a small child may accidentally tear off a key. Also, the cause of such a breakdown can be pets that live with you. This also happens quite often. But you don’t need to immediately take your laptop for repair. Very often you can do everything yourself.
Main types of faults
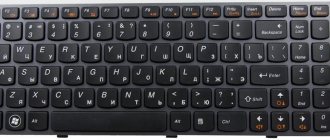
It's no secret that these devices can have different shapes and additional keys with corresponding functionality. Even take the same multimedia keyboard, which has a number of special keys at the top. Pretty convenient, right?
But what should you do if several keys stop doing their job or the entire keyboard is completely out of order? Without a doubt, you can purchase a new device, but then you need to be prepared to spend 10-100 dollars on a new device. Why spend money if you can restore your old device to working condition? Prepare a soldering iron, Phillips screwdriver, tester and read the description of problem solving for several cases.
Button structure
Before you consider how to insert a button on a laptop, you need to know its structure and mounting features.
A button consists of the key itself, a mechanism for holding it and a spring element with which it can be raised and lowered. There is also a special film with platforms and tracks.
The mount consists of two parts. These two parts are fastened together. They come out of the inner part of the mount and are inserted into special grooves in the outer part. Thanks to this design, they can move when you press them. The button itself is attached to opposite sides.
There are no general recommendations on how to insert a button on a laptop, since there are many well-known brands that produce keyboards. But we will look at general principles that can be applied in most cases.
The keyboard works, but not completely
We often spill something on the desktop, and it’s good if the liquid did not get on the keyboard from the computer, because if the keyboard gets wet, then several buttons or even all of them may fail to work. Also, strong mechanical impacts, which sometimes occur accidentally, can lead to partial damage. What to do in all these cases? Let's talk about each method of how to repair a keyboard in detail.
Spilled liquid
Did your favorite tea end up on your input device? Immediately disconnect the gadget from the computer and wait until it dries completely. If after this several buttons become unusable, then the following recovery method will help you:
- Remove all keys to expose the space underneath. Use thin objects or loops of copper wire for this.
Important! If you are a novice user, we recommend that you save a photo of the location of the keys on your computer so that assembly goes smoothly.
- Set the keys aside and turn the keyboard over. Now unscrew about a dozen screws holding the cover.
- Remove the cover and the film with the tracks, wipe them very carefully with a cotton swab moistened with alcohol. Let the film dry completely.
- Again, take a cotton swab moistened with alcohol and wipe the area under the keys.
- All that remains is to put everything back together and check the device for functionality.
Mechanical influences
The keyboard device contains contact pads and conductive rubber. All of them are located directly below the keyboard buttons. Sometimes minor damage to tracks can be repaired using special compounds that can conduct current. They are applied to conductive rubber tracks and bases. But repairs are not always possible if the device has been used for a very long time.
Important! Users who are fond of typing texts can completely forget about repairing it, since there is no point in it. Rapid wear and tear will return everything “to its place.”
Let's look at how to insert a button on a laptop
If a button falls out on your mobile PC, there is no need to panic right away. In many cases, the problem resolves itself. At home, you can also solve the problem of how to insert a button into a laptop. To do this, it is enough to have a simple paper clip with you. Before inserting the button into the laptop to replace it, the old part must be removed from the keyboard. Working with buttons on a mobile PC requires more care, as they are flatter and can be damaged if pressed hard. Removing an element goes like this. It is necessary to bend the paperclip into a straight line and pass it under the lower platform of the keys. Now you need to pull it towards you, and the key will jump off its base.
Now let’s figure out how to insert a button on a laptop, provided that all the “antennae” located on the “rocker” and the grooves are not damaged. This is the easiest way. To do this, the button must be installed in the upper position on the base under the required mount. After it is in place, the key must be gently pressed down.
It should be noted that you do not need to use force when installing the keys. Any pressing must be done smoothly and easily.
After installation, you need to carefully check the fastening of the replaced key. When purchasing new buttons, you need to check whether they will fit your laptop model. If you need to change several parts, it is better to do it gradually. So as not to confuse the location on the keyboard.
Before inserting a button on a laptop, you need to carefully check that the plastic mount, which is located under the key itself, is in its place. It may immediately seem that it is very difficult to connect everything. But in fact, this is not entirely true, because in reality there can only be one correct option. You can't install anything differently.
Your actions to eliminate the cause
- Let's look at what a keyboard with a fallen key looks like on a laptop. The key structure is standard throughout.
Keyboard with a fallen key on a laptop.
- Let's look at the structure of the back side of the key.
Reverse side of the key. Appearance
- We look at the fasteners (2 pieces) and grooves (2 pieces) with a device similar to a swing. The device is designed to attach a key to the keyboard; it consists of two parts connected into a unit. In the future, we will call it, as indicated above, a device.
The structure of the back side of the key, including fastenings (2 pcs) and grooves (2 pcs) with a device similar to a swing
- in the case when the key is torn out by the “roots”, i.e. together with the device, then you should disconnect it from the key cover, attach it to the keyboard, then install the key.
When the key is torn out by the “roots,” that is, together with the device, then you should disconnect it from the key cover, attach it to the keyboard, and then install the key.
- Having carried out the above operation, we get two parts: the key cover and the device itself.
After the operation, we receive two parts: the key cover and the device itself.
- We install the part on the keyboard, placing fasteners under the “ear.”
We install the part on the keyboard, placing fasteners under the “ear”
- Pressing lightly, we place the device on two small fasteners.
We install the device on two small fasteners
- After installation, return the key cover back, strengthen the protrusions of the device into the grooves of the cover
- press the key cover, securing it in place. The operation has been completed. A slight click is heard when inserted.
Strengthening the key cover
- Large keys (spacebar, for example), in addition to the device described above, may have additional mechanical fasteners, such as in the figure below.
Large keys may have additional mechanical fasteners
- The large key stabilizer is secured with additional fasteners located on the keyboard substrate.
The large key stabilizer is secured with additional fasteners
- To do this, you should wind the ends of the stabilizer.
We insert the ends of the stabilizer into the grooves
- then, insert the lower fastenings of the device into the grooves, press, putting the large key in place.
insert the lower fasteners of the device into the grooves, press the key, putting the large key in place
- The spacebar, for example, is mounted on two devices and a stabilizer.
Spacebar, mounted on two devices and a stabilizer
- The installation diagram for the large key is similar to the case described above.
The installation diagram for the large key is similar to the case described above
Keyboard failure can be more complex:
- Several keys fell out.
- The keyboard is filled with liquid.
- the keyboard is broken.
In these cases, contacting a service center will help. We told you how to handle installing a dropped key yourself, putting it in place correctly, and fixing it on the built-in keyboard of a laptop.
How to insert a large button
Let's look at how to insert a button on a large laptop. These are keys such as Space, Tab, Shift, Enter. In addition to the “rocker”, which is made of plastic, they may also have a metal stabilizer. It is necessary to ensure that the key is pressed evenly. On the inside there are two ears necessary for attaching the stabilizer to them. You need to tie up the ends right away. Next, insert the antennae of the “rocker” into the grooves and put the button in its place by lightly pressing it.
The space bar is supported by several “rockers” and a stabilizer. A situation may arise that the “rocker” may be disassembled. It is easy to assemble using a needle or toothpick. One side needs to be inserted into the groove, and the other is installed using a needle.
Let's look at how to insert a button on a laptop in which the mount is made using metal brackets instead of plastic swings. The mounting here is also simple. It should only be noted that such a keyboard will be noisier.
The lid fell out along with the elevator
And this happens: the lid is fastened to its elevator, but it unfastens from the keyboard fastener. As a result, we get this thing in our hands:
If nothing is broken, then no problems will arise during the repair: first we send the elevator into place, then the cover. Of course, before this we separate their tandem by simply separating the fasteners: latches from locks, protrusions from grooves. The keyboard has a metal elevator mount - two small lugs on top and one wide one on the bottom. Often they turn out to be bent (that's why the key came off), and they need to be straightened before installing the elevator. It is important not to overdo it here: the metal is very thin, so a couple of flexion and extension movements can lead to separate ears and the purchase of a new keyboard. The most convenient way is to take a thin flat screwdriver and use it to straighten the deformed areas.
When the fasteners are in order, you can begin installing the key. First, we insert a wide metal eye into the corresponding hole in the elevator, correct the position of the part, and then lower the top until the small ears are installed in the windows intended for this. The pressure should be minimal: everything can be installed easily, and if something doesn’t fit somewhere, you’ve either warped the elevator or crushed the metal fasteners. Try again and everything will work out.
It happens that the elevator, separated from the key cover, crumbles into two parts in the hands. There is nothing wrong with this: they are connected to each other by means of protrusions and grooves on both sides. You may need a needle or match to align the tiny plastic pieces. The procedure will be the same: first we insert the protrusion into the groove on one side, then on the other. It turns out to be such a “rocker”. Then we install it in place as if nothing had happened.
When the elevator is firmly connected to the keyboard, we attach the lid to the count of one, two, finished: we already know how to fix a key on a laptop. First the lower slots, then the upper latches. We check - the movement is smooth, nothing is loose, the letter remains the same. This cosmetic repair takes several minutes, even with a certain slowness, so it is not at all necessary to spend hours visiting a service center and days waiting for employees to get their hands on your laptop. If, nevertheless, your hands are afraid, following your eyes, then this video will help you overcome your fears:
Everything is easy and simple with desire and patience.
How to fix a button on a laptop
It is necessary to clearly understand that there will most often be only one attempt to repair the button. This must be taken into account before installing a button on a laptop. Before starting the necessary work, you need to have the following tools available:
- A needle from a simple syringe.
- Wire cutters, knife.
- Thin soldering iron.
- A needle.
- Small vice.
- Glue.
- Pliers.
- A lighter.
We place the broken mount on its workplace. Take a needle and a soldering iron. We apply the needle to the place of the broken antennae and make sure that it goes there a few millimeters. We heat it with a soldering iron and fuse it into the mount. We bite off the unnecessary part of the needle. Clean off excess plastic.
Let's consider another option on how to install a button on a laptop. We heat the needle with a lighter and make a groove with it, into which you can place, for example, lint or something like that. Place it in the groove and glue it with superglue
The key is broken
A broken lid that has fallen into several parts cannot be repaired. A broken elevator cannot be repaired. Broken lid and elevator fasteners cannot be repaired. These parts can be purchased either from service centers or from very specialized stores that service service centers. For a short time (to finish writing a coursework or completing other important tasks), a broken key can be replaced with the same one, but lightly loaded, but instead there will be a gaping hole in the laptop keyboard. If the fastenings are not damaged, then you can glue the lid and put it in this place with the condition that you do not use this key at all and replace it in the near future.
You cannot glue the fasteners to the lid or the lift to the base of the keyboard. In this case, one awkward movement or a drop of glue will lead to the need to replace the keyboard, from which it will not be possible to simply tear off the restored one with skillful hands. Finding and replacing a key is much easier and cheaper.
If the metal keyboard mounts to which the elevator attaches are damaged, you will have to purchase a new keyboard. Soldering in this case will not help and is even dangerous, while glue and other compounds are unreliable, and the elements are too small.
How to make a new button yourself
If the button stops working, there is no need to rush to throw it away immediately. Maybe she's just sunk and can be put in her place. If not, then first you need to carefully examine the button. If it is just a little cracked, then it can be glued together with simple superglue. The only most important thing is that her contact is in the same place.
If the key cannot be glued, you can make it yourself. Let's look at how to make a button on a laptop yourself. To do this, you need to have epoxy resin and plasticine with you. You need to make the necessary shape from plasticine and fill it with resin. You also need to put the contact there. It must be installed correctly. To make it even, it can be trimmed with ordinary sandpaper. So, we figured out how to make a button on a laptop at home. In some cases, this is easier than taking your mobile PC for repair.
Repairing a laptop keyboard with your own hands: a separate key or a flooded keyboard
People who use a laptop may need to repair the laptop keyboard with their own hands. In our world, the number of portable computers - laptops - is increasing every day. People choose them because of their mobility, compactness and ease of use. Like any technology, laptops also break down. In most cases, the laptop keyboard fails. If for a computer the keyboard is a separate device that can be easily replaced, then for a laptop it is a built-in part. You can try to repair your laptop keyboard yourself.
Let's consider two repair options:
- DIY laptop keyboard button repair.
- Do-it-yourself repair of a flooded laptop keyboard.
Laptop key repair
If for some reason you have difficulty pressing a key on your laptop, or it has fallen off its mounts, you can try to fix it yourself. Here you need to stock up on simple tools - Phillips screwdrivers, a clock screwdriver, a hook made of hard wire. Before starting disassembly, watch the instructions for repairing a laptop keyboard with your own hands using a video with your laptop model. We have selected such a video for you (presented at the end of the article), and, accordingly, it will be easier to understand. Let's see what a button on a laptop keyboard consists of:
- Actually the key itself.
- The spring-loaded mechanism is the so-called elevator.
- Rubber cap.
A key can fail in a completely unexpected way, for example, you dropped something on the keyboard or decided to clean it and accidentally pulled the key out of its place. Everything is easy to fix. We will repair laptop keyboard keys. Turn off the power to the laptop. In some cases, you will have to remove the keyboard from the laptop. To begin, remove the key. If it has not completely fallen off the fastenings (usually there are three or four of them), pry it up with a clock screwdriver or a stiff wire hook and remove it from the spring-loaded mechanism. Take a close look at the elevator and determine if there is any damage to it. If there is no damage, clean everything around with a rag soaked in alcohol. Place the button in place and press firmly until it clicks. The button should click into place. Here it is worth paying attention to the fact that long keys such as “Space” and “Shift” also have a metal stabilizing bracket for uniform pressing. You will have to tinker with them, installing them in place. First you need to secure this stabilizer to the button itself, then insert the other ends into the grooves on the board, and then put the button in place.
If the elevator is faulty, it must be replaced. Carefully pry it off with a screwdriver and remove it from the board. Usually there is one large and two small fasteners. We start shooting small ones, and then big ones. There are contacts under the rubber cap. The cap itself is securely glued to the board and should not be removed. We looked at an example of how to repair an HP laptop keyboard with your own hands.
Repairing a laptop keyboard after exposure to liquids
There is nothing better than work done with your own hands. Let's see how to repair a laptop keyboard that has been exposed to water or other liquid. First, let's remove it from the laptop. After which it needs to be dried. Usually one or two days. Instructions for disassembling a laptop with a video and detailed description can be found at the end of the article. We will only consider repairing the keyboard of an Asus laptop with our own hands, which has already been removed. Before you start disassembling the keyboard, take a photo of it so that you don’t have to worry about assembling it later and don’t mix up the keys.
The main reason why the keyboard fails to operate after liquid gets into it is corrosion of the conductive paths or contacts.
To repair the keyboard, you will need to take a tester, a conductive marker, superglue, varnish and a stationery knife. After everything you need is prepared, you can start disassembling: first, let's remove all the keys and mechanisms underneath them. We work extremely carefully so as not to break anything. After this, you need to carefully cut off the rubber caps with a stationery knife. Once all caps are removed, the board can be disassembled. In some cases, the board will have to be heated with a hairdryer, otherwise it will not separate into its component parts. When disassembling the board, be very careful - it consists of several layers of thin plastic that can tear.
After the board is disassembled, inspect it for damage to the tracks. All doubtful places need to be checked with a tester. If you find a torn or “rotted” track, restore it using a conductive marker and cover it with varnish. Wait for everything to dry. Test the repaired areas again with the tester. Before assembly, wipe all contacts with alcohol.
Then you can begin reassembly.
Be careful, don't rush. A breakdown of the elevator or mounting will result in the restoration work being in vain - you will have to order a new keyboard.
After everything is assembled, turn on the laptop and test how the keyboard works - to do this, launch Notepad and press all the keys. Ideally, the keyboard should start working. If this does not happen, you will have to order a new keyboard or disassemble this one again and look for damage again.
We considered two options for repairing a laptop keyboard - repairing the key and repairing the laptop keyboard flooded with water or other liquid. You should begin such work only with certain knowledge and skills, as well as armed with the necessary tools and detailed instructions. It is enough to know the principle of repairing the keyboard of one Asus laptop, for example, and if you decide to repair a laptop of another brand, then you have a rough idea of what you will encounter. To perform such repairs, you should evaluate your strengths and decide for yourself whether it is worth doing it yourself or turning to professionals. As a bonus, watch a video on how to repair an Acer laptop keyboard yourself.
Read also: - Removing old Windows after installing a new one - step-by-step instructions - Drivers for Windows 10 - Advertising in the browser: removing a virus from Opera, Chrome and Mozilla Firefox - Setting up a Windows 7 network - Setting up Skype on a Windows 7 laptop - How to set up a printer for printing from computer
←Return
bitu.ru
If the button just fell out
If a button falls out of a laptop, you need to perform the following steps. On its reverse side there are grooves and latches. They contain “rocker ears”. Their purpose is to connect the button to the keyboard. If the rocker key falls out, they need to be disconnected. Then the “rocker” is installed. There will be a button cover on it. They are connected to each other by the grooves that are located on them.
So, we figured out how to install a button on a laptop. As you can see, this is not very difficult to do, and in many cases you can solve the problem without contacting a service center.
The key cover fell out
Service center employees probably sigh heavily when an embarrassed laptop owner lays out one or two or three keycaps with letters or arrows on the table. Repair in this case consists only of putting it in place. Since the device is still compact, the fasteners are ridiculously minimal - tiny latches and grooves that can come loose with little effort. The result looks like this:
If, upon inspection of the damaged area, no debris is found (both on the button cover and at the place where it is attached to the elevator), then we just have to insert the cover back. It has two symmetrical grooves and two symmetrical latches, and the elevator that remains on the keyboard has two tabs and two locks. We align the grooves of the key cover with the protrusions of the elevator (the fit is quite tight), and then lightly press until it clicks and install the latches into the locks. Thus, we first act on the lower part of the key, and then on the upper, not vice versa. When installing, you must ensure that the cover is placed exactly in the center and does not warp or move: the fasteners are quite fragile, and applying significant force will lead to breakage.
If you miss the “space”, “enter”, “shift” or other beautiful key, then another operation is added in the process of installing the cover. The large keys are equipped with a stabilizer for uniform pressing. We don't always hit exactly the center, do we? Stabilizer is a big name for a piece of rigid wire that is attached to the inside of the lid. Its two ends are inserted into special lugs on the keyboard, located on both sides of the elevator mount, after which the key cover is latched in the usual order - first the bottom side, then the top.
Plastic is everything to us, but some manufacturers did not skimp on metal, so the key mounts can look almost exotic:
This, of course, was different from Apple. True, today you won’t see this anymore, and MacBook keyboards are no different from others. But if you are the happy owner of a rarity, then let us clarify, just in case: first of all, a wire is placed in the mounts on the keyboard, and then the key cover is placed on it. Well, maybe it will come in handy.
How to clean your computer keyboard yourself?
In this article we will look at how to clean your keyboard.
, both external from a desktop PC and a laptop keyboard. But first things first.
Clean the keyboard only when the computer is turned off!
How to clean your desktop keyboard?
First, let's determine exactly how it got dirty. If it's just dust, wipe it with a damp cloth, trying to wipe the space between the keys with the corners of the cloth. Also, a special can of compressed air can help in removing dust between the keys of the keyboard. It looks like a deodorant, but inside there is only pressurized air. This can is sold in many stores specialized in computer equipment. All you have to do is search. The spray bottle should come with a nozzle in the form of an oblong tube 10-15 cm. We place the end of this tube between the keys, and after pressing the valve, we move along the key, during which a large amount of dust and small debris is blown out with compressed air. A regular vacuum cleaner can serve as a good alternative to such a cylinder. Remove all attachments from the vacuum cleaner, leaving only the tip of the tube. After that, use it to clean the keyboard in the same way as using a spray can.
If the cause of the blockage is crumbs or some hard objects stuck behind the keys, it is recommended to remove them. Before removing the keys from the keyboard, take several pictures of the location of the keys on your phone, so that in the event of a mass removal of the keys, you do not confuse their places.
Removing a key is not as difficult and dangerous as it might seem. For ease of removal, you will need a nail file or knife; we will use one of these items to pick out the keys on the keyboard.
Carefully insert the tip of the knife/file under the key until it stops and either begin to slowly lift it, or rotate the knife/file to place the last one on the edge. Cover the key with your palm - it can quickly fly around the house. When you remove one key, you will then understand how best to act and continue filming on your own. In order to insert the key into place, get into the special groove and press the key, with an accompanying click, it should snap into place.
If it so happens that you actually spilled coffee or a similar drink on the keyboard, then here you need to:
1. Remove all the keys of your coffee-stained keyboard and soak them in a container of water to remove any coffee residue stuck to them. Then thoroughly wipe away the coffee from the place where the button was located. You can remove only part of the buttons and soak them in water only if you are sure that only this part of the buttons was flooded and that coffee did not spill inside the keyboard. Speaking of the insides... If you are sure that there is no coffee inside (NOT UNDER THE KEYS) of the keyboard, you can put the buttons back and your cleaning is complete. If the buttons still stick, proceed to step 2 of cleaning.
2. It's time to disassemble the keyboard piece by piece. This is perhaps a little more difficult than the previous stage, but just as doable. Turn the keyboard over with the buttons facing down, you should see screws, look at what kind of screwdriver you need (Flat or raised) and prepare it. It is advisable to start disassembling the keyboard on an empty table so that nothing gets lost. Unscrew the screws one by one, and in order not to confuse which is which, place them on the table so that they eventually outline the places where they are screwed in on the keyboard. Naturally, this needs to be done if the screws are different, but if they are the same, collect them in a menu so that you don’t get lost. Once you have removed all the screws from the keyboard, carefully separate the 2 parts of the keyboard - the bottom and the top.
What to do if a key breaks
Although laptop models differ from each other, the keys are usually attached in the same way. The button on the keyboard is a rubber base with a built-in contact. In the process of pressing, the contact touches the circuit, as a result of which the desired action is performed. Therefore, you must first ensure that this contact is correctly established.
Of course, from the very beginning it is necessary to find out the cause of the damage. If the button gets stuck, you should try to pull it out using a special screwdriver or a thick needle. To do this, place the end of the tool under the key and carefully pull it up. It is worth remembering that as a result of such an action, in no case should you use a lot of force, since the key can be damaged, and this already entails additional financial costs.
Having pulled out the key, you need to carefully inspect it and find out the cause of the damage. Of course, if the button cannot be restored, then it must be replaced with a new one, which can be purchased at any computer repair shop.
Sometimes the key can simply be glued together with super glue, however, when installing it in place, you need to make sure that the contact is in the same place. Otherwise, the breakdown will not be fixed.
If a key falls out, first of all you need to take a good look at the design of its fastening. On the back side of the button there are grooves and latches with “ears” of the rocker. They are designed to connect the keyboard to each individual button cover. If the key falls out along with the rocker, then they need to be separated. After this, you need to install the rocker itself, on which the key cover is located. These two parts are connected using grooves located directly on them.
It is worth remembering that before installing the element in place, it is necessary to tidy up the opened niche, removing all dirt with a napkin.
It is much more difficult to repair damage caused by accidentally spilled liquid. After all, in this case, contacts are blurred, which, in most cases, are almost impossible to restore on your own. In case of such damage, it is best to contact a service center specialist or try to change the keyboard yourself.
Simple repair
I must warn you right away: do not try to glue the button with “super glue”! This will not lead to anything good. In the best case, it will peel off very soon, and in the worst case, you will then have to take the entire keyboard for repair.
Let's get started! Repairing the button itself can hardly be called a repair. This is a very simple procedure for
which will need any handy tool: a large needle or toothpick, if you have one, it will be convenient to use a thin watch screwdriver. In the first option of tearing off the button, the only thing that is required of you is to first very accurately attach the button to the fastening protrusions from above, and then lightly press it from below, so that the button snaps onto the frame. If this button has a spring, then first insert the spring into the ears, and then begin attaching the button itself to the frame. But just calculate the force of pressure: it should not be excessive, otherwise the button may fly out again, but together with the frame. Then the work will become more complicated and take a little longer.
In the second case, when the frame still remains in the button itself, the repairman will have to tinker a little and do the following algorithm of actions: 1) You need to disconnect the frame from the button: to do this, use a needle to pry the frame from below, and then remove its ears from the grooves of the button from above. If suddenly the frame splits into two parts, do not be alarmed: they can be connected. Please note that on one part there are thin protrusions on the sides, and on the other there are two special recesses for them. You need to match them using a needle. The work, of course, is intricate and meticulous, but quite doable. 2) Install the frame on the keyboard: first hook it to the wide mount, then to the two small ones. Make sure that the frame is hooked tightly and will not fly out again when the button is secured. 3) Finally, using the method described above, attach the button to the keyboard.