What is a metered connection in Windows 10?
First, let's define the term itself. Some users are somewhat biased towards this function, believing that using a metered connection in Windows 10 can lead to a significant drop in Internet speed or installed programs that may require mandatory Internet access during operation will not work correctly. This is an absolute misconception!
The limit is set on the use of traffic for connections on stationary computer terminals or laptops, and for mobile networks and devices it is active by default (for example, when you connect to the Internet via a smartphone modem or a mobile operator service). Roughly speaking, activating a metered connection in Windows 10 on desktop computers and laptops can save traffic and not go beyond the amount of data received/transmitted that is provided to you by your provider. This is especially clear in cases where you do not have unlimited Internet, and all additional gigabytes that go beyond the scope of the contract must be paid separately.
Why can't I change the parameter?
If you yourself asked yourself the question described and found this function as follows: in “Options”, click on your connection and then click on the network you are using...
You might have encountered the following problem: in the “Limited Connection” section, the “Set” field is simply inactive. In this case, the slider is in the “On” position.
Go to the Data Usage tab and select the network you are connected to from the drop-down list. If you want to make the slider mentioned above active, the limit must be removed. If you have limited traffic, then in this window simply change the limit and indicate the number of GB/MB available for use.
As you can see, Windows 10 can help you keep track of your data usage if your internet plan has certain limits. Now you can easily set your connection to the desired network as a limit, and not worry about exceeding it: the system will remind you of this.
Rate this article:
( 1 ratings, average: 5.00 out of 5)
About the author: Anya Kaminskaya
- Related Posts
- How to fix Unmountable Boot Volume error in Windows 10
- Enable, configure, and use Windows 10's built-in sandbox
- Windows 10 Registry Recovery
What is the advantage of setting traffic limits?
The most important advantage when activating this option in Windows 10 64 bit or x86 is that using this technique you can ensure that even updates to the system or built-in protection components (Windows Defender) will not be automatically downloaded and installed. But without this, it is impossible to disable the same “Update Center” in the tenth modification of the system after receiving recent (forced updates and upgrades) using any other methods. Packages are installed automatically, regardless of your desire (and sometimes even at the most inopportune time). It's obvious that you can set a limit and get rid of the annoying installation of everything you don't need.
How to disable the traffic calculation function
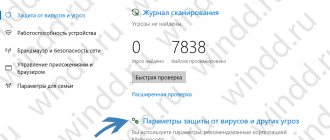
To prevent “ten” from counting your traffic anymore and not sending you messages when the traffic ends, do the following:
- Go to the Data Usage section in Windows Settings for Network and Internet.
- Click on the “Remove limit” button.
Click on “Delete”
Click on “Delete” in the dialog box
You can set up metered Internet on Windows 10 in the “Settings” system window, in the section for using data in the “Network and Internet” tile. The function is informational in nature - it does not turn off the Internet on its own so that you do not spend megabytes over the limit. The system will only send you a message that the limit has been reached. Your task is not to miss it.
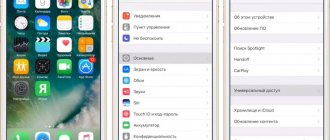
How to set a metered connection in Windows 10?
This option is activated in the networks section, which is called up through the parameters menu. Since this type of limit works primarily with Wi-Fi-based wireless networks (though you can also set a limit for Ethernet if you wish), you need to go to the menu on the left just to the Wi-Fi item.
Here, you first need to click on the name of your connection, and then in the metered connection block, move the switch to the right, setting it to the on state.
If there are other available networks that you use at home, the limits are activated in the same way.
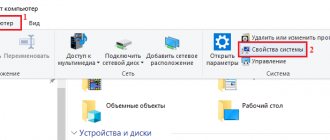
A simpler method of accessing activation parameters is to call up the menu of available connections in the system tray by clicking on the wireless connection icon, after which you will need to click on the “Properties” hyperlink. Next, the same section will open.
Why do you need a metered connection?
Thanks to this feature, users do not have to worry about accidentally and unexpectedly exceeding the traffic volume provided by the provider. In cellular networks - when using USB modems, as well as smartphones in modem mode - the function is automatically activated. For other methods of accessing the global network - via Wi-Fi or Ethernet - you will need to independently activate and configure a limited connection manually.
Limit connection
This feature is useful to users because it ensures the most efficient use of data. The main features of a metered connection are:
- disabling forced automatic system updates;
- suspending automatic synchronization with certain types of software, in particular Outlook, OneDrive, Dropbox, etc.;
- preventing Internet connection speed from slowing down.
Setting up basic settings
To set the required options, click on the limit setting button, then in the window with the presented parameters, select the type of limit, units of measurement and traffic limitation.
The most important thing is to remember to set the start date so that the system knows from what time to start applying the restriction for the network being configured.
To further limit the use of traffic by system services and even the “Store”, activate the permanent limit item (“Always”) just below. This will limit background data transfer (as, in fact, follows from the name of the parameter block itself).
By and large, one could describe setting restrictions for Ethernet-based connections, which is accomplished through fairly complex manipulation of the registry and changing the ownership and permissions of the DefaultMediaCost directory. However, at the moment it is unlikely that anyone has not yet installed the Creators Update upgrade (and this method only works for systems that have not received such an update), so for all updated modifications the easiest way is to use the same network and Internet section in settings menu, but instead of the Wi-Fi menu, use the Ethernet section and set the required restrictions in the same way.
How to activate the option in the “ten”
Enabling limit mode for wired and wireless Internet occurs a little differently - in separate sections.
For Wi-Fi connection
The easiest way to set a limit on traffic use for a Wi-Fi network (when using a router) is:
- We will perform all actions in the Windows Settings window. You can call it in two ways: through the combination Win + I and the Start menu (the gear-shaped icon above the virtual shutdown button).
In the Start menu, click on the gear to open the Settings window.
- In the settings, open the “Network and Internet” section.
In the Settings window, select Network & Internet
- Let's go straight to the second Wi-Fi tab. In it we click on our network. A page with your network settings will open.
Select your network in the Wi-Fi tab with the left mouse button
- You can also get into it in another way - click on the Internet icon on the “Taskbar”, located next to the clock and date, and then click on the “Properties” link above the “Disconnect” button.
Click the "Properties" link to open the network settings window
- Scroll down the page a little. In the “Limited connection” block, set the value “On”.
Click the switch to move it to the “On” position.
- After that, click “Set traffic limit” - the system will immediately redirect you to another tab called “Data Usage”.
Click on the “Set traffic limit” link to specify a specific amount of data
- Click on the “Set limit” button.
Click on "Set limit"
- In a new small window we set the required values in accordance with the amount of data in the tariff. We also indicate the type of limit (monthly, one-time or unlimited). We also set a reference date so that the system knows from what day to start counting the amount of data received from the network. At the end, click on “Save”.
In the new window, specify the amount of data, type of limit and start date
For Ethernet
If you activate the mode for wired Internet, you may have to perform other actions. If your “top ten” did not receive the Creators Update, which was released in April 2020, you won’t be able to easily enable the limit in the “Options” window.
In versions before the Creators Update
In this case, you can activate the mode by editing the registry (changing the value of a specific entry). The procedure is quite complicated for beginners, but we tried to describe it as clearly as possible:
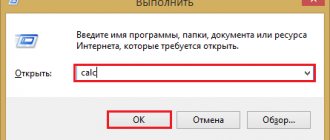
- Let's open the Registry Editor window, in which we will change the values of certain parameters. Simultaneously press two keys (Win and R) to open the “Run” window on the display. In the line we type the request regedit and click on OK or press Enter (“Enter”) on the keyboard.
In the “Open” line, write the command regedit
- Click “Yes” to allow the editor to make changes on your Windows system.
Allow Registry Editor to make changes to your computer
- In the left panel, double-click one of the main branches called HKEY_LOCAL_MACHINE.
Start the HKEY_LOCAL_MACHINE partition
- Now we also double-click directory by directory: SOFTWARE - Microsoft - Windows NT - CurrentVersion - NetworkList - DefaultMediaCost.
The last folder opened should be DefaultMediaCost
- First we need to change the owner of the last DefaultMediaCost folder. Right-click on it and click on “Permissions” in the list.
In the directory context menu, click on “Permissions”
- In the new additional window, click on the “Advanced” button - a third window will open.
Click on the “Advanced” button in the new window
- At the very top there will be an “Owner” parameter. There will be a “Change” link next to it – click on it.
Click on the “Edit” link to make yourself (your account) the owner of the folder.
- If you know your account name by heart, enter it in the appropriate field. If necessary, click on the button on the right to check that the name really exists in the system. If you don't remember the name, click on "Advanced".
Click on “Advanced” if you don’t know the exact name of your account
- In the menu that opens, click on “Search”.
Click on “Search” so that the system finds all users of this PC
- In the list of results, select your name (the account under which you are currently working on the PC) with the left mouse button. Click on OK.
Select your account from the list and click OK
- Click OK again to save the new directory owner.
Click OK to confirm that you want to change the owner of the folder
- Under your name, put a checkmark to the left of the item about replacing the owner of subcontainers and objects. Click on “Apply” and then on OK to close the additional window.
Be sure to check the box “Replace owner of subcontainers and objects” and click OK
- In the “Security” tab, in the list, select “Administrators” or “Users” with the left mouse button, depending on what type of account you have (you just made this “account” the owner of the directory). In the menu below, set o in the first column to “Allow”. Now apply the changes and click OK.
Select the “Administrators” or “Users” group in the first list
- Let's move on to changing the parameter itself. On the right side of the editor window we find the Ethernet entry. We double-click on it with the left button or right-click once and select the “Change” option from the list.
In the context menu of the registry entry, click on “Edit”
- In the small gray window, write 2 in the value field. Click OK to save the changes.
Enter 2 in the “Value” field
- For the changes to take effect, reboot the PC. In the “Data Usage” tab in the “Options” window, set the limit as in the previous instructions with Wi-Fi.
- If you want to put everything back in place, just set the value of the Ethernet entry in the registry to 1.
Deactivating restrictions
As for how to disable a metered connection in Windows 10, you probably don’t need to be a rocket scientist to guess that deactivation is done by doing the opposite. And in the case of mobile devices, when a limited connection is established automatically, you can simply move the fader to the inactive position, after which all limits will be reset. The most interesting thing is that when deactivating the limit itself, previously installed options do not need to be reset.
How to enable without the latest OS update
- We find two “Win” keys and an English “R” key on the keyboard and press them at the same time. Now we write the command as in the picture above and click “OK”;
- Now we follow the path:
HKEY_LOCAL_MACHINE\SOFTWARE\Microsoft\Windows NT\CurrentVersion\NetworkList
- Click again to go to the DefaultMediaCost folder and on the left you should see all your connections. You now need to right-click on this folder and select “Permissions...”;
- "Additionally";
- Click on the top link “Change”;
- Enter the name of the user you are currently using in the bottom line, then click “Check names”. If the name is not found, then carefully look to see if you wrote it down correctly.
- The name should be displayed at the top, now click “OK”;
- Select “Administrators”, then check the “Full access” box and apply the settings;
- Select the connection that you want to restrict and right-click and select the option to edit data.
- Set the value: 2. Make sure that the number system is “Hexadecimal”.
- Now go to “Settings” – “Network and Internet” and then go to the “Data Usage” section, you can set a limit.
How to enable metered internet and configure it
It makes no difference whether you have Wi-Fi or a wired connection, the setup will follow the same instructions in any case:
- Launch the Settings menu. To do this, click on the gear on the “Start” panel or hold down two buttons “Vin” and “I” at once.
- Go to the tile for the Internet and the network in general.
Click on the “Network and Internet” tile - Go to the block to use the data in the list on the left.
Click on the line “Data Usage” - In the first drop-down menu, indicate your current connection for which you want to set a limit.
If you have a wired option, choose Ethernet. Enter your network in the list - Now click on the “Set limit” button.
Click on "Set limit" - Set the type of limit - one-time (within one session on the Internet), monthly (if you have a certain number of megabytes or gigabytes per month), without a time limit (here you will only set the countdown date - this type is suitable only if you want to start counting your traffic without any notifications).
Select a limit type from the list - Now set the date from which the system should start counting your traffic, or the validity period in days if you chose a one-time restriction.
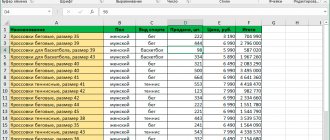
Also set a limit in gigabytes or megabytes. Be sure to save the changes. Specify the data validity period in days - In the options menu, you will see how many gigabytes you have already used, as well as how many days are left before the indicators are reset.
The percentage of traffic used will be displayed slightly higher. The parameters will display the used traffic - When you reach your specified limit, you will receive a message in the bottom right corner of the screen. Don't miss it so that you can turn off your connection in time and not start consuming traffic in excess of your allowance, which will be paid additionally in accordance with the tariffs of your provider.
- You can change your limit parameters at any time.
To do this, click on the corresponding button in the same “Data Usage” menu and specify new data. You can change the limit values if necessary