07/15/2016 windows
This instruction details what to do if you see blurry fonts in Windows 10 or individual programs and applications, which can happen both after changing the scaling in the screen settings, and without these actions.
We'll first talk about ways to fix screen resolution issues that are obvious to most users but may be overlooked by novice users, followed by other ways to fix blurry text in Windows 10.
Note: if the fonts have become blurry after recently changing the scaling parameters (125%, 150%) in the display settings (item “Change the size of text, applications, and other elements”), try simply restarting your computer first (even if this has already happened more than once before it was turned off and on, since turning off in 10 is not the same as rebooting).
Automatically remove blurred fonts in Windows 10 1803
The Windows 10 1803 April Update introduced an additional option to fix blurry fonts for apps that don't support scaling (or do it incorrectly). You can find the option by going to Settings - System - Display - Advanced scaling options, "Allow Windows to correct blur in applications."
If it turns out that the setting is enabled and the problem persists, try, on the contrary, disabling it.
Fix scaling for apps
Some desktop apps may appear blurry when you change display settings. Windows may try to fix the blur the next time you open such an application. This only applies to apps on your main display.
- Go to Start > Settings > System > Display > Advanced scaling options .
- In the current location, activate the Allow Windows to correct blur in applications by dragging the slider to the On .
The program may appear blurry if the resolution for the main display changes after logging into Windows. Windows may try to resolve the scaling issue for this program by using the resolution that was set for the primary display when you opened this program.
This situation can occur if multiple monitors are connected to your computer or if the display configuration changes. Therefore, when using multiple displays with different resolutions, it is recommended to use the current settings.
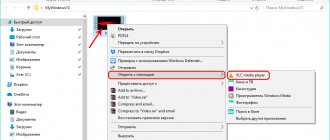
- Right-click on the desired application and select Properties .
- In the window that opens, go to the Compatibility , and click the button Change high DPI settings .
- Check the To fix scaling issues for this program, use this option instead of the option in Settings .
- Next, select Use the resolution set for my primary display when I log into Windows or I open this program .
And also, if necessary, you can use high-resolution scaling override. This scaling can be performed for the application or the system as a whole.
Checking screen resolution
This item is for those users who do not fully understand what the physical resolution of a monitor screen is and why the resolution set in the system should correspond to the physical one.
So, modern monitors have such a parameter as physical resolution, which is the number of horizontal and vertical pixels on the screen matrix, for example, 1920x1080. Moreover, if you have any resolution set on your system that is not much different from the physical one, you will see distortion and blurriness of the fonts.
Therefore: if you are not sure, make sure that the screen resolution set in Windows 10 matches the actual screen resolution (this may in some cases cause the font to appear too small, but this can be corrected by scaling options).
- To find out the physical resolution of your screen, you can simply search the technical specifications on the Internet by entering the make and model of your monitor.
- To set the screen resolution in Windows 10, right-click on any empty space on the desktop and select “Display Settings”, then click on “Advanced Display Settings” (bottom right) and set the desired resolution. If the required resolution is not in the list, then you probably need to install the official drivers for your video card; for an example, see Installing NVIDIA drivers in Windows 10 (the same will be true for AMD and Intel).
Read more on the topic: How to change screen resolution in Windows 10.
Note: if you use several monitors (or a monitor + TV) and the image is duplicated on them, then Windows, when duplicating, uses the same resolution on both screens, and for some of them it may not be “native”. There is only one solution here - change the operation mode of two monitors to “Expand screens” (by pressing the Win + P keys) and set the correct resolution for each monitor.
Using the Screen Resolution settings
Another reason for unclear display of fonts and pictures may be an incorrectly selected screen resolution. Before you start setting up, you should find out the real physical resolution of your display. To do this, you need to enter the brand and model of the monitor in any search engine and look at its technical characteristics.
Then you need to proceed to adjust the settings manually.
1. Right-click on any free space on your desktop.
2. Select “Display Settings” from the list that appears.
3. On the “Display” tab, you can change the screen settings and select the resolution from the drop-down list.
If the resolution you need is not available, then you need to go through the Start menu search to the device manager and look at the model of your video card.
Removing text blur when zooming
If the problem with blurry fonts occurred after changing the sizes of elements in “Right click on the desktop” - “Display settings” - “Change the size of text, applications and other elements” by 125% or more, and restarting the computer or laptop did not fix the problem, try next option.
- Press the Win+R keys and enter dpiscaling (or go to the control panel - screen).
- Click on "Set custom zoom level".
- Make sure it is set to 100%. If not, change it to 100, apply, and restart the computer.
And the second option of the same method:
- Right-click on the desktop - display options.
- Return the scaling to 100%.
- Go to Control Panel - Display, click "Set custom scaling level", and set the required Windows 10 scaling.
After applying the settings, you will be asked to log out, and after logging in you should see the changed sizes of fonts and elements, but without blurring (using this option applies a different scaling than in Windows 10 display options).
Other font display settings
Most websites are optimized for 1920x1080 resolution, so fonts may appear too small on 2K or 4K monitors. To make it larger, apply scaling.
- Open Tens Options
- Go to the “ System ” section.
- On the “ Screen ” tab, find the “ Change text size ” slider and play with its value, choosing the optimal font size.
Text may become blurry after scaling. This situation can be corrected by restarting the computer or re-configuring ClearType. If this doesn't help, try the following:
- Open Control Panel.
- Take a look at " Small Icons ".
- Go to the " Screen " section.
- Click on the “ Set custom level… ” link.
- Set the slider to 100% of the original size.
If these steps did not help eliminate blur, do the opposite: set the scaling options to 100%, and increase the scale in the control panel.
How to fix blurry fonts in programs
Not all Windows programs support correct scaling and, as a result, you may see blurry fonts in some applications, while the rest of the system does not experience such problems.
In this case, you can fix the problem as follows:
- Right-click on the program's shortcut or executable file and select "Properties".
- On the Compatibility tab, install o and apply the settings. In newer versions of Windows 10, click Change High DPI Settings, then o and select Application.
The next time you run the program, the problem with blurry fonts should not appear (however, they may appear small on high-resolution screens).
Enable screen font smoothing
- Go to the computer properties window by pressing the Win+PauseBreak or selecting Properties in the context menu of the user’s computer icon.
- Next, select the Advanced system settings and options .
- Activate the item Smooth out irregularities in screen fonts and click OK to apply the changes.
To change current settings, you must have administrator rights. Other key combinations can be found in the article Windows 10 Hot Keys. And also see the instructions on How to add My Computer to the Windows 10 desktop.
Conclusion
The current instructions show how to fix blurry fonts in Windows 10. Most problems with blurry fonts appear due to the incorrect screen resolution on Windows 10. Although there are other options for solving the current problem. And also see how to increase the font on a computer with Windows 10.
ClearType
In some cases (for example, due to incorrect operation of video card drivers), the problem with blurry text may be caused by incorrect operation of the ClearType font smoothing function, which is enabled by default in Windows 10 for LCD screens.
Try disabling or configuring this feature and check if the problem is resolved. To do this, type ClearType into the taskbar search and run “Adjust ClearType Text.”
After that, try both the option to configure the function and the option to disable it. Read more: Setting up ClearType in Windows 10.
How to return the old scaling method in Windows 10
If none of the tips above helped get rid of blurry fonts in Windows 10, you can try reverting back to the old scaling mode. There are two ways to return the old scaling mode in Windows 10 - using special applications or manually, we will consider both options.
Manual method
You can return to the old scaling method in Windows 10 by changing some registry settings. This is most conveniently done using an executable file, which can be created using a regular notepad. Do the following:
- Launch the regular Notepad application or its equivalent;
- Write three lines in it:
- Select "File" - "Save As". Set the “File type” column to “All files”, and write any name as the file name, but be sure to have a .bat or .cmd extension so that the file can be executed.
- After saving the file, you can close Notepad;
- Next, you need to right-click on the saved file and select “Run as administrator.” The appropriate changes will be made to the registry, after which the problem with blurry fonts should disappear.
It is worth noting that when you restart the computer, the registry will again update the changed values. To prevent this from happening, launch the “Run” line using the Windows + R key combination. Enter the shell:Startup command in it, which will open the startup folder. Place the previously created file in it, after which it will be automatically executed every time Windows boots.
System parameters
One convenient way to configure the operating system is to use System Settings. This option was added to Windows 10 to duplicate the Control Panel and part of the Start menu to expand your computer's customization options.
You can get to Settings from the Control Panel in the lower right corner or the Start menu. To get to the font scaling settings you need to follow the path.
1. Open Settings.
2. Go to the System section.
3. Click on the Display link.
4. Open “Advanced scaling options”.
Further work is carried out depending on which tool you choose to configure.
Automatic correction
The easiest way to figure out the quality of fonts is to let the system automatically adjust them itself. To do this, you need to: at the top of the advanced scaling options window, find the switch next to the phrase “Allow Windows to correct blurriness...”. Turn it on to let the system configure the fonts. Restart your computer and evaluate the result.
Customizable scaling
In the same tab there is a tool for manually adjusting scaling. Manually set the display scale to 100% to make the fonts appear more clearly. Then click on the "Apply" button. After this, the settings you made will be applied.
The essence of this method is that users often adjust the sizes of icons and fonts to fit the screen diagonal, increasing the scaling. By setting it to 100% you reset the user settings.
Why do elements become unclear in some programs?
The reasons for this phenomenon are related to the high resolution that the display of your computer or laptop has.
It’s one thing if, for example, the display has a resolution of 1920 by 1080 pixels and a diagonal of 27 inches, and quite another thing if a 15-inch display has the same resolution. In the latter case, all elements of the Windows interface and windows of programs and applications will be very miniature; the information in them will be difficult to perceive, causing excessive eye strain.
The developers at Microsoft who develop the popular Windows operating system understand this, but to this day they cannot completely solve this problem. On their part, they developed the ability to fine-tune the scale of the interface. It is available in all modern versions of the operating system, and in Windows 10 it is even turned on automatically if, at the system installation stage, a display with a small size, but at the same time having a high resolution, is detected.
It is very easy to check whether scaling is enabled in the system. To do this, right-click on an area of the desktop free of shortcuts. In the menu that appears, select Screen options .
The display settings window will open; in the Scale and layout , pay attention to the option that displays the current size of text, applications and other elements as a percentage. If it differs from 100%, then this means only one thing - the scale has been changed, and you will probably encounter incorrect display of the interface of some programs you use.
The root cause of the incorrect display of some programs lies in the reluctance of third-party developers to optimize their applications and implement recommendations developed by Microsoft that allow them to avoid problems with incorrect display when the system scale is increased.
Advice: always use the latest versions of programs and applications, because it is quite possible that in the new version the developer has made appropriate improvements that solve the problem with a blurry interface.
Font smoothing
Sometimes display problems are caused by the font smoothing function (ClearType). To disable it, follow these steps:
- Open the search near the Start menu (magnifying glass sign) and enter “ClearType”. Go to Set ClearType Text.
- In the window that opens, uncheck the box next to “Enable ClearType.”
- Restart your computer and evaluate the result. If this operation does not lead to a clear improvement, turn ClearType back on.
Blurry fonts
There are also cases in which only the text is blurred, and the rest of the image is normal. You can also deal with this problem using the methods described above, but if they do not help, you will have to make some additional settings.
For example, the “ClearType” function can help you. It allows you to make the text clearer and more comfortable to read.
To fix the font blurring error, you must either enable or disable it. First, find this application through the Start menu and launch it. Check or uncheck "Enable ClearType". Click Next. Check the changes.