Typically, when creating a text file, the page is in portrait or portrait orientation. Sometimes when working with a document, you may encounter a problem when the information you need in the form of a table or chart is stretched and simply does not fit. The ideal solution to this problem would be to convert the individual page format.
The user has the opportunity to choose between portrait and landscape spread
Adjusting position throughout the document
It is not difficult to guess that the least labor-intensive process would be to flip all the sheets in the document. To do this, you need to find the “Page Layout” area and select the desired format there from the drop-down menu, which contains 2 options - “Landscape” and “Portrait” layout. It is worth paying attention to the fact that once a provision is adopted, it will be applied to subsequent pages of the document, which indicates their strong relationship with each other.
Using Page Breaks
This method of setting landscape orientation in Word for one page allows you to solve two problems. First, set a different format for each (or specific) sheet. Secondly, immediately indicate which part of the text and other elements of the document (images, charts, tables) will be displayed in landscape orientation. The procedure is as follows:
- Place the cursor at the bottom of the last page that will be displayed in portrait orientation.
- Go to the “Layout” tab and click on the “Breaks” button.
- Select the “Next Page” option from the drop-down list. If you create a break in the simplest way (by pressing the Alt + Enter combination), you will not be able to set the orientation for a separate sheet - the formatting will affect the entire document.
- Check the location of the break by turning on the display of invisible characters (hot keys Ctrl+Shift+8).
- Place the cursor on the page whose orientation is changing.
- Go to the same “Layout” tab and select landscape orientation.
- If you only needed to change the format for one page, and not all the way to the end of the document, make the adjustment for each sheet separately using the same breaks.
The steps are no different in Word 2007 and 2010, but you can adjust breaks and select orientation through the Page Layout tab. In older editors (Word 2003), to set the format, you need to go to the “File” - “Page Options” section. Breaks are set from the Insert menu.
- Exploitation
How to convert a voice message to text
Changing the position of one sheet
Obviously, various tables or high-resolution informative pictures can take up a lot of space. Moreover, they need to be organically inserted into the text.
To achieve this goal, select all the text on the page whose position you want to change. It is worth noting that if you do not select all the information, the remaining information will be moved to the next or previous page. You can also designate an orientation transition location by placing the cursor in front of the text you want to leave unchanged. Thus, the sheet will be torn, and the necessary information will appear on the next one.
Then go to the “Page Layout” tab and select the “Margins” option, “Custom Margins” item. In the menu that opens, we find the desired position and below we determine to which part of the document the selected parameters will be applied. In our case, select the “To selected text” item.
If you preferred the method of breaking the sheet, you need to go to the “Page Layout” tab in the same way, but there select the “Breaks” item, and in it - “Next Page”. After this, you need to designate the end location of the sheet to be formatted by placing the cursor at the position after the last word, and follow the procedure described above, specifying a different type of orientation.
Simple ways to change page orientation in Word
When working on creating a specific text document, a person tries to arrange information in such a way as to convey the meaning of what was said to each reader. A change of orientation, which can be done in several ways, can help him with this.
To landscape using section breaks
First, place the cursor at the end of the previous sheet, go to the “Markup” section, click on o and select “Next Page”. Then the procedure is repeated with the sheet, the location of which should be changed.
When it is isolated, you can proceed to the main part. All in the same section, select the “Orientation” and “Landscape” icons. If all steps of the procedure are done correctly, the page will take a horizontal layout.
Via "Page Setup" in the middle of the document
There is another way to change the page layout in a text editor. Place the cursor at the end of the previous page, go to the “Page Layout” tab and click “Page Settings”.
In the window that appears, select the required orientation, be sure to indicate that the changes need to be made “To the end of the document” and confirm your actions. Thanks to this, all pages below the cursor will take a horizontal position.
Then the cursor is placed on the page, which should ultimately change its location, and we repeat the entire procedure described below. The difference is that instead of “Landscape” they return to “Portrait” orientation.
Individual pages
Often there is a need to change several pages in a document. The easiest way is to select all the information located in a given range and go to the menu for changing the page layout.
In it you need to select the “Options” section, which will appear if you click on the small arrow in the lower right corner.
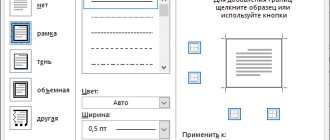
The dialog box that pops up marks the desired orientation, in this case “Landscape”. At the next stage it is worth paying special attention, since without it you will not get the desired effect. In the “Apply” line you need to indicate “to the selected text” and click “OK”.
All selected sheets will become horizontal, while the rest will remain vertical.
In the dedicated section
The method allows you to easily change the orientation of fragments in different parts of the text. The procedure is quite simple:
- the selected text should be highlighted using the cursor;
- access parameters;
- change the location to one of the proposed options;
- in the "Apply to" column o
- Confirm your action by clicking on the “OK” button.
Changing the spread in Word 2003
If in relatively modern versions of Word, released from 2007 to 2020, the settings of the parameters in question are not much different, then in earlier versions, for example, 2003, there are some nuances. The bottom line is that there are no areas familiar in the latest versions of the program, which may cause you some confusion. It's actually simple. You need to select the “File” option and select your preferred spread in the list that appears. If you only need to change the orientation of one sheet, you should select all of its contents before following the steps above.
Considering that many materials can be quite wide or long, using the methods listed above and changing the text or image in this way can greatly facilitate the work and organize your document. Now you know exactly how to do this.
How to flip a sheet in Word (Word 2013, Word 2010, Word 2007)
In versions of MS Word 2013, 2010, 2007, the same actions are performed, only the appearance of the program interface is different.
Go through the following steps:
- Select the text, element, or text with an object on the document page for which you want to change the display type from portrait to landscape.
- In the Word window, open the Page Layout menu.
- In the Page Setup group, click on the arrow located in the right corner of the group.
In this example, I selected an element on the page (an image) that needs to be saved on a document sheet in landscape form. You can select text alone or text with an element, depending on what you want to display on a separate page in landscape format.
- In the “Page Setup” window that opens, go to the “Fields” tab.
- Change portrait orientation to landscape in the Orientation section.
- In the "Apply:" option, select "to selected text."
- Click on the "OK" button.
After completing the necessary steps, the Word program resulted in one sheet being portrait and the other being landscape.
Changing the orientation of one page through page options
There is another way to change the orientation of one page in Word. To use this method, you need to place the cursor on the page that precedes the one whose orientation you want to change. In other words, the cursor must be positioned one page higher. After the cursor is installed, open the “Page Layout” tab and click on the “Page Setup” button (or open “Page Setup” by double-clicking on the document ruler).
As a result, the Page Setup window should open. Here you need to change the orientation of the document, select the application option “To the end of the document” and save the settings using the “Ok” button.
As a result, all pages that will be below the one where the cursor was placed will change their orientation. Next, you need to place the cursor on the page whose orientation needs to be changed, and again change the orientation of all sheets until the end of the document. Only this time you need to choose the original orientation.
As a result of these manipulations, you will change the orientation of only one page of the Word document.
Landscape page orientation in word 2007 and word 2010
How to work in Word. Namely: how to select a portrait or landscape page in Word?
Word text editor , users are often faced with the need to create a landscape page.
Sometimes you need to convert the entire document to landscape format, and sometimes you only need to convert one page to landscape format, while the remaining pages of the document need to remain in portrait orientation. In this article we will look at both of these cases and talk about how to make a landscape page in Word .
In order to make a landscape page in Word , you need to open a document and go to the “Page Layout” tab. Here you need to click on the “Orientation” button and select “Landscape” from the drop-down menu.


