AVCHD: what is this format?
Although at the moment we are talking about video, sound plays an important role here. The very decoding of this abbreviation refers specifically to the Advanced Video Codec High Definition.
This standard is relatively new and uses video compression technologies based on MPEG4 AVC/H.264 compression.
Other video recording formats, such as MPEG2, are clearly inferior to the new standard, since AVCHD provides better quality at 720p, 1080p and 1080p, and also has reduced data storage requirements.
AVCHD format - questions and answers
What is AVCHD? What resolution can AVCHD video have? Is any high definition (HD) video encoded using the AVC format an AVCHD video? Are there differences in image quality between AVCHD video and other types of AVC HD video? How is AVCHD different from other video formats? What are its advantages and disadvantages? Which consumer video cameras allow AVCHD recording? What other video recording formats are available in household HD cameras? How to choose the right AVCHD video camera for your needs? Which storage medium is better? How to watch AVCHD without a computer? Can I watch AVCHD on a regular DVD player? Is it possible to “teach” a regular DVD player to display AVCHD by changing the firmware? How to copy video from AVCHD camera to computer? When watching an AVCHD video, the video is shown as a “slideshow”, what should I do? What kind of computer do you need to watch AVCHD? What software players can display AVCHD? AVCHD is displayed with a “comb”, the image doubles, “blurs”, what should I do? What kind of computer do you need for comfortable AVCHD editing? What programs allow you to edit AVCHD? What programs allow you to edit AVCHD without completely recompressing the data? Why is this even necessary? How do I convert AVCHD to a "lighter" format so it's easier to edit and process? The computer is rather weak - how and into what format can you recompress AVCHD in order to watch smoothly, without “brakes”? I want to get the result from the AVCHD material I shot as quickly as possible, literally “with the press of one button” - just glue everything into one video and get a file as an output. How and with what can this be done? How to get a BluRay disc from AVCHD? What programs exist for “simple” and “advanced” BluRay creation? What programs allow you to make DVD Video from AVCHD? How to get DVD Video from AVCHD with the highest quality? How to publish AVCHD on YouTube and other similar services? How to play video from Canon 5D mk II and other DSLR cameras with video recording function? What and how to edit or at least recompress video from a Canon 5D mk II and other digital SLR cameras with a video recording function? I save the video in AVCHD format from Sony Vegas 9. The resulting file plays jerkily, the sound disappears in places, is not synchronized with the image, etc. Is it possible to somehow improve the situation?
Q: What is AVCHD?
A: AVCHD (Advanced Video Codec High Definition) is a high-definition video recording format used in camcorders, based on the AVC video codec (other names: MPEG-4 part 10, H.264). For a more detailed introduction to the AVCHD format, it is recommended to read the article.
Q: What resolution can AVCHD video have? A: Consumer AVCHD camcorders use High Definition (HD) video resolutions from 1280×720 (AVCHD Lite) to 1920×1080. It should be noted that, in addition to the “full” FullHD resolution of 1920x1080, there are cameras that record video with a resolution of 1440x1080 and non-square pixels - when played back, such video is stretched to a resolution of 1920x1080, but has slightly less detail than “real” FullHD. However, the drop in detail is not always noticeable to the eye, not to every person and not on any display device (TV, monitor, etc.).
Q: Is any high definition (HD) video encoded using the AVC format an AVCHD video?
A: No, not any. The AVCHD standard for home video cameras, in addition to the AVC video compression format itself, regulates the mandatory use of the AC3 (Dolby Digital) audio codec and the Transport Stream container (M2TS/MTS file extension). Failure to meet at least one parameter does not allow such a video to be called AVCHD. So, in addition to AVCHD, some home video cameras use high-definition (HD) AVC video recording in an MP4 container (using the AAC audio codec) or a MOV (QuickTime) container. There is no special term for such video; it can be conventionally called AVC HD (separated by a space) - in other words, high-definition video with compression in the AVC format.
Q: Are there differences in image quality between AVCHD video and other types of AVC HD video?
A: No (other things being equal). In terms of image encoding, AVCHD and other types of AVC HD videos are the same. Differences can be determined by resolution (from 1280×720 to 1920×1080), bitrate (the higher the bitrate, the less likely the occurrence of image artifacts), AVC codec profile (higher profiles allow you to “spend” bitrate more economically), etc. In addition, the quality of the final image very much depends on the quality and aperture ratio of the video camera's optical system, the size, type and number of its matrices, the effectiveness of the noise reduction system, the quality of video processing by the camera processor and other factors.
Q: How is AVCHD different from other video formats? What are its advantages and disadvantages?
A: The main difference between the AVC video compression format and others is its high compression efficiency with high image quality. For example, compared to the long-existing and well-proven MPEG2 format, the AVC format has more than two dozen improvements designed to improve image quality at the same or even lower bitrate (compressed data stream). This advantage also entails a main disadvantage - the format is quite “heavy” for both encoding and playback. For example, even to simply play such a video, it is desirable to have at least a dual-core processor, a video card with a not-so-weak 3D accelerator, and a software player with a decoder that can effectively use the capabilities of the processor and video card to speed up AVCHD video decoding. At the time of writing this document, almost any new “desktop” computer copes with the task of playing AVCHD video, but the same cannot be said about computers with mobile processors, rather the opposite. Therefore, you should not be surprised if even a fairly new laptop cannot play AVCHD video smoothly, without dropping frames. You can read more about the AVCHD format in the article.
Q: What consumer camcorders allow AVCHD recording? What other video recording formats are available in household HD cameras?
A: At the time of writing this document, such cameras on the market, if not the overwhelming majority, are close to it. Usually these cameras have the AVCHD logo, but the best thing to do is find the specifications for a specific camera on the manufacturer's website to make sure what format it saves video and audio in. If we talk about household high-definition cameras in general, then, in addition to AVCHD, they can shoot video in the AVC format, but in other containers (MP4, MOV), as well as in the MPEG4 ASP and HDV (MPEG2) formats. As for the latter, there are fewer and fewer such cameras on the market, because... they use an outdated storage medium - DV cassette. There are also even rarer exceptions where HD video in MPEG2 format is saved to the camera's built-in hard drive (HDD). You can read more about recording formats and storage media in household cameras in the article.
Q: How to choose the right AVCHD video camera for your needs? Which storage medium is better?
A: It is best to select a camera not by the media format, but by the required functionality and the quality of the resulting image (at a reasonable price, of course). To obtain the maximum quality of the result, the following are important first of all: the real resolution of the resulting video (in addition to 1920×1080, there is 1440×1080 with a non-square pixel, when such a video is stretched to 1920×1080 during playback, but the detail is slightly lower); matrix diagonal (usually it is indicated in inches, for example, 1/5″ - the smaller the number in the denominator, the larger the diagonal); number of matrices (3 matrices are better than one, but more expensive); the actual resolution of each matrix must be at least 2 megapixels; if it is much smaller, then the camera uses the so-called. Pixel Shift system (you can read more about it in the article), which gives worse detail than “real” 3 matrices; the maximum bitrate at which the camera allows you to save video - the higher the better. All of the above can be found in the specifications of a particular video camera on the manufacturer’s website, and you should not hesitate to search and study this information before purchasing a camera. However, reading the specifications alone is not enough - it is advisable to search the Internet for camera reviews, reviews from real users and videos, preferably raw (this is why videos on most services like YouTube are not suitable, since they are usually re-encoded into a different format and lower resolution). When choosing a camera, it would be a good idea to go to the store, hold different cameras in your hands and try to take pictures (after all, the camera should fit comfortably in the hand and its owner should like it). If, when choosing a camera, it is the storage medium that seems fundamental, then it is important to note two main points that should not be forgotten: the quality of video compression does not depend in any way on the storage medium, but only on the characteristics of the optics, matrix (matrices) and camera processor listed above ; each medium has both advantages and disadvantages; There is no ideal storage medium (otherwise the others would have ceased to exist long ago). You can read more about recording formats and storage media in household cameras in the article.
Q: How can I watch AVCHD without a computer?
A: The choice of players that allow you to play AVCHD videos without a computer is quite wide. The main types of such devices are: household BluRay players and Sony PS3; the video must be recorded on an optical disc BD or DVD (in the latter case - in the so-called AVCHD disc format); TVs that allow you to play AVCHD video from a drive connected via a USB connector (some TVs have the ability to play video directly from a memory card recorded in the camera); players with a hard drive that allow you to play AVCHD video from a built-in disk or drive connected via a USB connector or an Ethernet network (reviews of some of these devices can be read here). Naturally, the camcorder itself allows you to view recorded video without a computer - just connect it to your TV (to get the best image quality, this should be done via the HDMI connector). You can read more about this in the camera instructions.
Q: Can I watch AVCHD on a regular DVD player?
A: No, you can't. Conventional DVD players have a limitation - they cannot display video with a horizontal resolution higher than 720 pixels (rarely a little more), and they also cannot decode the AVC format.
Q: Is it possible to “teach” a regular DVD player to display AVCHD by changing the firmware?
A: No, you can't. To decode video, conventional DVD players have a chip installed that can only decode video in MPEG2 and MPEG4 ASP format (the latter is not available in all models), and with a limitation on the maximum image resolution (see the answer to the previous question). Unfortunately, it is impossible to “teach” such a chip to decode other formats. This limitation is not only technical, but also marketing - players capable of playing high-definition video are more expensive, and cheap players from the same manufacturer should not compete with them in the market.
Q: How to copy video from AVCHD camera to computer?
A: This requires a USB connector and cable (must be included with the camera). The instructions for the camera should describe in detail the procedure for copying video from the camera to a computer - be sure to study this section. Also, the camera usually comes with a disc with software that allows not only transferring video to a computer, but often convenient cataloging of video recordings and even simple editing and conversion of the result to DVD format. If the camera uses a removable flash card or optical disk as a storage medium, then the video can be transferred to a computer without the participation of the camera itself (using a memory card reader or optical drive; in the latter case, some problems are possible). In any case, it is important to know: no video “capture”, transcoding, processing or other data conversion occurs. Digitally compressed data is copied "as is"; the most that can happen is a change in the file extension, but this does not affect its content and quality in any way. You can read more about transferring video from a camera to a computer in the article.
Q: When watching AVCHD video, the video is shown as a “slide show”, what should I do?
A: First, read the article and make sure that you do not have the weakest computer (in short: an N-year-old processor with a frequency of 1 GHz or less will not work). Also, during playback, you can launch the system task manager (Ctrl+Alt+Del) and see what the load on the processor cores is. If at least one core is 100% occupied, then the processor is the bottleneck. In this case, you need to use a video card with a 3D accelerator and a software player that can use the video card accelerator to decode AVCHD. In the worst case, you may need to upgrade your computer to a more powerful one.
Q: What kind of computer do I need to view AVCHD?
A: A computer with a processor no weaker than Core2Duo (or a similar 2-core AMD processor) is highly recommended; a discrete (not built into the chipset or motherboard) video card would not hurt. At the time of writing this document, almost any will do. In principle, with some effort in setting up players and luck, you can “force” AVCHD and a rather weak computer to play, but this is worth doing only out of principle or if it is completely impossible to update at least the computer’s processor. It may well turn out that more dynamic video material with complex movement in the frame will still be played back jerkily, or that not only playback, but also processing of AVCHD video will be required. Therefore, it is better not to skimp and build a normal computer for comfortable viewing and, possibly, editing and processing AVCHD.
Q: What software players can display AVCHD?
A: Generally speaking, almost all modern software players. In particular, Media Player Classic Home Cinema, VLC, kmplayer, PowerDVD Ultra. Moreover, many have the opportunity to enable built-in decoders or use external ones (for example, CoreAVC decoder). Very good support for AVCHD playback is built into the standard Windows 7 player. You can read more about AVCHD playback in the article.
Q: AVCHD is displayed with a “comb”, the image doubles, “blurs”, what should I do?
A: This is the so-called interlaced or interlaced video (you can read more about it here). This video is obtained when the camera operates at a frequency of 50 or 60 half-frames (movement phases) per second. Typically these modes are labeled 50i and 60i - for example, 1080 50i. To get rid of the “comb” when viewing, you need to enable deinterlacing in the software player. For example, in the VLC player you need to select the menu item “Video/deinterlacing/double” - this will enable the so-called mode. BOB deinterlacing, when each half-frame is shown separately and sequentially, at double the frame rate. This allows you to maintain the original smoothness of movements, while getting rid of the “comb” during playback. Other players also have such settings (look for the words “Deinterlace”, “BOB”, “deinterlacing”, “deinterlacing” in the menu and settings of the player).
Q: What kind of computer do you need for comfortable AVCHD editing?
A: A computer with a processor no weaker than Core2Duo (or a similar 2-core AMD processor) is highly recommended; a discrete (not built into the chipset or motherboard) video card would not hurt. At the time of writing this document, almost any of those sold in the store will do (i.e. new, modern). However, in recent years, CUDA and Stream technologies have been increasingly used for video processing tasks, and if you plan to actively use them, a not the weakest video card will not hurt. You can read more about this in a series of articles. Unfortunately, the vast majority of video editing programs at the time of writing this document do not know how to use the video card accelerator for AVCHD decoding during editing, so for the editing process itself, the power of the video card is not decisive; processor performance is much more important. However, some editing programs can use the graphics accelerator to speed up the display of previews of video effects in real time. You can read more about modern editing programs and their capabilities in the Guide. Of course, the quality of the result does not depend in any way on the speed of the processor - it does not matter at what speed the edited video will be saved. However, as was said, during the editing process, decoding is performed by the processor, and its speed directly determines how quickly the desktop of the editing program is redrawn, the current frame is updated in the preview window during the editing process, etc. Therefore, if you want ease of use when editing AVCHD, and don’t want to wait tens of hours while saving the result, then you should pay close attention to the performance of the processor used.
Q: What programs allow you to edit AVCHD?
A: Almost all common modern editing programs: Adobe Premiere Pro, Sony Vegas, Pinnacle Studio, Corel Video Studio, Nero Digital, etc. It is best to use the most recent version of the program, because AVCHD is a fairly “young” format, and its support in editing programs is constantly being developed, errors are corrected, various optimizations are added to speed up work, etc. You can read more about modern editing programs and their capabilities in the Guide. The newest articles about editing programs usually separately cover working with the AVCHD format. In addition, do not forget that AVCHD video cameras usually come with a disc with software that allows you not only to copy video from the camera to a computer, but also often to carry out simple editing. Perhaps “advanced” users will not be delighted with the capabilities of the included programs, but for simple installation they may be quite sufficient. Some such programs allow you to save the editing result without complete recompression, which not only saves time, but also preserves the original quality of the material.
Q: What programs allow you to edit AVCHD without completely recompressing the data? Why is this even necessary?
A: As mentioned earlier, AVCHD is a “heavy” format even for decoding, so its complete recoding is a rather long process. In addition, on consumer AVCHD video cameras, the data stream (bitrate) is not very high (but the video compression rate is high), so recompressing such video can introduce noticeable artifacts into the edited material. Naturally, if during editing, full video processing is done (for example, text overlay, changing brightness/contrast, processing with filters and effects, etc.), then complete recompression while saving the editing result cannot be avoided. But if only simple cutting and gluing of videos is done, then such an operation can be carried out without completely recompressing all the material. This will both maintain quality and significantly save time while maintaining the installation result. However, not all editing programs allow this operation. In particular, simple editors that come with video cameras (for example, Sony Picture Motion Browser) can usually do this, so it would be a good idea to try the included program first. Also capable of this are Corel Video Studio X2 (formerly called Ulead Video Studio), Sony Vegas, starting from version 9, CyberLink PowerDirector; AVS Video ReMaker, Elecard AVC HD Editor - the list of such programs, we hope, will only grow in the future. There are also so-called “non-visual” utilities that allow you to carry out simple gluing without even watching the video. However, due to their free nature, simplicity and speed of operation, they also find their application - these are the SmartLabs tsMuxeR and multiAVCHD programs. [07/11/2011] Not long ago, iXBT.com conference participant alex0099 presented another way to combine AVCHD video files with the *.MTS extension. This does not require any special utilities, but rather an ordinary Total Commander, which has probably been installed on your PC for a long time. In order to “stitch” video files, you first need to rename them as follows: Old name New name 00010.MTS 00010.MTS.001 00011.MTS 00010.MTS.002 00012.MTS 00010.MTS.003 00013. MTS 00010.MTS.004 Now, having selected the first of the files, you need to start the assembly, for which in the Total Commander menu select Files -> Collect files. You can watch a video tutorial on this operation here. However, one unpleasant point should be noted that you may have to deal with: some video processing programs may incorrectly import such files, incorrectly determining its duration (for example, Sony Vegas does this).
Q: How do I convert AVCHD to a lighter format so it's easier to edit and process?
A: There are quite a lot of ways. Perhaps the simplest and most convenient (however, not free) was offered by Canopus. She created the AVCHD Converter utility, which literally, with the click of one button, converts files in the AVCHD format (with the mts or m2ts extension) into AVI files in which the video is compressed with the Canopus HQ codec. This codec is the so-called “visually lossless” - video compressed into this format is practically indistinguishable from the original by eye. Also, such video takes up several times more volume than the original AVCHD, but is much easier and faster to process, incl. and video editing programs. Another method is available in the Corel Video Studio X2 program: it is capable of creating intermediate files in a “lighter” format (the so-called Smart Proxy), with which it works during editing. And only when the finished editing result is output, the temporary files are replaced with the original ones to obtain maximum quality. There are other ways - for example, use video converter programs to various formats, or open the video in the VirtualDub editor using AVISynth, and then compress it into an AVI file using any video codec available on the system.
Q: The computer is rather weak - how and into what format can you recompress AVCHD in order to watch smoothly, without “brakes”?
A: Basically, almost everything is said in the answer to the previous question. We can only add that to reduce the load on the processor, it makes sense to reduce the resolution to, for example, 1280×720 when recompressing video. In most cases, there will be no significant differences from the original 1920x1080 video. It makes sense to compress the video with a less “heavy” codec - for example, DivX/XviD or even MJPEG (the load on the processor will be even less, however, the video volume will be much larger). If necessary, you can process the video with a deinterlacing filter if you want to get rid of interlacing. This may be required, for example, before publishing videos on services like YouTube.
Q: I want to get the result from the AVCHD material I shot as quickly as possible, literally “with the press of one button” - just glue everything into one video and get a file as an output. How and with what can this be done?
A: Perhaps this can best be done using the SmartLabs tsMuxeR program.
Q: How can I get a BluRay disc from AVCHD?
A: Using appropriate BluRay disc authoring programs. The authoring function, or BluRay assembly, is also present in many video editing programs. If you want to get exactly the recorded optical disc, for this, naturally, you will need a drive capable of recording BluRay discs.
Q: What programs are there for “simple” and “advanced” BluRay creation?
A: Let's try to list some programs capable of creating BluRay discs, from the simplest (and free) to professional (of course, with the corresponding license cost): SmartLabs tsMuxeR multiAVCHD programs included with AVCHD cameras (Panasonic HD Writer, Sony Picture Motion Browser ) editing programs: Corel Video Studio X2, Pinnacle Studio (starting from version 12), etc. Nero Vision Adobe Encore Sony DVD Architect (starting from version 5), also the function of creating simple BluRay discs without menus is available in the editing room Sony Vegas Sonic Scenarist HDMV program - a professional authoring program (and the most complex) It is impossible to list all the programs, especially since their list is constantly growing. Reviews of disk authoring programs can always be found in the Guide.
Q: What programs allow you to make DVD Video from AVCHD?
A: Simple editing programs included with AVCHD cameras usually have a DVD creation function: Panasonic HD Writer, Sony Picture Motion Browser, Corel Video Studio X2. It is also possible to create a DVD from the output of almost any modern video editing program and in specialized video transcoding programs (for example, Canopus ProCoder, Rhozet Carbon Coder). We should not forget that the resolution of the output material will be only 720×576 (PAL) or 720×480 (NTSC) pixels, so you should not expect that the original HD image quality will be preserved, as on a video camera. The DVD Video creation function is only necessary to obtain a disc compatible with conventional household DVD players. If you want to get maximum quality, you need to create a BluRay disc or so-called. AVCHD disc, and view the result on a player capable of playing HD video connected to an HD TV.
Q: How to get DVD Video from AVCHD with the highest quality?
A: When getting a DVD from HD video (whether AVCHD or another format), the most important point is high-quality video scaling (you need to reduce the resolution), especially if this video is interlaced (with half-frames). Video conversion or video editing programs that can reduce video resolution and even produce a finished DVD as an output, unfortunately, not only do not provide the ability to control the process of image scaling, but it is also unknown which algorithms they use for this. Some may well be satisfied with the quality obtained from the output of even “one-button” conversion programs or simple programs that come with the camera. For example, the Canopus ProCoder (Rhozet Carbon Coder) program produces fairly good DVD quality. If you want to precisely control the scaling process, you will have to use script writing for AVISynth. Let's assume that we have a finished editing result in AVCHD format (file with m2ts/mts extension). The sequence of actions could be as follows: Index the video file using DGAVCIndex. Save the project in the format of this program (for example, in a file named “video.dga”). Save the sound (usually in AC3 format) into a separate file, for example, using SmartLabs tsMuxeR. This will make it possible to maintain sound quality without re-encoding. Install the DGAVCDecode plugins (included in DGAVCIndex) and LeakKernelDeint for AVISynth in the folder with its plugins. Write a script like the following in a text editor (for example, notepad): LoadPlugin("DGAVCDecode.dll") LoadPlugin("LeakKernelDeint.dll") AVCSource("video.dga")# AVCHD video must first be indexed using DGAVCIndex LeakKernelBob(order =1)# first field top (TFF) LanczosResize(720,576)# for DVD AssumeTFF().SeparateFields() SelectEvery(4, 0, 3).Weave()# on output TFF ConvertToYUY2(interlaced=true)# for CCE or Canopus ProCoder Save the script to a file with the avs extension and open it in any MPEG2 encoding program. Transcode only video (without sound) into MPEG2 format with the settings you need, bitrate, etc. Open the resulting video stream (usually a file with the extension m2v, mpv, etc.) and the previously saved audio (AC3) in a DVD authoring program. Notes: The DGAVCIndex manual in English can be found here. There are other ways to process video to obtain high-quality results. You can read more about how video is processed in this script on the forum. There you can ask questions about the script.
Q: How to publish AVCHD on YouTube and other similar services?
A: In principle, modern video services like YouTube support the AVCHD format, so you can publish such a video in the same way as videos in other formats. However, in the case of interlaced video, it is recommended to deinterlace before publishing; at the same time, you can re-encode the video into another format with a lower resolution to reduce the file size. To simplify the process of uploading videos to YouTube, some editing programs have a built-in publishing function: for example, Pinnacle Studio 12, Sony Vegas Movie Studio and others. Also, a similar function is present in programs that come with AVCHD cameras - for example, Panasonic HD Writer.
Q: How to play video from Canon 5D mk II and other DSLR cameras with video recording function?
A: Typically, the CD included with video-capable digital cameras includes software for viewing video from the camera. In this case, the video is saved in a MOV (QuickTime) container, so you can install QuickTime from a disk and use QuickTime Player to view it. It’s no secret that not everyone will be happy with this option, so we can recommend using free players VLC (www.videolan.org) or Media Player Classic (as well as its Home Cinema version). They contain decoders for both the MOV container and the AVC format. It is possible that there may be problems with the sound during playback, in which case the answer to the following question may help.
Q: What and how to edit or at least recompress video from a Canon 5D mk II and other digital SLR cameras with a video recording function?
A: For example, such video is supported by the latest versions of Adobe Premiere CS4. Additionally, you can repack a video from a MOV container to an AVI container without transcoding the video using the free MP4Cam2AVI program. This also solves the problem with sound if it is not played (for example, some editing programs or hardware players do not support sound in video from such cameras). In order for the resulting AVI file to open in editing programs that do not have a built-in AVC format decoder (for example, VirtualDub), you need to install it - for example, ffdshow, and in its settings do not forget to enable the AVC format decoder for the Video for Windows interface.
Q: I save a video in AVCHD format from Sony Vegas 9. The resulting file plays jerkily, the sound disappears in places, is not synchronized with the image, etc. Is it possible to somehow improve the situation?
A: Try opening the resulting file in the SmartLabs tsMuxeR program and simply saving it to a new file with the m2ts container type (however, the output container type does not really matter). Often this is enough for the resulting file to be played normally both on a computer (provided its performance is sufficient) and on home HD players (they may require saving as a Blu-ray or AVCHD disk structure).
Source: iXBT
History and varieties
If you look at the history of development, the AVCHD recording format was originally created as a kind of alternative to the HDV and DV standards, which until recently prevailed in consumer and professional video cameras.
The new standard was first developed back in 2006 by Matsushita Electric Industrial Co. Ltd., which at that time actively collaborated with one of the leaders in the field of photo, video and audio - the world famous company Panasonic. At that time, the use of the new format was limited exclusively to video cameras.
And only in 2008, together with the Sony Corporation, solid-state recording technology was announced, which led to the emergence of the first professional camcorders.
The initial format itself has undergone some changes over time (several versions have appeared with different parameters and customization options). Today the following are distinguished:
- AVCHD Lite is a lightweight format with a resolution of only 720 lines and a storyboard frequency of 24, 50 or 60 fps;
- AVCCAM is a format of professional video cameras based on a 3-matrix CCD sensor, allowing recording with a bitrate of 24 Mbit/s, connecting a microphone via the XLR input and saving footage on solid-state drives;
- NXCAM is a “pure” format from Sony that allows you to record video in 720p, 1080p and 1080i quality, but does not work with frame rates of 24, 25 and 30 fps;
- AVCHD 3D/Progressive – an update of the 2011 format to version 2.0, supporting stereoscopic video recording at 1080p/50-60fps).
AVCHD video cameras
Currently, most consumer and semi-professional video cameras shoot in high definition AVCHD format. What is AVCHD? Everything is clear with the last two letters, HD means high definition, but what is AVC?
AVC (Advanced Video Coding, literal translation “Advanced Video Coding”) . AVC is a video compression format that also has standard names H.264 and MPEG4 . It is a variation of the MPEG4 format, developed as a significant improvement over the MPEG2 format. With a high-quality implementation of the encoder, the AVC format allows you to save an image of higher quality (with less loss relative to the uncompressed original) than MPEG2, even with a lower compressed data stream (bitrate). This is achieved through more than two dozen format improvements. However, this also requires significantly more complex calculations when encoding and decoding data. For example, even to simply play such a video, it is desirable to have at least a dual-core processor, a video card with a not-so-weak 3D accelerator, and a software player with a decoder that can effectively use the capabilities of the processor and video card to speed up AVCHD video decoding.
Also, don't assume that AVC video compression automatically means the camera is better than anything else that doesn't record video in that format. Image quality primarily depends on the quality of the optics , the correct operation of the automatic exposure meter, the low noise of the matrix, the real resolution of the matrix (or matrices, if there are 3), image processing algorithms by the camera processor, the amount of compressed data stream (bitrate), encoder implementation and other parameters . There are many video cameras that can shoot high-definition video in the AVC format, but do not comply with the AVCHD standard, for example, photo-video cameras that save video in MP4 and MOV (QuickTime) containers. So when choosing a camera you need to be more careful.
AVCHD is an acronym proposed by Sony and Panasonic, which means more than just a set of letters. The AVCHD format imposes some additional restrictions on data formats, namely:
Video and audio are stored in the MPEG Transport Stream (MPEG-TS) container
Sound in consumer AVCHD cameras is stored in AC3 (Dolby Digital) format.
Regardless of the storage media of the AVCHD camcorder, the video on the media is stored in files with the mts or m2ts . This is short for MPEG2 Transport Stream, the name of the container in which AVCHD video is stored. A container is a “shell” for storing data that “does not know” what data formats (video, sound) are stored inside. In particular, the MPEG2 TS container can store video in MPEG2 or MPEG4 formats, and audio in a variety of formats (MPEG Audio, uncompressed Linear PCM, AC3/Dolby Digital, and others).
It is best to select a camera not by media format, but by the required functionality and quality of the resulting image (at a reasonable price, of course):
- Consumer AVCHD video cameras use High Definition (HD) video resolutions from 1280×720 (AVCHD Lite) to 1920×1080. It should be noted that, in addition to the “full” FullHD resolution of 1920x1080, there are cameras that record video with a resolution of 1440x1080 and not a square pixel - when played back, such video is stretched to a resolution of 1920x1080, but has slightly less detail, than “real” FullHD. However, the drop in detail is not always noticeable to the eye, not to every person and not on any display device (TV, monitor, etc.);
- matrix diagonal (usually it is indicated in inches, for example, 1/5″ - the smaller the number in the denominator, the larger the diagonal);
- number of matrices (3 matrices are better than one, but more expensive);
- the actual resolution of each matrix must be at least 2 megapixels; if it is much smaller, then the camera uses the so-called. Pixel Shift system, which gives worse detail than “real” 3 matrices;
- the maximum bitrate at which the camera allows you to save video - the higher the better.
All of the above can be found in the specifications of a specific video camera on the manufacturer’s website, and you should not neglect searching and studying this information before purchasing a camera. However, reading the specifications alone is not enough - it is advisable to search the Internet for camera reviews, reviews from real users and videos, preferably raw (this is why videos on most servers like YouTube are not suitable, since they are usually re-encoded into a different format and lower resolution). When choosing a camera, it would be useful to go to the store, hold different cameras in your hands and try to take pictures (after all, the camera should fit comfortably in the hand and its owner should like it)
How to copy video from AVCHD camera to computer?
To do this, use a USB connector and cable (must be included with the camera). The instructions for the camera should describe in detail the procedure for copying video from the camera to a computer - be sure to study this section. Also, the camera usually comes with a disc with software that allows not only transferring video to a computer, but often even simple editing and converting the result to DVD format.
In most cases, the video camera is detected by the computer as a removable disk; it is enough to find all the files with the mts or m2ts extension on the connected disk (they may not be located in the root folder of the disk, but at an address like AVCHD\BDMV\STREAM - this is the captured video), and transfer them to your computer. The file extension may be different (for example, tod - in the case of MPEG-2 video cameras produced by JVC), but you can find video files according to a simple principle - they have the largest volume compared to all other files (usually service files) on the storage medium . After copying the files to your computer, video files can be viewed using a software player, opened in an editing program, etc. Almost all modern software players. In particular, Media Player Classic Home Cinema, VLC, kmplayer, PowerDVD Ultra. Moreover, many have the opportunity to enable built-in decoders or use external ones (for example, CoreAVC decoder). Very good AVCHD playback support is built into the standard Windows 7 player
How do I convert AVCHD to a "lighter" format so it's easier to edit and process?
There are quite a lot of ways. Perhaps the simplest and most convenient (however, not free) was offered by Canopus. She created the AVCHD Converter utility, which literally, with the click of one button, converts files in the AVCHD format (with the mts or m2ts extension) into AVI files in which the video is compressed with the Canopus HQ, Canopus HQX codec. This codec is the so-called “visually lossless” - video compressed into this format is practically indistinguishable from the original by eye. Also, such video takes up several times more volume than the original AVCHD, but is much easier and faster to process, incl. and video editing programs.
Another method is available in the Corel Video Studio X2 program: it is capable of creating intermediate files in a “lighter” format (the so-called Smart Proxy), with which it works during editing. And only when the finished editing result is output, the temporary files are replaced with the original ones to obtain maximum quality.
Related articles: New H.265 HEVC codec Codec for video editing - Avid DNxHD
♡ Don't forget to share this article on social networks ✔
Applicable video codecs
As for video, the codecs and decoders used are mostly based on MPEG-4 compression technologies, but have slightly different parameters.
Installing the same video codecs for XP is not difficult. To do this, you just need to find the latest version of the popular K-Lite package. But during the installation process, instead of the standard set offered by the “Setup Wizard”, you need to select the advanced one and tick all the elements presented in the list.
In addition, installed video codecs for XP or systems of a higher rank can be divided into two more categories - AVCHD-SD (standard definition) and AVCHD-HD (high definition). Based on this, we can provide comparative characteristics of both standards.
| AVCHD-SD | AVCHD-HD | ||
| Permission | |||
| 720 x 480 | 720 x 576 | 1920 x 1080 1440 x 1080 | 1280 x 720 |
| Frame frequency | |||
| 60i, 30p | 50i, 25p | 30i, 50i, 24p, 25p | 24p, 50p, 60p |
| Aspect proportions | |||
| 4:3, 16:9 | 16:9 | ||
Audio decoders
With audio things are not so simple. Signal conversion is based on two main technologies - Linear PCM and Dolby Digital. However, when it comes to audio, many users clearly do not understand the difference between audio signal quality and distribution.
So, for some reason, some users call the quality of the audio recording format 5.1, 7.1 or even 8.1. Remember: this is not quality, but only the ability to distribute the signal in a panoramic manner.
An analogy can be made with devices called crossovers. They can separate frequencies and route them to the appropriate speakers. If anyone remembers, in Soviet times, Radiotehnika S series speakers were produced with an open external panel, on which there was a low-frequency diffuser at the bottom, a mid-frequency speaker in the middle, and a high-frequency speaker on top.
A crossover connected to an amplifier can redirect a specific range of frequencies to a speaker that matches the sound characteristics.
But in terms of surround sound distribution, it is the panoramic characteristic that is used. And audio quality is determined by bitrate and sampling frequency. In our case, audio can be played back with characteristics at 320 Kbps and 96 kHz (professional sound, similar in parameters to the lossless format).
Everything you need to know about video codecs and containers, article. Portal “www.hifinews.ru”
Figuring out which codec and container is best for creating your video masterpiece is sometimes quite difficult. The presented material will help in solving this problem.
Save and read later -
Today, it seems, everyone aspires to become a filmmaker. People use a variety of gadgets and devices for video recording, including mobile phones, digital cameras, portable and professional video cameras. And the latest generation of digital SLR cameras allows you to record video with high-definition support.
Learning how to make a good video takes some effort, but things get even more challenging when you want to show off your masterpiece to other people in all its glory. Maybe you need to upload it to YouTube, maybe you're about to burn your Blu-ray or DVD disc, maybe you want to download the video to your mobile phone or tablet.
Figuring out which codec and container is best for creating your video masterpiece is sometimes quite difficult. The material presented below can help in solving this problem.
What's the difference between a codec and a container?
Beginner users are often confused when trying to figure out the difference between codecs and containers. Now the word Codec has become something commonly used, and initially the term was an abbreviation for the concept COMPRESSOR-DECOMPRESSOR. What do codecs do?
They take digital media data and either compress it (for transmission and storage) or decompress it for viewing and transcoding. Each codec uses a specific method for encoding and decoding digital data.
Uncompressed (English raw means unprocessed or often called “raw”) video and audio requires huge disk space for storage. Uncompressed 1080i high-definition video recorded at 50 frames per second consumes up to 410 gigabytes per hour. Audio from CDs, quite outdated by modern standards, lasts about 74 minutes on a disc with a capacity of 680 megabytes. However, eight-channel audio encoded at 24-bit resolution will require 16 megabits per second, or several gigabytes per hour. Even a broadband Internet connection is sometimes not enough to listen to music in full audio resolution. This is why digital video and audio recordings must be compressed for transmission and storage.
Once media data has been compressed within reasonable limits, it must be packaged for transport and subsequent display. For this, container formats are used, which act as a “black box” filled with various media formats. Good container formats can accommodate files compressed with different codecs.
Let's look at the types of codecs.
General concept of codecs
If you talk to people who are involved in video processing or visit relevant web forums, you will, one way or another, be involved in the sometimes heated debate about which codec is better. In reality, the effectiveness of any codec largely depends on the compression mode used and the type of video material being processed. So it’s worth considering different codecs, taking into account their specific use and the characteristics of the compressed material. The following mainly covers video codecs, but the section on format containers also mentions the use of audio codecs.
Video capture and archiving
Most modern consumer electronics devices receive content in some already compressed format. Typically, only professional videographers work with uncompressed HD video. Of course, ideally, if possible, if you have a very capacious storage system, video archives should be stored in the original shooting format, because this ensures maximum quality. Transcoding video from one compression type to another can introduce subtle distortions that can reduce image quality. (Such errors are minimized by good software transcoding.) Today, many codecs are offered, with a certain specialization. The average user may never encounter most of them. The next section is devoted to codecs, as compression/decompression systems used as part of special software that allows you to encode or transcode video files.
x.264/ MPEG-4 AVC (Advanced Video Coding).
This most common codec is used in modern digital video and photo cameras, in which the shooting results are saved as files on built-in hard drives, memory cards, etc.
MJPEG (Motion JPEG).
This is an older format used by some older generation digital cameras and video equipment. It was developed by the same specialists (Joint Picture Experts Group) who had previously developed the JPEG codec for compressing ordinary static images, hence the name of this codec.
DV and HDV.
The DV standard was developed by a consortium of video equipment manufacturers for tape storage systems and was often used in camcorders with a mini-tape slot. Some versions of DV have been used successfully in professional camcorders, and an HDV version has been developed to support high definition with tape cassettes.
Disk formats
Let's move on to the now outdated DVDs or slightly more fashionable Blu-ray discs. Despite the growing popularity of video streaming, the ability to transfer media data using discs will continue to be in demand for the foreseeable future. Materials recorded on discs can be easily transmitted where there are no communication channels and viewed everywhere, even where there is no way to connect to the Internet.
MPEG-2.
It is necessary to distinguish between the MPEG-2 codec, also known as x.262, and the MPEG-2 container format. MPEG-2 is used to compress video on DVDs and high-definition television (DVB) signals transmitted over the air. MPEG-2 was originally used for compression on Blu-ray discs, although most modern Blu-ray films do not use MPEG-2.
x.264/MPEG-4 AVC.
x.264 is used for video compression for Blu-ray discs. Essentially this is the same codec that is used for video compression in modern video cameras. This method is very scalable and at high bitrates, x.264 compressed video looks fantastic.
Microsoft VC-1.
Microsoft VC-1 includes three codecs with different compression rates. VC-1 Advanced Profile, also known as Windows Media Video 9 Advanced Profile or simply WVC1, is one of three codecs used to encode Blu-ray Disc content. VC-1 is used as an alternative to Adobe Flash technology in the Microsoft Silverlight Internet platform.
Streaming and web video
Transmitting video over the Internet necessarily involves trade-offs, mainly between image quality and data transfer speed, which today limits the maximum achievable quality. The transmission speed or, as they also say, channel width largely depends on the capabilities of the Internet provider and the technology it uses to deliver the signal to your apartment.
MPEG-1.
This is the old warhorse for delivering video on the Internet. Although YouTube, Netflix, and other providers of relatively high-quality video streaming have abandoned MPEG-1, a ton of MPEG-1-based standard definition video is still available on other sites.
WMV (Windows Media Video).
There is a Windows Media Video codec and a container file format. Although this compression method has not been as widely used as MPEG-1, there is still a lot of WMV content available online. But when creating your own video materials, it obviously shouldn’t be used either.
x.264/ MPEG-4 AVC.
x.264 provides fairly high video quality at a relatively low transfer rate. x.264 is probably becoming the most common codec. Adobe supports it in Flash, x.264 can be used with HTML 5 images, YouTube relies on x.264, and Apple fully supports this compression method. However, when creating videos compressed in x.264 formats, you will not be able to play them on older devices, this is a bet for the future.
The right container: flexible and convenient
The following is a brief look at the most common container media file formats today. Each of them has its own advantages and disadvantages. The choice depends on the intended task. Container files, in addition to compressed video, also contain digital audio compressed with appropriate audio codecs, as well as menus and additional information.
Containers for archiving and input
Just like with codecs, you must choose a container format for storing compressed video with the highest quality possible under your conditions. Most users just want a way to save their video so they can stream it over their home network or even over the Internet, but no one wants to see pixelated patterns and blurry images on the screen later. The right container will help maintain the balance between quality and streaming capabilities.
Advanced Systems Format (ASF)
– a container format developed by Microsoft. Several extensions are available, including .asf, .wma, and .wmv. Note that a file with a .wmv extension is likely compressed with the WMV (Windows Media Video) codec, but the file itself is contained within an ASF container file. ASF files, in theory, can contain video and audio files compressed with any codec. However, practical playback can sometimes become problematic, especially with video compressed with x.264 codecs. If you plan to use Microsoft products, ASF is a great choice, but there may be problems with media files based on other codecs.
Audio Video Interleave (AVI)
– one of the older Microsoft container formats. It's probably not worth using in new projects anymore.
QuickTime:
Apple is promoting its own QuickTime container format, which supports a variety of audio and video codecs. Apple is a strong supporter of x.264, so QuickTime files (.mov, .qt) can contain video compressed with the x.264 codec.
MP4.
This container format was developed by Motion Pictures Expert Group and is also known as MPEG-4 Part 14. Video within MP4 files is encoded with the x.264 codec and audio with the AAC codec, but other audio compression standards may be used.
VOB and BDAV MPEG-2.
These container formats are used to package data on DVDs and Blu-ray discs, respectively. Blu-ray disc files (.m2ts) can contain video compressed with x.264 and VC-1 codecs, audio can be compressed with one of the Dolby codecs, or use an uncompressed multi-channel signal in PCM format.
AVCHD:
This container standard is used in many video cameras. The captured video is pre-compressed using the x.264 codec. The audio signal for the container is encoded with the Dolby Digital (AC3) codec or uncompressed PCM is used.
Flash:
Adobe has its own Flash container format that supports many codecs. Most newly created Flash video is encoded using the x.264 video codec and AAC audio codec, but you shouldn't expect all sites to use these codecs, especially for previously created video.
Other containers:
Among other container formats that are widely used especially for delivering video over the Internet, we can mention the Matroska format (.mkv, .mk3d, .mka, .mks), which is popular largely due to its versatility and open source code, as well as OGG and DiVX. Files with the .divx extension contain video compressed with a codec of the same name with a pirate pedigree, which allows you to get fairly high video quality with effective compression of video materials. For a long time, Divx was not officially recognized and its use was not encouraged. However, today many well-known manufacturers are already integrating DiVX hardware codecs into their video equipment.
Which codec and container to choose
If you will host your video on a home server in order to later watch it on a TV connected directly to the network or through a media player, you need to find out what formats the TV and player recognize. Almost all devices today support encoding in accordance with the MPEG-2 standard, but in this case you will need a fairly large amount of space to store video in HD resolution. Obviously, the most suitable in the near future can be considered various versions of the x.264 codec, which implements a compression algorithm supported by all popular containers.
If you're more interested in playing finished video, and you plan to ripping movies from your personal DVD collection for transmission over your home network, you may be satisfied with the MP4 container as a good compromise between compression ratio and quality.
Material taken from PCWorld (translation from English - hifiNews.RU)
Prepared based on materials from the portal “www.hifinews.ru”, January 2012
www.hifinews.ru
This article was read 6,656 times
The article is included in the sections:
Useful tips
Application area
Now there is one more aspect regarding the AVCHD standard. What kind of format this is is already a little clear. Let's look at the most popular areas of its application.
Not to mention the possibility of using this standard in relation to video recording or in terms of processing video or audio signals, it can be noted that the main direction in its development, modification and use has become digital television, in particular, HDTV receivers of paid digital channels.
By the way, in Brazil, for example, this standard is used for absolutely all digital TV services. In South Korea, it is implemented in the Digital Multimedia Broadcast system, and the Japanese services Fuji Television and NHK associate this standard with the mobile segment of the market.
Features of the AVCHD format
What format is this - AVCHD? An AVCHD file consists of audio and video with subtitles and other supporting streams. They are multiplexed into an MPEG stream and stored on the media as binary files. Most camcorders that support AVCHD video use the Dolby Digital (AC-3) compression scheme, which supports stereo and multi-channel audio. Audio bit rates vary from 64 kbps to 640 kbps, but the most commonly used are 256 kbps and 384 kbps. The codec for AVCHD is FFmpeg. It includes an AVCHD decoder in the libavcodec library that uses ffdshow, a free and open source media library. This is actually H.264, which decodes AVCHD and some other formats. libavcodec is used to decode AVCHD for Linux, BSD, OS X, Windows and Solaris.
Carriers
As a rule, solid-state drives are used to store information with this method of video compression and audio encoding. If at the dawn of the development of this standard only Blu-ray discs or special AVCHD media (8 cm) were used, today files of this format can be easily saved to a hard drive or removable Memory Stick Pro or SD memory cards.
The question is: how to reproduce or edit such material? There are several means for this.
How to burn AVCHD to DVD
Video captured in Full HD format. How to view it - on a computer or on a TV? How best to preserve the source material, how to make the simplest film? In this article, we will look at various options for viewing video footage captured on an SD card of an HD video camera and the process of recording a film onto an optical disc. We won’t talk about editing for now, this is the topic of a separate article, but we will focus on the simplest operations of linear editing. As practice shows, these functions are often enough to create home video discs, because for home video, the content is more important, not its wrapper.
So, we have an SD card with video clip files contained on it. In a digital video camera, they are located in the PRIVATE/BDMV/STREAM folder, have a name in the form of an n-digit serial number and an mts extension. In case of difficulties with the search, we take the largest size in megabytes as a guide. Clip files are recorded in AVCHD (Advanced High Definition Video Codec) format. This format uses video in a TS (Transport Stream) container and an AC3 audio codec. The video has a resolution of 1920x1080 with different bitrates (usually cameras offer 3 options); To save space on the memory card, a resolution of 1440x1080 with rectangular pixels can be used; in this case, when viewed, it will be stretched in height to Full HD.
To view AVCHD files on your computer, any software player with a built-in AVCHD decoder is suitable. This could be Media Player Classic Home Cinema, VLC and The KMPlayer. The choice is huge, and even if the player does not have an AVCHD decoder, use an external one (for example, CoreAVC). In addition, starting with Windows 7, AVCHD support is regulated in Windows Media Player. To watch videos without “freezes” or “slideshows,” the computer for video editing must be powerful enough (a Celeron from many years ago definitely won’t cope).
There are no problems viewing it on a computer. How to watch a video on TV? It’s also nothing complicated: we connect the camera in analog or digital mode, depending on what input the TV has. It is clear that you won’t be able to find an HDMI connector on CRT TVs, and most often there is only a simple composite input (tulip). It's even better if the TV has a slot for SD cards. The viewing process will be simplified as much as possible, since no wire connections need to be made.
But today we are more interested not in the viewing method, but in the question of saving the captured video with the possibility of later viewing on TV
. Not archiving mts files on a hard or optical disk, but saving the video as a movie. There are several options here, depending on what kind of recording drive you have in your computer and what kind of reading player you are using. These options are summarized in the table:
Possible types of discs with recorded film
| type of drive → | Blu-ray | DVD |
| Player type ↓ | ||
| Blu-ray | Blu-ray disc | AVCHD DVD |
| DVD | DVD | DVD |
As you can see from the table, if you have both a Blu-ray drive in your computer and a Blu-ray player, then you can burn a full HD movie to a Blu-ray disc. In other cases, you will have to compromise. We will not consider the process of recording a regular DVD disc; we are interested in creating
an AVCHD movie
, i.e. An HD movie recorded on a regular DVD disc, but with the file structure of a BD disc. Let me make a reservation right away: to watch such discs you will need a BD player; a regular DVD player will not work, since it cannot play video with a frame width greater than 720 pixels.
An AVCHD player must be able to read video with a frame width of 1920 pixels, and no amount of flashing the DVD player can achieve this. Why not “convert” right away and buy yourself a BD drive? Firstly, this is a costly upgrade, and if the computer itself is not powerful enough, then to work with HD video you will have to upgrade it too, all this will cost a tidy sum... Secondly, BD discs are still not cheap, if you don’t take into account Attention: LTH discs are made from materials and equipment made for DVD discs and are not always recognized by home players. Therefore, purchasing a BD player that costs about 3500 is an acceptable compromise for viewing the AVCHD discs you have created.
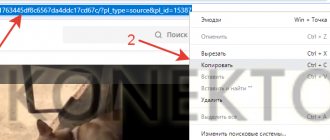
An AVCHD disc has the same folder structure as a Blu-ray disc and contains two main folders BDMV and CERTIFICATE. But simply creating them, placing your mts files in the STREAM folder and burning a disc to DVD will not be enough; you also need index.bdmv and MovieObject.bdmv files, which are difficult to create manually. In order to get the “correct” BDMV and CERTIFICATE folders, we will use the free tsMuxer program. Of course, it is not very convenient to glue fragments in it, but there is a free program called Freemake Video Converter for this. How to edit a clip using it is described in the material on video capture. Additionally, I note that this editor can also perform non-linear editing, i.e. arrange the fragments in a different chronological order than what was captured on the SD card. Let's assume that we have two clips 0000.mts and 0001.mts with scenes 1, 2, 3 and 4, 5, 6, respectively, and you want to get a file with the location of scenes 1, 4, 2, 5, 3, 6, as shown in picture:
To do this, open Freemake and add the 0000.mts file to the window. We cut it off so that scene 1 remains. Then we add the file 0001.mts to the window and cut it off so that scene 4 remains. Then we add 0000 again and cut it off so that scene 2 remains. Add 0001 again, cut off scene 5, etc. As a result, 6 cropped fragments of files 000 and 0001 will remain in the window. Set the “Combine files” switch to the “On” position. It will not be possible to output directly to the mts file, so we select the MKV container and start the conversion by specifying the required file name. If you just need to make a movie based on existing mts files, we don’t use Freemake Video Converter.
The next step is to open the tsMuxer program and add there either mts files from the card or the file of our converted movie in the MKV container. Moreover, in order to avoid desynchronization of audio with video, it is better to add mts files as separate clips using the “add” button, and not using the “join” button, when the muxer collects all the files into one.
We indicate in the Output section that we will assemble an AVCHD disc. When all the files have been added, click “Start muxing”, not forgetting to indicate where to save the folders. As a result, we get the BDMV and CERTIFICATE folders with the correct data structure.
Now we need to burn these folders onto a DVD disc. There are many programs for this; you can also use standard Windows tools. Just remember to specify UDF 2.5 as the file system, otherwise the player will not recognize the disk. But I recommend the free program ImgBurn - it has built-in tips for correctly burning any type of disc, can check the recorded data, and has an intuitive interface.
To burn a disc, click “Burn files/folders to disc,” indicate the folders we created and click “Burn.” You can optionally specify whether or not to check the recorded data. After this, the disc can be removed from the drive and placed in the DVD-AVCHD player. Enjoy watching!
Author: Alexey Kasyanov
Recording HD DVD2013-12-17T21:27:15+00:00 Alexey KasyanovHD & Blu-rayDVD-AVCHDFull HD video format was shot. How to view it - on a computer or on a TV? How best to preserve the source material, how to make the simplest film? In this article, we will look at various options for viewing video footage captured on an SD card of an HD video camera and the process of recording a film onto an optical disc. There will be no talk about editing for now...Alexey KasyanovAlexey KasyanovEditor
AVCHD: how to open it?
If we are talking about a software package in terms of playback, provided that there are installed codecs and decoders, any application in the form of a player or video program will recognize the format without difficulty.
In the most primitive version, you can use the same Windows Media Player or an equally interesting product called VLC Media Player. Such a common video program, by the way, has much greater capabilities compared to the standard Windows tool.
As for processing, there are some difficulties. Firstly, the main problem is copying material from the same camera or AVCHD disc. The UDF 2.5 media file system is not supported by the exp. The simplest solution to fix the problem is to install the additional software package Nero InCD.
In addition, the captured files on the camera themselves can be located in the STREAM directory, which is hidden in the root directory of the device or subfolders.
And opening using professional utilities like Sony Vegas Pro or something else is not discussed at all.
Even a program like audio processing applications such as Sony Sound Forge or Adobe Audition CS can import video of this format.
Open videos in AVCHD format
Since a file in this format is a video recording, only in high quality, it can be opened with various types of media players.
Method 1: VLC Media Player
Popular open-source media player. Known for the huge number of supported formats, including AVCHD. It works well, but many users find it not very convenient for everyday use.
- Open the program and select the menu “Media” - “Open file...”.
- In the Explorer window, go to the folder with your video. Please note that by default VLAN does not recognize the AVCHD format, so in the drop-down menu marked in the screenshot, select “All files (*.*)”.
- When the clip you want is displayed, click on it and click Open.
- The file will launch in the main program window.
Please note that AVCHD is a high quality video format, and such videos in VLC may be slow if you do not have the latest processor and video card.
Method 2: Media Player Classic
Another very common player with support for a large number of formats. It has existed for quite a long time, but its development and support will soon cease, which may not please some users.
- Open Media Player Classic. Select File, then Quickly Open File.
- In the Explorer window, go to the directory with the desired clip. Enable display of all files in the corresponding list.
- Select the file that appears and open it by clicking on “Open”.
- Playback will start and you can view the recording.
Media Player Classic is more gentle on hardware than VLC, but some AVCHD files may run without sound. This bug can be resolved by restarting the player.
Method 3: jetAudio
Player from the Korean company COWON, known for its MP3 players. Many additional functions of this program may seem like a drawback to some, and the interface could be a little simpler.
- After opening the application, click on the button with the image of a folder - it is located next to the playback control block.
- The standard interface for adding media files for such programs will open. It should enable the display of all file types in the drop-down list.
- Then navigate to the directory where the target file is located, highlight it and click Open.
- A warning appears indicating that the format is unsupported. Click Yes.
- The launched video can be viewed in the player window that opens.
An obvious drawback of jetAudio is also the lack of Russian localization - the developers never added it, despite the ten-year history of program development.
Method 4: KMPlayer
A recently popular program for playing multimedia files is also based on a free license. However, app developers make their profit by embedding advertising into their creation - a significant drawback, given the availability of advertising-free alternatives.
- Open KMPplayer. Go to the main menu by clicking on the program logo and click on the “Open file(s)…” item.
- Before getting to the folder with the desired entry, set the “File Types” list to display all possible ones.
- In Explorer, navigate to the location where the AVCHD recording is stored and open it.
- The file will be loaded into the program (may take a few seconds) and playback will begin.
KMPlayer, of course, copes with this task, but noticeably worse than the three previous players - in them the video started almost instantly, but here it required loading. Please take this point into account if you decide to use this particular player.
Instead of a total
That's all there is to it regarding the AVCHD video standard. What kind of format this is and what its quality is is best assessed directly when viewing the material on the same TV panel. Compared to other existing formats, this one is of the highest quality; in addition, it is not so demanding on the resources of cameras, televisions, computers or even mobile devices. By the way, the video compression technique packs the material in such a way that it does not take up too much space on any storage medium, as it should in theory. In general, there are some advantages.
VIDEO-SAM.RU
Currently, most modern household video cameras shoot in HD format (HD - high definition). Even many digital cameras can shoot HD video.
AVCHD is one of the formats used in camcorders to record high definition video. This video has a higher resolution - 1280x720 or 1920x1080 - compared to regular video (720x576).
The abbreviation AVCHD can be better understood if written as AVC HD: AVC stands for Advanced Video Coding, i.e. advanced video encoding, HD - High Definition - high definition. AVC is a type of MPEG4 format (advanced MPEG2 format, MPEG4 part 10) better known as H.264. This format produces higher quality video than MPEG2 (DVD) at a lower bitrate (data stream). This effect is due to multiple improvements to the format, which comes at the cost of difficulties in encoding and decoding video. The AVCHD format is characterized by storing video and audio in the MTS container (.mts or .m2ts) - MPEG Transport Stream, the audio is in AC3 (Dolby Digital) format. There are cameras that shoot video in AVC format, but do not comply with the AVCHD standard. If you have such a camera, don't be surprised that the resulting video has a MOV or MP4 container (i.e. your video has that extension). In this article we will talk specifically about the AVCHD format . Cameras that shoot video in this format may have different storage media on which they record: DVD, hard drive or flash.
If you have an LCD or plasma panel with a large diagonal at home, then by connecting the camera to it you can perfectly watch the captured video in all its glory. But there inevitably comes a time when the camera's hard drive or flash drive becomes full, or a large number of recorded DVDs accumulate. Even if you are not going to edit the captured video, the question arises about its storage, for example, basic transfer from camera to computer .
Cameras with a flash or hard drive are connected to a computer via USB 2.0 using the cable that comes with the camera.
With DVD cameras it is more difficult, you must read the instructions for this camera, the options may vary: copying can be done from the camera, or maybe from a disc inserted into the computer drive, and it is likely that the disc needs to be finalized before that. Some cameras require power from the mains and not from a battery. You may need to install some software that came with this camera. Therefore, before you panic - “The disc is unreadable!”, you need to study the instructions, and everything will work out.
After connecting the camera to the computer or inserting the DVD into the drive, look for files with the mts or m2ts extension; they may not be in the root of the disk, but in some folder. A distinctive property of video files is their large size compared to some service files. These files need to be copied to your computer's hard drive. You can use the special software included with the camera to make copying easier. Such programs allow you to copy, watch videos and even do simple editing.
The next problem you may encounter is watching videos on your computer . Your usual player will not be able to play HD video if it does not have the required codec. Of course, you can use the program that comes with the camera, but you may not like it (it’s inconvenient, has little functionality, etc.). Experts recommend the CoreAVC decoder as one of the fastest decoders. After installing it, your usual player will play HD video. The second option (so as not to bother with finding and installing a decoder) is to use a player that already has all the necessary codecs, for example, Media Player Classic or Media Player Classic Home Cinema. There are other players, but not all of them are free. People often ask, is it possible to watch AVCHD on a TV using a regular DVD player? It’s impossible, because the DVD player can display video with a horizontal resolution of no more than 720 pixels (720x576 or 720x480), and in addition, it cannot decode the new AVC format. The next problem you may encounter is that your video is very slow when viewed, it resembles watching a slide show, the sound stutters. This means that your computer is not powerful enough to view (let alone edit) HD video. For comfortable viewing, you need a powerful processor, preferably a dual-core one, a video card with a 3D accelerator, a fast memory bus and a large cache. There is no point in storing captured HD video on your computer, because you are going to watch it on a large TV screen, which means you need to burn it to discs (Blu-ray Disc) and buy a Blu-ray player to watch them.
Therefore, to enjoy the excellent quality of HD video, you need a whole bunch of advanced equipment: a TV panel with a large diagonal, a powerful computer, a drive for recording Blu-ray Disc and a player for playing them. Problems watching HD video
Video format with TSV extension
Rips and remuxes
Subscription form
to receive video tutorials and useful materials on working with video
your name
Your email:
Confidentiality guaranteed