With more than 1.4 million apps in the Google Play store, you can enjoy your Android smartphone or tablet to the fullest. But sometimes Google Play restricts the downloading of applications for certain countries and devices.
What should you do if your favorite game or app is not available in your country? Luckily, Android is an open operating system, which means we can do whatever we want.
Next, I will explain how you can bypass the Google Play restriction, thereby downloading and installing an application that is not available in your country.
Setting up payment for using the application
Sometimes the customer plans to sell content in the application, or make the application itself paid. To begin with, in your developer account, after downloading the application, you can select the type of application: paid or free.
Changing application type
You can make a paid application free without re-uploading the application to the store. But in order to make a free application paid, you will need to upload the application to the store with a new package name and price.
Linking to Merchant Center
To price your app, you'll need to link your developer account to the Google Payments Merchant Center.
This is necessary in order to indicate tax rates. Important:
Linking your account to the Merchant Center can only be done
once
, please pay attention to this. If an error is made when linking the Google Payments Merchant Center, you will have to pay $25 for creating a new developer account.
→ Steps to create an account are described here.
After you have linked, you must specify the sales tax for the region. We currently have no experience in such operations, so it would be advisable to consult with someone who does. How to specify sales tax for the region is indicated in the link.
Features of working with taxes in some countries
If the client is Russian, everything is simpler and more complicated at the same time, because for clients from Argentina, Russia, Taiwan, and India, tax deductions are carried out independently.
Thus, we must register as a sole proprietor and pay taxes on the sale of the application ourselves. Based on this, we include in the price of the application ALL taxes, which we will subsequently pay ourselves. Google will not make ANY royalties on sales. Google does not make deductions, but does make an operating fee of 30% of the net price. Net price is the price minus all taxes.
Example
Let's assume that the price of the application is 100 Japanese yen and VAT is 20%.
The developer transfers VAT in the amount of 17 Japanese yen to the relevant authorities. Formula: Application price - (application price * 1/(1 + tax rate)) 100 JPY. yen - (100 Japanese yen * 1/1.2) = 17 Japanese yen
Developer's income after payment of 30% transaction fee and VAT: 58 Japanese yen.
Formula: price excluding VAT * 70% 83 JP. yen * 0.7 = 58 yen yen
More information about taxes and Google Play rules is available here.
Once you've signed up for an account and provided tax information, you can price the app, making sure the price falls within your country's price range. All ranges are here.
Application and currency price
The price of the application is set in local currency. In order to see the price of the application, you must:
- On the Pricing and Distribution
, select the countries you want or select the Select All checkbox. - View the price for each country in the corresponding column: - prices for different countries are calculated at the current exchange rate, taking into account local pricing. - If the local currency is not supported, the default price for the country is in your currency.
As the owner of the application, we have the right to set prices for each country according to our whims. To do this you need:
- next to the desired country, click Change
; - enter price;
- click Apply.
Price update
Important:
if the client plans to make money from the application as the main source of income, it is worth telling him about the need to update the prices for the application in accordance with the exchange rate.
To do this, you need to check the boxes next to the desired countries and click Update exchange rates
on the “Prices and Pricing” screen.
PureVPN
3rd place in the VPNside rating
- 70% discount
- 30 days free trial
- Supports all devices and platforms
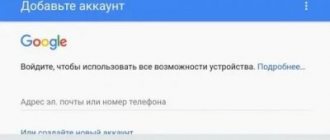
New Google account
Everything is simple here: create a new Google mail, when creating it, indicate not your real country of residence, but one from the list of supported ones for downloading the desired program. Then launch the Play Store and switch to the new account in the sidebar. Through it the download button will be available.
New payment profile
If you create a new payment profile, you will be able to set its settings to a country other than your current location: • Go to the Google Pay app; • Click on the Settings icon, select “Settings” - “General” - “Change account information”; • In the Payment Profile section, select Country/Region. The system will prompt you to create a new profile. After this: • Click “Continue”; • From the drop-down list, select the country that you want to associate with the new profile; • Enter address information; • Click Confirm.
Conclusion
As you can see, not every limitation is a serious obstacle. The Internet was and remains a global network where anyone can access the content they want if they know how.
Ensuring the assembly has a digital signature
A digital signature is required so that Google Play can identify the developer, and in the future only this developer can update/change the application.
In addition, many services rely on a digital signature, such as Facebook SDK, Vk SDK and most Google services. The digital signature is placed in a keystore (a file with a .keystore or .jks extension). The storage must be accompanied by:
- store password — password for the key store;
- key alias — name of the key in the storage;
- key password — password for the key.
We consider this section important.
From our experience, we have learned a sad lesson that customers, especially those who order applications from outsourcers or freelancers, unknowingly pay little attention to such an important thing as the digital signature of the application. Therefore, the manager must take it upon himself to ensure that the application is signed and that the key and accompanying passwords are not forgotten, lost, or fall into the wrong hands after publication. Attention!
The key storage must be in a secure location. If you lose access to your vault or your passwords, there is no going back. And even Google won't help. You will have to publish the application with a new package name and a new key. You will also need to update the description of the original app and make it unshared. Losing a file or passwords will result in a complete tragedy for your application: users will have to delete the current version and download a new one from Google Play, and you will lose statistics, downloads, audience and much more that you worked so hard for. In general, an unpleasant event. (See “Signature for an application”) It is good practice to sign a group of your applications with the same digital signature. Firstly, you won’t get confused in them, and secondly, you get a number of pleasant bonuses. For example, you can organize secure communication between your applications through a custom Intent and its android:protectionLevel="signature" property. But the developer should already know this.
What you will need to register the application:
- Google Play developer account. It costs only $25 and this fee, unlike the App Store, is charged only once, upon registration.
- Any computer. Again, unlike iOS, creating and distributing applications and games for Android does not require any specific software or platform. You can do this with macOS, Windows or Linux, in fact, you can even get by without Android Studio, the “official” IDE for development.
Android Studio is an integrated development environment (IDE) for working with the Android platform, announced on May 16, 2013 at the Google I/O conference. The IDE has been freely available since version 0.1, published in May 2013, and then entered beta testing starting with version 0.8, which was released in June 2014. The first stable version 1.0 was released in December 2014, at which time support for the Android Development Tools (ADT) plugin for Eclipse ended. Android Studio is based on IntelliJ IDEA from JetBrains and officially supports Kotlin, Java and C++ languages. Official website: https://developer.android.com/studio.
The developer console, where you can host your applications, is located at: https://developer.android.com/distribute/console. It looks, of course, quite archaic and does not really correspond to the principles of material design (unlike its competitor), but it has everything you need.
Convenient tools for promoting your application in the Appbooster service.
Age restrictions
Store requirements
The system of age restrictions for games and applications takes into account the specific laws and culture of individual countries.
This allows developers to more accurately define content restrictions and distribute applications to the audience they are intended for. To set an age limit, log into the Google Play Developer Console and fill out a special form for each of your applications. Programs that are not rated may be blocked for individual users or countries.
You are responsible for completing age rating surveys and following content rating guidelines. Apps that are not restricted may be removed from Google Play.
Attention! In the questionnaire, give truthful and as accurate answers as possible, otherwise the application may be deleted or blocked.
Filling out the form
- Sign in to Google Play Developer Console.
- Select an application.
- In the menu on the left, click Age Restrictions.
- Read the application information and enter your email address. IARC representatives will be able to contact you at this address.
- Click Continue
. - Select a category.
- Fill in the form. If you have answered all the questions in a section and want to change one of them, click Edit
.
To finish filling out the survey later, click Save Project
. Only one draft is available for each application. - Click Define age limit
. - Select Set age restriction
on the general restrictions information page.
You can then view age restrictions and profiles on the Age Restrictions
.
If you want to refill the application survey, click New Survey
on the
Age Restrictions
.