Necessary equipment for organizing surveillance with remote access
Setting up remote monitoring of a site and managing all necessary devices is not that difficult. Any user can handle the project, even if his knowledge of Networking requires the use of certain devices.
Digital Video Recorders
It performs several main tasks, including recording information on various media, signal processing, and recording. For registrars, access to the network interface is important, otherwise the information cannot be processed in accordance with all the rules. The interfaces themselves can be software or server-based.
In the case of software varieties, special software is installed on the PC. Usually it comes with the recorder itself, on a disk. With the server interface, just open a browser to view the recorded files. Many manufacturers have developed extensions that simplify the solution of the problem. Their representatives tell you how to connect a Wi-Fi camera to a computer.
Local networks
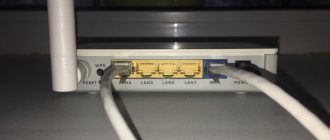
The camera, router and recorder connect to each other through this network. We accept a wired or wireless option for organizing such networks.
Router, routers
This is the main component on which local networks are created. Connects existing equipment to external channels. An example is the Internet.
- The IP camera itself.
- Software for viewing recorded information from various devices, including mobile phones, tablets.
Interesting. Obtaining a static IP address is also a mandatory requirement. Providers themselves provide such information, but it requires a separate fee. You can use cloud storage to watch videos.
Setting up the router
- Since all manufacturers have different settings menus, we will use the following example. We need a Port Forwarding menu item (or something similar). But first you need to enable the virtual server, then enter the data according to the screenshot. Such manipulations need to be carried out for each camera (if there are several of them).
- If you have a static IP address, simply write in your browser: https://your address:8181. This will take you to the page with the view from the first camera. But most often a dynamic address is set. In this case, proceed to step 3.
- You need to enable the DNS client in the WAN menu. For example, Asus allows you to use their server for free. Otherwise, you can resort to using third-party services (NO-IP, etc.).
- Having saved all the settings, you can go to the address that you got after registering with the services. Ready!
Now you know how to connect and configure an IP camera via a router. From now on, you can install your own video surveillance system and even make it wireless. Enjoy!
Connecting one video camera
Features of connecting and setting up Wi-Fi cameras for Xiaomi surveillance
Connecting one device for recording is the simplest option for organizing remote monitoring. In this case, the procedure is simple:
- Connecting an IP camera to a personal computer.
After this, you need to enter the IP address assigned to the device in your browser. Sometimes it is indicated on accompanying stickers; in most cases, the information is given in the user manual. Otherwise, it is impossible to figure out how to configure IP cameras for viewing via the Internet.
- A network interface with settings appears in front of the user when he enters the desired address.
You must select the option to automatically obtain an IP address. Or static information is registered manually. The login and password for remote access are written in the same section.
- Specify separately the port through which access to the World Wide Web is obtained.
The most commonly chosen value is 80.
- When the required address is specified, the camera is disconnected from the Internet and connected to a personal computer.
- You can view the video in the browser using any device. It is enough to first indicate the IP address, separated by a colon is the number of the port itself.
Connecting an IP camera
An IP camera is called that because it is a separate device that operates using IP network protocols. This is a completely independent device that does not require a specific operating system or deep settings. The only thing it requires is to connect it to power and to the network.
If you purchased such a device, then you have several options for how to connect it:
- Simply connect with a cable to your computer: use only when you are working on a PC. This is almost the same as connecting a webcam to a router via USB, but this limits all its benefits. Some devices do not support this use.
- Connecting the IP camera to the router: using a LAN cable or connecting the camera to WiFi. You will have access to it from any device within your network. But remember the maximum number of devices that can be connected to the router via WiFi at the same time.
- Set up a router to open Internet access: you can view its data and images from anywhere in the world.
Naturally, you can take advantage of all the benefits in the latter option. I will tell you further how to achieve this.
Important! If you want to view the “picture” from an external network, and not just while at home, then your router must have a static or dynamic external IP - the so-called “white IP address” that was provided to you by your provider. Otherwise, you should limit yourself to steps 1 and 2.
Step 1: Initial setup of your computer and camera
Once the device is unboxed, there are only basic settings. Among them is the initial (internal) IP address. It can be found in the information that comes with the kit. It is needed even before connecting the Wi-Fi video surveillance camera to the router - to set up the network.
- Check if the subnets of your computer and gadget match. To do this, right-click on the connection icon and select “Network Connection Center”. Click on the properties of your connection and on the “Details” button.
- If the first three numbers of the computer and camera addresses match, then everything is in order, you can continue setting up. Proceed immediately to further setup of the recording device.
- If the first three numbers in the address do not match, then before setting up the IP camera via WiFi, you need to provide the PC with access to its subnet. To do this, go to the properties of your connection.
- Click on the line “Internet Protocol Version 4” and on the “Properties” button.
- Click on the "Advanced" button.
- Select "Add".
- In the new window, enter any address from the desired subnet. For example, if the gadget has an IP of “192.168.1.10”, here you will be able to enter “192.168.1.3”. The main thing is that the first three numbers, separated by dots, match. Click on the “Subnet Mask” field and it will be filled in automatically.
- Click "OK" on all open windows.
- Now you need to connect the Wi-Fi camera to power and turn it on.
- Connect it to your computer or router using a cable. Most often, a regular LAN cable will do, but check the instructions.
- Enter the camera address in your browser. You will probably need to enter your username and password. Most often these are “admin” and “admin”. When you log into the system, it is better to change them immediately.
- Go to your device's wireless network settings (Wireless or similar) and enter your WiFi details.
- Disconnect the device cable. How can I now connect the IP camera to my computer via a router? It will connect itself and in a few seconds become part of the WiFi network!
Step 2. Settings for access within the network
Now you can enter the internal address on any gadget within the network - and you will be taken to the web panel and will be able to view the image. If you purchased several devices from the same manufacturer, they have the same internal address. This creates certain difficulties: you will not be able to connect a WiFi camera to the router at the same time as another similar one. It is necessary to assign new addresses for each of them.
- Perform the initial setup as described above, but do not disconnect the device from the PC.
- In the camera’s administration panel, go to its network settings: “TCP/IP”, sections “Administration”, “Configuration” or similar. You should get to the “Network” item.
- If you don’t need to connect it to the Internet, and you just need an answer on how to install a Wi-Fi CCTV camera at home and have access to it on the same network, then o. Save the settings, then disconnect the gadget and repeat the instructions for all other devices.
Step 3. Device settings for access from the Internet
If you plan to access the video surveillance system from anywhere on Earth, then the previous instructions will be expanded. Remember that setting up an IP CCTV camera with WiFi with an online function will only work if your provider provides you with an external IP address.
Do not exit the settings, but do the following:
- Instead of “Dynamic IP”, check the box next to “Fixed IP”.
- Enter a new IP address value. It must match the router's address, except for the last number after the dot. You can find out the router address by looking at the connection details window, which we already opened earlier.
- Select a permanent internal IP address. For example, "192.168.1.77". The last number should be selected in the range from 0 to 255, but so that it does not coincide with the router’s IP. In the “Gateway” and “DNS IP Address” fields you should enter the router’s IP. The subnet mask is usually specified as "255.255.255.0". For each subsequent camera, set a new address - 78, 79, 80 and so on.
- Change the HTTP Port or HTTP Port Number value if the settings allow it. For example, enter the number "8181". For each new camera, set a new number - for example, “8282”, “8383” and so on. If there is no such field in the settings, then the port of any of your gadgets is “80”.
- Repeat all steps for all your devices. After that, save the settings and disconnect the cable. The IP camera will automatically connect wirelessly through the router.
Step 4. Router settings for access from the Internet
The last thing left is to set up access from the external network - connect the IP camera to the Internet via a router. Here you will need to go to the router settings.
- Go to your router's control panel. To do this, enter the router address in the address bar of your browser. We have already defined it earlier. Now enter your login and access password. If you haven't changed it, it's "admin" and "admin", or it should be on a sticker on the bottom of the device.
- The following procedure is called “port forwarding”. Find out in which section of the menu you can enable port access. Its location differs in different router models. This can be “Port Forwarding”, and in Asus routers it can be “WAN” and then “Virtual Server”.
- Add all devices to the table: arbitrary name, previously assigned port and address. If the port has not been assigned, write "80". Each camera has its own port and address.
- The settings are almost complete. Now, if you do not have a static, but a dynamic “white” IP address, you need to assign it a constant value. If you are lucky and have an external static IP, go straight to step 10.
- I will carry out the setup using the example of a TP-Link router. Go to Network – “Advanced Settings” – DDNS. For other routers, look for the same item, or “Dynamic DNS”.
- If you have a more expensive model, then you can simply connect TP-Link as your service provider. You need to register on the site, it's free. After that, come up with a domain name and you're done. Go to point 10.
- If the model is more budget-friendly, the item may be hidden in “Advanced settings”. Here you will have to connect an external service, for example free NO-IP.
- You need to go to the service’s website and register your computer there: come up with a name and select a domain. Also specify port 80 forwarding. The remaining parameters will be entered manually.
- Enter the necessary data from your NO-IP account in the router settings. Now you have connected a static name for the router, with which you can access it from anywhere with the Internet.
- You have configured everything that was required and you can connect to the Wi-Fi camera via the Internet! Now enter in the browser, wherever you are, the line “https://ADDRESS:8181”, where ADDRESS is either a static IP or an assigned domain name (in the format “hostname.domain”). After this, you will connect to the equipment assigned to port 8181: in our case, we will see the image from the first camera.
Networking with a router
How to make a webcam from an Android smartphone via Wi-Fi
A router is needed if the system includes several devices at once. This creates a separate subnet that has access to all devices. The principle of setting is in many ways similar to what was already mentioned earlier. Everyone can figure out how to connect WiFi cameras to routers.
The router settings are entered in the same way. You must assign your own port to each camera that will operate in the system. The most commonly used menu is called Routing. Thanks to this item, it is easier to transfer external requests to different IP addresses of the system.
The operating principle is characterized by the following description:
- Each device in the system has its own external port and its own IP address.
- When the router itself is configured, they move on to each individual camera. It is easy to configure each such device directly.
- Each device has its own unique IP address. You cannot use the common one.
- After setup, each camera is connected to the router. You can see the devices immediately after connecting.
- To view information, you need to use the request “static IP address: external port of a specific camera.”
- Connecting the system with DVRs is the same as described above. The wireless method works here too.
Important. Even when the system settings are correct, some users have problems with remote viewing of video. The reason for this situation is frequent connections to cameras on the same network. That is, a request is sent from an IP address to connect to it. This is not a logical action; the device is physically unable to fulfill the request. Videos are viewed from other IP addresses.
Setting up intranet access
At this stage, it is possible to enter the starting address of the camera within the created network for any device. After this, a special panel will open, with which you can view the image in real time.
You can get the same internal interface, but to do this you need to purchase both devices made by the same manufacturer. However, this approach will lead to some difficulties. For example, it will not be possible to connect 2 cameras from the same company to the router at the same time. In this case, you will need to reassign network addresses for each device. Let's look at how to do this:
- Perform the manipulation that was indicated in the previous paragraph. When finished, do not disconnect the LAN cable.
- Open the administrative panel in the camera and go to network settings - “TCP/IP”.
- Find the “Network” item (“Network”, “Configuration” or “Administration”).
- If you need to have access to the camera within your home network, then you will need about (“Dynamic IP”).
- Next, disconnect the camera from the computer and manage the device using the administration panel.
Connecting a WiFi camera
How to choose a wireless camera for monitoring your home via the Internet
Here in the connection diagram there are also practically no differences from the previous options. The only difference is the need to use a special application to view the video remotely. Manufacturers usually release software to resolve the issue. The program must be downloaded from the Internet, then installed on your smartphone.
The video camera connects to the phone through this program.
Interesting. If it is not possible to run full wires, the option with a WiFi camera will be convenient. Connecting from a tablet or smartphone, even a laptop, will allow you to quickly view the necessary records at any time.
1.How to supply power to IP CCTV cameras
| Most modern IP surveillance cameras support two power standards, namely: Stabilized voltage (12 V DC ± 10%) Can be used with power supply | |
| PoE technology (802.3af standard) - power and data over a twisted pair network cable. For example, a PoE injector | |
Note! The power supply is not included in the package.
You can read in detail about how else you can supply power in the article - How can you supply power to an IP surveillance camera
How to find out the IP address of a CCTV camera?
Without this information, the camera will not be able to connect to the Internet. There are several options for obtaining this information:
- From the instructions.
- On the device box.
- Label of the device itself.
Sometimes the address is written only for the family, and not for an individual model. Then you need special software to accurately determine the characteristics of the camera. The best option is a proprietary application supplied in the kit. It's easy to get into.
Angry IP Scanner is a popular application for those who have problems using proprietary solutions. This development allows you to find out the address of any device if it is connected to a local network.
One of the available options to solve the problem is to use the command line. You need to use one of two commands:
- Arp-a.
- Ipconfig.
After this, the user will see all the devices that have been connected. Setup is no problem.
Interesting. You can first disconnect and then connect the camera to determine the address if other methods do not work. The correct address is the one that is connected.
How to change IP
By default, the penultimate digit of the IP address is one. This value must be changed to “0” for all cameras. And also change the penultimate digit in the gateway address (GateWay) to “0”. If the program does not have a line where it can be changed, then we change only the IP.
The last digits of the IP address must be different. Otherwise, the equipment will conflict and you will not be able to access them. We leave the first two values the same.
You can change your IP not only using special software, but also through the web interface. In this case, each will have to be configured separately. To get into it and change the camera address, you need to:
- Connect the camera;
- Enter the camera's IP address into the address bar of the browser;
- Log in to the device’s web interface;
- Enter authentication data (default login and password) to access configurations;
- On the page, find the “ Settings ” or “ Settings ” menu;
- Change IP cameras.
All data for logging into the web interface (login, password, IP) can be found in the device instructions (supplied, an additional copy of the documentation can be found on the manufacturer’s official website in the appropriate section).
Setting up an IP camera for viewing via the Internet
Any IP camera is a network autonomous device. Therefore, it is given its own IP address, as mentioned earlier. Such addresses can be static or dynamic. There is no need for additional manipulations if the address is dynamic. And when the service designated as DHCP was enabled on the router. The assignment of this parameter occurs automatically after connecting the main working elements, then take the cable. Then the camera itself appears in the list of devices.
But most devices have a static address type by default. There is a high probability that the numbers assigned to the equipment do not initially match the range of addresses typical for the network. Then you need to change the designation. A laptop assumes the same rules are used.
Note! If you change your address, you cannot do without connecting to a computer.
First you need to find the Ethernet item, then go to the settings section. There the user selects the required combination of numbers for the IP address that will be used in a particular case. The address and subnet mask are entered in the corresponding field. If necessary, you can delete any information during the settings.
How does video transmission from IP cameras work?
The IP camera shoots video and broadcasts it in real time over a closed channel.
The channel can be accessed using specialized programs using an RTSP link to the camera’s video stream. Example RTSP link for Hiseeu camera: rtsp://192.168.0.254:544/user=admin&password=12345&channel=1&stream=0.sdp?real_stream—rtp-caching=100
link decryption: • rtsp - protocol type • admin - Hikvision account login • 12345 - Hikvision account password • 192.168.0.254:554 - camera IP address • 544 - RTSP camera port
Connection and configuration takes place in several stages:
1. Setting up network equipment (router or router). 2. Setting up an IP camera. 3. Receiving an RTSP link to the video stream. 4. Connecting the camera in your personal account.
RTSP (real time streaming protocol) is a real-time streaming protocol used for remote viewing of a stream from a video surveillance device.
How to open a port to access an IP camera from the Internet?
Another question is connecting the camera remotely from an external network. To do this you will also need to perform several steps:
- To do this, the user must know his IP address on the Internet.
- Usually the information is seen on the status line of the router. The connection goes through it. Another option is special services like 2IP.ru.
- You need to open a port on the router that allows you to enter the video surveillance system from the outside.
By default, the camera web interface most often occupies port 80. The router interface belonging to a specific person can also be located there. But there is a simple way to resolve the conflict situation. To do this, they simply use a different port, because the device has this capability initially. After this you can always connect.
Note! As an example, the TP-Link camera interface. In the settings section, you need to sequentially open the Network-Information items. Otherwise, the connection cannot be established further.
On the next page, the user should see a parameter called HTTP Port Number. The value 80 is where the checkbox is by default. It must be moved to the input field, and then any free port must be entered there. It is acceptable to use the existing value of 20,000. The changes must be saved, then a port number is added to the IP address to enter remote control.
The main thing is not to forget to visit the “Virtual Servers” section. It also needs to specify the settings selected by the user for a specific situation. Otherwise the connection will fail.
The router's demilitarized zone is another login option for those who were unsuccessful with the previous solution. You need to find a section in the router settings called DMZ. The function is enabled by checking the appropriate box. After specifying the local IP for the equipment, save the changes.
Setting up a router with network access
Finally, you need to connect the video surveillance device to the Internet using a router. To do this, you need to configure access from an external network. Connecting an IP camera via a router is as follows:
- Open the router administration panel. This can be done by entering the router address into the search bar of the browser. Next, a verification window will open in which you need to enter your login and password (admin/admin).
- At the next stage you will need to forward the ports. Depending on the router model, the sequence of actions may vary significantly. For example, for TP-Link routers you will need to find the “Forwarding” section and select the “Virtual Server” subsection.
- Create a table into which you then add data about the connected camera: IP address, port, name, and so on. Each device is given its own address and name.
- The next step is to make sure that a dynamic IP address is selected and select a permanent combination for it.
Further instructions will be discussed using the example of a TP-Link router:
- Open the network section and select additional settings.
- Go to Dynamic DNS (DDNS). The connection method may vary depending on the cost of the router. If you have an expensive model, then you will need to go to the official TP-Link website, register and come up with a domain name. In the case of a budget model, the user needs to go to additional settings and connect the external No-IP service.
- Open the official website of the manufacturer, register your own PC and create an original name.
- Select a domain name and set the port forwarding to “9090”. Next, the system will automatically set the missing parameters.
- From the created No-IP account, enter the necessary data into the router settings. After this, a static name for the router will be connected, thanks to which you will be able to access the device anywhere with the Internet.
Now you can connect to your video surveillance device via wireless Internet. To do this, you need to open your browser and enter the static address of the camera and the port “HTTP:/IP:9090” in the search bar. IP—domain name or device address. After entering this data, an overview with the connected camera will open.
How to connect to an IP camera via the Internet?
Note! First you need to figure out whether the provider works with so-called “white” numbers. This is important for further work.
There are two main types of ports:
- Real ones, which are called “white”.
- Virtual. Usually these are “gray” addresses.
A “white” address can be specified for direct connection to the camera. Then the connection does not cause problems.
To check the designation, it is better to use special services. Most providers work with real varieties of them. If not, then this is only a technical problem that can be easily solved if you set the correct values.
If the issue with the address is resolved, all that remains is to open the port. By default, the number 80 is always used. But it is better to replace this combination with any other number when setting up.
In the router menu you need to find the “Forwarding” item. In English it is called Port Forwarding. Here you need to specify several types of data:
- Camera IP address.
- The port through which external connections are made.
- Import the camera itself.
Note! It remains to check the functionality of the connection when any changes are saved. You need to specify the IP address and port of the camera by opening any browser. If the web interface appears, it means everything is correct, the devices were connected successfully.
Receiving data
So, the device is installed and ready for use. The video stream of the configured camera can be received directly from the local network (via wire and WiFI), via the Internet or through specialized cloud services.
From local network
After completing the settings, a regular IP camera is immediately ready to broadcast streaming video to the network. You can connect in the following ways:
- by logging into the web interface;
- by connecting the video device to one of the supported surveillance programs, native or third-party. In this case, it is desirable that the device supports the ONVIF protocol, this will significantly expand the list of acceptable software. In addition, it adds additional features such as hard drive recording, video archive, and more;
- using a media player, if both it and the camera support broadcast protocols (for example, RTSP).
From the Internet directly
To see a picture from a camera installed and connected via the router via the Internet, the following conditions must be met:
- availability of a permanent “white” IP address;
- an open port on the router “forwarded” to the signal source.
The port is recognized and, if necessary, changed in the web interface of the video camera. You should configure the firewall rules on the router so that all connections to the external IP address and this port are “forwarded” to the camera. In professional terminology, this is called Port Forwarding; in the menu of routers, this function is sometimes placed on a tab with that name. In TP-Link devices, for example, the option is called “Virtual Servers”.
Important: sometimes the default port is 80. The same port is usually used to access the router configurator, so it is advisable to reassign it in the video camera settings to a less standard one, for example, 10000, and others.
If everything is done correctly, the gadget and viewing data from it will become available via a link like this:
https://external_ip_address:port_number
Connection via router and cloud server
Some cameras are natively supported by the developer's cloud. For example, it is very easy to set up a Hikvision camera: remote access, recording and viewing of data can be organized using the proprietary Hik-Connect service. But popular cloud services allow users to install almost any gadget in them, as long as they support the necessary protocols. Among the most popular are RSTP and ONVIF.
Important: the network must already be configured on the camera, and the required ports must be “forwarded” on the router.
Let's look at how to set up a connection using the Angelcam service as an example.
First, you need to register an account at https://my.angelcam.com/. This is done using a regular email-password pair, or using authorization via social networks.
Next, the site will offer to connect the camera:
In general, the choice should be Regular IP Camera.
Here you can select a device from the list of supported ones, or simply add it manually. The process specifies:
- external IP address;
- if the device is protected by a login and password, the corresponding “tick” is checked and the credentials are entered;
- If it is necessary to manually specify the port, Set Port Manually is checked and the previously specified network port number is entered.
Next, just click Detect camera, and, provided the settings are correct, the camera will be connected to the service.
Other “clouds” are connected in a similar way. In some cases, for example with Xiaomi smart devices, the process is simplified to just launching the application and scanning the QR code, although when working through a router, network port forwarding is usually still required for normal operation.
Programs for watching videos from a tablet or smartphone
In this case, no special settings are needed for the device itself. The following three applications that solve the issue have become the most popular.
- Exacq Mobile.
Supports both iOS and Android operating systems simultaneously. Can work with 48 cameras simultaneously. The scaling function and convenient control are the main advantages of the application. Connecting a camera through it is as simple as possible.
- IPCam Viewer.
Works with several cameras at once and combines them into groups. The application supports recording information on the media. Images can be easily scaled if desired. For quick access and updating of current information, you can install a widget. About 700 camera models are supported.
- TinyCam Monitor Pro.
Supports up to 16 cameras simultaneously. It even supports multi-brand cameras. Multiscreens. Thanks to convenient management, settings are quickly transferred from one device to another. Data is written to the media directly from the program. Images support digital zoom. It doesn't matter which registrar is used.
Note! Working with any IP cameras around the world is an interesting feature specific to the applications. It will be especially easy if the device does not have a login with a password.
Setting up on the router
If we talk about how to connect an IP camera to a router, they do it as follows. Connect the router to the camera. To do this, either use the appropriate wire or connect using Wi-Fi.
They do port forwarding so that the router shows the desired camera when accessing the local network address from an external one. To do this, go to the “Port Forwarding” section or any other similar one. Before this, an icon is placed opposite the inscription “Virtual Server”.
Then fill in the following fields:
- service name – give any name;
- port range – assign the value indicated above (for the first camera it is 8181, for the second 8282, etc.);
- the corresponding IP address of the camera;
- local port that was specified during device setup;
- TCP protocol and corresponding number.
The same manipulation is performed for all devices, changing the data. After this, proceed as follows. In the search bar of the browser, enter the following data: “https://static_external_address_provider:8181”.
If the IP address is dynamic white, then the procedure is performed through the DynDNS service. To do this, proceed as follows:
- enter the router settings;
- go to the “WAN” sub-item;
- select the “DDNS” tab;
- check the box next to “Yes” in the “Enable DDNS” column, set the appropriate parameters and save them.
Connecting the camera via the router is complete.
For instructions on installing and configuring a video surveillance system, watch in video format:
Determining IP from the command line
The IP address of the device can also be found using the Windows command line, running it with administrator rights.
This requires:
- Find the Command Prompt (CMD) program in the Start menu, right-click on it and select “Run as administrator” from the context menu that appears. If you logged into Windows with Administrator rights, you just need to launch the program by left clicking the mouse.
In the “Start” menu, enter “CMD” in the search field, right-click on the “Command Prompt” application, click on “Run as administrator”
- In the window that opens, you need to type “arp –a” using the keyboard and press “Enter”. A list of IP addresses of various devices connected to the PC will appear.
Enter the command “arp –a”, press “Enter”
If you want to know how to open the command line in Windows 8, you can read a new article on our portal.
If this list is large enough, and it is not clear which address belongs to the camera, you need to write down this list, turn off the camera, and run the “arp –a” command again, finding out the IP that has disappeared - this is the address of the video camera.
To solve this problem, you can also use special software scanners to scan IPs and their ports. The IP search algorithm is similar to working with the command line.
Connecting and setting up Hikvision IP cameras to the Hik-connect cloud service
Hik-Connect is a free cloud P2P service for viewing video surveillance via the Internet. The application allows you to remotely connect to your IP cameras, IP intercoms and Hikvision DVRs.
Unlike the ezviz service, where you can only connect to devices using P2P technology (when a cloud service connects the camera and your phone via the Internet), in the Hik-Connect application you can also connect to a Hikvision device via the Internet directly, using a static address . and there is also functionality for connecting to Hikvision devices locally (i.e., being on the same local network with your router, for example at home, where both cameras and your phone are connected to the same router, you can instantly directly view video from cameras by accessing the device via its ip address, both in the secondary and in the main stream! )
Thus, the Hik-connect application combines the functionality of two services from Hikvision, namely ezviz and ivms-4500