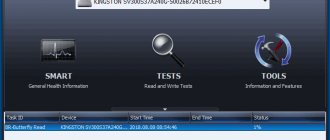
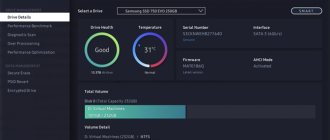
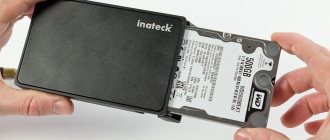
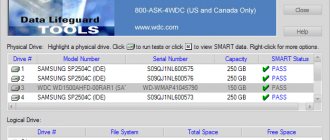
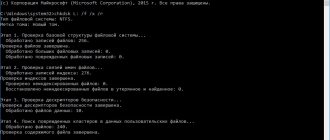
Greetings, dear inquisitive readers! Today we will find out how to disable the message “Windows has detected a hard drive problem.” Usually such an expletive actually indicates problems with your hard drive. In my case, it appeared after installing Windows on a hard drive with a certain number of bad blocks and an unacceptably large value for attribute No. 5 (Reallocated Sectors Count) in SMART. We will look at how to check a hard drive for errors separately, but now we’ll just turn off this window so that it doesn’t interfere with work with its sudden appearances. Nevertheless, as soon as the opportunity arises, I recommend replacing the hard drive with a new one.
Let's go to the Group Policy Editor. To do this, press Win + R and write: gpedit.msc.
The Local Group Policy Editor will open. Go to: Computer Configuration
->
Administrative Templates
->
System
->
Diagnostics
->
Disk Diagnostics
.
There we will find two parameters that we will deal with. Double-click on the first parameter and in the next window set the value to Disable. Click OK.
We will do the same with the second parameter. As a result, both parameters will have the Disabled status.
And at the end, reboot. This window should no longer bother you. But I still recommend replacing the hard drive as soon as possible, having first saved all your data.
How to temporarily turn off your computer's hard drive?
This action may be required, for example, when installing a second
EFI
Windows system.
If you install Windows on the second drive of a computer running in BIOS UEFI
, it will not have its own bootable
EFI
partition. And it will be dependent on the system bootloader on the first media. But if the first disk with system partitions is disconnected, the second Windows, during its installation process, will create for itself all the partitions necessary for offline startup.
And it will be able to start without problems if the bootloader of the first system is damaged. And perhaps the hard drive needs to be made temporarily invisible only in the environment of the current operating system, so that no one needs access to it.
Let us consider below how these and similar questions are resolved.
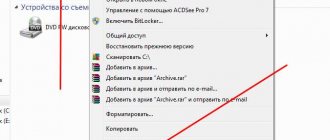
To prevent user data media from being temporarily visible in the operating system environment, you can disable it in the system device manager. Select it in the “Disk devices”
, indicate disabling in the context menu.
That's it - now an operable SSD
or
the HDD
will no longer appear either in Windows Explorer or in third-party programs that access data. The system can be turned off, rebooted - the disabled media will not turn on itself without our direct participation.
You can turn it on in the reverse way.
Disk Management
In the Windows environment, there is another place where you can deactivate information devices so that they do not appear in the operating system environment and cannot be accessed using programs.
This is the Disk Management Console.
In its window on the desired SSD
or
HDD,
call the context menu, click
“Offline”
.
To turn it on, do the reverse procedure - click.
How to disconnect a hard drive outside the operating system environment?
So that, as mentioned above, when installing a second Windows, it will have its own bootloader on, respectively, the second media.
Or perhaps we are talking about experiments with installing Mac OS
or
Chrome OS
, when it is better to remove unnecessary information devices with valuable data, so as not to mistakenly format them or delete their markup along with the contents.
In this case, you will need to disable it either in the BIOS
or hardware.
The disk controller is enabled in the computer's BIOS menu
During installation of the Windows 10 operating system, various errors may occur. As a rule, they are associated with incorrect BIOS settings or incorrect operation of computer or laptop components. One of the common errors sounds like this: “Windows cannot be installed on this disk. Your computer's hardware may not support booting from this disk. Make sure that the controller for this drive is enabled in the computer's BIOS menu." Yes, troubles happen when the disk actually gets cut off and no longer works. But most often the reason is different.
The most common reason why this malfunction occurs is in the settings of the SATA controller when working with old hard drives. First, when you turn on the PC, try going into the BIOS and changing the controller operating mode from ACHI to IDE.
On more modern motherboards with UEFI, instead of the usual BIOS, changing to Legacy mode can help.
If none of these manipulations help, then return everything as it was. The reason is most likely something else.
Sometimes the error “Make sure that the controller of this disk is enabled in the computer’s BIOS menu” may appear because the boot record of the hard disk has become corrupted and needs to be restored. To do this, when starting the installation of the Windows 10 operating system, click on the “System Restore” button and go to the “Diagnostics” menu>>”Advanced options”>>”Command Prompt”, or simply press the key combination Shift + F10. A black Windows console window will appear:
We type the commands one by one:
Bootrec /fixmbr bootrec /fixboot bootrec /RebuildBcd
Each of them should complete successfully. After that, reboot the PC and try to start the installation again. Usually, this resolves the disk controller error in the computer's bios menu and then everything goes on without any problems.
set-os.ru
Hardware disconnect
100%
-but working, it is also a universal way to deactivate
an SSD
or
HDD
- disconnecting
SATA
cable or power cable
(optional)
PC
system unit or laptop case.
The need to disconnect one of the hard drives on your computer, if there are several of them, may arise for various reasons. Naturally, this does not mean the hard drive on which Windows is installed, but an additional one used as file storage. If we are talking about the safety of some important files stored on one of the hard drives, as an alternative, you can simply make the partitions of such a disk invisible, in order, for example, to limit access to important information to children or employees at work. In this case, using the functionality of the standard disk management utility or third-party programs, the letters of the required disk partitions are removed so that such partitions are no longer displayed in Windows Explorer or file managers. Of course, this is not as reliable data protection as encrypting it, but it is a simpler method that will not add headaches if you lose your disk lock password. But there are also situations when the hard drive needs to be turned off not for reasons of data safety, but, for example, because of the appearance of annoying clicks and squeaks during operation. Or another example - if the HDD overheats. In such cases, when there is a possibility that further work may cause harm to the hard drive, it must be turned off until a verdict is made on it by a service center specialist.
How to turn off the hard drive? There are several ways to disable a problematic HDD: at the Windows level, at the BIOS level, and through hardware.
Instructions
Turn on the computer, and immediately after turning on, without waiting for the operating system to start loading, press the “DEL” key. You will find yourself in the BIOS menu. Go to the "MAIN" tab and press "Enter". A menu will appear showing the optical drives and hard drives connected to the computer. Find the required hard drive in the equipment list. If it is not there, select the number of the “SATA” connector to which it was connected and click “AVTO”. The system will now search for equipment connected to this connector. If the hard drive was detected by the system, click on the “save end exit” command. The computer will restart and the hard drive will be available in My Computer.
If the system is unable to detect the hard drive, the SATA interface controller is most likely disabled. Find the line “SATA configuration” and in the “controller” tab select “enable”. Then perform the operation described in the paragraph above.
If you just accidentally turned off the hard drive in the BIOS, the easiest way to turn it back on is to reset the settings. Enter the BIOS and select the line (Load Default). The computer will restart and the hard drive will be accessible again.
After the hard drive is displayed in the BIOS, you will need to update the data about the connected devices in the operating system. Turn on your computer and wait for Windows to load. Right-click My Computer. Select the "Properties" command. Then go to Device Manager. Click on the line that displays the names of your system. This is the computer name that was specified when installing Windows. Simply put, this is the top line, right-click on it and select the “Update Hardware Configuration” command. The system will scan the connected devices, and the hard drive will be available for use.
The situation when the computer does not see the disk
, is quite rare. In this case, the user may need to open the BIOS and set the correct settings. Knowing how to do this will allow you to return your computer to working condition.
Hardware shutdown of HDD
If the BIOS does not allow you to disable a separate HDD without turning off its controller, this disk can be disabled by hardware. Hard drive shutdown is carried out when the computer is turned off. To disconnect a problematic hard drive, simply disconnect its power cable.
If your hard drive overheats, or if clicks, squeaks, or similar problems occur, it is recommended to immediately back up your important data. If the HDD fails, the service center can only discuss the issue of possible disk recovery, but not data recovery. Firstly, this procedure costs extra. Secondly, data recovery in full is not always possible, even if experienced specialists get down to business.
Have a great day!
Windows 10 has such a feature - if you do not use the computer for a while, the system not only turns off the monitor, but also disconnects the disks over time. I have never used this even in previous versions of Windows.
I don’t know what is more beneficial or harmful from this, but on the Internet I realized that it is better for the system not to disconnect the disks like that. You may have noticed this - when you return to the computer, the hard drive makes a strange sound, this is the sound of “starting up”, so to speak.
In general, I don’t dare to say, but it seems that without this “disconnector” hard drives will last longer.
The hard drive is the only mechanical device in the computer (unless you count the fans, of course) and it is damaged by frequent shutdowns and startups; it must either work or not. And it is better to minimize transitions from one state to another.
This is easy to do, you need to open the control panel:
And at the very bottom of the page (at least for me) there will be a Power Supplies
, select it:
Now you will have the power scheme you selected here, opposite it click Settings
:
And here, by the way, I advise you to immediately set (if necessary) the screen timeout and the time after which the computer goes into sleep mode when the computer is idle (that is, when no one is using it). Click on additional settings:
And now a window will open where you need to specify that the hard drive does not turn off itself - to do this, set the time to zero and click OK
:
After this, save the changes:
That's all, I hope the problem is solved, and if not, write in the comments!
In Windows XP, Vista, Linux and Mac OS X operating systems, you can disable optical drives, virtual and local disks, and volumes. This article will tell you how to do it.
SATA controller. How to enable SATA controller in BIOS?
Computers are complex devices that rely on many different elements to operate. One of them is a SATA controller. What is this device? How to work with it? How to take care of its performance? Here is an incomplete list of questions that will be considered as part of our article.
What is a SATA controller?
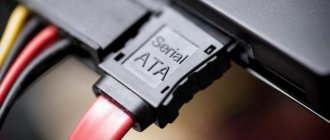
Serial Advanced Technology Attachment is a technology that allows storage devices such as hard drives and optical cables to communicate over a high-speed cable with the motherboard. It is optimal to use the connector with the lowest number. SATA0 or SATA1 are considered ideal. For optical drives, it is possible to use other ports.
When working with hard drives, you must initially use SATA0. It is installed on system media. Each subsequent one must have a number one more and so on. If you have multiple hard drives and use RAID mode to increase storage space, one wire is connected to the connector, and then everything else is connected to the controller.
Operating modes
Controllers determine how the hard drive will communicate with the motherboard. There can be three principles of interaction:
- Operating mode of the SATA IDE controller. The simplest option. With it, the hard drive functions as IDE or PATA. In this case, it has limited potential and is also not very fast. But this mode is very valuable if it is necessary to ensure compatibility of interaction with equipment that is already outdated. It can also be used in cases where the computer has only one hard drive and there is no need to use various drive functions.
- Operating mode of the SATA AHCI controller. In this case, the use of advanced drive functions becomes possible. An example is Native Command Queuing and hot swapping. Also a significant advantage is the high speed of interaction (when compared with the previous option).
- RAID controller operating mode. With this setup, multiple separate hard drives can be used to create a single storage array. It is characterized by redundancy of information, as well as higher performance. The first is achieved by creating a backup copy of the hard drive, and the second by striping the disk space. When this mode works, AHCI also functions together with it.
Notes
Initially, you need to set the operating mode in which the SATA controller for a laptop or computer will function correctly, and only then deal with the operating system. After all, if you do this later, the OS may not work correctly, even to the point of failure. So, this may happen due to the disk driver being disabled or the wrong BIOS setting being used.
Causes of malfunctions
Let's say your PC stops working with its hard drive. This malfunction may have several reasons:
- Cables are loose.
- The hard drive has failed.
- The SATA controller does not work or is very slow.
In the first option, you need to check the tightness of the cable. In the second case, the device most likely needs to be replaced. And in the third - set the correct settings. Administrator rights are required for such changes. If they are, then you can begin to solve the problem.
How to enable the SATA controller in the computer BIOS?
First you need to go into the BIOS. There is no single standard here - each machine uses a separate special key for this. To find out, you need to read the instructions on the screen that appear immediately after turning on the computer. Moreover, for a guaranteed result it must be pressed more than once.
After logging in successfully, you need to find the Integrated Peripherals item. If it is not there, then any one that is consonant in meaning will do. It contains all the parameters that relate to the internal capabilities of the motherboard. Now you need to find the Onboard SATA Controller. If it's not there, just look for any entry that says "SATA controller." This parameter can only be set to Disabled and Enabled (disabled and enabled, respectively). You need to make sure that it is activated.
To save changes, you can press F10 and the enter button. If you do not do this, the system itself will offer to perform these actions. After this, you should restart the computer and go into the BIOS again to make sure that the hard drive has been detected. You can understand this thanks to the Standard CMOS Features item. Now we know how to enable the SATA controller. Let's look at the modes.
AHCI connection
This is done using the same BIOS. To make changes, go to the control window. After that you need to look for IDE, AHCI or RAID. They must come with SATA. Also, on some devices, the word “MODE” is used additionally. We disable the mode that we do not need, and, on the contrary, enable the necessary one (this is also done by changing Disabled to Enabled and vice versa).
If, when you try to change the mode, a message is displayed stating that no disk is located, it means that the necessary drivers are missing. Therefore, you will need to log into the operating system and install them with administrator rights first. This can also be done using the OS installation disc. But still, the first option is less time-consuming. Also remember that changes you make to the basic I/O system must be saved for them to take effect. How to do this was discussed in the previous paragraph.
In general, here's how to switch the SATA controller to AHCI mode or another mode that is necessary. In this case, it is important to strictly follow the instructions so as not to touch anything unnecessary. Now let's take a look at two options that may come in handy when setting up your computer. Moreover, the main topic of the article has already been revealed, and we will now deepen our knowledge.
SATA Controller Mode
This option is used to specify the operating mode. We have already discussed this. Now let's pay attention to how and what works in this case. If you set the IDE mode, there will be no need to use additional drivers when working with equipment that uses this technology. The RAID mode is compatible with all operating systems starting from Windows 2000. The only peculiarity is that outdated media for drivers will be required here (if the equipment is of the same year as the operating system). Otherwise, their role can be successfully performed by a Flash drive or CD. But it makes sense to talk about creating a RAID array only if there are at least two hard drives. Their work will be positively influenced by the same brand and volume. And if the parties and firmware match, these are already ideal conditions for using this mode.
ANSI is a newer technology and is not compatible with older (relatively) systems. Due to the fact that this mode has a positive effect on the performance of the equipment, it is recommended to focus on it. Moreover, although RAID and ANSI can still be launched on representatives of operating systems and computers starting from the 2000 generation, they will not help with Windows 9x: there are simply no drivers that would combine the operation of software and hardware. Please note that changes must be made before the OS is installed. If you change the mode when the operating system is already installed, you can find a “blue screen of death” on your computer, which will display information about an error and the impossibility of correct operation. If you don’t want to see him and demolish the OS, then you should forcibly change the controller driver to one that will work with the new settings.
History of development
The first of the family of controllers is rightfully considered SATA 150. It is an interface that uses a serial data bus. It operates at a frequency of 1.5 GHz, thereby providing a throughput of 150 Megabytes per second. The standard has spread due to a number of advantages that previous developments did not have. Thus, the architectural advantages of the bus, the small size of connectors and cables, ease of use and overall reliability of the connection played a role. Also, when connecting two devices to one port, there are no conflicts or problems.
The second generation of SATA 300 provides operation at speeds of 300 Megabytes in one second. In theory, both options are compatible, but problems cannot be ruled out. But, in fairness, it is worth saying that even the most modern hard drives have not yet learned to operate faster than 130 Megabytes per second, so there is no particular point in chasing numbers in this case. So there is no difference when using controller types. All that matters is which one connects first.
Conclusion
The SATA controller is, of course, an important part of any computer. It is a device that allows us to access data that is valuable. Also worthy of special attention is the success the developers of this part were able to achieve in terms of performance. In addition, this suggests that there is significant reserve for increasing the capacity of hard drives without improving data transfer technology, which makes it unlikely that it will become obsolete and unnecessary in the next few decades.
fb.ru
Your actions
Method 1 of 4: Disconnecting a disk through Disk Management in Windows XP, Vista, Windows 7
Open the Computer Management window. Click Start.
In Windows XP, click "Run" and in the window that opens, enter the command compmgmt.
msc.
In Windows Vista or Windows 7, type the command in the search box and press Enter, and then click compmgmt in the search results. You can also type a command and press Enter.
In the Computer Management window that opens, click Disk Management (in the left pane of the window).
Select a drive. Right-click on the drive you want to unmount.
From the menu that opens, select “Change drive letter or drive path.”
Disconnect the drive. Select the drive and click Remove.
Click OK (to confirm disable/delete).
Close the Computer Management window.
Method 2 of 4: Unmount a Volume (Attached to a Folder) via Command Prompt in Windows
Note: This method works with any volumes (even missing ones).
Open a command prompt.
Click Start.
In Windows XP, click “Run” and enter the cmd command in the window that opens.
In Windows Vista or Windows 7, type cmd in the search box and press Ctrl + Shift + Enter (to launch Command Prompt with administrative rights).
Dismount the volume. Enter the command mountvol Path /d, where Path is the path to the folder (to which the volume is mounted).
Method 3 of 4: Dismounting a Disk in Linux
- Open your console. To do this, in the Linux GUI press Ctrl + Alt + F1.
- Alternatively, you can open a terminal (console) from System Tools.
- Disconnect the drive.
Enter the command umount /dev/partitionID, where PartitionID is the identifier of the disk to be detached.
Method 4 of 4: Disconnecting a drive in Mac OS X
- Disconnect the drive. Right-click on the drive and select “Eject” from the menu that opens.
- Or drag the icon of the disk to be disconnected to the trash.
- If your Linux system gives an error when you try to unmount a disk, identify the process that is using the disk. To do this, open a terminal and enter the following command: lsof +D /mnt/windows. Complete such process and disconnect the drive.
- Dismounting a volume does not delete the corresponding folder (or its contents).
- The umount unmount command (on Linux) unmounts flash drives and CD/DWD drives. However, the command syntax is slightly different. For example, to unmount a CD, enter the command umount /media/cdrom in a terminal.
Why does this error appear?
There are several options for the message “Make sure that the controller of this disk is enabled in the computer’s bios menu.”
One of the most likely is that the hard drive operating mode is incorrectly set in the BIOS. There are two main modes - Achi and IDE, which we wrote about in the article.
Sometimes on new motherboards the UEFI/BIOS boot mode option contributes to the appearance of this error.
Less often, but another situation also occurs. This is damage to the boot record of the hard drive and in this case it will need to be restored.
