Although Windows 10 receives regular updates to improve overall performance and fix security vulnerabilities, sometimes updates can cause problems.
For example, one of the most common problems you may encounter after installing an update is Internet connection problems such as intermittent connections, slow Wi-Fi connection speeds, or complete loss of connection, regardless of whether you are using wireless or wired connection, which does not allow you to connect to network drives and access the Internet.
However, if you are having problems connecting to the Internet or accessing your local network after the recent Windows 10 update, there are several methods that Microsoft recommends to fix the problem.
In this Windows 10 guide, we'll show you how to resolve common network connection issues after installing an update on your device.
Basic network problems in Windows 10
If your device experiences network problems after installing a quality update, some basic troubleshooting steps can help you get back online quickly.
Restarting the computer
You will be surprised to know that a simple reboot can fix many problems in Windows 10, including network problems.
To restart your computer, follow these steps:
- Open Start.
- Press the Power button .
- Select the Reboot .
Once you complete these steps, launch your web browser and check if you can connect to the Internet.
Checking the network configuration
If you are unable to connect to the Internet, the next step is to make sure, using the command line, that there are no connectivity issues between your device and the router.
To check your current network configuration in Windows 10, follow these steps:
- Open a command prompt.
- Type the following command to find out the router's TCP/IP address and press Enter: ipconfig
- Note the "Default Gateway" which is the address of your local router.
Advice. Typically the address is 192.169.1.1 or 192.168.2.1, but depending on your router, Internet Service Provider (ISP), or if you manually updated the settings, the address will be different. - Type the following command to confirm that the router is reachable and press Enter: ping Default Gateway
This example tests the connection to the router with the address 10.0.2.2:ping 10.0.2.2
In this command, remember to change 10.0.2.2 to your router's IP address.
Tip: You can also use the ping 127.0.0.1 to check if the network stack is working on your computer.
- Ensure that you receive a response without any packet loss in the output.
After completing these steps, if no packets have been lost and you still cannot connect to the Internet, it may be a problem with your router or ISP.
Restarting the Wi-Fi connection
If you are using a laptop with a wireless connection, the problem may be with the adapter or signal, which can be fixed by restarting the device and connecting to the network:
- Open Settings .
- Click on Network and Internet .
- Go to the Wi-Fi .
Tip: If the Wi-Fi section is missing, it means that Windows 10 is not detecting the wireless adapter. - Turn off the Wi-Fi .
- Wait a few seconds and turn on the Wi-Fi .
- Click Show available networks.
- Select your wireless network.
- Click the Connect button.
- Enter your wireless password.
- Click "Next.
Once you complete these steps, you will be able to connect to the network and the Internet.
If you connect to a network using Wi-Fi, you can also generate a wireless history report to help diagnose the problem.
Disabling Airplane Mode
An update may sometimes enable Airplane Mode without your permission, or you may enable it by mistake. If you can't connect to the Internet, make sure this mode is disabled.
To turn off Airplane mode , follow these steps:
- Open Settings .
- Click Network and Internet .
- Go to the Airplane mode .
- Turn off the airplane mode switch.
- (Optional) Restart your computer.
After completing these steps, your Internet connection should be restored.
Restarting the router
In addition to all the basic troubleshooting steps above, restarting your router can also resolve many connection issues.
If you think the problem is with your router, you can restart it by following these steps:
- Find a router.
- Unplug the power cord.
- Wait about 60 seconds.
- Connect the power cord.
After completing these steps, wait three to five minutes for the router to reboot and double check your connection.
How to enable and configure sharing of a folder or drive in Windows 10
Before you begin, keep in mind that to set up shared access to folders and drives, you must have “Private Network” selected as your network profile in Windows 10. You can change this before starting setup (How to change a public network to a private one and vice versa in Windows 10), or take no action yet - at one of the stages you will be automatically prompted to do this. The next steps to share a folder in Windows 10 are as follows:
- Right-click on the folder you want to share over the network, select “Share access to” - “Individual people”.
- If your network profile is set to Public, you will be prompted to make the network private. Do this (“No, make this network private”).
- A window will open showing the current user's name and a Share button. You can click this button immediately to share the folder, but in this case, connecting to this folder from another computer will require you to enter the username and password of that computer's owner user. Attention: if the user does not have a password, the default connection will not work.
- If you don't want to use the current computer's administrator username and password when connecting from another computer, or your user doesn't have a password, you can create a new user on the current computer, not necessarily an administrator, but definitely with a password (How to create a Windows 10 user), for example using a command line running as administrator: net user Username Password /add
- Then enter this username in the field at the top of the sharing settings, click the “Add” button and specify the desired permission level.
- When finished, click the Share button. Done, the folder is now shared.
There is another option for sharing a folder (also suitable for a disk) in Windows 10:
- Open the properties of the folder or drive, go to the “Access” tab.
- Click the Share button and follow steps 3-5 from the previous section.
- If the Share button is not available (which may be the case when sharing a drive), click the Advanced Setup button, and then o.
- In the advanced setting, under Permissions, you can also specify the users who are granted access to the drive.
- Apply the settings you have made.
If you need to disable sharing access to folders, you can at any time either return the “Public” network profile, cancel sharing in the folder properties, or use the context menu “Give access to” - “Make inaccessible”.
Network Troubleshooting Wizard
If you recently installed a cumulative update and are no longer able to connect to your network, you can use the troubleshooter to quickly diagnose and fix common problems.
To run the Network Troubleshooter on Windows 10, follow these steps:
- Open Settings .
- Click Updates & Security .
- Under Troubleshooting, select the Internet Connections troubleshooter.
- Click Internet Connections → Run the troubleshooter .
- Select the Troubleshoot Internet connection
- Select the Try these fixes as an administrator (if applicable) option.
- Continue with on-screen directions (if applicable).
After completing these steps, the troubleshooter will run and fix all detected connections.
Additional Tips
If you are connected via cable, then try connecting via Wi-Fi (if you have a laptop), or vice versa, if you are connected via Wi-Fi, then connect via cable. If the connection is stable, then most likely you have a problem with the drivers. Therefore, simply install a new driver on the “broken” network adapter. Therefore, I wrote a detailed article about this, and you can read it here.
Another way to solve the problem is to enable FIPS. To do this, right-click on the connection and select the first item from the bottom as in the picture below.
Click on your connection and then select properties. Select the bottom checkbox and click OK. Now, even if the network is not visible, the laptop will constantly try to connect to it.
Also go to the second tab “Security”. Click on the only button below and select the checkbox. After that, click “OK”.
A few more tips:
- Check your computer or laptop for antivirus software;
- Go to Programs and Features and check that you have not installed any unnecessary software. To do this, simply set the program list and sort by date. If you find unnecessary software, remove it;
- Download CCleaner. Do the cleaning first. Then go to the “Registry” tab and correct errors. Next you need to go to “Service” – “Startup”. Remove unnecessary programs and restart your computer.
- If there is no access to the Internet and you see the message “No network access,” then the last hope is to restore the system.
If you are all asking the question why a laptop or PC does not connect to WiFi or via cable, and the issue is also not resolved, then write your questions in the comments. Try to write as completely as possible so that I can help you. Also, do not forget to indicate the actions that you have already completed.
How to reset the network stack using the command line
In case the troubleshooter fails to resolve the network issue, you should try resetting the Windows 10 TCP/IP stack and clearing any DNS information on your computer.
- Open Command Prompt as Administrator.
- Type the following command to reset the function that handles network requests for applications and press Enter: netsh winsock reset
- Type the following command to reset the Internet Protocol stack and press Enter: netsh int ip reset
- Type the following command to clear the current network configuration and press Enter: ipconfig /release
- Type the following command to change network settings and press Enter: ipconfig /renew
- Type the following command to flush DNS information cached on your device and press Enter: ipconfig /flushdns
- Restart your computer.
Once you complete these steps, open your web browser and check that the internet is working again.
First actions
First of all, you need to think roughly about the possible reasons. Remember how long ago you paid for the Internet and, perhaps, the hour for payment has come. For example, this happened to me quite recently. At the same time, even if you pay for the Internet, this error may continue to appear.
Therefore, another piece of advice would be to reboot the router and computer or laptop. Rebooting the router is quite simple - just press the power button. You can simply unplug the cord from the outlet and then plug it back in.
If you are connected via cable, then look at how intact it is. Sometimes pets like to chew on them. If you just started setting up your router, but saw this error. Most likely, you either connected the wires incorrectly, or entered incorrect Internet configuration data in the admin panel. Make sure that the cable from your provider is connected to the WAN port. It is usually one and stands out from the rest: by color or other marks.
The remaining ports have a different designation and are intended for local connection: computers, laptops, TVs, printers, etc. Also, go to the router settings again and make sure that you have correctly specified the type of Internet connection. It is usually specified in the contract from the provider.
How to reset a network adapter using Settings
In Windows 10, you can also use the Reset Network feature to fix Wi-Fi or Ethernet connection problems after installing an update or any time you can't connect to the network.
To reset the network adapters on your device, follow these steps:
- Open Settings .
- Click Network and Internet .
- Open Status.
- Under Change network settings, select the Reset network option.
- Click Reset Now and Yes.
After completing these steps, the device will automatically restart and after rebooting, you will be able to connect to the Internet.
The tool resets all network adapters installed on your computer to factory default settings, which means you will need to re-enter your password to connect to your wireless network, and you may need to reconfigure other networking software depending on your requirements.
How to enable anonymous access to shared folders without entering a username and password
If you need to make it possible to open folders over the network without entering a username and password, in Windows 10 Pro and Enterprise you can do this as follows:
- On the computer on which the shared folder is located, in the sharing properties, add the “Everyone” group (enter Everyone in the top field, click the Add button) and provide the necessary permissions. In Windows 10, which was originally in English, this group is called Everyone.
- Go to the local group policy editor ( Win+R - gpedit.msc , note: the element is not present in Windows 10 Home), go to the "Windows Configuration" - "Security Options" - "Local Policies" - "Security Options" section.
- Enable the Network Access: Allow everyone permissions to be applied to anonymous users option by double-clicking it and selecting Enabled.
- Open the folder properties and on the “Access” tab at the bottom, in the “Password Protection” section, click on the “Network and Sharing Center” link to change the setting. Expand the “All Networks” section, install about and apply the settings.
- If we provide anonymous access to a disk and not a separate folder, additionally go to the disk properties, on the “Security” tab, click the “Change” button, add the “Everyone” group and set the necessary permissions.
- Some instructions suggest that in the same section of the Local Group Policy Editor, enable the "Accounts: Guest account status" , and then open the "Network access: Allow anonymous access to shares" and specify the network name of the folder in the line (or several lines, if there are several folders), the folder name is indicated without the path to it, for the drive we simply indicate the letter without a colon. But in my experiments, anonymous access (to all shared folders) works without this, although it can be useful if anonymous access needs to be provided only for individual shared folders.
From this moment on, you can connect to a shared folder or network drive from other computers without entering a login and password (sometimes you may need to restart the computers). However, keep in mind that this is not very good from a security point of view.
How to update your network adapter driver
An old version of your network adapter driver may cause compatibility issues with the new, recently available Windows 10 update.
To update your network adapter driver to the latest version, follow these steps:
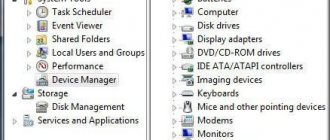
- Open Device Manager .
- Expand the Network adapters .
- Right-click on the adapter with the problem and select the Update driver .
- Click Search automatically to update driver software.
- Continue as directed on the screen (if applicable).
After completing these steps, if an update is available, it will be downloaded and installed on your computer.
Of course, if you can't connect to the Internet, you'll need to download the driver manually from the manufacturer's support website using another computer. Then save the driver package to an external drive and use the manufacturer's documentation to install the driver.
If the Internet stops working after a clean install or reinstallation of Windows 10
If the Internet does not work immediately after installing Windows 10 on a computer or laptop, then the problem is most likely caused by the drivers of the network card or Wi-Fi adapter.
At the same time, some users mistakenly believe that if the Device Manager shows that “The device is working normally,” and when they try to update the drivers, Windows reports that they do not need updating, then the problem is definitely not the drivers. However, it is not.
The first thing you should take care of after installing the system in case of such problems is to download the official drivers for the chipset, network card and Wi-Fi (if available). This should be done from the website of the computer motherboard manufacturer (for a PC) or from the website of the laptop manufacturer, specifically for your model (and not use driver packs or “universal” drivers). Moreover, if there are no drivers for Windows 10 on the official website, you can also download them for Windows 8 or 7 in the same bit depth.
No activation of Windows 10 / are there any restrictions
When installing them, it is better to first remove those drivers that Windows 10 installed itself, for this:
- Go to Device Manager (right click on Start - “Device Manager”).
- In the “Network Adapters” section, right-click on the desired adapter and select “Properties”.
- On the Driver tab, uninstall the existing driver.
After this, run the driver file previously downloaded from the official website, it should install normally and, if the problem with the Internet was caused by this particular factor, everything should work.
Another possible reason why the Internet may not work immediately after reinstalling Windows is that it requires some kind of setup, creating a connection, or changing the parameters of an existing connection. Such information is almost always available on the provider’s website, check (especially if you installed it for the first time). OS and don’t know if your ISP requires Internet configuration).
Open Shell - installing the start menu from Windows 7 in Windows 10 and instead of Classic Shell
How to disable security apps
Sometimes your antivirus or firewall may prevent you from connecting to the Internet. You can quickly find out if your security apps are the problem by temporarily disabling them and trying to connect to the Internet.
Disabling antivirus
To temporarily disable Windows Defender on your device, follow these steps:
- Open Start.
- Find Windows Security and click the top result to open the application.
- Click Virus & threat protection .
- Under Virus and other threat protection settings, select the Manage settings option.
- Turn off the real-time protection .
After you complete these steps, see if you can download Yandex.ru or Google.com on your computer.
You can always undo the changes by restarting your computer or turning on the real-time protection toggle in step #5 .
Disabling the firewall
To temporarily disable Windows Defender Firewall , follow these steps:
- Open Start .
- Find Windows Security and click the top result to open the application.
- Click Firewall and Network Security.
- Click on the network with the “active” label.
- Turn off the Windows Defender Firewall .
After completing these steps, confirm whether you can load sites such as Yandex.ru or Google.com.
If you want to enable the firewall again, you can use the same steps, but in step #5, make sure to turn on the Windows Defender Firewall .
These steps will disable Windows 10 security features, if you are using other security software, be sure to consult your manufacturer's support website for more details.
How to remove a recent update
Finally, in other cases, you may lose your network connection or experience other network issues if your device has a faulty update installed. If this is the case, you can uninstall the update to fix the problem until Microsoft releases a new update that will fix the problem for good.
To remove the problematic update in Windows 10, follow these steps:
- Open Settings .
- Click Update & Security .
- Click Windows Update .
- Click View update history.
- Click Uninstall updates.
- Select the most recent update that is causing network problems.
- Click the Remove button.
- Click Yes and Restart Now buttons.
After completing these steps, Windows 10 will roll back to the previous build if there were no problems with the Wi-Fi or Ethernet adapter.
After you uninstall an update, the system should not attempt to install that update until the next quality update becomes available through Windows Update.