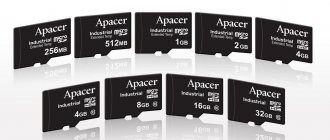
Most modern smartphones are produced with a large amount of internal memory, but there are still many models on the market whose phone memory does not exceed 16 GB, which is already not enough for 2019. Why, you ask? Photos take up the most space if there are a lot of them, but here you can also highlight the abundance of various applications or games installed on the device, so they resort to using SD cards, which can be purchased at any store from 2 to 256 GB (in some cases there are also large volumes, depending on the manufacturer).
However, here comes the problem! All products downloaded to Google Play are still installed in the phone's memory, and the SD card is not used for its intended purpose. This leads to two questions: how to install applications on Android directly onto an SD card and how to transfer them from the phone to a flash drive, if the installation by default goes to the phone’s memory? We answered these questions in as much detail as possible within the framework of this material.
Installing applications on the SD card
Attention! Not all phone models allow you to install programs and games directly onto a removable storage device. It all depends on the manufacturer and version of Android. By default, most smartphones download to the phone, so transfer to a removable drive is required. That's why we suggest you consider several transfer options first.
Migrating applications to Android 6.0
Once you have installed any product from Google Play, it will be saved in your phone's internal memory. Next, the application will need to be transferred. To do this, perform the following steps:
- Go to “Settings” of your gadget and select “Device”;
- Next, find the “Applications” tab and click on “All applications”;
- Here you need to find what you decided to transfer and click on the product name to go to its parameters;
- Next, click on the “Memory” item and in “Storage location” click “Change”, then select “Memory card”;
- In this way, you can transfer any number of applications to an SD card, however, there are programs that cannot be ported to removable media, and they can only be located in the phone’s internal memory. The same situation is with most pre-installed software.
Transferring Android Marshmallow 6.0 and higher applications
Starting with this version, it became possible to make an additional internal drive from a removable drive. That is, your flash drive can become additional memory for your phone, and the system will sum up the total volume of both media. This technology is called Adoptable Storage.
The main advantage of this technology is the automatic installation of all applications from Google Play and unknown sources on the SD card, which is very convenient. But keep in mind that you will not be able to remove the flash drive and insert it, for example, into a computer, since Windows simply will not detect it due to the formatting of the partitions. You will have to reformat the SD card to view files on it and transfer them from your PC. If you still decide to activate Adoptable Storage technology, you need to perform the following steps:
- Open the card slot on your phone and insert the SD drive;
- Wait until the Android system detects the flash drive and a new notification appears in the notification shade where you can make the settings;
- Click the “Customize” tab and select “Use as internal storage”;
- The system will automatically format all the data on the SD card, after which you will be prompted to transfer files to it, but you can click “Transfer later”.
Now, by default, all applications will be installed on a removable drive, but in the system it is displayed as the internal memory of your phone. If you remove the flash drive, then all the data along with it stored inside will be removed and inaccessible.
Attention! For correct operation, it is recommended to use MicroSD class 10, since this type of card has the highest data transfer speed and increased stability.
What you need to know before transferring applications to a memory card
The first is that memory cards are slower than the device's internal memory, so you may notice slightly worse performance for resource-intensive applications. When purchasing a card, choose the fastest card in terms of performance. Believe me, it is much better to take a card that is 2 times faster with, say, 64 gigabytes, than a card that is 2 times slower, but with 128 gigabytes. How much memory does your device have? Tell us about it in our Telegram chat.
Naturally, after installing the card in your smartphone, it will prompt you to format it into a suitable format. We wouldn’t focus on this if it weren’t for one “but”: the smartphone not only formats the card, but also encrypts it. So other devices (smartphones or PCs) simply won’t read it. Well, that's sorted out. Let's move on to how to move applications to a memory card on different versions of Android OS.
Transferring apps on Honor phones
Not all manufacturers allow you to transfer applications from your phone to an SD card in their devices, since games and programs can launch much slower from a flash drive. However, we have described transfer methods for you for Honor, where you have to come up with additional ways to bypass the blocking.
Standard application migration
First, check whether your device allows you to migrate applications to removable media through standard settings. To do this, follow these steps:
- Go to the “Settings” of your gadget and go to the “Applications” item;
- Click on the “All applications” tab and select the required product from the list;
- Click on it and in the menu that appears, click the “Memory” tab;
- Next, the “Move to SD card” tab should be active;
- If there is no such item, it means that this option is not available for you by default, but it can be activated by other methods.
Transferring applications to SD via developer mode
If you do not have the item discussed in the paragraph above, you need to enable developer mode on your device, which allows you to save all applications to removable media by default. To do this, follow these steps:
- Go to the “Settings” of your smartphone and click on the “About phone” item;
- Next, find the “Build Number” tab and click on it several times to turn on the additional mode;
- A notification “Developer mode has been activated” will appear at the bottom. This means that you did everything correctly and now you need to make some settings in another menu;
- Go back to “Settings” and scroll down until you find the “For Developers” item;
- Click on it and scroll down the list to the item “Saving applications to an external drive.” Activate it;
- Now you will have all applications installed on your external drive by default.
Please note that programs and games that were previously installed before activating this mode will remain in the same directory where they were, that is, in the internal memory of the phone. If you need to transfer them too, then in this case we recommend using the option below or installing one of the specialized programs, which are also described later in the article.
Selecting the default installation
You can choose the default location where all applications will be installed, including internal files of standard programs and games on your phone, photos and all other data. To do this, follow these steps:
- Go to “Settings” of your smartphone and select “Memory”;
- Here you click on the “Default save location” item and select a memory card there, after which you confirm your actions;
- Your phone will reboot, after which you can safely install applications on the SD card.
How to save photos and videos to a memory card on Samsung?
Most of the space on a smartphone is taken up by photos and videos, which quickly accumulate on the internal memory and slow down the operation of the device. The ideal option is to immediately dump the files onto your computer. But this is not always possible due to lack of time. This is why transferring data to SD card is one of the best solutions.
Before saving photos to a memory card in Samsung, you need to install an SD card in your phone. Next, the device should request information about changing the photo storage location. This happens when you turn on the camera for the first time. If the corresponding inscription does not appear, take the following steps:
- Go to Settings in the Camera section (gear view).
- Find the line Storage location (by default, photos and videos are stored on the phone).
- Click on this line.
- Select SD card.
- Make sure you make the right choice.
From now on, the Samsung smartphone will save photos on the card. Please note that the manual concerns the standard Camera program installed in the device. If you use an additional application, the setting may vary. The advantage of transferring to an SD card is that in case of failures on the smartphone, important data is saved and can be transferred to the PC at any time. But there is another risk that the data on the SD card will be lost due to damage to the flash drive itself.
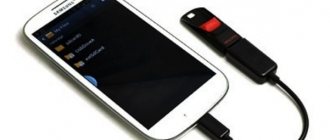
Using Android Debug Bridge on PC
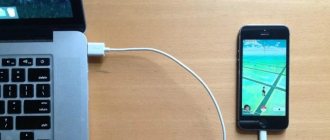
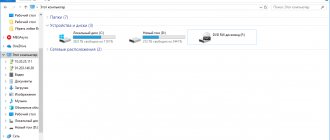
You can use a specialized utility to change the default location for installing applications, even if you do not have such an item in your phone settings. The program is called Android Debug Bridge and is only available for the computer, so you will need to connect your device to the PC and follow some steps:
- Download the program from this link and open the archive;
- Unpack the contents of the archive in the root directory, that is, where your operating system is located. Usually this is the local drive "C". That is, your path should look like this: C:\adb;
- In the settings of your phone, also without turning off “Developer Mode”, enable “USB Debugging”, and connect your smartphone using a cable to the computer;
- Wait for the system to automatically install all the necessary drivers and launch the command line as an administrator;
- Next, in command line mode, enter the command cd c:\adb to access the directory we need and press Enter;
- If everything was entered correctly, then you need to enter another command: abd devices and press Enter to confirm the operation;
- You should see information about the connected device marked successfully. This indicates that the system has recognized a new device;
- Next, enter the command adb shell pm set-install-location 2 and press Enter;
- If everything is entered correctly, the default location for installing applications will be the SD card. For those who don’t know, the value “0” is the internal memory of your phone. If something happens, you can always return the standard values using the same principle;
- Disconnect your device and check its functionality.
What applications can be transferred to a memory card?
Not all applications can be transferred to external memory. There are programs in the phone system that support this function, and there are those that completely ignore it and are not portable.
Most often, applications that are installed from official sources can be transferred directly from internal memory to external memory. Such applications include games, various additional realities, and so on.
Another action is when there is a need to transfer system applications, such as “Calendar” or “Calculator”. Often the transfer of applications of this kind ends very, very badly. The user will have to completely reflash the phone.
Therefore, it is worth keeping an eye on what applications are transferred to the external drive. You should not allow system utilities to be transferred to another drive, since their “roots” have already grown to the internal one.
Default SD card destination without programs
This method will not work on all devices, so we cannot fully guarantee its relevance for your phone. It is also not recommended for beginners to perform this operation, as it can cause harm to the entire system.
- For our work, we only need a file manager, and it is best to use Root Explorer or any other for this purpose that allows you to see all root directories and files;
- Open Root Explorer and go to the system section, then find the etc directory;
- In this directory, find the vold.fstab file and open it using the built-in editor;
- Scroll down the contents of the text until you find items with lines where sdcard0 and sdcard are mentioned. Swap them and save the changes. It is advisable to restart your phone after this.
Using system capabilities
Most users, when buying a smartphone, immediately purchase a microSD card. An external drive is suitable for storing audio, video, photos and some documents. Most modern smartphones support external storage, with the exception of some devices that do not have a memory card slot. Before purchasing an SD, you should find out in advance whether there will be any compatibility issues.
Another pitfall that the owner of an Android smartphone may stumble upon is the limitation on the size of the external storage. Budget phones often don't support cards larger than 128GB. You can find out what volume will be compatible with the gadget in consultation with a store employee. You can obtain information remotely by exploring online hardware stores.
If an SD card can still be used on a smartphone, and the owner has already selected the optimal capacity, you should first try the internal capabilities of the gadget. Android smartphones of older versions allow you to transfer applications to SD without additional software. Even in new versions of the operating system, one of the following methods may work:
- Setting the save path when downloading content from the Internet. Allows you to immediately install APK files on external media.
- Transferring programs to SD via the “Applications” tab. By going to the program description, you can transfer it from internal memory to removable memory.
- Moving software to the phone's file system using a computer. Download data using USB.
These are the basic ways to install applications on an external drive. If they do not work, you should proceed to the instructions below.
Actions for Android versions 5.0 inclusive
Smartphones with the Android operating system from 4.2 to 5.0 allow you to move applications to an external drive in just a few clicks. File management occurs through the “Applications” or “Manage Applications” settings section. Data transfer instructions:
- Go to “Settings”. Find the “Applications” item.
- In this item in the top menu, different categories of programs will be presented: “Preinstalled”, “Downloads”. You need to select the “Downloads” section. It contains programs downloaded from the Internet or an application store. These are the ones that can be moved to an external drive.
- Select any application from the “Downloads” list and click on it. The description will tell you where the program is stored - in internal memory or external memory. If the data is collected on the built-in storage of your smartphone, you can click “Transfer to SD card”.
- The transfer may take several minutes. After the process is completed, you can verify its success by checking the amount of free internal memory and occupied external memory.
Some programs, even on older versions of Android, cannot be transferred to an external drive. This is because using removable memory may disrupt applications. If the user tries to transfer important data that was not intended for this to the memory card, the system will warn him about this. It is impossible to make a mistake, so you can safely use the preinstalled functions.
Some files do not need to be transferred to the drive in such a lengthy manner. You only need to save photos and videos once to an external card. After this, all new files of the same category will automatically be added to it.
Combining external and internal
If you are using a smartphone with an Android version higher than 5.0, then additional difficulties will arise when using an SD card. Transferring the program to a removable disk, as in the example above, will no longer work. On the other hand, gadgets running updated versions of the OS now have the Adoptable Storage utility. It allows you to combine an external drive and a built-in one to create a single storage. For example, if you have a 64 GB memory card and a built-in 16 GB card, you can create a single 80 GB file system.
Convenient, but there is one caveat: the memory card cannot be removed. If you remove the SD after combining it with the internal storage and then insert it back, system crashes may occur. If you need to remove a removable drive and use it on another device, you will first need to prepare:
- Copy all important files from a removable drive to internal memory, cloud storage or PC file system.
- Format the card after removal.
- Transfer copied important data to a new card if the device does not have enough internal memory.
How to combine two types of drives? Step-by-step instruction:
- Insert the SD card into the gadget. If this is not a new storage, then first you need to format it. The drive must be completely empty.
- The phone will recognize the inserted card and offer to insert or remove it. You need to select an installation.
- During installation, an additional dialog box will appear in which you can configure the properties of the drive. It must indicate that the card will be used as internal storage.
- After the installation process is completed, restart the gadget.
If the card has already been installed previously, but the user has not specified it as an internal storage device, you can change the settings. This is done through the “Storage” section by clicking on SD.
After combining the drives, some files, as well as applications, will be saved to the external drive. If, in addition to automatically transferred documents, you need to move additional media files, you can perform the following procedure:
- Go back to the “Storage” section.
- In the section menu, go to the very bottom item - “Send data to memory card”.
- Select the documents that need to be transferred. Confirm the change of location. Wait for the process to complete.
Even when combining two types of memory, the user will not be able to transfer system files to the removable card. Pre-installed applications, of which there are quite a lot on Android, will continue to take up space in the internal memory and slow down the device. If the user needs to solve a problem with them, third-party programs will be needed.
Transferring apps to SD via mobile app
If you do not want to connect your smartphone to the computer and carry out any manipulations with the command line, you can simply download a specialized application to Android that allows you to transfer any games and programs to removable media in a few clicks. We will look at the example of AppMgr III:
- Download this utility to Google Play and provide all permissions for it to work correctly;
- Launch the program and select the applications in the list that will need to be transferred to the SD card. The operation can be carried out either with one product or with several at once;
- Once you have selected the necessary applications for transfer, confirm the operation and wait for the process to complete. This completes the procedure.
Using this utility, you can transfer both from an SD card to the internal memory of the phone, and in the opposite direction. There are many programs for these purposes on Google Play, so you can choose which one to use. Here are some examples: Link 2 SD, Titanium Backup. Please note that you may need root rights for these programs to work correctly.
There are many options for transferring and installing applications directly to an SD drive, but here you need to take into account the individual characteristics of each smartphone manufacturer, the specific model, version of the Android operating system and many other factors. We recommend that you check all the methods described in the article and continue to use what works. Perhaps soon your version of Android will be updated, and you will be able to immediately transfer applications to a removable drive without using any additional tools or actions.
Share link:
What you need for a successful transfer
To correctly transfer an application from internal memory to an SD card, you need to know some features. If you ignore the requirements written below, then there is a risk of turning your smartphone into a “brick”.
Android version 6+
The phone must have Android version higher than 6.0 installed. You can find out the operating system available on your smartphone through the settings:
- Go to the " About phone " or " About device " section.
- Scroll down to Android Version .
- To check its relevance, you can click on this line several times.
An animation corresponding to the operating system version will appear on the screen.
Android 6, 7, 8, 9 and higher are suitable for this method.
Activity Launcher app
Before starting the procedure, it is advisable to install the “Activity Launcher” application on your phone. You can find the software on Google Play, for this:
- Open Play Market.
- Search for " Activity Launcher ".
- Go to the page with the official utility.
- Click on the “ Install ” button and wait until the download completes.
The downloaded utility should appear on the desktop with the name “Application Activation” .
SD card class 10 or higher
For this method to work correctly, it is recommended to purchase a new memory card, and it must be class 10 or higher . Any version of an external drive will be suitable, be it 8, 16, 32 or 64 gigabytes. You can find out the class of an SD card on its packaging, which is often designated as “class 10”.
Archive aftiss
aftiss_b2.rar
You need to download the aftiss_b2.rar archive to your computer. It is with its help that the memory card will be converted into the internal storage of the device. You can download the archive on Windows XP, 7, 8, Vista and 10.
Method 2: Setting up memory
Let's return to system tools again. On Android, you can specify the SD card as the default installation location for applications. Again, this doesn't always work.
In any case, try the following:
- While in settings, open the “Memory” section.
- Click on "Preferred Installation Location" and select "SD Card".
- You can also designate storage for saving other files by designating the SD card as "Default Storage".
The location of elements on your device may differ from the examples given. Therefore, if you have any questions or are unable to complete all the steps described in this article, write about it in the comments below. We will definitely help solve the problem.
Method 1: Link2SD
This is one of the best options among similar programs. Link2SD allows you to do the same things you can do manually, but a little faster. In addition, you can forcefully move games and applications that are not moved in the standard way.
Instructions for working with Link2SD are as follows:
- The main window will display a list of all applications. Select the one you need.
- Scroll down the app information and tap "Move to SD Card."