Google Photos Storage Space and Cost
You have the opportunity to install the Google Photos app on Android and iOS devices completely free of charge. This software automatically sends your photos (if you have a connected Wi-Fi network) to Google and frees up memory on your smartphone/iPhone once downloaded.
Google gives you a large amount of storage space for photos and videos. Your photos will be reduced in size to 16 megapixels (for video, the limit is 1920 x 1080 pixels, 30 frames per second). If you plan to upload larger or RAW photos or 4K video files, you'll need to opt for the paid version.
For unlimited storage, use the file compression method:
- Click on the menu icon in the top left corner.
- Then select the "Settings" section.
- In this section, open the “Save and Sync” item.
- Next, set the size of the uploaded files.
- Now select the “High Quality” option.
When your storage capacity runs out, you can also apply retroactive compression to photos and videos. In this case, previously downloaded versions of the media files will be replaced with compressed versions, and copies of the originals in your Google Drive storage will be lost.
If you choose the High Quality option, you will have unlimited storage space for your photos.
Google Photos - how to use and all sorts of tricks
Google Photos
— service for storing photos and videos. Many smartphone owners use this service because, firstly, it is quite convenient, and secondly, where else can you find a free, unlimited cloud for storing your photos and videos? And with Google Photos it is unlimited, however, provided that you allow your media data to be compressed in a certain way.
In this article we will talk about how everything is arranged in Google Photos, how everything works there, and we will also discuss all sorts of useful tricks when working with this service.
By default, Google Photos is not present on all smartphones, and to start working with this service, you need to install the appropriate application - here it is for Android and iPhone.
When you start the program, you will be prompted to enable auto-download of your photos and videos.
If you turn it on, you will be asked the following question.
You need to select the first item “High quality”, because then the cloud for storing photos and videos will be unlimited. Otherwise, only 15 GB will be available to you for free, and this, frankly, is very little: for me, only a photo from a smartphone takes about a gigabyte per month, and a video, for example, of a couple of children’s parties will immediately take at least 7-8 GB.
What will happen to photos and videos if we select “High Quality”? Google will compress photos using its own algorithms. It must be said that in general the JPG format as such already involves a certain compression. And Google will noticeably tighten up these photos - in order to save money. It also reduces the resolution of the photo: theoretically, if this resolution exceeds 16 megapixels (the vast majority of modern smartphones take pictures with a resolution of less than 16 megapixels), but practice shows that Google Photos usually reduces almost all images to a resolution of 1500 -2000 pixels in width.
So what about compression? The file size is as follows. Typically, a photo on a mid-price smartphone takes about 4-8 megabytes (depending on the subject: the more details, the larger the file size). Google Photos compresses such files to a size of 300-600 kilobytes, that is, ten times.
Like ten times, you may ask, but this will have a catastrophic effect on the quality?!!
No, not catastrophically at all! The algorithms are very smart, and if we talk about photos purely for the Web and purely “to look at,” then you won’t notice the difference at all.
Here are examples.
Original.
This is a photo from the cloud. Do you see a big difference?
Let's compare the crops (bringing the photo to the same resolution). Original.
Photo from the cloud.
Well, yes, it’s clear that it’s compressed and that the detailing is a little worse, but this is not a catastrophic deterioration in quality.
It’s even more interesting to compare how high-resolution photos deteriorate: now there are cameras with matrices over a hundred megapixels.
Original 27 megapixels (this is a 108 megapixel matrix of the Xiaomi Mi 10 Pro smartphone in the mode of combining 4 adjacent pixels).
This is a photo in the cloud.
Original 108 megapixels.
This is a photo in the cloud.
Let's look at the crops. Original.
Photo from the cloud.
From this we conclude that for everyday use and for the Web, the quality of compressed and reduced photos that Google stores in a dimensionless (which is important!) cloud is quite sufficient.
What happens to video in the cloud? Everything is the same: compression and, if necessary, reduction of resolution - if the resolution is greater than FullHD (1920x1080), it will compress the video to FullHD. Compression is also a factor of ten: for example, if the original video was 100 megabytes, then in the cloud it will be about 10 megabytes in size. How much does the quality deteriorate? Yes, too, in general, purely visually - very slightly. For household use and for the Web it is quite suitable.
Well, for comparison. Original.
Video uploaded to the cloud.
And here is a very clear comparison of these two videos in one: on the left is the original 73 MB file, on the right is the 26 MB file uploaded to the cloud.
Now about the capabilities of Google Photos.
Photo
The “Photo” tab—photos and videos are shown there, grouped by shooting dates.
On the right there is a navigation icon, when you click on it, you will be shown the corresponding time period, where you can quickly find the year, month and day you are interested in.
When you click on any photo you will be taken to the following window. Icons on the top right - display the image on an external source (for example, on a TV), add to “Favorites”, file information.
File information.
Here you can: add a photo to an album, transfer it to the archive (the photo will be available in the archive, in search and in albums if you added it there, but it will not be shown in the main window), download, use as a contact photo or as wallpaper, start a photo slideshow (three seconds per photo), print.
We return to the previous window. Icons below: share the photo through the selected application, open editing, launch Google Lense (detecting objects in the photo, searching and displaying information on them), delete.
Editor window. There are many opportunities there.
The first icon is effects. The Auto mode usually gives good results for amateur photos - it slightly brightens the shadows.
It should be kept in mind that any editing can be canceled (until you click the final confirmation button), and if you click on the picture during the process, the option before editing will appear. But you should also keep in mind that when you give the command to save the edit, the original photo will be overwritten (there is an option to save a copy).
Next icon: adjusting brightness, color and details (this is sharpness, Sharp).
Note that "Light" and "Color" have chevrons that expand the submenu.
Light. (It scrolls, under “Dark Areas” there is also “Vignette”.)
Color. (Skin color is very useful in portraits, and blue level is very useful when editing photos with sky and sea.)
The third icon is crop and rotate.
The fourth pictogram is drawing, spraying and inscriptions.
Well, the last application is cropping (without rotation) or editing photos in another editor.
Search and selection
Now we return to the main window and go to the “Search” tab.
Here you can search for photos based on some criteria (objects, places, events, etc.), but the main thing is that the service itself can track and group photos of people (you, of course, sign their names yourself), photos taken in specific places , groups photos by objects (quite simple, but nonetheless).
Other categories of groups are also available here: screenshots, selfies, videos, panoramas, scanned photos and documents using the Photo Scanner application (by the way, it’s quite interesting, it can remove glare when photographing photos), photos with movement.
Well, there are tools here that allow you to manually create animations, collages and videos from captured photos (you yourself specify which photos from them).
Library
In the third section of Google Photos there is the “Photobooks” service (you can order a photobook printed from some of your albums, but this does not work for all countries: for example, it is not available for Russia), favorites, archive, basket and tools.
In the tools, you can add a partner to share all your Google Photos or starting from a specific date. There are also tools for creating animations, collages and videos, sending photos to an archive and importing a folder with photos on your phone.
Below is the photo section on the device, and even lower are all the created albums.
Settings
In any tab of the program in the upper right corner there is an icon for your Google account, there are Google Photos settings.
What's interesting about them?
Grouping of similar persons
- a very useful feature. However, you will be prompted to enable this option when you first go to the “People” section.
Memories
is an interesting feature that will allow Google Photos to group certain photos (for example, a trip or a holiday event) into animations, collages, photos with highlighting colors, and stylized photos. Sometimes this results in very interesting videos. As a rule, the most successful animations are made from a series of photographs. They look good in the application itself, but saving them as GIFs on your computer to use somewhere else will not work; the quality will be unsatisfactory. However, from a smartphone they are sent quite normally in instant messengers and are displayed quite normally.
Partner access
- you can set an email address and allow a certain person to see either all your photos, or only those photos that were taken after a certain date. At first glance, there is a serious lack of settings here, for example, giving access to a specific album. But you can give access to a specific album directly from the album itself, there is such an option.
Hide location information
- this is for photos that you share with someone.
How to upload an album to Google Photos from your computer
And really, how? After all, by default, only photos from the smartphone are saved.
There are several solutions.
The first option is to add it directly in the browser in the service window. Create a corresponding album, upload photos from a folder with subfolders there. But this is quite tedious and synchronization will not work.
The second way is through Google Drive. But at the same time, you lose the division into subfolders (albums) and the service itself will take over the organization of your photos. But this is extremely simple and synchronization will work, that is, photos added to the album will be automatically uploaded to the cloud.
How is this done with Google Drive? You need to install it on your computer (follow the link - for Windows, but there is an analogue for Mac) - Backup and sync from google.
When you first start the program, you will be asked to enter the appropriate Google account.
Next, you indicate which files you will synchronize with Google Disk, and there you need about. If necessary, you can add any folders (for example, if your photo album is not in “Images”).
Please note that when you enable photo uploads in Google Photos, you are prompted to select the size of the media you are uploading. And if you select “High Quality”, photos and videos will be uploaded to the dimensionless cloud.
But you should keep in mind that the structure of your folders will not be saved in Google Photos (photos and videos will be uploaded en masse, and Google Photos itself will sort and select them according to its own criteria), and all RAW will be uploaded as JPG.
And if you want the folders to turn into albums (why did you spend so much time sorting it all out) and for RAW to be uploaded to Google Photos as is?
There is such a way, and it’s very simple, convenient and free! However, I emphasize that it does not work with the dimensionless cloud, because it only saves the original photos and videos, and they will take up space in your Google Drive! Moreover, you may have “High quality” (dimensionless cloud) set in Google Photos, but the program will still import everything through Google Drive. So this is only for cases if you have a very small photo album (less than 15 GB), or you pay to expand Google Drive space.
This program is called Jiotty Photos Uploader, I know its developer. He wrote it for his own purposes, and then, when he found out that such a program was relevant to many people, he posted it on GitHub along with the source code. And there you can find versions for Windows, mac OS, and Linux.
The program works just fine: you indicate which folder you need to send to Google Photos, and that’s it, the program will upload everything, carefully create albums from your folders and associate the corresponding photos with the albums.
However, an important warning! Google Photos is designed in such a way that the entry fee is a ruble, and the exit cost is a hundred. That is, you can easily and easily pour anything in there, but you can’t just clean something out of there. And if there is still one life hack for destroying a large number of photos (I write about it below), then albums can only be deleted ONE PIECES, it won’t work en masse. Therefore, before you start transferring your photo album from your computer to Google Photos in this way, think about whether you want albums from folders to be created there (you simply won’t be able to delete the albums themselves if there are a lot of them).
Here, for example, is how many of them I have created, and I just tested the work of this program on literally three folders from my photo album. It is almost impossible to remove this by hand. (These albums are empty because I deleted the photos from there myself; the program does not turn empty folders into albums.)
How to quickly delete many files from Google Photos
This is a very interesting question. Google Photos does not provide the ability to clear the cloud of your media data at once: they say, once you’ve uploaded it, there’s nothing to spoil now, because Google likes to study and analyze it all. It’s generally impossible to delete everything from a phone, but even from a computer, the ability to somehow group files and delete them en masse only works for one day.
Here I have highlighted all the photos for today.
What if you have downloaded an album for a year? What if in ten years? You can kill yourself by deleting everything one day at a time!
But there is actually a way to tag and delete a large group of photos fairly quickly! Google Photos writes that after you have marked a group of photos, you can add some more photos to it by marking them with Shift pressed. And the life hack is that if you simply scroll down a sufficiently large number of photos (the main condition is that their thumbnails should load) and with Shift pressed, mark only one bottom photo, then all the photos that you scrolled through will become marked. Do you see how in the screenshot all the photos have acquired a blue tint (this is just when you hover over the last photo)? This is a sign that if I click on the last photo now, all the previous ones will be marked!
And this way you can delete several hundred files at a time. The only condition is that all the previews are loaded, otherwise it may not work.
Scaling previews
Not everyone knows that when you view your Google Photos in a browser on a PC, then when you scale the page of the service itself (Ctrl and “+” or Ctrl and “-“, or Ctrl + the middle mouse wheel), the previews will be scaled together with the page.
Little ones
Large
Hide individual photos
How can you prevent someone who has been given access to all your photos or a specific album from seeing a particular photo(s)? If you gave access to the album and this photo is there, then no way.
And if you have given access to all the photos and this photo is not in the album, then it can be transferred to the archive - then the person with access will not see this photo, but you can see it in the archive.
Add folders from your smartphone to the service
You can also add some third-party folders containing images from your smartphone to Google Photos.
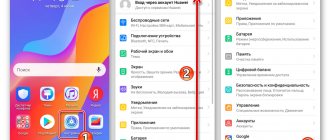
This is done in the account settings (icon on the top right) - Google Photos settings - Autoupload and synchronization - Folders on the device. All folders in which some images were found will be shown there.
Additional storage costs
If you decide to upload your files in their original size, the standard 15 GB will be used up fairly quickly. Google's cloud storage prices at the time of publication are as follows:
| Storage space | Price per month | Price per year |
| 15 GB | for free | for free |
| 100 GB | 1,99$ | 19,99$ |
| 200 GB | 2,99$ | 29,99$ |
| 2 TB | 9,99$ | 99,99$ |
| 10 TB | 99,99$ | – |
| 20 TB | 199,99$ | – |
| 30 TB | 299,99$ | – |
By the way, storing files on Google Drive will be cheaper if you pay for the whole year in advance. For current prices and special offers, visit one.google.com.
Recovering deleted files from Google Drive
Restoring a file deleted from Google Drive is only possible if it was placed in the Recycle Bin without subsequently emptying it.
- In the left panel, go to the Trash.
- Select one/several desired objects.
- At the top of the page, click on the “Restore” .
Restoring a file deleted from the Recycle Bin is a tedious task. You will have to contact the service support by phone or chat.
Upload photos manually or automatically and save them online
By default, Google Photos synchronizes photos taken with your smartphone camera. You can also select other folders to sync. There are two ways to do this:
- When Google Photos finds a new folder of images, you'll receive a notification. Then decide whether to back up the folder in the future.
- Open Google Photos and click on "Device Folder" in the side menu on the left. There you will see all the folders with photos. Click the gray cloud icon to the right of the folder name to make sure that the folder is also supported by Google Photos.
Answers to frequently asked questions from users
On the Internet you can find many questions from users regarding cleaning Google Drive. Let's answer some of them.
Does Google Disk delete files on its own?
No. Google does not review, edit, or delete files that users store in the cloud. Also, the service does not have a built-in function for automatically clearing the “cloud” of data.
How to delete Google Drive notifications on your smartphone
To change notification settings on your mobile device:
- Open the Google Drive application.
- In the upper left corner, click on the “Menu” , then select the “Settings” .
- Click on the item “Notification settings” .
In the menu that appears, you can change the settings for messages from the application: completely refuse them or customize their display.
How to delete photos from your phone
When you delete a photo in Google Photo, it is deleted everywhere, including from cloud storage. But if you want to delete only the photo on your device (not from the cloud), you will need to follow these steps:
Navigate to the internal folder to delete photos locally.
To begin, call up the left menu and click on “Device Folder”. Here you can see all the photos that are stored on your device. If you delete a photo here, it will only be deleted from the device, not from Google storage. This can be handy if your smartphone's memory is running low, but you don't want to lose your photos.
To quickly free up internal storage space, you can also delete all previously downloaded photos from your phone in one go. Just click on "Memory Cleaner". Photo previews remain visible on the Google Photos home page, and the main version is available online. This is because high resolution versions are downloaded when needed.
Part 5: Frequently Asked Questions about Deleting Photos from Android
Question 1: If I delete the Google Photos app, will I lose my photos?
Answer 1: No. Google Photos can store downloaded Android images in the cloud. So it doesn't matter if you uninstall the Google Photos app.
Question 2: How to delete Google Photos backup from Gallery?
Answer 2: Find your Google account sync settings on your Android device. Later, disable the Google Photos option to stop Google syncing. After that, you can tap "Gallery" and select "Clear Data" to delete photos from Android Auto Backup.
How to delete photos from the cloud
If you want to delete photos not only from your device, but from anywhere, you can do so from the main Photos menu. Photos deleted on this page then disappear from the cloud and from the device, but they are still saved on the device. The deleted photos are then sent to the trash. If you accidentally delete an image, you have 60 days to restore it from the Recycle Bin. After this, it will be permanently deleted from Google storage.
Did you accidentally delete a photo? Don't worry, you have up to 60 days to restore it.
Part 2. How to Delete Google Photos Account Permanently
Step 1
After deleting photos from your Google Photos account, you can go to the MENU option and select the Settings icon.
Step 2
Select the Maintain option to turn on Backup and Sync option to ensure that photos are permanently deleted from the cloud service.
Step 3
Click on the three bars icon at the top, click on the small down arrow next to your email to expand control options for deleting your account.
Step 4
Select Manage accounts on this device option. You can tap on the Remove from this device option for your iPhone, or the Remove account option for Android to delete your Google Photos account permanently.
Note:
To permanently delete your Google Photos account, you can sign out of Google Photos using the same method. After that, uninstall the Google Photos app from your device accordingly.
Regret deleting your Google Photos account? Just restore your Google account.
How to Hide Images in Google Photos
If you want to hide your private photos from other people looking over your shoulder, Google Photos makes it difficult. You can select individual photos and "archive" them through the menu, but they may then still appear in search results. And since Google Photo's image recognition accurately recognizes many details, this may be inconvenient for you. If you are wearing a hat in an archived nude image, and if you search for the word "hat", that image will show up without any shame.
The situation is similar with albums. In this state of affairs, the “Hidden from Albums” section may have some significance. However, the images it contains remain in place and are found both when searching for recognized objects and scenes, and by the album name in the search function.
To protect individual folders from syncing, you can temporarily assign a different recording path to your camera app, manually pause Google Photo sync, create an empty file called .nomedia in your designated folder on your phone.
Use or download Google Photos on PC or Mac
The Google Photo app is also available for download on PC and Mac. You can then save photos from your regular digital camera to a picture folder on your computer, and save, organize, and share photos in Google Photo according to the above criteria.
Google Photos for Windows or Mac automatically uploads photos from your digital camera to Google.
The app can be downloaded for free from Google and is set up as a background service during installation. It keeps track of the folders you set for changes and uploads the files to Google according to your preferences.
Define backup folders and file formats in the Google Photo app.
Just like in the smartphone app, you have the option to choose the upload quality. All videos and photos are transferred to the Photo web app and then accessible from any PC, tablet or smartphone (as long as you're signed in to your Google account). Other file formats go to Google Drive cloud storage, but they are only backed up in one direction. The Google Photos app for Windows and MacOS doesn't load photos that are already stored in the cloud.
Excludes file formats such as .ini or .db from the backup.
What is the Google Photos app and how does it work
The Google Photos app on Android (you can, if you want) is traditionally a gallery app for browsing photos, with advanced functionality that lets you back up your photos to the cloud, edit them, make copies, and so on. When you first launch the app, it will ask you if you want to back up your photos to the cloud. You can either enable backup or continue to use the app exclusively offline.
When the backup feature is enabled, all photos on your phone will be synced to your Google account for which you have enabled backup. Another interesting thing about synchronization is that Google Photos also allows you to automatically sync (pardon the tautology) your photos across all connected devices.
Tips for using Google Photos
How to quickly select and tag photos
To quickly select multiple photos at once, hold your finger on the first photo and then swipe to other photos. This will select all the photos between the first and last you touched.
Changing the appearance of a photo
Google Photos sorts your photos in chronological order (today, yesterday, Monday, December 2020, etc.). You can also change the view by stretching the preview screen with two fingers to enlarge the photos. If you change the view using your fingers, you can switch to the month or year view and see a larger period of time.
Change the appearance of a photo using two fingers.
Search for people, places, things and more
In cloud storage, an algorithm tags images stored in Google Photos with keywords. Whether you're looking for Berlin, a cat or a bike, you'll probably find what you're looking for. This process is so precise that it is even a little scary.
Google Photos will find everything.
Delete all Google Photos
- Open Google Photos
- Select the first photo
- or hover over the first date to select all photos from that date.
- Scroll down, but not too far and not too fast. While trying, I found that you can press "Page Down" about 4-5 times.
- Hover over the photo and hold down the Shift key.
- When the thumbs turn blue, you can select with the left mouse button.
- Repeat steps 2 and 3
- If your thumbs don't turn blue, go back to the last image you selected, select another image, and repeat steps 2-3.
Google Photos: Tips for Sharing Memories
Easy photo sharing (via WhatsApp)
Google Photos lets you share your photos with friends and family without much hassle (and it doesn't matter if other people also use the app). You send a link through which other users can view photos on the site. Just follow our advice:
Select the photos you want to share, then tap the Share icon (to the left of the Plus icon) at the top of the menu. In the new "Share" menu, you must click on the inscription "Get link". A sharing link is created and then copied to the clipboard.
Now you can share this link with your friends, for example via WhatsApp or email. This is better than direct downloading via WhatsApp as the images are not compressed again with loss of quality.
Google Photos: Shared photo albums
Google Photos allows different users to upload images to the same album. To use this feature, simply send a link to the corresponding photo album so that your contacts can access the folder. Each recipient of the link can then add more photos as a user of the album itself. All people associated with the album will receive a notification on their device when new photos are added. This way you can easily collect photos from birthdays, weddings or trips together.
To get to the albums you've been invited to later, click the Share icon in the bottom navigation bar on the Google Photos home page.
An important caveat: albums are not folders. This means that images can be placed in multiple albums without creating duplicates.
Google Photos allows multiple users to upload images to the same photo album.
Commenting on photos and albums
You can comment on shared photos and albums directly in the application. If you have a shared album open, you can share photos and albums with your friends, and they can comment directly within the app. There is a speech icon at the bottom of the application. If you click on it, a comment box will open and you can leave a comment immediately. Alternatively, you can also click on the little heart icon if you just like the image.
All users who have been approved for an image or album will receive a notification when there is a new comment or heart. With this comment or similar feature, photos and albums gain a more interactive and social component.
In Google Photos, you can comment on individual posts and full albums. Later a heart icon was added.
How to use?
First you need to download the application to your phone if it is not already installed by default. There is also a version for computer. Here is the link to the official website.
Detailed work on a PC is shown in the video instructions (see the end of the article).
In addition to the mobile version, you can also view the content in the browser by going to photos.google.com.
But we will concentrate on the utility for Android smartphones.
- We launch, enter your Google account information if you haven’t done so before, and immediately see the content (photos + videos) that was automatically synchronized with the storage when connected to the Internet:
- We can open a specific photo for editing - applying filters, cropping, writing, manually adjusting brightness, contrast, etc. is available. In the upper right corner there is a button for calling up a menu, inside which there are several useful options - activating viewing in slide show mode, printing, downloading to the phone memory:
- The “Albums” tab displays both automatically created libraries (grouping by shooting location, depicted objects) and user catalogs. Initially there are none, but you can create them:
- The “Assistant” section contains visual tools for creating videos, collages, and animation collections. Experiment, it's very interesting!
- “Shared” - actually create libraries with shared access, so that not only you, but also other users can see new content as it is updated:
- To go to the general settings menu, click on the button in the upper left corner. There are not many parameters. I’m sure you can figure it out on your own, because Google provides detailed tips for each option:
Google Photos: People Tags and Face Recognition
It should be noted that in the application in question, you will not have the ability to tag people. Apparently, the facial recognition feature has come under fire for being highly questionable from a privacy perspective. As a result, this feature is not available worldwide.
Personalized shortcuts should make it easier to find specific images.
View Google Photos on TV
Looking through photos of parties or other significant events is usually akin to torture. So what could be more natural than showing photos to your family on TV? Thanks to Chromecast support, it's very easy with Google Photos.
Before your photos appear on the big screen, you can choose which ones will be displayed on your smartphone or tablet. Videos and animated GIFs can also be displayed this way.
Google Photos is compatible with Chromecast, so you can cast images and videos directly to your TV.
How to free up space in your Google Account?
Google allocates 15 gigabytes to each of its users.
This space is divided between data in different services (Gmail, Google Drive, Google Photo), so managing it is not very convenient. If you don't know how to do it. How can you find out what is full of storage?
You can see how much space is allocated to you and how much data takes up in a particular service on the Google Drive website. If you received additional space through some promotion (for example, for purchasing a Chromebook or installing an application), this will also be shown - along with the expiration date of the “gift”.
How to clear space in Gmail?
If you notice that mail is taking up a significant part of the disk space allocated to you, do not rush to delete all the letters in a row. Go to the Gmail web interface and enter “size:10m” in the search bar - you will see letters with attachments of 10 megabytes or more. Instead of 10, you can write any number. Delete unnecessary emails - you will notice that there is more space.
In an email client like Mozilla Thunderbird, you can sort emails by attachment size, which is even more convenient.
How to clear space in Google Drive?
Google Drive is a cloud where you can store files of any type. Here's the trick - each file takes up exactly as much space as it "weighs", with the exception of Google Docs files, their volume in the cloud is not taken into account. This means you can convert PDF and Microsoft office documents into Google format files and save space. Conversion is carried out literally in a couple of clicks, the original files can then be deleted.
If you use Google Drive to edit documents, it makes sense to delete previous versions of files - they are stored in case you want to restore them. After 30 days they are deleted automatically.
You can also sort files in the cloud by size, see which ones take up the most space, and delete those you don't need.
How to clear space in Google Photos?
Google Photos allows you to store unlimited images with resolutions up to 16 megapixels and videos with resolutions up to FullHD. If you take higher resolution photos or videos, go through your collection and remove duplicates or bad shots.
If even after these manipulations you are sorely short of space in your Google account, try using other cloud storage services to store large files or purchasing additional space from Google.
Scanning old paper photos
Although digital cameras have been on the market for about 20 years, many photographs are still analog and only available on paper. If you want to digitize such memorabilia, you can try the photo scanning feature. Behind this is an additional application that specializes in taking old photos. A photo scanner doesn't just take a photo, it captures an old photo several times and from different angles. The application can deal with 5 photos. Reflections from photos are almost invisible, so photos are digitized without much distortion. Once you save the photo, it will be automatically uploaded to Google Photos.