Taking a screenshot in Windows has always been easy. Let's just remember the new “Scissors” assistant, which appeared in “Seven” and Vista. Essentially, starting with Vista, there are two ways to take screenshots without third-party software: using a keyboard shortcut or the Snipping Tool.
As the operating system developed, so did the methods for obtaining images. Now in the top ten there are many options to get the perfect screenshot without much effort. In our article, we will describe all the methods for taking screenshots in Windows 10, and also briefly talk about how to take screenshots of the Windows boot screen.
Conventional Methods
In the "ten" the good old methods still work: pressing the PrtScr key and Alt + PrtScr . You can use the first anywhere, for example, when taking a picture of your desktop. When using this option, a photo of the entire screen will be taken and saved in the PC memory.
Pressing Alt + PrtScr takes a screenshot of only the active window. After this, a picture created using one of these methods can be easily inserted using the Ctrl + V .
I note that on a laptop, to get the same result, you will need another combination - Alt + Fn + PrtScr .
Print Screen key in Windows 10 to take a screenshot
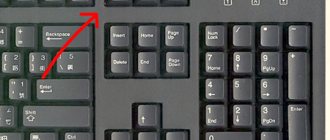
Probably the easiest way is to take a photo using the Print Screen key. There is definitely such a key on the keyboard of your laptop or PC (somewhere closer to the upper right corner). Most likely it will be signed as PrtScn.
Please note that if third-party screenshot programs are installed on your computer, they can “intercept” the Print Screen key. And then this method will not work until you close these programs
Windows 10 has several shortcuts for the Print Screen key. Showing:
- If you simply press the Print Screen key, a snapshot of the entire screen will be created. In this case, you will not notice anything. The fragment will be placed on the clipboard. From there you can paste the screenshot into some kind of graphic editor, or for example into Microsoft Word.
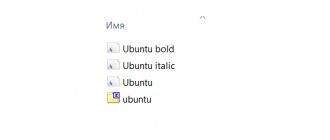
To do this, use the key combination Ctrl + V. Or right-click and “Paste”. - The Win + Print Screen key combination automatically saves a screenshot (you'll see the screen go blank for a second). Where is a screenshot saved in Windows 10? In the “Images” folder – “Screenshots”.
Then you can send it, edit it in some editor, move it, etc.
- And if you press the key combination Alt + Print Screen, a snapshot of not the entire screen will be created, but only the active window. The fragment will be placed on the clipboard, as in the first case.
This is a function key that many people don’t know about.
Win+PrtScr
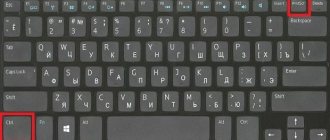
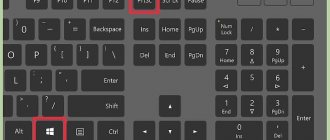
Also, a screenshot of the screen in the “top ten” is obtained by the combination Win + PrtScr .
With this option, the entire screen is captured and instantly sent to the “Images” directory in the “Screenshots” section. The file is saved with the png extension. If you press just one PrtScr , it will send a copy of the screen to the PC memory, but will not transfer the snapshot to a file. Again, on a laptop you will need a slightly different variation of the keys: Win + Ctrl + PrtScr or Win + Fn + PrtScr .
Built-in Scissors program
The built-in Scissors utility in the new OS version has received an additional function: delay in creating a screenshot. The user has the ability to select a time interval within 0-5 seconds. Using the application, you can take a screenshot of any shape or a single area. If necessary, notes are made on the screen. The Marker and Pen tools are designed for this.
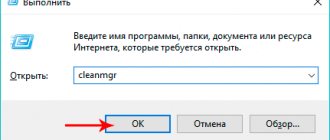
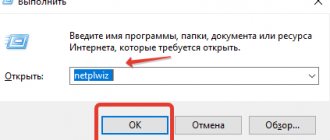
- Run window > enter Snipping Tool.
- Specify in the utility the parameters that will be used to create the screenshot.
- New menu > highlight the zone you want to save.
- Save the photo you took in the format you need (png, jpeg, gif).
In the video you can see the process of creating an image in detail.
Screenshot of Windows boot screen:
If you've ever tried to do anything on your PC screen before booting into Windows, you've learned that it's nearly impossible. The only way is to film everything on your phone or video camera. Keyboard shortcuts do not work during loading, so taking a screenshot is useless.
But how then do some people get great images without using cameras? It's simple. Pictures are taken using a virtual machine . It boots into the host operating system and therefore sees the entire boot process. The most popular VMs are VirtualBox, Hyper-V and VMWare. Personally, I recommend using VirtualBox because it is free and open source. Hyper-V is also free but a little more difficult to use, and VMWare arguably has better tools but costs a pretty penny.
Third party programs
If standard methods are not enough for you, you can try these tools with additional functions.
Nimbus Capture
Nimbus Capture is a browser plugin that makes it very convenient to take screenshots of web pages. In addition to the usual snapshots of the entire screen, window, or selection, it also allows you to capture the full length of a page, even if it doesn't fit on the screen.
And in Nimbus Capture you can edit images and save them directly to Google Drive. Plus, the plugin can record screen video.
To take a screenshot, just click on the Nimbus Capture button on the browser panel and select an area of the screen. You can also configure hotkeys and image format: PNG or JPG.
All listed features are available for free. But, if you want to attach your logo to screenshots, save them in Dropbox and receive prompt technical support, you will have to subscribe for $15 per year.
Download QR Code
Nimbus Screen Capture
Developer: NimbusWeb
Price: Free
Download QR Code
Nimbus Screen Capture: Screenshot, Edit, Annotate by Nimbus Web
Developer: Developer
Price: Free
PicPick
An image editor very similar to Paint, with a screenshot feature. PicPick can take pictures of the entire screen, any selected area and selected window - including scrolling. As for the editor, in addition to basic functions like adding text and notes, it allows you to adjust the colors of images and apply various effects.
You can configure hotkeys and save the file in one of the following formats: PNG, JPG, BMP, PDF and GIF. After installation, the program icon appears on the taskbar. To take a screenshot, you need to click on it and select an area of the screen.
The program can be used for free, but in this case new versions will have to be downloaded from the site manually. For the ability to auto-update, the developers ask for a one-time payment of $30.
LightShot
LightShot is a simple tool that allows you to take screenshots of a selected area in a couple of clicks. You just need to click on the program icon and select the required fragment with the mouse. You can then add text, arrows, or draw something over the image.
LightShot makes it easy to share screenshots. After taking a screenshot, you can immediately save it on the program server to receive a direct link to send to colleagues or friends. There are two formats at your service: PNG and JPG.
The application is free, but it prompts you to download additional software before installation. Don't forget to refuse it.
This material was first published in January 2020. In March 2020, we updated the text.
Where to look for screenshots created by other programs
There are many utilities whose purpose is to make creating screenshots convenient. Each has its own features, but at first it is not always clear where in Windows 10 the screenshots created with their help are. Most popular programs:
- Joxi;
- LightShot;
- PicPick;
- ScreenShooter;
- FastStone Capture.
Note! Many allow you not only to capture the screen itself, but also to add captions, filters, crop and rotate the image, and instantly share it on social networks.
Joxi
To take a screenshot, you need to launch the program and select the desired area on the desktop. You can also set “Full screen capture” through the settings. A menu will immediately appear with the ability to edit the image and send it to friends via social networks.
Screen fragment selected in Joxi and ready for processing
Joxi stores screenshots in its cloud, but it is possible to download duplicates to your computer. To do this, go to the settings and in the “Advanced” section, put a tick next to the appropriate item. The folder where Joxi saves the print screen in Windows 10 can be selected manually by clicking on the “Change” link.
LightShot
In this program, every time the user takes a screenshot, he chooses where to save it. After launching the utility, click “PrtSc” and select the part of the screen that needs to be captured. A menu will appear in the selected area where you can view the picture and select a storage location, including the clipboard.
Important! In the latter case, you will need to “implement” the screenshot using Paint.
PicPick
The program allows you to take pictures in several modes:
- window element;
- the window is completely;
- whole screen;
- arbitrary area;
- with scrolling (to fix, for example, the entire site page);
- snapshot using the previous parameters.
When the screenshot is taken, the program will open an editing window, and here you can select the saving path. The principle is the same as in standard editors - through the “File” section.
PicPick home screen
ScreenShooter
Here you can pre-set the place where it will be easiest to find pictures. To do this, you need to launch it and find the blue circle icon in the tray. If you right-click on it, a menu will appear. You need to select “Save to” and then specify the drive and folder.
Note! When you select the "Hard Drive" option, the program will create a folder called ScreenShooter on drive C in the "Images" section.
FastStone Capture
It also allows you not only to capture the screen, but also to edit the picture and record video. Can capture the desktop, the active window, a separate fragment or a custom zone. There is a delay function with timing, like Scissors.
The finished photos and videos are saved in a specified folder, which you can select after editing is complete; you don’t have to search for them. You can put the screenshots on the clipboard and immediately send them by mail or on social networks.
In general, where screenshots are stored on Windows 10 depends on what programs the computer owner uses (or does not use). Most standard and third-party utilities have similar functionality, the same principles for saving images and paths for them. As a rule, this is your hard drive or clipboard, where you should look for ready-made screenshots.
Screenshot via key combination Win+Shift+S
This is a new method, and if your Windows 10 is not updated, then most likely it will not work for you. This opportunity appeared after installing update version 1703 (it was released around April 2020).
How this method works: Just press the key combination Win + Shift + S
Select the area you want to screenshot.
The created photo will be placed on the clipboard. From there you can paste it into different editors (for example, Paint or Word) using the Ctrl + V key combination.