Google Play
The fastest way to restore an application deleted from a gadget that uses the Android operating system is to re-download it from the Google Play service.
This can be done even if the user does not remember the exact name. It does not matter how much time has passed since the deletion.
The main disadvantage of the method is that account settings or information about completing levels, if we are talking about the game, will not be saved. The exception is those who independently create backup copies in the smartphone’s memory. For example, WhatsApp messenger has this function.
You can return the application using the following step-by-step instructions:
- Open Google Play.
- Press the button that calls up the menu. It is located in the upper left corner of the screen and is an icon with 3 parallel lines.
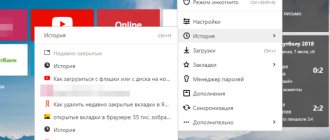
- Click on the very first section “My applications and games”.
- Go to the “Library” tab. If you are using a version of the OS that is not the latest, the required tab may have a different name, for example “All”.
- At this step, the user will be offered a list of programs that were previously downloaded from the Google account used on the device. The default sorting is by date added, from newest downloads to older ones. The user needs to study the list and find those applications and games that need to be returned.
- Click on the “Install” button located next to the selected name. After this, the download will begin.
If you cannot find what you need to restore in the list provided, this may be due to 3 reasons:
- the software you were looking for was downloaded using another account;
- the user has previously erased the download information (this can be done by clicking the “X” icon located to the right of the “Install” button);
- the program was removed from the Play Market by the developer.
In the first 2 cases, you can return the application if you can find it through the search bar. For the last case, there are 3 solutions:
- Search for the apk file on specialized forums. This will not allow you to restore your account data or game history.
- Use a backup created using utilities previously installed on your phone.
- Download the program for data recovery. Numerous recommendations for such software can be easily found through Yandex. Examples include DigData and Disk Digger.
How to remove unnecessary Windows 10 applications - 5 ways
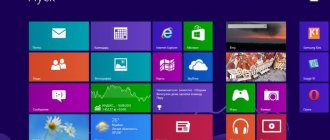
Now I will talk about how to remove built-in Windows 10 applications from the operating system. Uninstalling a Windows application is not at all easy because it is pre-installed on your computer and is part of the system.
Most users do not pay attention to most of the built-in applications in the operating system. There is a certain program on the PC and okay, maybe someday it will be needed.
But there is one caveat: the operation of standard pre-installed applications affects the performance of Windows. The firmware communicates with Microsoft servers and interacts with various OS and PC hardware components.
Android BackUp Service
Android BackUp Service is a built-in Android feature. It is used to store data about the Wi-Fi networks used, gadget settings and other Google account parameters. It also copies information about third-party applications installed on the phone.
By default this service is disabled. You can activate it in 5 steps:
- From the main menu of the gadget, open settings.
- Go to the “Cloud and Accounts” section.
- Open the “Archive” tab.
- Set the “Data backup” indicator to the “on” position.
- Add a Google account to which you should upload information.
- Activate "Auto-recovery". It is thanks to this setting that the user account parameters will be saved.
Some programs may not work correctly with Android BackUp Service. Additionally, this feature only copies account information. It will not allow you to download the application again if the developer has deleted it from the Play Market. Therefore, installing specialized utilities is considered a more reliable protection against data loss.
Program recovery
Program recovery checks all files in the program folder, replaces any corruptions, and can even check/correct registry entries. It will start installing the program again, but will try to save any settings you've made.
Using the Control Panel
Click Start, type “control panel” into the search box, and click on the result.
In the Control Panel window, click Programs.
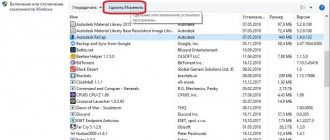
Then click Programs and Features.
You should now see a list of all programs installed on your computer. Scroll through the list and select the program you want to restore. If this feature is available for this program (not all support it), you will see a Restore button at the top of the list. Click this button.
One caveat to using this feature is that you need to have the Windows installation package installed on your computer to begin restoring the program. If you have already uninstalled it, you will need to go to the website and download the installer again.
After clicking Restore, Windows should handle the remaining settings on its own and calmly restore the selected program. Follow the dialog boxes until they are completed.
Using the Settings app
You can restore the program using the Settings app. This option contains a complete list of applications, including Windows applications and traditional desktop programs.
To get started, open the Settings app by pressing Win + I, then tap Apps.
By default, the Apps & Features section will open, but if it doesn't, select it from the list on the left.
Next, in the list below, click on the application you want to restore, then click Change.
Plus, you can use the search bar to find a program much faster than scrolling through the list.
Depending on the application, an installation wizard will open, make sure the repair option is available to you, then click Next.
Follow the instructions, and when they are finished, the program will be reinstalled and restored.
Dumpster
Dumpster is a shopping cart for Android. All accidentally and purposefully erased files will end up in it and not disappear from the gadget. You can restore them in 3 steps:
- Open Dumpster.
- On the main screen, find the desired object and highlight it. When searching, you can rely on the name, size and date of deletion.
- Click the “Restore” button located on the left side of the bottom menu bar.
Using this utility, you can only return information that was deleted after its installation. Dumpster is available for free download on Google Play. In the settings you can choose which types of files should be saved. This can be not only applications, but also photos, videos, etc. The exception is SMS messages and contact data.
You can also set the frequency of archive cleaning. This will save space in the device memory, but will limit the time during which recovery will be available.
Installing this app ahead of time is an easier way to get your information back. Using most gadget memory scanning utilities, such as Disk Digger, requires root access.
How to recover deleted windows files?
Users of different versions of Windows often encounter a situation where important and necessary data is deleted. There may be several reasons for this. Firstly, problems with files (saving errors, malware attack, software / system errors), secondly, human error is possible (unintentional deletion, formatting the place where important data is saved, emptying the trash can, deleting a partition), in - thirdly, hardware failure (damage to a partition or the entire disk, incorrect operation of the processor or disk), and, finally, there are unforeseen circumstances (such as a power outage, thunderstorm, etc.). We all know how important it is to periodically save important data, but what if we are not ready? There are several ways to recover lost files - with or without the use of specialized programs. Now we will look at how you can recover deleted files in Windows.
Remove unwanted apps with Remove Windows 10 Bloat
User matthewjberger posted code on GitHub for a batch file with a “.bat” extension that removes pre-installed Windows 10 apps, as well as OneDrive, OneNote, WindowsPhone, 3D Builder and other system components.
Follow these steps:
- Follow the link to the page: https://gist.github.com/matthewjberger/2f4295887d6cb5738fa34e597f457b7f.
- Click on the "Download ZIP" button.
- Unzip the archive on your computer.
- The folder contains the file “Remove-Windows10-Bloat” with the extension “bat”.
- Right-click on the “Remove-Windows10-Bloat.bat” file and select “Run as administrator” from the context menu.
- The Command Prompt window will begin uninstalling Windows applications and components. Wait until the operation completes.
- In the command line interpreter window you will see the message: “To continue, press any key...”.
- Press any keyboard key, Explorer will restart, and then the Command Prompt will close.
- Restart your computer.
How to Remove Unneeded Apps on Windows 10 Debloater
Windows 10 Debloater, created by Sycnex, runs a PowerShell script that removes standard Windows 10 apps. The script comes in three flavors: silent version, interactive version, and GUI version.
We use the simplest GUI option:
- Follow the link to the GitHub site page: https://github.com/Sycnex/Windows10Debloater.
- Click on the green “Clone or download” button.
- Select "Download ZIP".
- Unpack the archive, enter the “Windows10Debloater-master” folder. The folder contains three files for different options for executing the script: “Windows10Debloater.ps1” is an interactive version, “Windows10DebloaterGUI.ps1” is a version with a graphical interface, “Windows10SysPrepDebloater.ps1” is a silent version without message output. Select the GUI method: "Windows10DebloaterGUI".
- Right-click on the “Windows10DebloaterGUI” file and click on “Run with PowerShell” in the context menu.
- In the Windows PowerShell window, press the Y key to change the script execution policy and run the script.
- A “Windows10Debloater” window will open on top of Windows PowerShell with options for running scripts. The settings are divided into three sections: “Debloat Options”, “Revert Registry Changes”, “Optional Changes/Fixes”, which contain buttons for performing the necessary actions.
In the Debloat Options section there are buttons:
- Customize Blacklist - customize the blacklist.
- Remove All Bloatware - removes all redundant applications.
- Remove Bloatware with Customize Blacklist - removes pre-installed applications with a customized blacklist.
In the “Revert Debloat” section there is a button:
- Revert Registry Changes - Reverts registry changes to default values.
In the “Optional Changes/Fixes” section there are buttons:
- Disable Cortana - disable Cortana.
- Enable Cortana - enable Cortana.
- Stop Edge PDF Takeover - Disable the use of the Edge browser to open PDF files by default.
- Enable Edge PDF Takeover - Enables opening PDF files by default in the Edge browser.
- Uninstall OneDrive - remove
- Disable Telemetry/Task - disable telemetry and tasks in the Task Scheduler.
- Unpin Tiles from Start Menu - unpin tiles from the Start menu.
- Remove Bloatware Regkeys - remove application registry keys.
- Enable Dark Mode—enable dark mode.
- Disable Dark Mode - disable dark mode.
- Install .NET v3.5 - installation of Microsoft .NET Framework v3.5.
If you need to customize what should be removed from Windows, click on the "Customize Blacklist" button to select the applications to remove.
In the “Customize Whitelist and Blacklist” window that opens, check or uncheck the box next to the specific application that you want to remove or leave on your computer. After making your selection, click on the “Save custom Whitelist and Blacklist to custom-list.ps1” button.
- Depending on your desire, click on one of two buttons in the “Debloat Options” section: “Remove All Bloatware” - to remove all pre-installed applications or “Remove Bloatware with Customize Blacklist” - to remove built-in applications from the blacklist.
- The “Windows PowerShell” window will begin uninstalling applications, wait until the operation completes. “Finished all tasks” will appear in the window.
- If you wish, you can select additional options, for example, remove OneDrive or disable telemetry.
- Click on the “Remove Bloatware Regkeys” button to remove registry keys from the removed software.
- Once you have completed removing the registry keys, close the Windows 10 Debloater window, and then restart your computer.
Uninstalling Windows 10 apps in CCleaner
The free CCleaner program has a built-in function for removing programs from your computer. In addition to regular programs, CCleaner can remove built-in Windows 10 applications.
In the CCleaner program window, do the following:
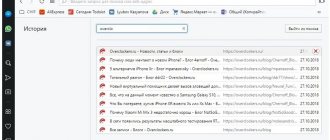
- Open the "Tools" section and then the "Uninstall Programs" tab.
- Right-click on the application and select "Uninstall". Another way: select the program, and then click on the “Uninstall” button.