Hard disk (HDD) is one of the basic elements of any computer. It is he who is responsible for storing all information - from the operating system to individual user files. In recent years, classic hard drives have been replaced by more reliable but also more expensive solid-state drives (SSDs), but they come in the same form factor and serve the same functions. Therefore, all the information presented here applies to both types of data warehouses. We will tell you how to remove them from your computer and what rules you need to follow.
How to remove a hard drive from a computer
About sizes, location and interfaces
To remove a hard drive, you need to know what it looks like, where it is located, what and how it is connected. Experienced computer scientists can skip this section, for others - a small theoretical basis.
The specific operation of a hard drive requires its protection from excessive vibrations, as well as the impossibility of free movement of the part in the computer system unit. Therefore, the HDD is usually installed in a special pocket equipped with two guides, and fixed in it with bolts or clamps.
Note! Although SDD is less demanding in terms of mechanical stability, it is usually located there. The pocket on most system units is located in the lower front part.
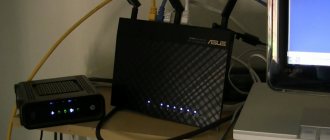
Hard drive mounting location
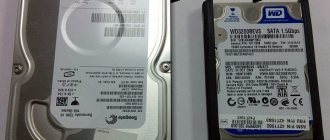
Externally, the hard drive is a rectangle with a standard width of 2.5 or 3.5 inches (70 or 102 mm), corresponding to the width of the mounts. Other form factors are also less common. The standard sizes have official names: Small Form Factor (SFF) and Large Form Factor (LFF). Thickness can vary between 7-15 mm.
The thickness of hard drives varies
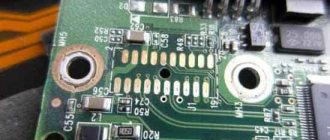
The hard drive has an all-metal or semi-closed metal casing, while solid-state drives come in aluminum or plastic casings. Data exchange interfaces are installed on the rear end panel. They come in two types:
- IDE (ATA) - widely used from the 1990s to the 2000s, easily recognizable due to its wide 40-wire cable with a rectangular plug;
- SATA is a modern high-speed interface, much thinner than its predecessor and has only seven pins hidden under the plug hood.
As you can see in the figure, the shape of the four-pin power plug for hard drives with IDE and SATA interfaces is also different.
Distinctive features of the plugs
Data buses connect hard drives or solid-state drives to the computer's motherboard. Well, the electricity necessary for the operation of the components comes directly from the power supply via a standard four-wire branch.
How to remove a hard drive from a computer
The need to remove the hard drive from your computer may arise for several reasons. Firstly, it may fail or there is simply a desire to replace it with a newer one. In the second case, the user removes it to make an external hard drive. Be that as it may, you need to remove it carefully and competently so that you can use the device in the future.
Let's imagine a situation where we need to remove the hard drive from one computer and move it to another in order to copy the information we need. In this case, the removed hard drive will no longer serve as a place to install the system, but simply as a storage medium for information, such as movies, music, text documents, etc. If you do everything quickly, then the operation of transferring information from one hard drive to another will turn into a simple formality, as if you had transferred it to a regular flash drive. And so, we learn how to do it.
Important! You must remove the hard drive carefully so as not to knock it anywhere, otherwise you risk losing important information and damaging the equipment.
First, you need to make sure that the computer is turned off from the network. Therefore, shut down the operating system and turn off the power to the system unit.
Then you need to unscrew the four screws on the back wall. On some system units, instead of screws, you need to open latches.
Then we remove the side panels of the computer case: on the right and left sides. Lightly press the panel with one palm and move it to the side with the other, holding it by the notch, in the direction of the horizontal arrow in the figure.
Now in front of you are the internal parts of the computer. The hard drive is usually located at the front of the case.
Next, disconnect two cables from the hard drive: one supplies power, the other transmits data.
Typically, the hard drive is attached to the case with screws. There can be two or four of them: two, as shown in the figure, and two on the opposite side of the body. In any case, the screws must be unscrewed.
Next, carefully remove the hard drive by pulling it towards the back of the computer.
This completes the work, and now you know how to remove a hard drive from a computer. Then simply install the new hard drive and replace the side panels of the system unit so that it does not get dusty. If your HDD starts making strange noises during operation, read what they might mean.
And also watch a video on the topic:
Rate this article:
( 4 ratings, average: 4.00 out of 5)
About the author: Oleg Kaminsky
Webmaster. Higher education with a degree in Information Security. Creator of the portal comp-profi.com. Author of most articles and computer literacy lessons
- Related Posts
- How to connect a second hard drive to your computer
- How to find out at what frequency the RAM operates
- How to install a driver on a video card
Your comment Cancel reply
What should I do if my external hard drive cannot be removed using any of the above methods?
Well, if no programs were launched manually, but the device is still being used for something, what should you do? It is difficult to find the reason without special utilities.
One of the best ways to disable an external drive that is used by unknown programs and cannot be stopped using standard Windows tools is to use special programs for removing flash drives and disks like USB Safely Remove. The Unlocker program also helps to identify and disable processes that are occupied by an external storage device, after which the disk or flash drive can be safely removed.
It happens that it is not possible to safely remove a USB HDD using any of the above methods, which was noticed in Windows 7, and when using completely different external drives. If the disks were connected to the computer in the current session, they are usually removed without problems. However, as soon as you reboot the system with the connected disks, it will no longer be possible to remove them, since they will be occupied by the system processes System.exe and svchost.exe, which are “unkillable” even with the help of Unlocker.
Unlocker shows that the device is occupied by explorer.exe and svchost.exe processes
And this is even if you disable indexing on all disks! In order not to rack your brains, you can simply remove the disk after shutting down the computer.
If the hard drive in a laptop begins to fail, then this is a signal to repair it or replace it with a new, possibly more powerful hard drive. You can take your laptop to professionals who will complete the task in a few minutes. Or you can remove the hard drive yourself, thereby only increasing your technical knowledge and self-esteem.
Before you begin, turn off your computer and remove the battery. To disassemble the laptop and remove the hard drive, you can use a set of small screwdrivers. The arrangement of the bolts connecting the lower case to the upper case is different for each laptop model. Study it carefully and only then unscrew the bolts. Removing the cover must be done carefully, making sure that there are no fasteners. In some laptop models, for example, Sony, the case should be pryed off with a fingernail or a flat-head screwdriver and slowly lifted up. In others, for example, Asus, the cover is removed by sliding it parallel to the laptop to the rear. The location of the hard drive is also different for each model. In this case, access to the hard drive may be blocked by other functional components of the laptop, for example, a USB port. If there are devices that make it difficult to remove the hard drive, carefully unscrew the fasteners and remove or move them to the side. Having direct access to the hard drive, carefully inspect it. In earlier versions of laptops, the hard drive itself was secured with bolts. To remove the hard drive from the slots, you need to pull the special tape located on the drive mount. It is forbidden to pull the hard drive sideways or upwards, as there is a risk of damage to the contacts. You need to pull parallel to the laptop to the side. If you are confused about which way to remove the hard drive, take the disk tape in your hand and gently pull it; if directed correctly, the tape will fit comfortably in your palm without lifting.
When replacing a hard drive with a more advanced one, remember that a laptop can be equipped with a hard drive with a maximum memory of 20-30 GB and a speed of 4200. More powerful hard drives threaten the failure of other outdated but working parts.
This article is intended for beginners, those who need to remove a hard drive from a computer for the first time. It's quite simple. However, there are some nuances that inexperienced people may forget about or not know at all.
First you need to make sure that the computer is turned off from the network. You also need to be aware of electrostatic charge, which can damage your computer equipment. Therefore, ideally, you should use gloves. Once the safety precautions are in place, you can begin work on removing the hard drive.
How to properly remove an external hard drive?
We all know that you can’t just take and disconnect an external hard drive or flash drive from the cord or USB port of the computer system unit without clicking this icon in the tray:
In the list that opens, we select the drive we need and left-click on it:
Voila! A message appears indicating that the device can be safely removed from the computer.
There is another simple way to safely remove a device - through the “Computer” folder: right-click on the device that you want to disconnect from the computer, left-click “Remove”. If the device is “busy”, the OS will ask whether all current operations need to be interrupted.
But things don’t always go as smoothly as we would like. Often, when you try to safely remove a device in Windows, a message pops up stating that it is in use by other programs and cannot be removed. Processes blocking the device cannot be forcibly terminated using this system function! All that remains is to determine which programs are occupied by the device and close them.
You can urgently disconnect an external drive from your computer using the task manager, which is called up by simultaneously pressing the Ctrl+Alt+Del keys. Go to the processes tab, find your device there and right-click on it and click “End process”.
The intricacies of working with MacBook Pro
Replacing the HDD with an SSD in the MacBook Pro has recently become widespread among users. This is not surprising, because replacing an HDD with an SSD in a laptop is driven by the desire for faster and more comfortable operation of your pet, and Apple fans are no exception.
For esports players, installing an SSD in a laptop is mandatory.
After the upgrade you will receive:
- productivity increase;
- noise reduction;
- weight loss;
- increase in operating time;
- The device will heat up less.
To replace the SSD on a MacBook there can be various reasons, breakdown or lack of space, and it is not at all necessary to contact service centers. Anyone who can use a screwdriver can replace the hard drive on a MacBook Pro. Below you can watch a very detailed video on replacing an SSD drive on a MacBook Pro.
We prepare the PH0 and T6 screwdrivers and get to work:
- Turn the device over and unscrew the screws.
- Carefully lift the lid and remove it.
- The hard drive is held in place by a 2-part fastener; unscrew the one closest to the HDD.
- Since it is necessary to remove the hard drive from the laptop carefully without damaging it, manufacturers have provided the device with a special tongue. By pulling the tab, we lift the hard drive and remove the second part of the mount.
- Replacing the hard drive on a laptop requires caution. Carefully disconnect the cable connecting the hard drive to the board.
- We unscrew the hexagons located on the sides and screw them into the new SSD.
- We install the new media and assemble everything in the reverse order, replacing the hard drive in the laptop is completed. The old hard HDD can be used as an additional external drive.
Before installing the SSD in your laptop, turn off the power and remove the battery.
Don't forget to copy the necessary files from the old hard drive. If the new SSD is empty, you will need to install the system again.
The nuances of connecting incompatible hard drives
Sometimes you need to connect your computer's hard drive to your laptop or vice versa. Due to differences in product form factors or interface types, a number of problems may arise, which, however, can be solved very simply. Follow these tips and you will succeed:
- to connect a hard drive with an IDE interface to a SATA motherboard, use a special adapter; it also allows for the reverse sequence of connecting the part;
Removing a hard drive, replacing it, or installing an additional drive is difficult only at first glance. Follow the instructions outlined here exactly, be careful and careful, and you will definitely succeed!
Video - How to remove a hard drive from a computer
Did you like the article? Save so you don't lose!
Removing the hard drive
The first step in how to remove a hard drive from a computer is to completely de-energize the system unit. To do this, simply shut down and disconnect the system unit from the network.
After this, you need to unscrew the four bolts on the rear panel of the case. Sometimes these may be hinged fasteners instead of bolts.
Next, you need to open the covers of the system unit, which are located on the sides. Each one must be carefully pressed down and directed towards the rear panel. For these purposes, there are special recesses on the covers.
When there are no side covers, you can see all parts of the system unit, and the required hard drive is located at the front.
The next step on how to remove a hard drive from a computer is to disconnect the two cables. One of them supplies power to the hard drive, and the other is responsible for data transfer.
Once the cables are disconnected, you can begin to remove the screws. They are usually twisted in two pieces, on the sides. After this, you can safely remove the drive from the system by pulling it towards the rear panel.
Check the disk
If you hear clicks, crunching and other extraneous sounds while the drive is operating, it is better to immediately seek the help of specialists. Do not disassemble the disk under any circumstances! It will be almost impossible to recover data on your own.
If nothing like this is observed, check the disk in all three ways.
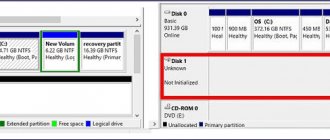
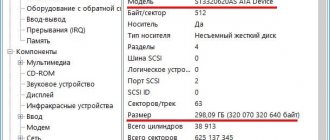
Make sure the device is recognized in the BIOS
YouTube channel “Alexey Vinogradov”
Turn on your computer and immediately after starting, press the Delete or F2 key several times. In some cases, other keys are used, which ones are always written on the screen. After opening the menu, go to Boot → Hard Disk Drives. If the disk appears in the list, then there is a chance of recovery.
Connect the drive to another computer
This is necessary to exclude malfunctions of the motherboard. Simply connect the external hard drive with a USB cable to another computer or laptop and check its functionality.
First remove the internal drive from the system unit by first turning off the computer or removing the laptop battery. To do this, remove the cover, disconnect the power and SATA cables, then unscrew the fastening screws and carefully remove the disk. In the same way, connect it to another computer and check if the disk is available on the system. You can also use a special pocket to turn the internal drive into an external one and connect it with a USB cable.
Disconnecting and removing drives on a PC
Dismantling a hard drive can be carried out for various reasons: to diagnose a part, clean the system unit, replace a faulty or outdated drive with a new one.
Important to remember! After removing the HDD or SDD from the computer, all the data stored on it will be inaccessible, and if an operating system is installed on this drive, the PC will not turn on at all until the disk is returned to its place.
The work is performed in the following sequence:
- Turn off the computer and unplug the power cord from the power supply. Let the system unit stand for 10-15 minutes. This time will be enough for the mechanical elements of the HDD to stop rotating, the parts heated during operation to cool down, and the capacitors to release their residual charge.
This completes the removal of the hard drive. Installation is performed in reverse order.
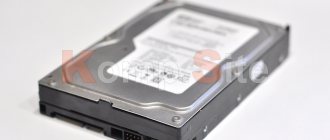
Types of hard drives
At the moment, two types of internal storage are popular - HDD and SSD. The first consists of mechanical parts, can be easily damaged and is inexpensive.
The second representative of data storage is solid-state and consists of microcircuits, which enhances its shockproof functions. Its data transfer speed is much higher than that of its mechanical counterpart, but the cost is also higher. Modern system case cases provide “slides” for connecting an SSD to the port of a regular hard drive.