- FastStone Image Viewer
- Caesium
- FILEMinimizer Pictures
- Light Image Resizer
- ImageCompression.SB
- RIOT
- Image Tuner
To save computer memory, share photos with friends and upload them to cloud storage, you can reduce the size of photos and other images. To compress files without losing image quality, you need to use special graphic editors.
FastStone Image Viewer
FastStone Image Viewer is a program for viewing, editing and converting photographs and graphics. Using the utility, you can resize the image, remove unnecessary fragments and watermarks, and reduce the size without serious loss of quality. The application works with all popular file formats: jpeg, png, bmp, gif, pcx, etc.
The program is fully compatible with the operating system Windows XP and newer (32 and 64 bit). A completely Russian version of the software is available for installation. The FastStone Image Viewer distribution model is free.
After launching the utility, you need to go to open photos for editing. To do this, you need to go to the section on your computer where the images are located. This can be done using the application’s built-in explorer, which is located on the left side of the main window interface.
All files located in the selected folder will be displayed in the window on the right. To compress a photo with minimal loss of quality, you need to select the desired file from the list and right-click. In the menu that opens, go to the “Tools” - “Batch conversion” section.
The image editing tool will launch. The right window contains the selected files for conversion. If necessary, users can add additional files from the left window to process multiple files at once. Before you begin compression, you must select an output format from the list. Next, select a folder to save the photo on your computer.
You can also change the file name. The next step is to set the parameters for the output file. To do this, you need to select the “Settings” tool. In the window that opens, you need to select quality, set photometry, color subsampling, and anti-aliasing. Once all settings are complete, click “OK”.
After this, you can begin the process of compressing the selected photo.
Advantages of FastStone Image Viewer:
- free program distribution model;
- a large set of image editing tools;
- the finished file can be sent by email;
- simple and convenient interface with Russian language support.
Flaws:
- there are no tools to create new images.
Programs for compressing images/pictures for the site
Images are the resources that take up a lot of space on a page and weigh the most. By optimizing your images, you can significantly improve the page loading speed of your website.
Image compression is the application of data compression algorithms to images stored digitally. As a result of compression, the image size is reduced, which reduces the time it takes to transfer the image over the network and saves storage space.
Image compression is divided into lossy compression and lossless compression. Lossless compression is often preferred for artificially generated images, such as graphs, program icons, or for special cases, for example, if the images are intended for subsequent processing by image recognition algorithms.
Lossy compression algorithms usually generate artifacts that are clearly visible to the human eye as the compression ratio increases.
Caesium is a free program for compressing images without losing quality
Caesium - Image Optimization
Caesium is a simple open source tool that is designed to compress PNG, JPG and BMP. This is a fairly easy-to-use program. It supports the Russian language, and it is also possible to use the program in the Portable version, that is, do not install it on your computer, but open it directly from the folder.
To compress images, click the File - Add button, select images, select the folder where the processed images will be loaded - Output, select the compression option: “Quality” and click the “Compress” button, and in a second you will get the finished result. Official website address - https://caesium.sourceforge.net/
Free FILEminimizer Pictures program for compressing images
FILEminimizer Pictures - Free Picture Compression Software
FILEminimizer Pictures takes a more radical approach to image compression than most of its competitors. By default, when it tries to compress your photos, it may change the image format and size, re-encode JPEG files with lower quality, and strip out metadata. Most of these options can be set in the program settings.
In use, the program adheres to the generally accepted principle. Once you've given it the source file, chosen a folder for the output, and maybe configured an option or two, it only takes one click to start optimizing. This all happens fairly quickly, so you don't have to wait too long.
How good is the compression? Everything varies depending on the format, at least in the tests that were produced. PNG compression was nothing special - 26.8% (some tools do better without losing quality), GIF compression was above average - 16.5%, but our JPG web graphics were reduced in size by 39.3% - the highest compression in the study group. But in all tests the loss of quality was visually slightly noticeable. The official website where you can download the program for free is https://www.balesio.com/fileminimizerpictures/eng/index.php Let's move on.
Free FileOptimizer - a program for compressing images without losing quality
FileOptimizer is a program for compressing JPG, GIF and PNG images.
The capabilities of the FileOptimizer program are quite large. Not only can it compress JPG, GIF and PNG images, but it can also work with executable files, archives, Microsoft Office documents, PDF files - the list goes on and on.
Surprisingly, it is absolutely not difficult to use. In fact, the program has one of the simplest interfaces: drag images into FileOptimizer, right-click, select Optimize, and enjoy the results. However, this simplicity also has a downside - the original files are replaced by the program. The originals are sent to the trash, so you will have to restore them, of course, if you need them.
But compression is, of course, of paramount importance, and here FileOptimizer provides good results. For example, the program reduced the PNG test graphics by 42.2% - this is the best compression without loss of quality in this group. JPEG and GIF compression were 17.7% and 15.9% higher than standard, respectively, but there are still plenty of useful options in this program that you can use with FileOptimizer to compress other files on your site. Of - site for downloading the program for free - https://nikkhokkho.sourceforge.net/static.php?page=FileOptimizer
PNGGauntlet is a program for compressing images without losing quality
PNGGauntlet is a program designed for image compression.
PNGGauntlet is a rather interesting tool, essentially a wrapper for three other open source programs (PNGOUT, OptiPNG, DeflOpt) designed for image compression.
In the process of work, it acts in the same way as its competitors. Drag and drop your source images, select the output folder, click the “Optimize!” button! and wait. It is possible that you will have to wait and wait. Presumably this long wait is due to the fact that it combines the work of three processing tools. PNGGauntlet can be very slow, in our case it took 50 minutes 44 seconds to compress 25 high-resolution PNG photos.
However, the results obtained are impressive. When processing test PNG web graphics, the program reduced our 50 images by an average of 41.3% and even reduced photos by 7.75% without any visible loss of quality. Sometimes this is enough to justify performance problems. So if you're looking for a quality PNG compression tool, then PNGGauntlet really needs to be on your list. The website address is https://pnggauntlet.com/ So, let’s move on. For those who do not want to work with the provided programs, there are excellent services online for the same purposes.
ImageOptim for Mac
ImageOptim speeds up image loading. Removes bloated metadata. Save disk space and bandwidth by compressing images without losing quality.
Free ImageOptim for Mac
ImageOptim is a Mac tool that optimizes GIF, JPEG and PNG images, and also acts as an interface to a variety of other applications: PNGOUT, AdvPNG, Pngcrush, extended OptiPNG, JpegOptim, jpegrescan, jpegtran and Gifsicle.
The program performs almost lossless compression: rather, it removes comments, color profiles, etc., without recoding or reducing the number of colors. ImageOptim's interface is also very user-friendly. Drag and drop a single file, group, or folder of the files you want, and the program immediately begins compressing each image and displaying the results. It's not the fastest tool, but even if you send a thousand high-resolution JPEG files for processing, it's unlikely to be a problem.
The end results were impressive, but not exciting. Our GIF web graphics decreased in size by 16.2%, PNG by 17.8%, and JPG files by 18.3%. You can do better with individual tools. But if you want a simple Mac tool that can handle GIF, JPEG, and PNG files, then ImageOptim is a reasonable choice.
Download from the official website - https://imageoptim.com/mac
See other programs for effective image optimization at the end of the post. In a pivot table.
Caesium
Caesium is a small utility for optimizing graphic images. The program allows you to reduce the size of a photo by 90% and remove metadata. The original file after compression retains its original quality.
The application is fully compatible with the operating system Windows XP and newer (32/64 bit) and translated into Russian. The distribution model of the Caesium graphic editor is free.
After launching the utility, the main window will open. At the initial stage of working with the software, you need to open a photo from your computer for editing. To do this, use the “Add Images” function, which is located on the toolbar. Users can add one or more pictures at the same time.
The uploaded file will appear in the list. The program provides information about the file: size, resolution, full path to the image. To start compressing a photo, you need to use the tools that are located at the bottom of the interface of the main Caesium utility window.
Here users need to set the quality (the main parameter for compression) and select the format. It is also possible to change the dimensions of the photo: width and height. To complete the settings, you need to select a folder to output the resulting image to your computer.
To start the compression process, you must use the “Run Compression” function on the top toolbar. The result will be saved on your computer in the previously specified folder.
Benefits of the Caesium program:
- simple interface in Russian;
- compression of images without loss of quality;
- free distribution model.
Flaws:
- There is no possibility of applying additional effects for photos.
Measuring Image Resolution
The quality of the photograph is also influenced by the resolution in which the shooting is carried out. As an example, let's take a photo taken at a resolution of 3264 by 2448 pixels (8MP camera) and 7952 by 5304 pixels (42MP camera). Each pixel takes up a certain amount of memory, and as their number increases, the weight of the image increases significantly.
This parameter should be assessed correctly. A photo taken with an 8MP camera may have better quality than one taken with a 40MP camera. What does resolution affect?
Each display or canvas paper has specific dimensions. If the photo resolution is less than the display resolution, the image begins to stretch, resulting in loss of sharpness and quality. The same thing happens when printing photos.
Reducing the resolution to save memory is allowed only in view of the further use of photographs. If they will only be used for viewing on a mobile device, you can reduce the indicator using a graphic editor and thereby save on free space. If a 2K or 4K resolution display is used for viewing, then such actions will lead to deterioration of the displayed image.
The process of changing the extension in many graphic editors is similar. Here's an example of working in Photoshop:
- The file opens.
- Opens in the top menu: “Image”, “Image size”.
- After this, a window will open with fields for entering the width and height values. The main thing is to pay attention to the fact that the lock icon on the right side is lit - a function of maintaining proportions. Otherwise, the image may differ significantly from the original, since the sides will not change proportionally.
As a result, the desired result is achieved after saving the file.
FILEMinimizer Pictures
FILEMinimizer Pictures is a small utility that is used for working with graphic images. Using the program, you can reduce the size of a photo without losing quality. The application allows you to work with both one file and several images at the same time.
The utility is fully compatible with the Windows XP operating system and the latest (32/64 bit). The interface language is English, the Russian version is not supported. The FILEMinimizer Pictures distribution model is free.
After starting the program, you need to add a file for optimization. To do this, use the “Open Files” function on the toolbar.
After the file is added in the application, you need to select a folder to save the original file. Next, users need to select the compression level in the “Compression Settings” line. There are three compression levels available here:
- Web/E-mail. Allows you to compress photos for sending by email or uploading to websites and forums.
- Standard. According to the developers, this is the best option for compressing images without loss of quality. Suitable for solving any problem.
- Low/Print. Used to compress photos that will be printed on a printer.
Users can also set custom compression settings. To do this, check the box next to “Custom Settings” and open the settings section. Here you need to select the resolution for the photo and check the box that is responsible for maintaining the original quality. Next you should set the compression as a percentage.
Once you have completed setting all compression parameters, you must select the “Optimize Files” function on the top toolbar.
Advantages:
- simple and convenient interface;
- free distribution model;
- the ability to select ready-made templates for compressing photos.
Flaws:
- there is no official support for the Russian language;
Testing
In this article, we have collected 18 of the best photo compression tools online and locally. Most of the programs presented are designed for Windows and can reduce the size of images with virtually no loss of quality. In addition, we have not forgotten about programs for Mac, as well as web services, so everyone can find a suitable option.
We tried compressing the same set of GIF, PNG, and JPG images using each of the tools described below, and the images were already optimized for the web, but we were still able to reduce their size. The results turned out to be quite interesting! Let's see what we managed to find out.
Light Image Resizer
Light Image Resizer is an application that is used to optimize images: compress files without losing quality, apply effects, add watermarks. The utility supports all popular photo formats.
The program is compatible with the operating system Windows XP and newer (32/64 bit). A completely Russian version of the software is available for download. The distribution model of the Light Image Resizer application is shareware. To get the full version, you need to buy a license. The full version costs $20. A free Trial version is available with limitations: users can process no more than 100 images.
At the initial stage of working with the utility, you need to download graphic files. To do this, you need to use the “Files” tool and select photos located on your computer.
After uploading the photo, you must click “Forward”. A settings window will open. Here users can do the following:
- Change image resolution.
- Select mode: crop, stretch, fit, center.
- Set the folder to save the file.
- Apply effects and filters.
- Flip the image.
In the Compression line you need to specify the compression quality in percentage. Alternatively, users can specify their desired file size. In this case, the Light Image Resizer program will automatically select the desired quality for the photo in accordance with the set size. To start the process, click “Run”.
Advantages:
- convenient interface with Russian language support;
- the ability to apply effects for photography;
- The ability to batch image processing is supported;
- users can specify the exact file size to be compressed.
Flaws:
- There is no possibility to create slideshows.
Changing the Canvas Size
Another common method for reducing the weight of photos without compromising quality is to crop borders that are not needed. In this case, it is not the image that is resized, but the canvas. This method is useful if there is something unnecessary around the central object of the scene.
In the program under consideration, the trimming process is performed in two ways:
- The menu opens: “Image”, “Canvas Size”. In the window that opens, you can specify the required length and width, as well as how the photo will be cropped: evenly from the edges or only from one edge or a certain angle.
- The second method is more practical to use. To do this, select “Frame” in the toolbar, after which by moving the edges you can separate the part of the photo that you want to leave.
There are other methods for reducing the weight of images. It is worth considering that most methods involve a reduction in quality, since this indicator is directly related to the weight of the file. There are also programs that compress images, but their use may lead to an error when opening on certain devices.
ImageCompression.SB
ImageCompression.SB - utilities for fast batch compression of graphic images. Using the utility, you can reduce the file size without losing quality. The final result can be sent by email. The application supports all major image formats: png, bmp, jpeg, gif, tiff, etc.
The utility is fully compatible with the operating system Windows XP and newer (32 and 64 bit). To work comfortably with the program, Windows XP or newer is required. Russian version is available for download. The ImageCompression.SB distribution model is free.
After launching the utility, you need to open the photo for editing. To do this, users should click “Select” in the line for selecting a folder with an image.
Once the folder with the files is selected, you can begin the editing process. Working with photos is done in the “Compression Settings” section. Here users need to set the following parameters:
- Maximum height/width.
- The name of the folder in which the source files will be placed.
- Check the box for image formats that will be processed by the ImageCompression.SB utility.
- Set the quality using the slider: best compression or best quality.
Once all settings are completed, users can save the created profile. This allows you to apply these settings in the future. To do this, click the button “Compression settings profiles” - “Save current settings as a profile” - “New”.
Once you have completed setting the desired compression parameters and saving the profile, you need to start the workflow. To do this, select “Start processing” in the main window of the ImageCompression.SB application
Advantages:
- simple and convenient interface with Russian language support;
- the ability to batch process files;
- free distribution model;
- ability to save compression settings in a separate profile.
Flaws:
- There are no tools for applying various effects to photos.
Photo compression programs
All modern, more or less advanced graphic editors, as well as batch (batch) image processing programs, provide the user with the ability to save photos with pre-quality settings.
Let's look at how this is done in two free applications - Paint.net and FastStone Photo Resizer. More detailed instructions and other photo compression programs are available here.
Paint.net
The Paint.net editor is a free analogue of earlier versions of Photoshop. Like its “progenitor,” Paint.net has the function of saving images not only in various formats, but also with customizable quality. Everything is very simple here:
We open any photo in the editor (for example, we took a photo of a mountain landscape, the original size of which was 1.15 MB, resolution - 2560 by 1600 pixels).
From the “File” menu, launch the “Save As...” function (or “CTRL + SHIFT + S”), give any name to the saved file.
The Save Options window will open, allowing you to preview the image. Please note that with the “Default” saving settings, the size of the saved image exceeds that of the original photo (in our case - 1.8 MB) - apparently this is some kind of feature of the Paint.net editor (not important).
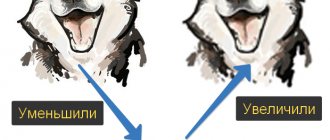
But as soon as you move the “Quality” slider to the left, the physical size of the photo begins to decrease. For example, let's lower the quality of the original image to 70 points. Comparing the image in the preview window with the original, you will not notice much visual difference, but the physical size of the image will be reduced to 730 KB.
Here's a comparison of the "Before" and "After" photos of the transformation, zoomed in a bit.
Thus, with the help of Paint.net, you can compress a photo in a few seconds, leaving its original resolution intact (however, if necessary, you can reduce the dimensions of the image in the editor, achieving even greater compression).
FastStone Photo Resizer
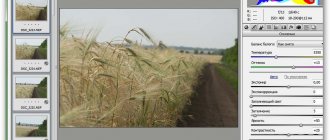
Using Paint.net is convenient when processing a small number of photos. If there are hundreds or thousands of them, and each one needs to be compressed for a website or something else, FastStone Photo Resizer, a free program for batch image processing, will come to the rescue. It has many functions, incl. and the compression function we need. Let's consider working with the application on the same photograph of a mountain landscape:
In the left part of the window, open the folder containing the images to be compressed. We select the files that need to be processed (in our case, this is only 1 picture), and click the “Add” button in the middle.
Under the list of files on the right, you can select the format of the saved image (if you need to convert it) and set the parameters for saving it (the “Settings” button).
For example, in the “Output Format Settings” window, set the following values: Quality - 70 points, uncheck the “Use JPEG quality from the original file if possible” item, otherwise the conversion may not work, leave the Photometric settings as they are, In the Color Subsampling settings, set it to “Medium”. Click “OK”, then “Convert”.
In the conversion completion window, you can see that the image size has decreased from 1180 KB (i.e. 1.15 MB) to 728 KB. We will not provide a screenshot of the “Before” and “After” photos of the transformation, because... the “After” result, both in terms of physical size and quality, is almost completely similar to that when processing a picture in the Paint.net editor.
Thus, if the task is to compress a large number of images, we use FastStone Photo Resizer. By the way, it is capable of not only compressing images, but also changing their overall dimensions, applying text and watermarks, changing color depth, rotating, mirroring, etc. — the main thing is that the program can do all this in relation to a large number of photographs.
RIOT
RIOT (Radical Image Optimization Tool) is a handy application for optimizing images. The program works with files in png, gif and jpg formats. It is possible to adjust brightness, contrast and gamma. Batch photo processing function is supported.
The application is fully compatible with the Windows XP operating system and is more up-to-date (32 and 64 bit). The interface language is English, the Russian version is not supported. You can download and install the utility absolutely free.
After launching the RIOT application, you need to open the graphic image for editing. To do this, use the “Open” function, which is located on the toolbar.
The uploaded image will be displayed in the “Initial image” window. The “Optimized image” window displays the final result of photo optimization. To configure the file, use the toolbar, which is located at the bottom of the interface of the main RIOT program window. In the process of editing PNG photos, you need to make basic settings: select an external tool for optimization, an algorithm for setting quality, color, compression type (low, medium, high or maximum).
When working with JPEG files, other settings are made: setting the quality as a percentage, encoding format, etc.
Once all the settings are complete, you can see the size of the final file in the “Optimized image” line. Next you need to save the resulting file. To do this, use the “Save” function, which is located on the top toolbar.
Advantages:
- simple and convenient interface;
- free distribution model;
- ability to view compression results in real time.
Flaws:
- Supports only 3 image formats: jpeg, png, gif.
Image compression: JPEG and JPEG2000
The good old JPEG, despite a lot of undeniable advantages, still has significant limitations. A new method of image compression, the development of which had been underway for a long time, was called upon to remove them. Now that JPEG2000 has become an officially recognized format, this should serve as the beginning of its active support by various software manufacturers.
Surely many who work with graphics on a computer are interested in the question: how can an image that occupies a very impressive amount of space in the PC memory be squeezed into a much smaller size on the disk?
I remember that at the dawn of my publishing career, the word “compression” was so mysterious and surprising for me... In fact, how does image compression occur - after all, without it it is now unthinkable to imagine either the Web, or digital photography, or color printing? So, compression. It may or may not lead to a loss of quality. The latter case is such methods as RLE (Run Length Encoding, encoding the length of runs, which results in the formation of pairs like (skip, value, where skip is the number of consecutive zeros, and value is the value following them) and LZW (compression Lempel-Ziff-Welch method), implemented in PSD, GIF and TIFF formats. They are widely used by archivers such as RAR and ZIP. The average degree of lossless compression is 2-3 times.
If you need to compress an image more, you cannot do without losing quality. What are the principles? Firstly, any image contains a certain redundancy, the removal of which will not lead to a noticeable change in the quality of the image. Secondly, the human eye is more sensitive to changes in brightness than color. Therefore, different degrees of compression are applied to different image channels - information is lost, but this is not visually noticeable. In addition, the eye's sensitivity to small image elements is low, which makes it possible to remove them without compromising quality. This way you can compress the image (even if the deterioration in quality is already noticeable) up to an acceptable threshold. The degree of quality degradation is determined for each specific case. For printing, only minimal distortions are allowed, but for posting on the Internet (depending on the purpose) - much more.
The most popular among lossy compression methods is JPEG, which, even with thirtyfold compression, retains sufficient image quality. By the way, most modern data compression methods (for example, Layer-4, known as mp3, as well as MPEG) implement mechanisms similar to JPEG. Let's take a closer look at this format, especially since not so long ago its newest implementation, JPEG2000, was finally approved, which included all the additions made to JPEG/MPEG over ten years of its development.
JPEG
The name of the compression algorithm is an abbreviation for the Joint Photographic Expert Group, an initiative group formed from experts from the ITU (International Telecommunication Union) and ISO (International Organization for Standardization). That is why its name contains the prefix Joint. In 1992, JPEG was declared the international standard for graphics.
When compressing using the JPEG method, quality is always lost. In this case, there is always a choice: to give preference to quality at the expense of volume (the file size will be compressed by approximately three times) or, on the contrary, to achieve a minimum image size at which it will still remain recognizable (the degree of compression can reach 100). Compression, in which the difference in quality between the resulting image and the original is still unnoticeable, results in a 10-20 times reduction in file size.
Application area
JPEG is the best compressor for photographic-quality full-color and monochrome images. If you want to save an image with an index palette, it is first converted to full color. When compressing using the JPEG method, you need to keep in mind that everything depends on the nature of the images: much less volume will be occupied by those where the color changes are insignificant and there are no sharp color transitions. JPEG is used wherever photographic images need to be stored: in digital cameras, printing (EPS DCS 2.0), and the Internet is unthinkable without it.
There are several types of JPEG compression, but we will consider only two of them, used in the standard package for working with raster images in Adobe Photoshop - baseline and progressive. The other two methods - ariphmetic and loseless - are exotic, and for a number of reasons have not become widespread.
How does compression occur?
1. The first stage is to convert the color model of the image (usually RGB) into a model where the brightness and color components are separated (for example, YCbCr or YUV), which allows you to optimally approach the choice of compression levels for each channel (taking into account the characteristics of eye perception). The conversion occurs as follows:
Y = 0.299xR+0.587*G+0.114xB Cb = (BY)/0.866/2+128 Cr = (RY)/0.701/2+128
2. At the next stage, the so-called prefiltering, in which neighboring pixels separately in each of the Cb and Cr channels are grouped in pairs in the horizontal and vertical directions, and the brightness channel Y is left unchanged. After this, the entire group of four pixels receives the average value of the corresponding Cb and Cr components. For brevity, such a scheme can be designated as 4:1:1 (the same form of representation is adopted in DRAW - the jpeg export window). Taking into account the fact that each pixel is encoded with 3 bytes (256 levels for each of the three channels), as a result, the amount of data is automatically reduced by 2 times (instead of 12 bytes, to transfer 4 pixels it is enough to transfer only 4+1+1 = 6 bytes) . From a mathematical point of view, such a transformation leads to a significant loss of information, but the human eye does not perceive the loss, since there is significant redundancy in ordinary photographic images.
3. The received information, which has passed the stage of primary “cleaning”, is separately grouped in each channel again into blocks, but already 8x8 in size, after which the main compression is applied to them - the so-called. discrete cosine transform, for short - DCT (discrete cosine transform). As a result, information about the distribution of pixel brightness is converted into another form, where it is described by a distribution based on the frequency of occurrence of a particular pixel brightness. DCT has a number of advantages over other transforms (for example, the Fourier transform), providing better information recovery.
Instead of an array of 64 values (8x8 pixels) for each block that makes up the image, we get an array of 64 frequencies. Let's look at how DCT works using an example. Let's say the brightness of the pixels in one block of our image has the form shown in Fig. 1 on the left, then the result of the transformation will be as shown on the right.
| 1 |
Despite significant accuracy, some loss of information does occur at this stage - this is why JPEG always leads to loss of quality. The main purpose of the transformation is to find out the overall picture of the distribution of large (in the figure - top left) and small (bottom right) objects, which will be useful later when eliminating unimportant information.
4. The next stage is the removal of information that is barely noticeable to the eye from the block, or quantization. All components are divided into various coefficients that determine the significance of each of them for high-quality restoration of the original image, and the result is rounded to the nearest whole value. It is this procedure that introduces the greatest loss of quality, reducing the final volume of the image. High-frequency components are quantized roughly, while low-frequency components are quantized more accurately, since they are most noticeable. In order to somewhat smooth out the decrease in quality, the luminance channel uses smaller division factors than the chrominance channels. But more often (this is done to speed up calculations), instead of specially selected values, only one is taken - the one entered by the user when choosing the degree of compression.
Here, for example, is what the Photoshop window looks like when saving an image using the Save for web operation, where the Quality parameter (or rather, a derivative of it) is the same rounding factor (Fig. 2).
| 2 |
Despite this coarsening, for most images the result is quite acceptable. And only in special cases, when we are talking about optimizing an image with a lot of small details or where large areas are occupied by one color, this does not work well.
| 3 |
As a result of quantization, a set of components is obtained, from which the original image is reconstructed with a given accuracy (Fig. 3).
| 4 |
In Fig. Figure 4 shows the result of reconstructing a black and white square using one, four and fifteen components, respectively.
5. After the main work of image compression has been completed, further transformations are reduced to secondary tasks: the remaining components are assembled into a sequence in such a way that those responsible for large details are located first, and then for all the smaller ones. If you look at the picture, the movement of the encoder looks like a zigzag line. This stage is called ZigZag (Fig. 5).
| 5 |
Then the resulting sequence is compressed: first with the usual RLE, then with the Huffman method.
6. And finally, a purely technical stage - the data is enclosed in a shell, supplied with a header in which all compression parameters are indicated so that the image can be restored. However, sometimes this information is not included in the headers, which gives additional benefits in compression, but in this case you need to be sure that the application that will read the file knows about them.
That, in general, is all the transformation. Now let's calculate what compression was achieved in our example. We received 7 values from which the original 8x8 image will be restored. So, the compression from using the DCT transformation in both color channels was 8×8/7 ≈ 9 times. Let's allocate not seven, but 11 coefficients to the brightness channel, which will give 8 × 8/11 ≈ 6. For all three channels it will be (9+9+6)/3=8 times. The reduction in quality during the “decimation” of the image, which occurred at the second stage, gives an additional double increase (the 4-1-1 scheme, taking into account the peculiarities of encoding the brightness component), which will give a final result of 16 times. This is a rough calculation that does not take into account some aspects, but reflects the real picture. To get a thirty-fold reduction in file size, you need to leave only 3-4 components.
The image restoration process proceeds in reverse order: first, the components are multiplied by the values from the quantization table, and approximate coefficients for the inverse cosine transform are obtained. The better the quality selected during compression, the higher the degree of approximation to the original coefficients, which means the image will be restored more accurately. There is only one action left to add: just before completion, make some adjustments (noise) to the boundary pixels from neighboring blocks in order to remove sharp differences between them.
Disadvantages of JPEG
- Inability to achieve high compression ratios due to block size restrictions (8x8 only).
- Blocky structure at high levels of compression.
- Rounds sharp corners and blurs fine elements in an image.
- Only RGB images are supported (JPEG for CMYK images can only be used in EPS format via DCS).
- The image cannot be displayed until it has completely loaded.
It's been ten years since JPEG was approved as a standard. During this time, groups of researchers proposed a number of significant additions to the original version, which resulted in the emergence of a new standard at the end of last year.
JPEG2000
Since 1997, work began aimed at creating a universal encoding system that would remove all the limitations imposed by JPEG and could effectively work with all types of images: black and white, grayscale, full color and multi-component, regardless of content ( whether these will be photographs, fairly small text, or even drawings). Along with international standardizing organizations, such industry giants as Agfa, Canon, Fujifilm, Hewlett-Packard, Kodak, LuraTech, Motorola, Ricoh, Sony, etc. took part in its development.
Since the new algorithm claimed to be universal, it was additionally tasked with using various methods of data transmission (in real time and with a narrow bandwidth), which is especially critical in multimedia applications, for example, in real-time broadcasts over the Internet.
Basic requirements for the JPEG2000 format:
- Achieving a higher degree of compression compared to JPEG.
- Supports monochrome images, which will allow you to use it to compress images with text.
- Possibility of compression without loss at all.
- Outputs images with gradual improvement in detail (as in progressive GIF).
- The use of priority areas in the image, for which the quality can be set higher than the rest of the image.
- Decoding in real time (no delays).
Compression principle
The main compression mechanism in JPEG2000, unlike JPEG, uses wavelet transformation - a system of filters applied to the entire image. Without going into details of compression, we will only note the main points.
| 6 |
First, in the same way as for JPEG, the image is converted into the YCrCb system, after which the initial removal of redundant information occurs (by already known combining adjacent pixels into 2x2 blocks).
Then the entire image is divided into parts of the same size (tile), each of which, independently of the others, will undergo further transformations (this reduces the requirements for memory and computing resources). Next, each channel is filtered by low-pass and high-pass filters separately in rows and rows, as a result of which, after the first pass, four smaller images (subband) are formed in each part. All of them carry information about the original image, but their information content is very different (Fig. 6). For example, the image obtained after low-pass filtering by rows and rows (top left) carries the greatest amount of information, and the image obtained after high-pass filtering contains the least. The information content of images obtained after low-pass filtering of rows and high-pass filtering of columns (and vice versa) is average. The most informative image is again filtered, and the resulting components, as with jpeg compression, are quantized. This happens several times: for lossless compression the cycle is usually repeated 3 times, with losses - 10 iterations are considered a reasonable compromise between size, quality and decompression speed. The result is one small image and a set of pictures with small details, which sequentially and with a certain accuracy restore it to normal size. Obviously, the highest degree of compression is obtained on large images, since a larger number of cycles can be set.
Practical implementation
Since the foundations of JPEG2000 compression were laid, a number of companies have developed fairly effective algorithms for its implementation.
Among the major software developers, Corel can be noted (by the way, it was one of the first to introduce into its packages support for the wi format, based on wave transformations, for which it is honored and praised) - all images are supplied on CDs with the CorelDRAW package up to the ninth version , were compressed in exactly this way.
Later, Adobe joined in. Some of the ideas contained in JPEG2000 were applied by the developers of Photoshop 6 in the form of advanced options when saving an image in the JPEG format (regular, based on the cosine transform). Among them is progressive JPEG (the Progressive option in the Save for Web window). This algorithm is intended primarily for real-time systems and works exactly the same as progressive GIF. First, a rough copy of the image appears, consisting of just a few large blocks, and over time, as the rest of the data is loaded, the structure begins to be viewed more clearly until, finally, the final image is completely restored. Unlike GIF, this algorithm places a greater burden on the viewer, since it will have to complete the entire transformation cycle for each version transmitted.
Among other additions, we note the inclusion in the file of several JPEG-compressed images with different degrees of compression, resolution and even color models. Accordingly, in Photoshop 6 it became possible to select individual regions in an image and apply different compression settings for them (Region-Of-Interest, such a mechanism was first proposed back in 1995), using lower values in the quantization table. To do this, set the required area (for example, in the form of a new channel in the image) and click the mask icon next to the Quality item. In the window that appears, you can experiment with the image by moving the sliders - the finished result is displayed on the screen, allowing you to quickly find the necessary compromise between quality and size.
Specialized converters and viewers
Since the standard does not stipulate specific implementations of compression/decompression methods, this gives scope to third-party developers of compression algorithms. In fact, you can use either a simplified wave conversion algorithm and thereby speed up the compression process, or, conversely, use a more complex one and, accordingly, requiring large system resources.
Customized solutions from other companies are available as commercial designs. Some are implemented as separate programs (JPEG 2000 developed by Aware), others - as additional modules for the most common raster editors (ImagePress JPEG2000 developed by Pegasus Imaging and the LEAD JPEG2000 module from LEAD Technologies). The company LuraTech, which has been working on this issue for a long time, stands out against their background. It promotes its LuraWave technology in the self-contained product LuraWave SmartCompress (the third version is already available) and offers modules for Photoshop, Paintshop, Photopaint. A distinctive feature is a higher operating speed (almost instantaneous conversion) even with images several megabytes in size. Accordingly, the price of this module is the highest - $79.
To view JPEG2000 images in browsers, you need to install a special viewer module (all developers offer it for free). Inserting an image into an HTML document, like any plug-in, comes down to using the EMBED construct (with additional parameters). For example, means that a progressive image transmission method will be used. That is, in our example (a file of 139 KB in size), first only 250 bytes are transferred, on the basis of which a rough image will be built, then, after loading 500 bytes, the image is updated (this continues until the LIMIT value is reached).
If you want to get a better image, you need to select Improve from the menu that pops up using the right button (Fig. 9). In four downloads, the entire image will be downloaded completely.
| 9 |
conclusions
So, JPEG2000 objectively shows better results than JPEG only at high compression levels. With compression of 10-20 times, there is not much difference. Will it be able to displace or simply compete with the widespread format? In the near future - it’s unlikely; in most cases, the quality/size ratio provided by JPEG is quite acceptable. And those 10-20% additional compression that JPEG2000 provides with visually the same quality are unlikely to lead to an increase in its popularity.
But digital camera manufacturing companies are showing keen interest in the new format, since the size of light-sensitive matrices is steadily increasing every year, and it is becoming increasingly difficult to store images in memory. And then the new format will become more widespread, and who knows, perhaps after some time JPEG2000 will become equal to JPEG. In any case, Analog Micro Devices recently released a specialized chip in which compression/decompression using the new technology is implemented at the hardware level, and the US Department of Defense is already actively using the new format for recording photographs obtained from spy satellites.
About the author: Mikhail Borisov ( [email protected] ) is an independent author.
Facts and speculation
JPEG loses quality when opening and resaving the file.
Not true. Quality is only lost when a compression level less than the one with which the image was saved is selected.
JPEG loses quality when editing the file.
Is it true. When you save the modified file, all transformations are performed again - so avoid frequent image editing. This only applies when the file is closed; if the file remains open, there is no cause for concern.
The result of compression with the same parameters in different programs will be the same.
Not true. Different programs interpret user input differently. For example, in one program the quality of the saved image is indicated (as, for example, in Photoshop), in another - the degree of its compression (the inverse value).
When the quality is set to maximum, the image is saved without any loss of quality.
Not true. JPEG always compresses with losses. But setting, for example, 90% quality instead of 100% results in a reduction in file size greater than the deterioration in quality perceived by the eye.
Any JPEG file can be opened in any editor that understands the JPEG format.
Not true. This type of JPEG, called progressive JPEG, is not understood by some editors.
JPEG does not support transparency.
Is it true. Sometimes it may seem that some part of the image is transparent, but in fact its color is simply chosen to match the background color in the html page.
JPEG compresses better than GIF.
Not true. They have different areas of application. In general, a typical “GIF” image after conversion to JPEG will have a larger volume.
JPEG2000 vs JPEG
| 7 |
1. With twenty to thirty times compression, JPEG2000 and JPEG give approximately the same quality (by the way, Photoshop cannot compress a regular photo beyond this limit).
2. With higher compression, the quality of JPEG2000 is significantly higher than that of JPEG, which allows you to compress up to 50 times without any losses, and with some losses (we are talking about images for the Internet) - up to 100 and even up to 200.
3. At high levels of compression in those areas where a smooth color change occurs, the image does not acquire the block structure characteristic of a simple JPEG. JPEG2000 also somewhat smears and rounds out sharp edges - see photographs (Fig. 7 and 8).
It shows the results of compression of a test file with different degrees of compression (on the left - saved in Photoshop in JPG format, on the right - in JPEG2000 format). For the image in Fig. 7, compression levels of 20, 40, 70 and 145 were selected (they can be explicitly specified when saving in JPEG2000), the JPG compression level was chosen so that the file size was the same as after compression using JPEG2000. As they say, the results are obvious. For clarity, a second experiment was carried out on an image with sharper details (with compression levels of 10, 20, 40 and 80). The advantage is again on the side of JPEG2000 (Fig. 8).
| 8 |
4. Since, in fact, copies with different resolutions are stored in one JPEG2000 file
I mean, for those who make image galleries on the Internet, there is no need to create thumbnails for them.
5. Of particular interest is compression without distortion (loseless mode). Thus, the test file with LZW compression from Photoshop took 827 KB, and the compressed JPEG2000 took 473 KB.
6. Compared to JPEG, its more advanced namesake consumes significantly more system resources. But the power of computers, which has significantly increased over the past couple of years, makes it possible to successfully solve image compression problems using a new method.
7. Lack of JPEG2000 support in browsers. To view such images, you need to download a fairly large additional module (1.2 MB).
8. Lack of free software for saving images in the new format.
Photosizer
Fotosizer is a program in the “graphics editors” category, created by the developer of the same name and designed for batch resizing of images. This free application, compatible with all versions of Windows (starting from XP), has English and Russian interfaces.
Positive qualities include:
- ease of use;
- the ability to set both specific sizes and percentages, as well as maintain proportions;
- the presence of visual effects, rotations and mirror reflections;
- when compressing folders, you can convert files from one format to another;
- It is possible to change the DPI parameter.
The disadvantage is the small number of supported formats compared to the previous program.
Step-by-step instructions for working with the program:
- Add a folder or individual images to the list.
- Select settings that will be saved in the application for later use.
- Click the “Start” button.