Why is this happening
Interference occurs due to:
- poor quality microphone;
- incorrect OS settings;
- damage to the device cable;
- interference caused by the presence of nearby electronic devices;
- incorrectly installed software.
Often the problem arises due to a combination of several factors. Let's take a closer look at how to remove background noise from a microphone.
Device type
Microphones are divided into: condenser, electret, dynamic. The first two are used to connect to a PC without additional equipment. The third type is connected through an amplifier. If you connect it directly to the sound card, the sound will be of poor quality. Because the voice has a low level compared to extraneous interference. It needs to be amplified. Capacitor devices, thanks to phantom power (transmission of direct current and information signals through wires), are highly sensitive. Therefore, not only the voice is amplified, but also the sounds of the surrounding environment. The solution to the problem is to reduce the recording level in the settings, place the microphone closer to the sound source. The second way to solve the problem is software. Let's take a closer look at what to do to remove background noise.
Making a homemade windshield for a microphone
Method 1
This method is suitable for those who do not have time to search for wind protection. You can quickly create it using the following method:
Wrap the microphone in several layers of gauze or a handkerchief and secure it with any elastic band at the bottom. This is useful to ensure that the microphone is protected from the howling sounds of the wind. It will also help reduce the likelihood of bright and ringing sounds “P”, “B”.
Method 2
If you need to shoot video material with sound, then aesthetics will play an important role and the first option will not work.
- Increase the microphone volume as high as possible.
- Move the microphone away from you, up or to the side.
- Close the windows and doors in the room.
Editing an audio track takes a lot of time. You will need to delve into the nuances of the program, watch video tutorials explaining the workflow. Despite the effort expended, the program does not guarantee a high-quality final result.
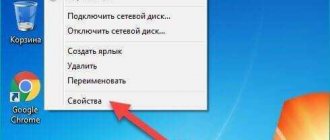
How to remove background microphone noise using standard OS tools
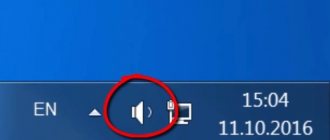
Find the speaker icon in the system tray. Next: If this is a laptop, in addition to the microphone, the device built into the PC will be displayed. Open the “Recording” tab and click on the device you are using.
Further:
Adjust the volume level while speaking into the microphone. Open the “Levels” tab:
Next, open the “Advanced” tab:
Adjust the sound quality (described above). Now the question of how to remove background noise from a webcam microphone will not arise.
Removing noise and hiss after recording
If a noisy recording has already been made, then you often have to deal with what is there. If the noise is not too strong, then it can be cleaned up using modern sound editors.
Reaper
REAPER is a software environment for processing audio files. It has wide functionality for recording, creating and editing sound and is actively used in a professional environment. a 60-day trial version on the official website .
In Reaper, you can “clean” a track of extraneous sounds using the ReaFir plugin . To do this, press the FX button :
reafir in the search field that appears and select the appropriate filter by double-clicking:
Next, you should select the exact editing mode (Edit Mode – Precise) and the mode of operation by “subtracting” noise (Mode – Substract). You also need to start automatically building a noise profile by clicking on the checkbox next to “ Automatically build noise profile ”:
Now you need to move the filter plug-in window to the side so that it does not overlap the track, listen to it, select the area where only noise is heard. To do this, left-click on one end of the fragment, and then, while holding Shift, click on the other. reset the selection using the Esc key. Now turn on loop playback with the R button and press Play. If the area is selected correctly, after several “passes” the filter will recognize and clear the noise. Now you can turn off looping by pressing R again, turn off “ Automatically build noise profile ” and deselect the sample fragment.
How to fix the “USB device over current status detected” error
Audacity
For the vast majority of home users, REAPER's capabilities are redundant. You can also remove noise from a recording using Audacity.
Audacity features sample-based noise reduction system To use it, you need to select a segment of the recording in which only noise is heard, and open Effects - Noise Reduction :
Next, click “ Get noise profile ”:
Now you need to select the entire track by pressing Ctrl+ A and open Effects - Noise Reduction again. Now you can click “ Listen ” and evaluate the filter’s performance. If you wish, you can try adjusting the settings. If you are satisfied with the result, you can click OK and save the cleared track.
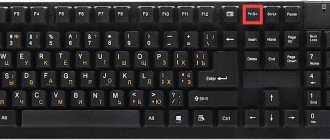
How to remove background microphone noise on a laptop when power saving mode is activated
When saving mode is activated, the sound card does not have enough power. Therefore, interference appears. What to do? Press “Win+R”, enter the command “control”:
Further:
Click the "Create Schema" link.
Select High Performance mode.
What to do if the microphone is very noisy
After reinstalling Windows 7, I noticed that my microphone began to record with a lot of noise and crackling. I kept sinning on my simple microphone that came with the headset and on the sound card, which is built into the motherboard. I recently bought a better microphone and decided to check it out and to my surprise the recording did not improve at all, quite the opposite. I immediately realized that something was wrong here. I searched the Internet for a solution to the problem. It turned out to be very simple - outdated drivers were installed on the Realtek sound card.
In general, I updated the drivers for the sound card and then the “Improvements” tab appeared in the microphone settings, where you could set noise suppression and several more options to significantly reduce noise when recording.
Now let's talk in more detail about how you can do all this if your microphone is very noisy. I’ll make a reservation right away that I will show it using Windwos 7 Professional as an example, because... This is the system installed on my computer.
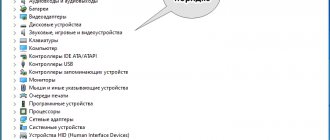
First of all, check the driver version of your audio device. Right-click on the “My Computer” icon -> Properties -> Device Manager -> then open the list of Sound, video and game devices, right-click on the driver of your sound device and select “Properties”.
In the window that opens, switch to the “Driver” tab and just below we find the line “Date of development”. If you have a date there, say, 2009 or 2011, then most likely your driver is outdated and needs to be updated.
To update the driver in the same window, switch to the “Details” tab and in the “Property” drop-down list, select “Hardware ID” and in the “Value” field copy (right click -> Copy) the first value to the clipboard. The next thing we will do is go to the website https://devid.info/ru. In the search field, enter the code of our driver from the clipboard (Ctrl + V). Click on search and select the driver for your OS from the results. Download the driver and install. After this, the system may ask to reboot. Let's reboot. Now, if we go to the information about our driver, we will see that the driver development date is already much more recent. My development year changed to 2013 and a speaker icon of a different color appeared in the tray.
Now, to apply noise reduction options, let's go to the sound recording settings. To do this, go to the control panel (Start -> Control Panel), go to the “Sound” category. If you cannot find this category, then switch the viewing mode to “Large icons”. In the window that opens, switch to the “Recording” tab, right-click on the microphone and select “Properties”.
Another window will open and here we see the “Improvements” tab. Let's switch to this tab. We have available options such as: DC removal, noise suppression, beamforming, echo suppression. Here you can play with these options and see how the sound recording changes. For me personally, checking the boxes for “noise reduction” and “echo suppression” was enough.
Alternatively, you can go to the “Advanced” tab and select the “2 channel, 16 bit, 48000 Hz (DVD)” format.
That's all. Thank you for your attention. Bye everyone...
How to remove background microphone noise when recording
We remove interference in real time. For example, for streaming? Let's take the sound and process it with REAPER. You will also need the “Virtual Cable” utility. Download and install them on your PC.
Setting up REAPER
Go to:
Select the Device section:
- Check the OS version in the “Audio” field;
- Define the microphone in “Input”;
- Headphones - “Output”.
Settings
At the bottom of the application, click on the free area to make an additional panel appear. Further:
Click on the “FX” button. Set the values as in the screenshot:
. Set the following settings:
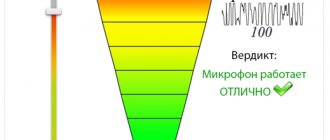
The application will build a graph of interference:
Uncheck the "Automatically" box. Say a few words into the microphone. If interference persists, follow the steps described above. Activate and after a while disable the “Automatically build” checkbox. Provide audio on a virtual cable so other applications can use it. Go to the Device section. In "Output" set the value to "Line1".
Save the project so you don't have to configure it the next time you use it by pressing the key combination "Ctr+Alt+S".
How to use
Open REAPER from the saved file. Open the desired program, specify the value “Line 1”. For example, open Skype, go to settings, then:
A program that will help remove noise
If you are still not satisfied with the quality of the recorded sound, then the program discussed below will be even more likely to remove microphone noise. It's called BIAS SoundSoap Pro. Download the archive with the utility from my Yandex Disk using the link: https://yadi.sk/d/sOt146-U233gQg.
In the “Downloads” folder, look for the downloaded archive and unpack it.
Then go to the folder “Virtual.Audio.Cable.4.14.Retail” and click “setup”. The installation is very simple and I will not dwell on it. As a result, a virtual audio cable will be installed.
After installation, the sound on the computer will disappear - don’t worry, we’ll figure out how to turn it on.
Next, go to the folder “BIAS.SoundSoap.PRO.v2.0.RTAS.VST” and run the installation file “SoundSoap Pro 2 Installer”. Follow the step-by-step installation wizard.
When the utility is installed, go to the path: C:\Program Files (x86)\BIAS\VSTPlugins. You will see one plugin in the folder. Select it and copy it.
Then return to the unzipped archive and open the “SaviHOST” folder. Paste the copied plugin there.
In the same “SaviHOST” folder there will be a file with the same name. You need to change it to "BIAS SoundSoap Pro". If the extension .exe appears at the end of the name, do not delete it. This completes the installation of the required program and all necessary components.
To launch the utility, run the file that has been renamed. The BIAS SoundSoap Pro interface looks like this.
Before you run the utility, you need to restore sound on your computer. Read about it a little further down.
Open the “Devices” tab and select “Wave” from the list.
Then, in the “Input Port” field, specify your microphone, and in the “Output Port” field, select “Line 1”. Specify the frequency as 48000, and the buffering as 200. Save the changes with the “OK” button.
In the program itself, place the marker opposite “on”. Next, from the colored rectangles at the bottom, you need to select the green tab and put a cross in front of “Broadband”. After that, click “Adaptive”, create complete silence and click “Extract”. The program will begin to pick up noise. When the program finishes tuning, the blue markers in each column will be set to a specific frequency. Everything below these markers (noise) is discarded, and everything above (your voice) is recorded. This suppresses microphone noise or extraneous noise in the room.
Leave the utility running and you can move on to communicating on the Internet or recording voices. Please note that in the program with which you will record your voice, you need to go to the settings and specify not a microphone, but a virtual cable – “Line 1” as the input device.
The same applies to instant messengers. For example, I’ll show you the actions on Skype. I open “Settings” and in the “Sound and Video” tab, select “Line 1” as “Microphone”. Thanks to this, all these programs will receive sound not from a microphone, but pure filtered sound through a virtual cable.
How to return missing sound
Immediately after you install “Virtual.Audio.Cable.4.14.Retail” the sound on the computer will disappear. To get it back, enter “Control Panel” into the search and open the corresponding application.
In Large Icons view mode, go to the Sound section.
In the Playback tab, select your speakers. Right-click on them and select “Set as default” and “Use default communication device”.
In the “Recording” tab, a virtual cable must be selected. If it is not selected, right-click on it and specify the two items mentioned above.
Personally, I was able to remove microphone noise using a utility from Realtek and the BIAS SoundSoap Pro program. Now the recorded sound is clear, there is no extraneous noise, but only the voice. Write in the comments below if you have questions and can share what programs or methods you know to suppress noise.
Rate this article:
( 1 ratings, average: 5.00 out of 5)
About the author: Anya Kaminskaya
- Related Posts
- How to connect a new hard drive or from a PC to a laptop
- What is RAM and its main characteristics
- How to adjust mouse sensitivity on a Windows computer