In its new version of the operating system, the famous one presented users around the world with a very useful interface - “Windows Action Center”. This system application is indispensable, as it provides the user with all the information he needs. Thanks to “TsU” you can always be aware of the latest updates, system messages, notes from various applications and the like.
Action Center does not open in Windows 10, problem solution
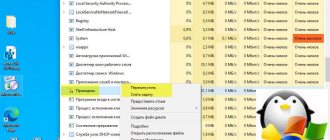
We open access to the “TsU”
So that the user could easily open the necessary program, Microsoft developers worked on two possibilities at once.
- the first is with the mouse. This method involves simply clicking on the corresponding icon at the bottom of the work area;
Launch the Notification Center
- the second is a combined press of the “Win” and “A” keys.
Press the “Win” and “A” keys
Re-register Notification Center using PowerShell
Let's re-register the notification center using PowerShell, the latest and most reliable method.
- Click Search in windows and enter PowerShell.
- The best option is to right-click on PowerShell and Run as administrator .
In the blue window that opens, enter the following command:
The process may take some time, after which restart your windows system and make sure that the action center is working.
mywebpc.ru
Clearing accumulated messages
Note! In order not to clutter up the workspace, as well as the “TsU” itself, it is necessary to clear all received messages from time to time.
To do this you need:
- In the open notification panel, hover over any of them and click on the white cross.
- To delete all notifications from a specific program at once, hover over the name of the required software and click “Clear”.
Select the notification and close it
- To completely clear all existing notifications, find and activate “Clear all notifications.”
To completely clear all existing notifications, click “Clear all notifications”
The stable operation of the Notification Center application allows you to always be aware of the latest events and changes in your computer. Therefore, it is strongly recommended not to remove or disable this software.
Knowledge BaseTry 2 Fix beta
April 16, 2017
Classic Shell cmd DISM powershell regedit sfc scannow Windows 10 Class not registered Start button not working
The Start button and notification bar do not work in Windows 10, or Metro applications do not work in Windows 10, or the Class is not registered in Windows - our knowledge base already has an article on this topic, but as practice shows, the solution proposed in it is not always works. Sometimes these problems occur separately, sometimes together (more often together). Therefore, we will try to collect and post here new solutions that helped solve this mysterious and wildly annoying problem.
Method No. 1.
- By pressing Ctrl + Shift + Esc we will open the Task Manager. If the manager window is empty, you need to click “More details” at the bottom right.
- File > Run New Task.
- Check the box “Create a task with administrator rights”, type Powershell in the “Open” line, then click Ok.
- Copy and paste into the Powershell window. Get-AppXPackage -AllUsers | Foreach {Add-AppxPackage -DisableDevelopmentMode -Register “$($_.InstallLocation)\AppXManifest.xml”}
- Reboot and check.
Method No. 2.
- By pressing Ctrl + Shift + Esc we will open the Task Manager. If the manager window is empty, you need to click “More details” at the bottom right.
- File > Run New Task.
- In the “Open” line, type regedit, then click Ok.
- In the registry we look for the branch: HKEY_CURRENT_USER\Software\Microsoft\Windows\CurrentVersion\Explorer\Advanced
- Create a DWORD parameter (32 bits).
- Parameter name EnableXAMLStartMenu, value 0.
- Reboot and check.
Method No. 3.
Checking the integrity of Windows files
- By pressing Ctrl + Shift + Esc we will open the Task Manager. If the manager window is empty, you need to click “More details” at the bottom right.
- File > Run New Task.
- Check the box “Create a task with administrator rights”, type cmd in the “Open” line, then click Ok.
- In the command line window that appears, enter sfc /scannow
and wait for it to finish. If there are any errors, the path to the CBS.log file will appear in the command line window, where you can see the problems found during testing. Anything can happen, there is no universal solution - write to us. - The second step is to enter the command dism.exe /Online /Cleanup-image /Restorehealth into the same window
and also wait for the end. - Reboot and check.
Method No. 4.
- By pressing Ctrl + Shift + Esc we will open the Task Manager. If the manager window is empty, you need to click “More details” at the bottom right.
- File > Run New Task.
- Check the box “Create a task with administrator rights”, type cmd in the “Open” line, then click Ok.
- Enter the following code into the command line (re-register some dlls): regsvr32 quartz.dll regsvr32 qdv.dll regsvr32 wmpasf.dll regsvr32 acelpdec.ax regsvr32 qcap.dll regsvr32 psisrndr.ax regsvr32 qdvd.dll regsvr32 g711 codc.ax regsvr32 iac25_32.ax regsvr32 ir50_32 .dll regsvr32 ivfsrc.ax regsvr32 msscds32.ax regsvr32 l3codecx.ax regsvr32 mpg2splt.ax regsvr32 mpeg2data.ax regsvr32 sbe.dll regsvr32 qedit.dll regsvr32 wmmfilt.dll regsvr 32 vbisurf.ax regsvr32 wiasf.ax regsvr32 msadds.ax regsvr32 wmv8ds32.ax regsvr32 wmvds32.ax regsvr32 qasf.dll regsvr32 wstdecod.dll
- Reboot again and check everything.
Method No. 5.
Another case in our practice was when the culprit for this whole bacchanalia was programs for Windows 8.1 and Windows 10, which replaced the tiled Start menu with the classic one. After removing these programs everything worked. In our specific case it was the program:
- Classic Shell 4.3.0
Method No. 6.
Let's try to roll back the system to an earlier state when these problems did not exist.
- By pressing Ctrl + Shift + Esc we will open the Task Manager. If the manager window is empty, you need to click “More details” at the bottom right.
- File > Run New Task.
- Check the box “Create a task with administrator rights”, type rstrui
, then click Ok. - Next, you will either see a window with the message “System protection is disabled...” - that’s all, this method is not suitable for you, or you will see a list of checkpoints suggested for restoring. The master describes in some detail how and what to do - it’s hard to get confused.
Setting up notifications
You can't set many of the settings that control how Windows
notifications will be displayed, but there are several ways to configure the notifications themselves.
To get started, you need to open the Settings
. This can be done in different ways, we will show you a few of the most common ones:
Method 1
: Open the Windows main user menu by clicking the Start button
located
on
the Taskbar
in the lower left corner of the desktop.
Click on the gear icon in the left menu bar. Or, using the scroll bar, move the slider down and in the list of installed available applications and programs, select the "Settings"
.
Method 2
: Press the keyboard shortcut together
“Windows + X”
or right-click on the
“Start”
on
“Taskbar”
, and in the pop-up menu that opens, select the
“Settings”
.
Method 3
: Click the notification area icon on
the “Taskbar”
in the lower right corner of the desktop, then in the pop-up panel that opens, click the
“All settings”
.
Method 4
: Press the
“Windows + I”
and call the
Settings
directly.
In the list of available pages in the Settings
select the
"System"
(marked in the image above).
System
settings page, in the left pane of the window, go to the
Notifications and Actions
.
In the right pane of the window, using the scroll bar, move the slider down and select the “Notifications”
.
The following are the main types of notification settings settings:
- Show notifications on lock screen
- Disable this option if you want to prevent any notifications from appearing when you use PC lock mode.
Simply move the switch next to the corresponding cell to the “Off” position.
. - “Show reminders and incoming VoIP calls on the lock screen”
– Turning off notifications on the lock screen allows you to display reminders and incoming calls. Turn the switch to the “Off” position. and turn off this setting to prevent these types of notifications from appearing on your lock screen. - “Show the Windows Welcome screen after updates and sometimes when you sign in to tell you about new features and offers”
and
“Receive tips, tricks, and tricks when using Windows”
– turn these two options off if you are not interested in tips, offers, new features, or announcements . - “Receive notifications from applications and other senders”
– this option allows you to completely disable notifications. To do this, in the corresponding cell, set the switch value to “Off.” and the changes made will be instantly applied to the notification settings. - Hide notifications when mirroring my screen
- This option can be turned off if you are mirroring your screen (for example, while presenting a presentation) and want to limit the appearance of notifications during the show. Disable this option by setting the switch value to Off. in this cell.
If you move the scroll bar down a little further in the right pane, you'll see the settings for the "Receive notifications from these senders"
(
“senders”
is what the
Windows
calls applications and other notification sources).
Please note that you will not necessarily see every application that is shown here in our example. Some apps have their own notification settings that you'll need to configure directly in the app. However, any application you obtain through the Microsoft Store
, as well as many desktop applications, can be controlled from this section.
Toggle the switch next to any listed app to the Off position.
to completely turn off notifications for this app.
Click on any app name to open another page that allows you to customize settings for that app in more detail. the Skype application settings
.
On the app settings page, you can turn off notifications for the app, choose whether banners are shown or sounds played, and block notifications from being added to Windows Action Center.
and even control the number of notifications that the application can show in the above-mentioned center.
Skype app notification priority controls.
in
the Windows Action Center
, which allow you to control (at least to some extent) the order in which an app's notifications appear in the center's list.
You can apply one of three available priority settings to an application. By default, the application priority setting is set to Normal
and appears below high priority notifications in the
Windows
.
High
priority allows notifications to be placed above all regular priority notifications.
"Highest"
priority means the notification will appear at the top of the
Windows
.
However, “Highest”
priority to only one application, and the default application with this priority is
“Cortana”
.
How to disable Windows 10 Action Center entirely
In addition to the described methods for disabling notifications, you can completely remove the Notification Center so that its icon does not appear in the taskbar and there is no access to it. You can do this using the Registry Editor or the Local Group Policy Editor (the latter option is not available for the home version of Windows 10).
In the registry editor for this purpose you will need the section
Create a DWORD32 parameter with the name DisableNotificationCenter and the value 1 (I wrote in detail how to do this in the previous paragraph). If the Explorer subkey does not exist, create it. To re-enable Action Center, either remove this setting or set it to 0.