During operation, the operating system and programs save so-called temporary files on the hard drive - these are system files that contain the results of certain processes, calculations, etc.
As soon as these files are no longer needed by the process or program that created them, they are deleted. But this does not always happen; sometimes too many unnecessary temporary files accumulate and need to be deleted. Let's figure out how to do this on Windows 10.
Removing temporary files using Disk Cleanup
See also: “How to reduce or enlarge the screen scale in Windows 10”
A tool specially built into the OS will help you clear your computer of excess temporary files.
- First you need to run the Disk Cleanup utility. You can do this in different ways:
- launch the “Run” window by pressing the Win+R key combination and enter the command cleanmgr, then press the Enter key or the OK button.
- go to My Computer, right-click on the system drive (usually drive C), and select “Properties” from the context menu that opens.
In the disk properties window, click on the “Disk Cleanup” button (the “General” tab).
- The system will analyze the disk data and eventually display a window in which, broken down by category, it will provide a list of temporary files and objects that we can delete without harming the performance of the OS and programs installed on the computer.
- Check the boxes next to the required items, and then click OK. Immediately below the window with a list of objects, the amount of freed up disk space will be displayed, taking into account the lines we have selected.
- The system will ask for confirmation to delete files. Click on the corresponding button and wait for the operation to complete.
Storage locations
In all modern Microsoft operating systems running on the NT kernel, temporary files are located the same way. Two folders have been allocated for storing them. One is for system temporary files, and the second is for user files.
To check the storage directories, call the “Run” menu. Press the key combination “Win” + “R” and enter the command “sysdm.cpl” as shown in the screenshot.
In the properties window that opens, at the top, switch to the “Advanced” tab. We find the second designated item and open it.
The Environment Variables system menu is divided into two parts. The upper area is user, and the lower is system. The values of the "TEMP" and "TMP" variables indicate the storage directories.
The Environment Variables system menu is divided into two parts. The upper area is user, and the lower is system. The values of the "TEMP" and "TMP" variables indicate the storage directories.
If desired, you can remove them from your computer manually. This method is not the best or most convenient. Some of the files located in these folders can be currently used by programs or the operating system and will be protected from erasure.
More on the topic: Restoring shortcuts on the Windows 7 desktop
Internet Explorer Cache
Another place where temporary files are stored in Windows 7 is the Intenet Explorer browser cache directory. He is not popular and people rarely work with him. Most users consider it a program necessary to download a “normal” browser.
To see where IE stores temporary Internet files, open it and go into settings.
Clicking on the “gear” brings up a context menu. We move on to the designated point.
Browser properties will open to the General tab. We need a “Options” button on it.
The window that opens specifies the directory and storage settings for temporary Internet files.
In Windows 10, IE is not the main browser, but is still present in all OS builds. The order of his settings has not changed, but Microsoft has renamed the folder for storing temporary files. Now it is called not Temporary Internet Files, but INetCache.
The screenshots show that this is the only change in the IE settings. All other parameters and values are in place.
Clearing temporary files through System Settings
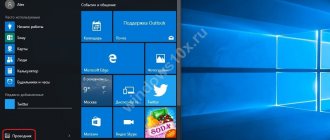
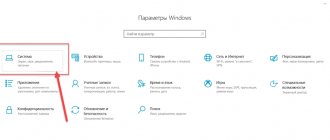
- Launch Windows Settings by pressing the Win+I key combination or by clicking on the desired item in the Start context menu.
- Here we need the “System” section, click on it.
- In the list of subsections on the left, select “Device memory”. On the right side of the window, click on our system drive.
- The window that appears will display information about how the memory of our disk is used, broken down by category. There is also a “Temporary files” item here, click on it.
- We find ourselves in a window with data on temporary files. We wait for the system to scan the disk, after which it will display another breakdown by category. As in the case of disk cleanup through the utility, check the box next to the required items, and then click the “Delete files” button, opposite which the total volume of the selected items will be indicated.
Process automation
The proposed method allows you to configure the automatic execution of operations to delete temporary files every time you restart your PC. More precisely, it solves two problems:
- Extremely shortens the storage path for temporary files. During the installation process, programs unpack the contents of installation packages into a user folder. The path to it is already quite long, and the presence of Cyrillic characters in it can lead to a malfunction of the installer. As a result, the program “loses” the location of the unpacked files and its execution is interrupted by an error;
- Cleaning the system of “garbage” is performed without user intervention or third-party programs.
First of all, create a new folder “Temp” in the root area of the disk. We change the system parameters of environment variables. We consistently bring everything to the form indicated in the screenshot with the number “2”.
We perform this operation for user and system variables. As a result, the settings should look like this.
Apply the changes made by clicking on the “OK” button. Here, in a shared folder, you can transfer the contents of temporary Internet files from IE. In the browser options, select the highlighted item.
In the window that appears, specify the new storage directory.
After confirming the actions, the path selection window closes. System parameters take the form shown in the screenshot. The frame indicates the new storage location.
When saving changes, a warning window will appear. We check that the data in open programs is saved and agree.
Now, having collected everything in one directory, we will create a script that allows you to delete temporary files in Windows. Open Notepad and copy the following lines into it:
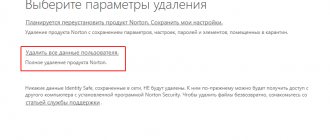
More on the topic: How to completely remove Avast from Windows 7
pushd C:TEMP && rd /s /q . > nul 2>&1
Save the created file with the CMD extension. By default it is written to the user's folder.
We issue the command to launch the administrative console in the “Run” dialog box.
In the navigation area, expand “Windows Configuration” and go to the “Scripts” section. The items available for editing will be displayed on the right side of the window. We launch the one marked with the number “2”.
We use the specified item to add a cleaning script.
The designated Browse button will open the custom folder.
Find the file created in Notepad. Confirm your choice by clicking on the “Open” button.
The preview area should display a ready-to-use script. We confirm our actions by successively pressing the indicated buttons.
This completes the automation process. You can close the Group Policy Editor and go about your normal business.
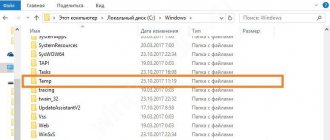
Deleting files in the Temp folder
In addition to the methods listed above, Tens users have the option of manually deleting temporary files accumulated on the computer. Most of them are stored in two folders that can be opened using Explorer:
- Directory for the current account: C:\Users\Username\AppData\Local\Temp
- General system directory: C:\Window\Temp
Once you are in these folders, you can begin deleting their contents. If some items are not removed, they are probably currently in use and should be skipped.
After closing all programs and completing processes, for example, before turning off the computer or after starting the PC again, you can try to delete objects that you were able to erase the first time.
Using a third-party program “CCleaner”
Perhaps this is one of the most common programs for deleting unnecessary data on a computer.
- In order to download it, go to the official website: https://www.ccleaner.com/ru-ru/ccleaner.
- We launch the installation file by double-clicking the mouse, allowing the application to make changes to the system (if there is such a request).
- The program installation window will open. Pay attention to the lower left corner, there is an automatic checkmark here, which requires the installation of the “Avast Free Antivirus” antivirus along with the installation of the “CCleaner” program. If you do not need this antivirus, you should uncheck the box. Click the “Install” button to start the installation process.
- When ready, an information window will appear, from where you can immediately run the program by clicking the “Run CCleaner” button. Also, you should uncheck the box next to “View release notes” if you do not want to automatically go back to the developer’s web page.
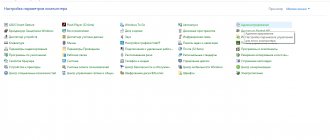
- Most likely, the default interface language will be set to “English”. But this can be changed. To do this, in the list on the left, click on the “Options” item, then on the “Settings” subsection. By clicking on the current option opposite the “Language” parameter, we can expand the list of all languages supported by the program and select the one we need (in our case, Russian).
- Now let's start cleaning. The program offers two options for its implementation:
- Easy cleaning . Click the “Analyze” button, wait until the program analyzes the data and suggests objects for deletion.
- Standard cleaning . First, check the boxes where you need to look for extra “system junk”. Next, we also click the “Analysis” button, wait until the data analysis is completed and delete the files by clicking the “Cleanup” button.