The laptop was flooded, our actions
In such situations, calm is necessary. If you spill a cup, glass, or other vessel, you cannot turn back time, but you can try to optimally eliminate the consequences. The main thing is that the faster you implement further actions, the more interest you have on a successful result. This all has a direct dependence on certain points.
Coffee, water, beer or cola, is there a difference?
Of course! The easiest way to remove water is because it is pure and causes less harm than sugary sodas, juices, or alcoholic drinks. All these liquids include foreign elements that penetrate even deeper than water. Their composition can be aggressive.
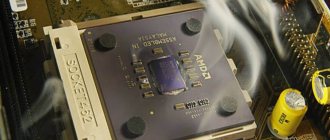
For example, cola. I think many of you know that if you pour it into a kettle with scale and boil it, the kettle will clean itself. Cola corrodes, including parts of the microcircuits in the keyboard.
Also, corrosion of parts of the microcircuits poses a significant danger. The later you decide to restore your gadget, the more you expose it to danger and this can lead to irreparable damage to the components. It is possible that in this case, repairs may be useless.
I think you know very well from your physics course that if water gets into electrical equipment that is connected to the power grid, electrocorrosion will occur. It is due to the influence on the composition of water, which contains metals and salts that conduct electricity well. If this liquid was an excellent conductor, electrocorrosion will occur faster. But the main danger is still a short circuit, which you yourself understand.
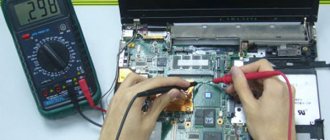
If the laptop does not turn on, contact a service center
If the actions are carried out promptly, the gadget will work for a long time. When the equipment does not turn on, this is the first sign that you need to seek help from specialists.
Our technicians will eliminate existing problems and defects. In addition, this is a chance to get guarantees that the equipment, ASUS VivoBook Pro N580VD-DM039T or HP 15-ay044ur, will continue to work without failures or complaints. There is no need to take on solving the problem on your own, given that in the absence of experience you can make the situation even worse.
What should you do first? Turn off the gadget
The danger is electrocorrosion and short circuiting. From here, you need to turn off all laptop devices that are connected to the network. Remove the adapter. But, if the Laptop continues to function, you need to turn it off manually. Hold down the Power button for a few seconds until the device turns off. Don't forget to remove the battery.
If this version of the laptop has a built-in battery, you need to turn it off by pressing the “Reset” button. For example, in routers it is located inside, and you can activate it with a thin tool, such as a pin, paper clip, toothpick or needle.
In theory, you can also remove the CMOS battery responsible for the BIOS from the motherboard. It needs to be removed when it is removed quite quickly, without wasting time unscrewing 10 bolts. Otherwise, you can simply waste precious time.
To prevent short circuits, we disconnect all external devices, such as a mouse, speakers, various cards, an external keyboard, and flash cards.
How to minimize damage?
Even if water leaks through the case, it will not be able to immediately penetrate into the “vital” parts of the laptop. From here, you need to remove it before it gets there. The weak point is the display. From here, when you remove the battery, be very careful. Try to prevent moisture from getting into it.
It is advisable to open the laptop wider and place the device from top to bottom on a plane that has a hard surface. Then, cover the laptop with a towel or delicate paper napkins (you need to put more of them). In addition, you can place the laptop on small brackets for faster drainage of water.
If the appearance of the laptop cannot allow the matrix to be folded out completely, then it is advisable to place it so that the laptop looks like a pyramid of 3 corners. But, a new threat may appear that water will begin to accumulate in the corners. From here, you can place the gadget so that the input device is on the surface and the monitor is below.
Don’t forget that everything needs to be done quite quickly, and, most importantly, with accuracy. Otherwise, instead of protecting parts of your laptop (most importantly, the motherboard), the user can further intensify negative actions.
Please use caution. If a wet laptop begins to spark and smoke or fire appears, but unplugging it from the outlet has become problematic, you need to save the external situation. First, remove flammable items. Next, if there is a fire extinguisher (made of powder) in the house, try to remove the flame. Otherwise, you need to run out of the building and report it to 001.
How to properly dry a laptop?
If you have turned off the laptop according to all the rules, then for proper drying it is advisable to place it in a warm place. Drying time – from 20 minutes to 3-5 days. This is determined by the degree of water ingress into it. To speed up the process, you can place a bag over the device with a material that absorbs water well: Hercules, cat litter, silica gel (it is often sold in bags along with shoes).
The laptop was turned off when exposed to liquid
If the gadget was not turned on when water got into it, then its chances of recovery increase sharply, since there could be no corrosion and part of the liquid will evaporate, and the other part will simply pour out. But, all the same, its condition must be carefully studied, its parts must be cleaned and they must be dried separately.
Of course, things can go in a completely different direction if you poured a liquid into the device that contained sugar or other elements. In this case, even when the liquid evaporates, there will be a different mixture of sediments in the device, which can cause dangerous reactions. From here, you need to dry, as I said above, for at least twenty minutes. Regarding dangerous sediment, it must be found and removed.
What is better, to disassemble the laptop yourself, or to take it to a service center?
If the user has the necessary skills, tools and knowledge, it is quite possible to disassemble the device in parts, dry them and put them back together. There is a service manual for repairing laptops. This instruction will help you on how to disassemble your laptop step by step.
But, if you yourself understand perfectly well that you should not unwind this device, otherwise you may simply break it, then it is better to send it to a service center.
It is recommended to take the device to service even if you were able to disassemble and clean it yourself. Help from a professional will give you confidence that the laptop will function properly in the future.
If you nevertheless give your laptop for service, then you must clearly understand that if water gets on the device, the warranty automatically expires. To avoid this, at the time of purchase you can expand your insurance to cover additional cases. Of course, this will entail more costs. But, on the other hand, you will be able to save money in the future (buying a new device will cost you more).
How to save a laptop yourself?
— Disassemble the laptop and keyboard
Please note that this may not be easy. It is not always easy to unscrew all the screws on the bottom; often some of them can be hidden under peel-off legs and panels that are held on by the same latches, attached under the keyboard, display hinges, and so on. However, as a rule, all common laptop models have disassembly guides and videos. Go to the manufacturer's website for information, Google or YouTube. In order to reduce search time, enter “disassemble *laptop model name*”, or better yet “*laptop model* disassembly”.
Disassemble the laptop into the smallest possible components and check where the liquid managed to reach. The main thing is to remove the CMOS battery on the motherboard, as it constantly powers the board, which in the long run is enough to cause a short circuit. It is easy to find, it is quite large, round and difficult to confuse with something.
As for the keyboard itself, it will have to be disassembled and sorted separately, having previously photographed or recorded the location of the keys on the keyboard. Next, simply remove the keys with a thin screwdriver or any thin handy tool; as a rule, they can be pryed off from the bottom. Then “pull out” the pushers and spring elements. In this case, three films will remain on the keyboard substrate: two conductive, with tracks, and a dielectric separating film between them. On older keyboards, the membranes are either not glued together, or they are glued only at a few points and are quite easy to separate. However, on new ones they are often glued more securely and it will be more difficult to unstick them - here you can’t do without a hairdryer. We warn you that the gluing process requires certain skills, so it would be better to stop at this stage and hope that no water got between the films; after all, they are glued quite tightly.
- Clean and rinse
Pay special attention to the keyboard and motherboard, you can even check it with a magnifying glass.
If there is any buildup or discoloration on the motherboard, use a lint-free cloth or soft toothbrush to wipe away any dry residue from the spill.
Then carefully, sparing no effort and attention, clean off all foreign matter using an alcohol solution, followed by distilled water. If distilled water is not available, you can use plain water. However, the problem is that ordinary water contains impurities of metal salts and can leave them on the board after washing, which can subsequently cause a short circuit. Therefore, we recommend buying distilled water at a pharmacy or auto store.
If the affected area is large, then remove the board, disconnect everything possible from it, rinse it with warm water and leave it to dry for at least 1-2 days. In the same way, you need to check and wash all the other insides of the laptop and parts of the disassembled keyboard, getting rid of stains and sticky areas wherever you find them.
— Dry the laptop
Now all that's left to do is dry everything you washed. There is an opinion that you need to use a hairdryer, but we do not recommend that you do this. First, a hair dryer can blow hot dust onto various areas and make them dirty. Secondly, there is a risk of overheating and melting various elements. Thirdly, if there is moisture left somewhere, then a stream of air will send it even deeper into the case.
Dry for 24-48 hours in a warm, dry room, out of direct sunlight. Place the case, board, films, keyboard on supports or a grill over some surface so that air can circulate around the parts. You can even put the ingredients in a container with rice, since dry rice draws out moisture well.
— Assemble and test the device
After a day or two, reassemble the keyboard and laptop, turn it on and check its overall performance. You can check the keyboard in any text file, but it will be easier to go to Keyboardtester.com and check all the keys there.
If everything is functioning normally, then consider yourself lucky. If only the keyboard does not work, then you will have to replace it with a new one or simply buy an external one.
— If the laptop does not turn on, you will have to contact a service center or buy a new one.
To summarize, let's say that it is possible to protect yourself from such incidents. If you are using a laptop as a replacement for a desktop computer, you can put it on a stand, move it away from you and use an external keyboard and mouse. However, as a rule, a laptop implies mobility, and this option is not suitable for everyone; in this case, you should not risk drinking drinks dangerously close to the laptop.
By the way, spilled liquid can destroy not only a laptop, but also a smartphone. The risk of dropping it into a sink or pond, or spilling juice, tea or coffee on the phone is very high. The Product-test.ru team of experts has prepared detailed instructions in case you dropped your smartphone into water or spilled liquid on it.
Let us remind you that on our website you can view the laptop test results. Our experts tested the quality of popular models in the laboratory and, based on the test results, compiled a rating of laptops.
Want to understand other important issues? Read a selection of useful articles from experts.
How to properly clean the components of this device
To remove various impurities from the sediment, it is advisable to use distilled water and treat the parts with isopropyl alcohol or isopropanol. Also used for cleaning are toothbrushes, cotton swabs and soft tissues.
It is advisable to prepare various screwdrivers with a hairdryer set to low temperature. You can use a compressor or purchase compressed air (in old Soviet vacuum cleaners, the hose can usually be adapted for both blowing and blowing). A soldering iron may come in handy.
Before you start disassembling the laptop, it is advisable to use a napkin, distilled water and cotton swabs to remove all moisture stains from the surface. After this, remove the keyboard and remove other parts of the device. Please pay attention to the condition of the electronic parts.
It is advisable to remove the liquid and stain from it with a soft (delicate) cloth. If some of the parts in the device are corroded, they need to be cleaned with wipes moistened with isopropanol. It needs to be diluted 1/1 with the addition of distilled water. We also use it to remove the excess part of the solution with which we moistened the device.
Parts must be cleaned with the utmost care, accuracy and caution. Use a hairdryer to dry only at low temperatures. A hairdryer may also be needed to remove dust accumulated in the device. During drying, do not forget about Hercules with silica gel.
If you've dried everything properly, it's time to assemble your laptop. In this case, use the instructions.
Important: - before disassembling the device, it is advisable to take step-by-step pictures with a camera. Based on these pictures, you can easily reassemble the laptop. Instead of taking pictures, you can film everything with a camera, which will also make it much easier to reassemble the device.
After assembly, install the power supply and turn on the device. Did everything work for you? That is great! If not, we take the device to a service center.
Actions after complete drying
After two days, you can try to turn on the computer if it was not very flooded. But I would advise you to follow a few more steps before turning it on. Only for experienced ones!
- For your model, find instructions for complete disassembly;
- Remove the motherboard;
- Using a magnifying glass, carefully examine all contacts and tracks for dark spots (carbon deposits);
- If such defective areas are found, try gently cleaning them with a stiff-bristled toothbrush. Ideally, the blackened traces should be soldered. But it’s better to contact service specialists or other experts in their field;
- Reassemble the device and try to turn it on.
Some keys may no longer work. Try removing them and cleaning them. Some craftsmen advise thoroughly rinsing the keyboard with water and detergent. I have not tried this method myself, so I cannot vouch for its effectiveness.
At the end of my story, I suggest watching a video on what to do if you spilled tea on your laptop:
I hope everything worked for you! Tell us in the comments about your situation and how you managed to solve it (or maybe it didn’t work out...).
What difficulties might arise?
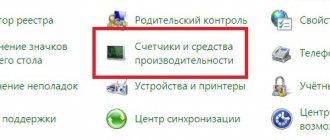
One of the main difficulties during drying the device can be water getting on the BGA chip (processor chip). Distilled water with isopropyl alcohol under the system can help in this matter. Then, you need to remove the water with great care using a hairdryer. Instead of a hairdryer, you can use special vacuum cleaners as in the screenshot.
It is quite possible that it will help you to unsolder some of the parts and dry them separately. Of course, after this the soldered parts need to be soldered as before. Most people will not be able to do this, so it is advisable to call a professional.
A bigger problem may be when water gets inside the railway. This part of the device is delicate and in this case you should definitely bring the device to a service center so that in case of difficulties they can at least recover your information from this media.
Do not try to disassemble or dry the railway yourself. It is enough to wipe it with a soft cloth and send it to specialists. There is no need to try to recover information yourself using the appropriate software.
It should be remembered that it is advisable to make backup copies of important information and place it on the cloud or external drives.
Complications and difficulties
A big problem when drying a laptop is liquid getting on the BGA chips. It can help to put a small amount of distilled water and isopropyl alcohol under the system, and then very carefully remove it with a hairdryer. Sometimes, however, desoldering, separate drying and cleaning, and then re-soldering are required. If you do not have the knowledge or equipment, you need the help of specialists.
An even more problematic situation is when liquid gets inside the hard drive. Then you should hand it over to specialists for data recovery. The disc should not be disassembled or dried. Wipe it with a cloth and – place it in an anti-electrostatic bag – then deliver it to the service center as quickly as possible. Do not attempt to recover data yourself using available software.
Remember to always back up important materials and place them in the cloud or on external drives.
What is prohibited to do if your laptop is flooded?
You can't be nervous and rush. You also need to know exactly what to do. Most of the mistakes made by users when they tried to save a laptop were due to doing the wrong thing in such a situation. So what should you not do when saving your laptop from water?
Do not use high temperatures during drying
I said several times that during drying you need to use only a low temperature, since some of the delicate plastic microcircuits may simply begin to melt. But many frightened owners still often turn on a hairdryer or other device at a high temperature, which can lead to dire consequences. Not only can the microcircuit melt, but also the liquid can spill even more into different corners of the device.
The laptop is dangerous from the high temperature of the oven, various heaters and a heat gun.
Blowing water with a compressor without disassembling the device
Also, a fairly common mistake is trying to dry the laptop and using a compressor or cleaning with compressed air, without disassembling the device into its component parts. With this method, instead of removing water, the user, on the contrary, harms his device even more.
Trying to vacuum a laptop
If you try to remove water from your laptop using a vacuum cleaner, many will nod approvingly and say that this is a fairly effective method. But the crux of the problem here is that there is a danger that water will get into the dry area of the device. Also, if you try to bring the hose from the vacuum cleaner to the typing device, the keys and their silicone parts may fly into the hose.
Removing water by force
Under no circumstances should you shake a wet laptop to remove water. This action will only worsen the situation. This also applies to the case when the device was only slightly flooded with water. Of course, if the user starts shaking the laptop, he will actually remove some of the water. But, by doing this, he will also add another part of it to places in the device where it was not there.
Also, when the user shakes the device, which continues to function, the person is exposed to the risk of electric shock.
Cleaning with the wrong products
I talked earlier about Isopropanol alcohol, as it is quite pure and does not leave any residue. But if you confuse the name and start cleaning with a different alcohol, a sediment may form.
When you use Isopropanol, do not forget to dilute it with distilled water 1/1. Then, you need to carefully remove everything when you finish cleaning. You should not immerse computer components and, in particular, hard drives and external devices, such as flash drives, in this alcohol.
Covering the laptop with rice
I have already said that rice does not absorb water very well, and it is recommended to use Hercules or shoe bags instead. But, these substances should not be treated as miracle cures that can dry out your LepTop once and for all. Do not cover the device with rice. Also, dust and rice particles can get into unexpected places in the device and then cause malfunctions.
Ultrasonic bath
An ultrasonic bath is a modern device that makes it possible to remove dirt without using laundry detergent. This bath removes dirt with the formation of microbubbles. This method is applicable to remove sticky stains. But when it comes to drying a laptop, ultrasound will make the situation even worse.
Very fast device startup
Once you have disassembled, inspected, cleaned and restored the device, you begin to think about turning it on. But, if you start the laptop if there is still water in its remote places, as a result, no matter what, a short circuit or electrocorrosion will occur.
Just because your device begins to function correctly after turning it on does not mean that the threat has gone away. In the future, the keyboard or motherboard may become damaged even after a few weeks. In this case, repairs can cost a pretty penny.
- Press the power button as quickly as possible and hold it for about 4-7 seconds. There is no need to waste time on correctly removing flash drives, correctly exiting Windows, and saving documents. Documents have autosave, but the laptop does not.
- If the device was connected to power, unplug the power cord.
- Remove the battery.
- Disconnect peripheral devices: external hard drives, flash drives, card readers, etc.
- How quickly was it possible to de-energize the device?
- What type of liquid came into close contact with the laptop.
- If you do not have a special keyboard in your laptop, then liquid that gets on it penetrates inside, damaging the motherboard.
- If you do not turn off the laptop in time or turn it on half-dry, a short circuit may occur, as a result of which the laptop will simply burn out.
- It is impossible to determine how dry the device is by eye. Moisture gets under the radioelements, electrochemical corrosion begins, and a short circuit may occur when power is applied.
- Even if the laptop turns on and works great, this, unfortunately, does not mean that the problem is solved. Some processes are sluggish. For example, the gradual destruction of microcircuit contacts and conductive paths. The process does not happen immediately. Therefore, the laptop continues to function for some time. But every hour increases the cost of subsequent repairs.
Motherboard after flooding
Step 2: Turn over
Open the lid more firmly (but without fanaticism) and turn the laptop over so that the liquid flows out of it and does not fall on the matrix.
Step 3: Contact the service center
While the laptop is drying, try to find a trusted repair service center. It is important that the service is verified, and not the closest one. Although ideally, of course, both proven and closest.
Perhaps friends will tell you. Or reviews on the Internet will help. The fact is that repairing a laptop after a flood can be a simple and inexpensive procedure, and everything can be done with cleaning and drying if measures are taken in time.
How do laptops get repaired after a flood?
If liquid gets on the keyboard, then in 80% of cases it will have to be replaced with a new one.
The motherboard is washed, cleaned of dirt, traces of corrosion are removed and dried. After this, diagnostics are carried out.
Sometimes damaged tracks are immediately visible. They are being restored. Rotten radioelements are replaced. Often, when liquid gets in, large BGA chips and their wiring are damaged. If the laptop was working during the flood, the motherboard may burn out and repair will be impossible.
As you can see, the work is global. That’s why it’s so important not to give corrosion and oxides a chance. Then the process will be reduced to the actions described above.
Laptop motherboard after flooding
The cost of repairing a laptop after a flood
In our service center, the average cost of such repairs ranges from 1,500 to 4,500 rubles. Perhaps by the time you are reading this article, the situation has changed. See the price list for current prices.
If any part fails as a result of the incident, it needs to be replaced and is counted separately. Important - diagnostics do not increase the cost of repairs. If you become our client, you do not pay for diagnostics.
Is it possible to fix a laptop after a flood yourself?
It is possible if you are familiar with a soldering iron and are familiar with the basics of circuit design. You will need distilled water, a brush, detergent, alcohol, or a spray cleaner that evaporates without leaving any residue. Schematics for many motherboards are freely available. They will help you with diagnosis.
How long does it take to make a decision?
Well, no luck. It happened. Some liquid was spilled on the laptop. But I have my own things to do and plans. How long can you delay repairs?
The answer to this question depends on two factors:
In service centers, all types of liquids that are spilled on a laptop are divided into two types: aggressive and non-aggressive.
Plain or purified water, unsweetened tea or coffee are non-aggressive liquids. And everything else, perhaps, can be attributed to the second type.
Milk on the motherboard
If ordinary water was spilled on the device, then there are three days left. All this time, the laptop should stand with the lid open in a well-ventilated but dust-free place. The main thing is don’t turn it on!
If the laptop gets acquainted with a mineral water, a sweet drink or something like that, then the clock counts. To reduce the cost of repairs, you need to put things aside and immediately go to a specialist.
The type of liquid ceases to matter if the laptop cannot be turned off in time. Under the influence of electricity, destructive processes are accelerated. It also happens that a laptop that was dried at home was turned on. He started working and even behaved normally for a while, but then he switched off and showed no signs of life. Therefore, it is important not only to turn off the device in time, but also not to try to turn it on until diagnostics and repairs are carried out.
Why does a laptop still have to be repaired after it’s flooded?
Serious damage to the motherboard
Let's sum it up
If you are reading this article, it means everything has already happened. Now you are trying to figure out what to do next, or you just want to know what to do right if this situation happens again.
Your main friend is time. This is what helps you save money. Turn off the power to your laptop in a timely manner. Get it repaired right away. And it will definitely last for a long time.
Waterproof laptops
Yes, such laptops really exist. They can withstand contact with a certain volume of water (preferably not hot). Nowadays there are many laptops in stores that have waterproofing properties. For example: - ThinkPady Lenovo . It has certain channels that drain water. Or even similar ones: - ProBook from HP, Toughbook from Panasonic, Chromebook from Asus . As you can see from the screenshot, this Panasonic has a detachable monitor. Therefore, if you flooded the keyboard, it will not affect the screen!