Everyone knows that flash drives must be removed before being disconnected from the port. The computer often displays a dire warning about the possible consequences of unsafe removal. Is it necessary to do this? What happens if you ignore the system message?
Let's figure it out.
How to safely remove a flash drive from your computer
Why do you need to remove the equipment?
If a flash drive (or drive) is connected using the USB Mass Storage protocol, ideally it should be removed in safe mode. Although, as we will see later, it differs slightly depending on the operating system.
You should know that Windows/Mac use a process called caching. Files are not always written to disk immediately, but are instead cached as multiple writes complete.
Doing these steps simultaneously improves system performance, but if caching is still occurring when you remove the drive, your data will be corrupted. When you click the “Eject” button, the cache will be cleared and the data will be written to the flash drive.
When you click the “Eject” button, the cache will be cleared and the data will be written to the flash drive.
It is for this reason that there is often a delay of several seconds between the removal of the drive and the notification that it can be removed.
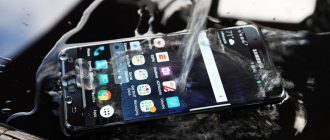
There may also be problems with the flash drive suddenly disconnecting from power. Its memory is very susceptible to this action, which can damage the device.
How to properly connect a flash drive to a computer.
To avoid most of the problems associated with the failure of a flash drive, it is important to know not only how to correctly remove a flash drive from a computer, but also how to connect a flash drive to a computer.
Very often, the cause of burning tables on the media is a poorly grounded computer. It happens that a potential of tens of volts wanders on the case, which can lead, if connected carelessly to the USB port, to burnout of the controller and wiring elements. To prevent this from happening in principle, any user should ground the system unit of a desktop computer as best as possible.
If there is no grounding, then before connecting the drive, it will be useful to touch the computer case with your hand. Static electricity disappears and the “flash drive” will ultimately be intact. It should also be noted that it is best to connect an external drive to the back of the system unit, and not to the front. Since there USB ports are soldered into the motherboard, and are considered more reliable.
And on the front, the USB ports are connected in the same way from the motherboard, but through an extension cord that connects to the computer builder. When connecting, it is enough to confuse “+” and “-” and your flash drive will burn out. So, you should only connect a flash drive to the USB ports on the front panel of the case if you are sure that they are working properly.
Removing a drive on Mac
All this information applies to flash drives connected to computers running Mac as well as Linux.
They use write caching to provide superior performance.
Removing a drive on a Mac is a straightforward process:
- just drag the flash drive icon that appears on your desktop the first time you connect it to the trash;
Drag the flash drive icon to the trash can
- or click the Eject icon next to the drive's name in the Finder window.
Click on the “Eject” icon next to the name of the flash drive in the “Finder” window
How to get the "Safely Remove Hardware" icon back
Sometimes, for unknown reasons, the safe removal icon may disappear. Even if you connect and disconnect the flash drive over and over again, for some reason the icon does not appear. If this happens to you (and this is most likely the case, otherwise you would not have come here), press the Win + R buttons on your keyboard and enter the following command into the Run window:
RunDll32.exe shell32.dll,Control_RunDLL hotplug.dll
This command works on Windows 10, 8, 7 and XP. The absence of a space after the comma is not an error, it should be so. After running this command, the Safely Remove Hardware dialog box that you were looking for will open.
- Solving the problem when Windows 7 does not see USB devices
Safe Removal Dialog in Windows
In this window, you can, as usual, select the device that you want to disable and click the “Stop” button. A side effect of running this command is that the safe eject icon will reappear where it should be.
If it continues to disappear and each time you need to re-execute the specified command to remove the device, then you can create a shortcut for this action: right-click on an empty space on the desktop, select “Create” - “Shortcut” and in the “Object location” field » enter the command to open the Safely Remove Hardware dialog. At the second stage of creating a shortcut, you can give it any desired name.
A few words about hard drives
So far we have talked about flash drives. If you are using an external hard drive, you should always remove it before turning it off in Safe Mode.
External hard drives require safe removal
Most modern devices can also be connected via a USB connection. Turning off the power while the drive is running may damage the head.
In this case, it swings back and forth just above the spinning disk while reading and writing data, coming into direct contact with it and causing physical damage.
This may render portions of the storage device unusable or destroy the entire device. You must know how to use solid drives correctly.
The Safely Remove Hardware and Disks icon is missing
Users have reported that the Secure Hardware icon is missing from the notification area in Windows 10. This does not only happen in Windows 10 but is also present in Windows 7 and XP. There are also issues where it is safe to remove the hardware icon and the devices that are currently connected to the computer are not displayed. This guide is designed to resolve all of these issues.
Solution 1: Enable “Safely Remove Hardware” from the taskbar
The icon and module will not appear on the taskbar if they have been disabled from the taskbar settings. It's possible that you may have disabled this option in the past and hence it refuses to display. We will open the settings and enable the module again.
- Right-click anywhere on the taskbar and select Options .
- Go to the notification and click Select the icons that appear on the taskbar .
- Check the File Explorer: Safely Remove Hardware and Drives option .
- After saving the changes, exit. The icon will now appear automatically on the taskbar. If not, click the up arrow to expand the taskbar and select the icon to safely remove the hardware.
Solution 2: Disabling Quick Delete
USB devices have "Quick Erase" technology that disables write caching on the device and in Windows, so you can plug it in without using the Safely Remove Hardware icon. This may increase availability, but may reduce performance. We can try changing this and see if it does the trick.
- Press Windows + R, type " devmgmt. msc" in the dialog box and press Enter.
- In Device Manager, expand Disk Devices
, right-click the USB drive, and select
Properties . - Once in properties, go to the Policies and select
Optimum performance option . - Now check if the icon is present on the taskbar. If it doesn't, you can go back to Device Manager and select Quick Uninstall and check.
Solution 3: Checking Plug and Play Service
The Plug and Play service is responsible for synchronizing the entire USB connection and output procedure on your computer. This service detects the USB or hard drive connected to your computer and prepares to begin transferring data. We can check if this service is working properly.
- Press Windows + R, type services . msc" in the dialog box and press Enter.
- Find the "Plug and Play" entry. Right-click it and select Properties .
- Make sure the service is running and the startup type is set to automatic .
- Click Apply to save your changes and exit. Restart your computer and see if the icon appears on the taskbar.
conclusions
So, media devices do not need to be removed in Safe Mode. This also applies to flash drives in Windows, unless you specifically made changes to the settings. Hard drives on Mac computers, like hard drives, should always be properly removed.
Important! Improper removal can result in data corruption or, in the worst case, compromise the integrity of your drive.
Another way to safely remove your device in Windows
There is another simple method that allows you to safely remove your device when the Windows taskbar icon is missing:
- In “My Computer”, right-click on the connected device, click “Properties”, then open the “Hardware” tab and select the desired device. Click the “Properties” button, and in the window that opens, click “Change settings”.
Properties of connected drives
- In the next dialog box, open the “Policy” tab and on it you will find the “Safely Remove Hardware” link, which you can use to launch the desired feature.
This concludes the instructions. I hope the methods listed here to safely remove a portable hard drive or flash drive will be sufficient.
| Updated 2019-04-29 | Security |
Method two - Notification area
After the flash drive is installed in a computer or laptop, it is displayed, or rather its connection is displayed in the notification area .
When you are finished working with the USB drive, you can remove it by clicking on the corresponding icon. In some cases, with a large number of icons in notifications, it may be hidden. Then click on the arrow, as shown in the photo
we find the desired icon, click once with the left mouse button, confirm the action “Remove the name of the flash drive”, wait a while and after receiving a message that the flash drive can be removed , carefully remove it from the USB port.
If a message appears stating that the device cannot be stopped now, repeat the above steps after a few seconds.