The desire to save time is quite natural for both ordinary users and experienced programmers. Adding a program to autorun will help not only synchronize certain applications on your personal computer, but also get rid of routine tasks, such as conducting hardware tests according to predefined parameters. This instruction will reveal the nuances of methods for setting up automatic launch of Windows programs.
How to add a program to autorun
Adding a program to startup using Windows 7 Start
Step 1: Expand the Start menu and go to the All Programs subdirectory.
Click “Start” and go to the “All Programs” subdirectory
Step 2. In the expanded list, you need to find the “Startup” folder, and, calling the context menu, click on the “Open” link.
We find the “Startup” folder, and by calling the context menu, follow the “Open” link
Step 3. When the Windows 7 automatic loading window opens, you will be able to edit its contents - just drag the shortcut of the program you need into the window, and it will launch when you log into the operating system.
When the Windows 7 automatic download window opens, you will be able to edit its contents
Important! This is the easiest way to add programs to the auto-download list, but not the best. Many programs that actually start with the system do not appear in the startup directory.
First way
Launch the required program and go to the settings section. Perhaps there is an option here that allows you to launch the software along with the OS startup. You just need to check the box next to this item. With a subsequent restart of Windows, the program will start automatically.
The simplest example is uTorrent. If you wish, you can make the application run along with Windows. To do this, you just need to check the box in the right place.
Adding a program to startup using MSconfig in Windows 10
Step 1. To enter the MSconfig environment in Windows 10, you need to expand the context menu of the Start button using the right mouse button.
Right-click on “Start”
Step 2: Run the Run procedure.
Launch the “Run” procedure
Step 3. In the window that pops up, in the query input box, you need to enter the “msconfig” command.
Enter the command “msconfig”
Step 4. In the software interface, switch to the “Startup” tab.
Switch to the “Startup” tab
Step 5: Click on the “Open Task Manager” link.
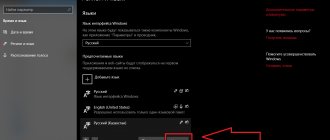
Step 6. In the appropriate tab, select the line with the name of the program or application that should be launched together with the operating system, and use the “Enable” button.
Click on the required program or application and click on the “Enable” button
On a note! You can launch the task manager in another way - by calling the taskbar context menu and clicking on the desired link. After entering the utility, switch to the “Startup” tab and follow step 6.
OS configuration
Let's consider another option that allows you to add a program to startup in Windows 7. Its work is based on the standard “System Configuration” utility:
- Using the already well-known combination of Win + R buttons, we launch the “Run” utility, which we recently worked with. In the small window, enter the command “msconfig” and click the “OK” button.
- When the configuration window starts, we will need to go to the “Startup” tab. For clarity, we have marked it in the screenshot below.
Adding a program to startup using MSconfig in Windows 7
Step 1. To enter the MSconfig environment in Windows 7, you need to expand the Start menu, search for “MSconfig” and run it as an administrator.
Run "MSconfig" as administrator
Step 2. After launch, in the software interface, switch to the “Startup” tab.
Go to the “Startup” tab
Step 3. Set automatic download permissions for the required items. To allow all programs, use the “Enable All” button.
On a note! This software shell interacts with the Windows registry and collects data from it. That is why this utility displays many more startup keys than in the Startup directory. Displaying all elements will allow you to work more closely with program launch parameters when loading the operating system.
Task Scheduler
To download the program without user interaction, you can use the task scheduler included in the distribution of the Windows 7 operating system.
To speed up access, use the Run dialog box. Type “taskschd.msc” in the text field and click “OK” to launch the scheduler.
The program window is divided into three parts. On the far left, select the “Library” item with the mouse, and on the far right, click on the “Create” area.
The Task Wizard window will open. On the first tab “General”, in the field highlighted with a green marker, indicate a convenient name. Check the “Run with highest rights” box. The last action allows you to run programs ignoring the UAC system security prompt.
Go to the “Triggers” tab. Click “Create” to configure the program launch parameters.
Using the drop-down list, change the “By schedule” mode to “At login”. In order not to create unnecessary load when the operating system starts, we set a time delay. Check the “Delay” box. In the menu marked with a three, select “30 seconds”. We save the changes with the “OK” button.
Move to the “Actions” tab. Click “Create” to specify the software for which the new automation rule will apply.
Use the drop-down list to set the “Launch program” parameter. Click on the “Browse” button and specify the path to the executable file. As a result, it should appear in a field highlighted with a green marker. Save the settings by clicking “OK”.
Laptop owners can also go to the “Terms” tab. We remove restrictions on task execution when operating on battery power. First, uncheck the second-level menu. We record the changes and close the task wizard window.
An entry with a new task appears in the central area of the scheduler window, indicated by an arrow.
Adding a program to startup using the registry in Windows 10
Step 1. To enter the registry editing environment in Windows 10, you need to expand the context menu of the Start button using the right mouse button.
Expanding the context menu
Step 2: Run the Run procedure.
Launch the “Run” procedure
Step 3. In the window that appears in the query input box, you need to enter the command “regedit” and launch the editor control console.
Enter the command “regedit” and launch the editor control console
Step 4. In the console interface, go through the list to the “Run” directory.
- LOCAL MACHINE (for local station), or CURRENT USER (for your user);
- SOFTWARE (software settings are stored in the folder);
- Microsoft (corporation product settings);
- Windows (operating system settings);
- CurrentVersion (current version settings);
- Run (settings for automatic program launch).
In the console interface, we sequentially go through the list to the “Run” directory
Step 5. To add a program, use the “Edit” menu and use it to select the command to create a new string parameter.
Using the "Edit" menu, select the command to create a new string parameter
Step 6: Set the parameter name.
Set the parameter name
Step 7. Expand the line parameters and write the path to the executable file. After specifying the path, save the settings.
Expand the line parameters and write the path to the executable file
Important! When changing registry settings, be careful - careless handling of entries can disrupt the normal operation of the software and operating system.
Adding to startup via the program startup folder.
Let's start with perhaps the simplest method. The essence of the method is simple, you need to place the program shortcut in a special startup folder.
Go to one of the following folders:
a) If you want the program to run only for the current user, then insert the following line into the address bar of Explorer (if you want to go manually, then %USERPROFILE% is the folder C:\Users\*your user\): %USERPROFILE% \AppData\Roaming\Microsoft\Windows\Start Menu\Programs\Startup
b) If you want the program to start for all users, then paste: C:\ProgramData\Microsoft\Windows\Start Menu\Programs\StartUp
After inserting, press Enter on your keyboard.
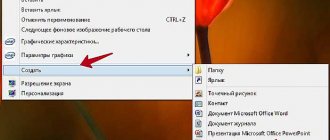
Minimize the Explorer window with the selected folder and begin creating a shortcut. To do this, right-click on the shortcut or executable file of the program and select “ Copy ”.
We return to the previous window, right-click on an empty space in the folder and select “ Insert shortcut ”.
Adding a program to startup using an additional application
To change the software startup mode in Windows, you can use the CCleaner software product. It is completely free and provided "as is".
Step 1. Launch the software product.
On a note! When choosing a program, you can download the full version (requires installation) or portable version (works without installation).
Launch CCleaner
Step 2. Expand the “Service” list located in the left frame of the interface.
Expanding the “Service” list
Step 3. Go to the Startup list. To add an additional element to the automatic download, select it with a mouse click and use the “Enable” button.
Go to the “Startup” list, select the element with a mouse click and click the “Enable” button
Important! Please note that the program uses direct access to the registry, just like the MSconfig utility. Since CCleaner is a third-party software product, attackers can use it for their own purposes. Install only proven versions of the software package.
Video - How to add a program to startup
How to configure Windows autorun?
Autorun can be found in the System Configuration program. But you can open the application window using several ways. You can enter a similar search phrase into the Start menu, and select the desired program from the search results. The second path also starts with the Start menu, but then we need to use the Run command, and fill the line with the phrase “msconfig”.
In the System Configuration window, one of the tabs is called Startup. In the long list of programs you can find the name of those applications that we want to disable. The disabling procedure boils down to the fact that you need to uncheck those programs that you do not need to run. After this, you need to confirm your settings by clicking on the “Apply” and “OK” button.
You will then be prompted to restart your computer. A reboot is not at all necessary; the settings will take effect the next time you turn on the PC, so the choice of action is yours.