Error: “The camera cannot be connected. Close other applications that may use the camera and flash” - a glitch that occurs for many owners of the same-named equipment. This question comes up quite often on user forums. There are several options for troubleshooting. In some situations, it is enough to restart the smartphone, in others you will need to resort to more serious measures. At the moment, the camera in a smartphone is an important tool for any user. In this article we will tell you how to quickly determine the cause of the breakdown and fix it at home. Follow simple recommendations.
Method 2: Global cache clearing through recovery
If the previous method turned out to be ineffective for you, and the camera crash error continues to appear, then try this method. It involves a global wipe of the cache partition for all applications installed in memory.
- Turn off the phone, and then simultaneously hold down the Volume Up, Power and Home buttons.
- Wait until your device name appears on the screen and then release the buttons.
- Using the volume keys, highlight “Wipe cache partition” and then press the power button.
- A few seconds later, you can reboot your phone by selecting “reboot system now”.
Skype: the webcam is occupied by another application, what should I do?
I ask for help in solving this problem: When I try to run a program that uses a webcam, a message appears: The webcam is being used by another application.
I launch Process Explorer (as Administrator), I want to find the process that occupies the webcam: Ctrl+F, I insert the name of the physical device object for the webcam from the device manager - it doesn’t find anything.
I checked the system with many antiviruses, but found nothing. Reinstalled the webcam driver.
I suspect that some malware has learned to hide its process from Process Explorer.
System Windows 10 Professional 1709 64-bit.
Category: Devices Asked by: Guest
Answers from experts and user comments
No, everything is much simpler. Go to Start - Settings - Privacy - Camera. Disable all unnecessary applications that use the webcam and leave only the ones you need.
But sometimes there are cases with a similar symptom, when the camera itself is to blame, namely its physical malfunction. Try another webcam.
Do you have to turn on Maps and Edge? I don't use them, only Skype.
Well, just leave Skype. I took a screenshot on my computer, I don’t get this error, so I don’t touch them.
To respond to this topic, log in to the site using your username or register.
In this review, we will look at why the webcam is occupied by another application when you open Skype. Let's figure out what causes this problem and describe in detail the solutions. This article will be useful to all users, since no one is immune from this trouble. Carefully study the information provided to find out what to do if Skype writes that the Web camera is occupied by another application.
Are you making a video call, but the interlocutor does not see you, only hears your voice? In this case, a message from Skype “Web camera is busy with another application” will appear on the screen. Do not be alarmed, this problem can easily be solved by the user, without the involvement of specialists or support services.
If you have any other problems with your Skype webcam, look for a possible cause in our other article.
The signal can be intercepted by:
- Antiviruses;
- Graphic applications;
- Game streaming services and other services.
Let's figure out how to solve the problem if the camera is occupied by another application in Skype Windows 10.
Let's look at the available options for troubleshooting. Carefully study the list below and you will find a solution to the problem.
- Are you using Kaspersky antivirus? Open the program menu, find the “Privacy” item, select the “Camera” icon and add the messenger to the program that is allowed access;
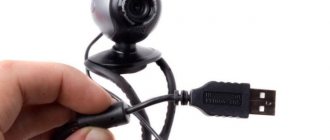
- Try unplugging the USB cable of the device from your PC or laptop and reconnecting it;
- Restart your computer to close all third-party programs.
This is a fairly simple method that will take a few minutes of your time. Another way is to reset the system settings:
- Press the "START" button;
- Select "Settings" and then "Applications";
- Open the “Applications and Features” block;
- Open the section with the name of the messenger “Advanced options”;
- Select the line “Reset”;
- Go back to programs and open camera settings. Repeat the steps;
- Restart the messenger.
If this method does not help, you can try updating the device drivers:
- Press WIN+R on your keyboard and enter devmgmt.msc in the search bar;
- Find your video device in the list and click on it to go to properties;
- Select the "Driver" tab and remove it;
- Go to the distributor's website and download new drivers;
- Restart your computer.
Choose only official software to avoid infecting your computer with viruses or malware.
Now you know all the ways to solve the problem if the webcam is currently occupied by another application in Skype Windows 10 and you can restore the functionality of the messenger in a critical situation.
It usually starts like this: you want to make a video call or receive an incoming one. But that’s not the case: Skype writes that the camera is occupied by another application . Of course, the interlocutor cannot see anything, only the voice from the microphone is heard.
Method 3: Using Safe Mode Features
Every Android gadget has a so-called safe mode, which allows you to diagnose it. The device boots with a limited set of applications, and if the problem is caused by some third-party program, then in this mode the “Warning: Camera Failure” problem should disappear. Everything is very simple and you will see it now. In many cases, such tools use the camera's capabilities and it ends up being constantly busy. As a result, it refuses to start. Next, you need to remove applications one by one to find the culprit.
How to find out which program is using the webcam?
Hello everyone! In today's article we will talk about the security of Webcams. We have already talked in detail about all the ways to protect your webcam. If you haven't read it yet, I encourage you to read it.
Today, in follow-up to that article, I decided to write about how to find out which program uses the Webcam. This may be useful in some cases. And not only in situations related to viruses and malware, but also in case of device conflicts in the operating system. For example, quite often such conflicts occur when using Skype.
In Windows 10, you control how apps use your webcam using a native feature. It is located in the “Settings” -> “Privacy” -> “Camera” section.
This is a pretty useful thing for controlling application access to the webcam. If you use Windows 10, then in terms of security, I highly recommend disabling everything unnecessary that can use the webcam.
If you are not using the webcam at all, then move the “Allow applications to use...” slider to the off position. If you intend to use the webcam with certain applications, then you should disable only unnecessary applications.
All this is of course good. But there is one thing... You understand that not one normal malicious Trojan program will be visible on this list. Such programs are good at camouflaging themselves and hiding their presence in the system.
What to do in such a situation? How to determine which program is using the Webcam?
Very simple. We will search for a webcam in running processes by the physical name of the device using the small and free program Process Explorer from Microsoft. This utility will greatly simplify and speed up the search for a device. The presented method works on Windows 10, 8, 8.1, 7 operating systems.
So friends, let's move on to the instructions themselves.
Method 4: Hard reset
So, let's move on to heavy artillery.
If none of the above helped, and the “Camera Failure” warning does not disappear, then you need to perform a hard reset of the device. Please note that all existing data in memory will be deleted, so save it on your computer, for example. If you don’t know how to do this, then read the instructions on our website.
If you're trying to launch the Camera app on your device, but instead of seeing a viewfinder window, you see a black screen or the message "Couldn't connect to the camera," then either there's an error in the Camera app or your camera module is damaged. Let's figure out what the procedure should be if the camera on Android does not work.
What program uses the Webcam
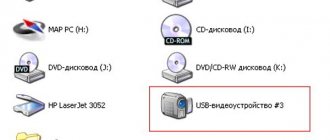
Let's launch Device Manager. To do this, use the Win + R key combination to open the “Run” window.
In which you need to enter the command “devmgmt.msc” and click “Ok”.
After that, in the “Task Manager” window that appears, in the “Image processing devices” drop-down menu, we will find the webcam. If you have several webcams installed on your system, follow these steps for all of them.
Double clicking on the device will open the settings window. By default, the General tab will open, but we want the Details tab.
On the “Details” tab, in the “Properties” drop-down menu, find the item “Physical object name...”. And in the “Value” field, right-click its name.
Now you need to download a small free application called Process Explorer. By the way, a very useful program. It may be useful to you in different situations. I recommend mastering it. In many of our instructions we will use it or other similar programs that replace the standard Windows task manager.
After installation, run the program and use the Ctrl+F key combination to open the search, in which we will paste the device name copied to the clipboard. Click on the search button and wait for the process to complete.
If after the end of the search no results are found, then this can only indicate that the webcam is not being used by any application at that particular moment.
But there may be a different picture. As you can see from the screen above, in my case the webcam is occupied by the Google Chrome browser.
What could this mean?
The first is that one of the open sites is currently using a webcam. Typically, to enable the user's Webcam, the site requests permission using the browser. As a rule, such a window appears on all sorts of online video chats, but this is if the site is white and clean.
What to do if the camera does not work on Android
If your Android camera does not work, then first of all pay attention to the lens to see if there is any visible damage. If the camera stops starting after physical damage or, then the right decision would be to contact a service center.
First, reboot your device. Many software malfunctions are then successfully resolved on their own. If restarting your device doesn't help, clear the Camera app cache and try launching it again. This is done like this:
- Open the applications menu in settings
- Select the Camera app
- Click "Clear cache" and "Clear data"
New updates are constantly being released for applications, as well as for the Android system itself. While some applications may work without being updated, others require timely updates to function. Here's how you can check for updates for the Camera app:
- Open Play Market
- Go to the list of installed applications
- See if there is an update for the Camera app
How to check for new system updates:
- Open Settings
- At the bottom of the list, click "About phone"
- Go to the "System Update" section
- If there are updates, install them
It is possible that the camera is being interfered with by a third-party application that you have installed on your smartphone. This option can be checked in which only system applications are enabled. If the Camera app works fine in safe mode, then the error is caused by a conflict with one of the installed apps. Try disabling the apps you installed recently while trying to turn on the camera. This way you will understand which application is causing the camera to not work, after which you will only have to remove this application from the device.
Using Process Explorer to determine the process that is occupying the webcam
The Sysinternals Process Explorer utility, which can be downloaded from the official website https://docs.microsoft.com/en-us/sysinternals/downloads/process-explorer, will help in the task of determining which application is using the webcam.
The next steps will look like this:
- Go to Device Manager (you can press Win+R, enter devmgmt.msc and press Enter), find your webcam in the list and open its properties.
- Go to the Details tab and copy the Physical Device Object Name property. Unfortunately, the described method does not always lead to the desired result: sometimes the search result is empty: for example, when using a webcam in Google Chrome or the Camera application in Windows 10, Process Explorer finds nothing.
In such a situation, I recommend looking into the Windows task manager and carefully examining the running processes, paying attention to those that could use the webcam of a laptop or computer: video broadcasting and recording tools, instant messengers, processes like Intel RealSense and others.
As a last resort, try simply restarting your computer. However, keep in mind that this may not work in a situation where the program that uses the webcam is in startup.
And maybe this will be interesting:
Why not subscribe?
Distribution of new, sometimes interesting and useful, materials from the site remontka.pro. No advertising and free computer help for subscribers from the author. Other subscription methods (VK, Odnoklassniki, Telegram, Facebook, Twitter, Youtube, Yandex.Zen)
Note: Once you submit a comment, it does not appear on the page immediately. Everything is fine - your message has been received. Replies to comments and their publication are carried out every day, sometimes more often. Come back.
It usually starts like this: you want to make a video call or receive an incoming one. But that’s not the case: Skype writes that the camera is occupied by another application . Of course, the interlocutor cannot see anything, only the voice from the microphone is heard.
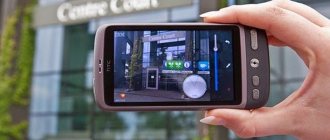
Camera on Android via a third-party application
Today there are many high-quality applications for using the camera on Android; their functionality is often much richer than a standard camera. If the Camera app is not working, you can install one of the third-party apps and use the camera using it. Here are a few applications that have already earned recognition among Android users.
. “Could not connect to the camera”: this error message is displayed on the screen when there is a problem accessing the camera of an Android device - a smartphone or tablet computer. More and more users are reporting that they are encountering this particular error. The difficulty is that there is no single solution to the problem, since it can be equally likely to be related to both the software and the hardware of the device.
It all starts with the fact that when you try to use the camera on your Android device, you first see a blank screen with a camera icon in the center, and then you receive the message “Could not connect to the camera.” Sometimes it is possible to use the camera after rebooting the device, but, as a rule, the frequency of the error increases, and soon it becomes simply impossible to use the photo module to take a couple of photos. Many users also complain that they receive a similar error message when trying to shoot video at the minimum resolution (240p). Is it possible to somehow improve the situation? Let's try to figure out what's happening together and find accessible ways to independently solve the problem.
Available methods
Users report that the camera starts working after rebooting the Android device.
Sometimes you have to reboot the gadget several times to achieve the desired result. In any case, it makes sense to try this elementary method - turn off and turn on your smartphone or tablet again. Every Android device has a boot into "Safe Mode" feature, which means you reboot the phone and turn it on, activating only essential apps and a limited number of available features. Safe Mode is great for troubleshooting, as downloaded applications will be disabled and you will be able to determine whether there is indeed a conflict between various third party software and system software related to the use of the camera. To restart in safe mode:
If the camera works normally in safe mode, then you have narrowed down the search for the causes of the error. The problem is a conflict between third-party applications and system software. It is because of them that you cannot connect to the camera. Your next steps:
C
)
Remove conflicting third-party applications
Try uninstalling third-party applications related to the camera. These are applications that can take pictures during their operation. For example: Snapchat, Whatsapp, etc. Surely there are programs on your smartphone or tablet with which you can take photos directly from the application and share them. Remove such programs sequentially, one after another, checking after each removal to see if the error has disappeared. If you were able to connect to the camera, you have found a third-party application conflicting with the system software. And one more thing: do not forget to switch between video, panoramic shooting and other modes during the test - the problem can appear in any of them, and it is important for us to restore the full functionality of the camera.
D
)
Try using a third-party camera app
If the system app is the only program that can access the camera on your Android device, and you receive the message “Couldn't connect to the camera,” you might want to try using a third-party app to access it. The Google Play store offers many programs suitable for this purpose. Use the search function to find apps in the Camera category. Choose one of the popular applications - such as: Candy Camera, Open Camera, Camera 360, Camera MX or Camera for Android. Download and install the application, launch it.
If you managed to launch the camera from a third-party application downloaded from Google Play, then the problem lies in the official system application for it. Try the following:
Medium difficulty methods
These are the standard steps you can take when the app shows the error message “Failed to connect to camera”. Try using them all - it should help. And don’t forget to stop the application and restart it before each new attempt to connect the camera. The methods given here to fix the “Unable to connect to the camera” error do not carry the risk of losing saved photos and videos.
A
)
Clear cache and data
B
)
Uninstalling and reinstalling updates
Go to the same camera application settings as shown above. If there is an option to remove updates, do so. But remember that you should not use old versions of the apps, so you will have to visit the Play Store to update the camera app again.
B
)
Check permissions (Android Marshm only)
Android Marshmallow has a personalized permission system for core applications. You must confirm that your camera app has permission to access the camera. Typically, if the required permission is missing, it is requested during application startup.
Error resolution methods for advanced users
Attention
: These methods to fix the error “Couldn’t connect to the camera” when used will result in the loss of data saved on the Android device. To avoid losing contacts, photo galleries, games, music and other content, you need to perform a backup. Back up your photos, account information, and apps to your Google Account. All this will be re-installed after adding the same Google account to the device.
A
)
Clearing the cache
This action allows you to clear the device system of temporary data - outdated and only cluttering up the memory. This option is activated in Recovery mode, which becomes available after rebooting the phone using the bootloader.
To clear the cache, follow these steps:
Once clearing cache is completed successfully, restart your phone and try launching the camera app again. Please note that your Android device may have a different button combination for accessing maintenance and repair mode.
B
)
Reset to factory settings
Resetting settings is considered the most drastic way to solve problems, as it entails complete loss of data. But if no other methods help, then you will simply be forced to use it. However, backup will help you save your data, and re-configuring the device will only strengthen your skills in working with Android devices. Here are two ways you can use to reset your phone or tablet to factory settings.
Method I: From the recovery menu
Method II: From System Settings
If none of these methods worked, then the problem most likely lies in the hardware of your Android device. You can return the phone or tablet back to the seller if the warranty period has not yet expired. Otherwise, you will have to contact the authorized service center of the gadget manufacturer or choose a repair shop with a good reputation, whose specialists will be able to understand the malfunction of the device. However, if you are not sure that the cause of the “Unable to connect to the camera” error does not depend on the hardware, then you can wait for the next operating system update. Sometimes after updating some problems resolve themselves. The only pity is that this happens extremely rarely.
Modern smartphones provide their users not only with numerous capabilities comparable to those of a computer, but also with various problems. These include lags, common errors and glitches that can make working with a smartphone unbearable. Fortunately, all of them can be fixed quite easily and the problem with connecting to the camera is no exception. It is only important to know how to eliminate such an error.
Causes of the problem
This may cause paranoid thoughts. After all, if the webcam is occupied by another application, and Skype has nothing to do with it, then perhaps they are spying on you right now?
Exhale and relax. This is a fairly common system problem in Windows, which can be dealt with using available methods. It is not necessary to put duct tape on the camera or put foil on your head.
A variety of applications can be caught in the bad habit of intercepting the camera: antiviruses, graphics packages, game streaming services. It could also be an incorrect system configuration. Let's try to figure out how to appease uninvited video call applicants.
Elimination
There are several options for how to block the camera for use on Skype:
- If you use Kaspersky Antivirus, then you may have to accept its “what is not allowed is prohibited” logic. Open its window, select the “Privacy” “Camera” tab in it and allow Skype to use it. This should solve everything.
- If your camera is not built-in, but is connected via a USB connector, try reconnecting it physically.
- Try booting Windows in clean mode. After that, launch the applications one after another and try video calling on Skype after launching each of them. It's quite troublesome. But if you have a recurring problem, this is the only way to solve it permanently.
There is no Kaspersky on your computer, and there is no one to blame? Then reset all settings using system methods. Everything is done like this:
- Click the Start , then the Settings . There, select “Applications” , then the “Applications and Features” .
- Go to the Skype section (no version), then to “Advanced options” and select “Reset” . Confirm if necessary.
- Go to the “Camera” and repeat the same steps.
- Restart Skype. If necessary, log in again.
Reinstall the video camera driver completely. For this:
- Press Win + Break to go to Control Panel and select Device Manager from .
- Find your camera in the list of devices and double-click to open properties.
- Go to the "Driver" and remove the device.
- Visit the webcam manufacturer's website and download the latest driver for it.
- Reboot your computer, then install the downloaded driver. You may have to reboot again during the process.
What is this error?
A similar malfunction, in which a user who decides to use the smartphone’s camera is shown a message: “could not connect to the camera on Android,” has been encountered by many users lately. At the same time, the number of owners of gadgets on this operating system who have reported the presence of such an error is constantly growing.
The problem itself, oddly enough, does not have a guaranteed solution, since the process of troubleshooting depends solely on the cause of its occurrence. The difficulty is that, as a rule, it is not possible to identify them. This makes solving the problem somewhat more difficult, but does not prevent it at all.
Removing the entire cache of an Android device
If you open the camera, but still see the message that the camera cannot be connected, “Close other programs that may be using the flash or camera,” you need to do the following:
- You need to open Recovery mode. Typically, this requires using the Power and Volume Up or Down buttons simultaneously. The required login keys can be found in the documentation for your device;
- Select the “Wipe cache partition” section here;
Clear Android device cache
Then restart your smartphone again. When it turns on, try opening the camera and checking it.
Elimination methods
Since this problem occurs very often and can be caused by a huge number of reasons, in most cases you need to try all the methods listed below in turn to completely eliminate it.
- A reboot, which sometimes needs to be done several times in a row, can restore the functionality of the smartphone camera. In some cases, you may need to enable/disable the gadget, however, this method does not help everyone.
- Reboot in a special, . Its peculiarity is the limited number of applications and components involved when the system boots. This method is very effective in situations where you need to resolve a software conflict caused by downloaded applications. If everything works successfully in safe mode, then you should use the following method.
- , which were uploaded by the user. There are often cases when they are the cause of incorrect camera operation.
This can be done using the standard capabilities of the device or by using one of the file managers. - If other methods do not help, you should use a third-party application designed for the camera. It is possible that the system program has been damaged, and such a replacement will allow you to use the camera as usual.
As practice shows, after all these manipulations, the device begins to function normally.
However, if the problem cannot be resolved, it makes sense to clear the cache, reset the settings, or even reflash the smartphone.
Camera error. Failed to connect to Android camera - what to do? The most reliable way to get rid of camera problems is to contact a service center. But sometimes outside interference and spending substantial sums on repairs can be avoided. How?
When entering the camera, a system message like “Failed to connect to the camera” may appear on the screen, the screen may simply turn black, and the application may close spontaneously. If you encounter such a problem, first inspect the lens. New packaged gadgets have a camera protected with a special film; perhaps you simply did not pay attention to it and forgot to peel it off. If the gadget has been in your possession for a long time, pay attention to the presence of dirt. A visual inspection can also detect the presence of mechanical “injuries” - such a situation cannot be avoided without paid professional intervention.
- Restart your phone and try logging into the camera again. Sometimes the problem goes away on its own.
- Run a scan for malware on any antivirus and remove it.
Sometimes simply cleaning your phone from unnecessary programs and files helps. Clogged memory simply does not have room to perform simple basic operations.
Consider whether you have installed any new components on your phone. They probably have a negative impact on the camera's performance. If there are any, remove them and check if the camera works.
Perhaps you recently changed something in the settings menu and accidentally disabled access to the camera. Carefully review your phone settings; the problem may be hidden there too.
If the above manipulations are not effective, only a specialist will deal with your problem. To carry out competent diagnostics and high-quality repairs, provide all the important points about the operation of your gadget, list recent events that likely affected its operation.
Causes of the problem
This may cause paranoid thoughts. After all, if the webcam is occupied by another application, and Skype has nothing to do with it, then perhaps they are spying on you right now?
Exhale and relax. This is a fairly common system problem in Windows, which can be dealt with using available methods. It is not necessary to put duct tape on the camera or put foil on your head.
A variety of applications can be caught in the bad habit of intercepting the camera: antiviruses, graphics packages, game streaming services. It could also be an incorrect system configuration. Let's try to figure out how to appease uninvited video call applicants.
Elimination
There are several options for how to block the camera for use on Skype:
- If you use Kaspersky Antivirus, then you may have to accept its “what is not allowed is prohibited” logic. Open its window, select the “Privacy” “Camera” tab in it and allow Skype to use it. This should solve everything.
- If your camera is not built-in, but is connected via a USB connector, try reconnecting it physically.
- Try booting Windows in clean mode. After that, launch the applications one after another and try video calling on Skype after launching each of them. It's quite troublesome. But if you have a recurring problem, this is the only way to solve it permanently.
There is no Kaspersky on your computer, and there is no one to blame? Then reset all settings using system methods. Everything is done like this:
- Click the Start , then the Settings . There, select “Applications” , then the “Applications and Features” .
- Go to the Skype section (no version), then to “Advanced options” and select “Reset” . Confirm if necessary.
- Go to the “Camera” and repeat the same steps.
- Restart Skype. If necessary, log in again.
Reinstall the video camera driver completely. For this:
- Press Win + Break to go to Control Panel and select Device Manager from .
- Find your camera in the list of devices and double-click to open properties.
- Go to the "Driver" and remove the device.
- Visit the webcam manufacturer's website and download the latest driver for it.
- Reboot your computer, then install the downloaded driver. You may have to reboot again during the process.
Camera won't turn on on Android
When the camera on Android does not work, the system, as a rule, signals this with special system messages. It could be “Cannot connect to camera”, “Camera error” or a set of code characters. Try switching the camera mode from front to main and back. If the system warning is displayed in only one mode, most likely everything is normal at the hardware level, and one of the lenses or related spare parts needs to be repaired.
It also happens that the camera turns on, displays the image from the lens on the screen, responds to the display buttons, but does not save images and videos. Try to delete unnecessary things from the phone’s memory; perhaps the device simply does not have enough free space to save. The problem may also be hidden in the settings, where the application is simply not allowed to save files on this device.
Users of inexpensive devices produced by small companies are more likely to encounter problems when using the camera.
Skype: the webcam is occupied by another application, what should I do?
I ask for help in solving this problem: When I try to run a program that uses a webcam, a message appears: The webcam is being used by another application.
I launch Process Explorer (as Administrator), I want to find the process that occupies the webcam: Ctrl+F, I insert the name of the physical device object for the webcam from the device manager - it doesn’t find anything.
I checked the system with many antiviruses, but found nothing. Reinstalled the webcam driver.
I suspect that some malware has learned to hide its process from Process Explorer.
System Windows 10 Professional 1709 64-bit.
Category: Devices Asked by: Guest
Answers from experts and user comments
No, everything is much simpler. Go to Start - Settings - Privacy - Camera. Disable all unnecessary applications that use the webcam and leave only the ones you need.
But sometimes there are cases with a similar symptom, when the camera itself is to blame, namely its physical malfunction. Try another webcam.
Do you have to turn on Maps and Edge? I don't use them, only Skype.
Well, just leave Skype. I took a screenshot on my computer, I don’t get this error, so I don’t touch them.
To respond to this topic, log in to the site using your username or register.
In this review, we will look at why the webcam is occupied by another application when you open Skype. Let's figure out what causes this problem and describe in detail the solutions. This article will be useful to all users, since no one is immune from this trouble. Carefully study the information provided to find out what to do if Skype writes that the Web camera is occupied by another application.
Why can't I connect to the camera on my phone?
Let's look at the reasons why the camera stops working:
- One of the reasons is a firmware update. If the camera fails after updating the Android version, the operating system should be rolled back and reinstalled.
- Damage to camera setup modules. This result is caused by serious mechanical impacts on the device, corrosion of the internals due to the ingress of liquid, and fatigue failure on old equipment.
- Virus programs. Malicious programs can interfere with the correct operation of the camera; they can easily enter the device’s computer if it is not protected by anti-virus applications.
- The module cache is clogged.
Causes of the problem
This may cause paranoid thoughts. After all, if the webcam is occupied by another application, and Skype has nothing to do with it, then perhaps they are spying on you right now?
Exhale and relax. This is a fairly common system problem in Windows, which can be dealt with using available methods. It is not necessary to put duct tape on the camera or put foil on your head.
A variety of applications can be caught in the bad habit of intercepting the camera: antiviruses, graphics packages, game streaming services. It could also be an incorrect system configuration. Let's try to figure out how to appease uninvited video call applicants.
Elimination
There are several options for how to block the camera for use on Skype:
- If you use Kaspersky Antivirus, then you may have to accept its “what is not allowed is prohibited” logic. Open its window, select the “Privacy” “Camera” tab in it and allow Skype to use it. This should solve everything.
- If your camera is not built-in, but is connected via a USB connector, try reconnecting it physically.
- Try booting Windows in clean mode. After that, launch the applications one after another and try video calling on Skype after launching each of them. It's quite troublesome. But if you have a recurring problem, this is the only way to solve it permanently.
There is no Kaspersky on your computer, and there is no one to blame? Then reset all settings using system methods. Everything is done like this:
- Click the Start , then the Settings . There, select “Applications” , then the “Applications and Features” .
- Go to the Skype section (no version), then to “Advanced options” and select “Reset” . Confirm if necessary.
- Go to the “Camera” and repeat the same steps.
- Restart Skype. If necessary, log in again.
Reinstall the video camera driver completely. For this:
- Press Win + Break to go to Control Panel and select Device Manager from .
- Find your camera in the list of devices and double-click to open properties.
- Go to the "Driver" and remove the device.
- Visit the webcam manufacturer's website and download the latest driver for it.
- Reboot your computer, then install the downloaded driver. You may have to reboot again during the process.