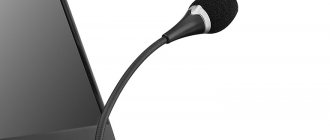
Having an audio microphone is an important component on every PC. After all, almost every second communication application requires a microphone. Therefore, you always need to be ready to communicate with relatives, loved ones or work colleagues.
[toc]
Thus, this article will explain how to enable the microphone on a Windows 7, Windows 8/8.1 and Windows 10 laptop. Apart from this, we will also cover how to configure and fix common microphone problems.
How to enable the microphone on a computer, laptop Windows 7, 8/8.1 and 10?
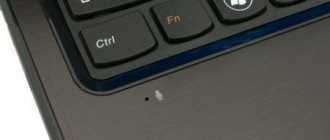
Initially, you need to decide which microphone is installed on your device; it can be a built-in microphone or an external microphone. In the case of a built-in microphone, there is no need to turn it on. But, there are cases when malfunctions occur in the operation of sound recording devices.
So, below we will look at the steps by which you can enable the microphone on Windows 7, 8/8.1 and 10.
- Click on the Windows icon and wait for the main window to appear. You need to find and click on “Control Panel” .
- In the new window you need to select the “Hardware and Sound” .
- In the sound equipment section, select “Change system sounds”.
- In the “Sound” in the “Recording” , you need to find the muted microphone. An inactive microphone will have a black and white image and a mark that says "Disabled" .
- Activate the microphone by right-clicking and selecting "Enable" .
- Ready! You have activated the microphone. Now try to say a phrase and you will notice green bars appear on the right. This means your microphone is ready to use.
Microphone not working on Skype
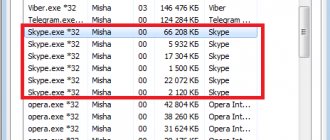
Most often it is necessary for communication on social networks, for example, Skype. If you notice that the microphone does not work in Skype, you can only fix it in the settings of this program. You can find them in the program's control panel. Open the pop-up menu and set the desired options using the recommendations below (Figure 4).
Figure 4. Solving the problem with the microphone not working in Skype
Checking Skype settings
If you are wondering why the microphone does not work on the computer, namely in the Skype program, then it may not work due to incorrect settings. If you updated the day before, you may have selected the wrong device for communication in the program settings (Figure 5). Instead of one device, another device may be indicated, which is currently disconnected from the computer.
Figure 5. Sound settings window in Skype
To change this, you can click in the settings on the item that allows automatic configuration. After this, the necessary parameters will be selected independently, without any effort on your part. At the same time, you can not take risks and avoid possible mistakes that you could make when setting up the microphone yourself.
How to set up an external microphone on a computer, laptop Windows 7, 8/8.1 and 10?
For example, if you purchased an external microphone and want to adjust the sound recording quality and set it to default, then for this we have prepared detailed instructions, which you will learn about below.
- In the taskbar, right-click on the sound icon, and then select “Recording Devices” .
- In the image below we have shown how the built-in microphone and external microphone are displayed in recording devices.
- By default, the built-in microphone is set as the main microphone. In order for the external microphone to become the main (conversational) microphone, click on its icon, and then click on the “Default” .
- Now the external microphone is set as the main microphone.
Checking your privacy settings
You should check your privacy settings from the very beginning, as a common reason is that the use of a microphone is prohibited. To remove it, you need to do the following:
- Click on the start button, then select “Settings” in the menu on the left;
- Go to “Confidentiality”;
- Select “Microphone”;
- Move the slider under “Allow applications to use the microphone” to the On position. Also see if the microphone is activated for the applications you want to use it with.
After that, restart the program and check if the microphone works. If not, use the tips below.
How to record your voice on a computer from a microphone on Windows 7, 8/8.1 and 10?
In order to record any playback or voice from a microphone on your computer/laptop, you need to use the appropriate utility from Windows. Below we have listed a few steps that will help you record your voice on your computer.
- Click Start > All Programs > Accessories > Sound Recorder . Be sure to make sure that the microphone is connected to the PC.
- After clicking the “Start Recording” button, the sound will be recorded. Once you finish a speech or phrase and want to stop recording, click Stop Recording .
- Then a window will appear asking you to select a directory to save the recording. Set the sound file to the desired name, and then click on the "Save" .
- Now double click on the audio file to listen to it. If the sound is clear and does not hum, it means that the microphone is configured properly. Otherwise, proceed to the next section of the article, which talks about what to do if the microphone is humming or hard to hear.
What to do if the microphone is humming on a computer or laptop running Windows 7, 8/8.1, 10?
So, if you have problems such as extraneous backgrounds, hissing and other interference, then this indicates that the microphone is not configured correctly.
Let's take a step-by-step look at how to fix the microphone background noise problem:
- First, you need to open the audio hardware settings panel and then go to the Recording .
- You need to click on the microphone icon and select “Properties”.
- Then go to the “Listen” and check the box next to “Listen from this device.”
- Now go to Levels and adjust the microphone volume slider until there is no more background noise. Don't forget that as you lower the volume level, your voice will become less audible and you will have to speak louder. You can also use the microphone volume boost function, but do not set the volume more than 12 dB, otherwise interference is inevitable.
- Once you are done with adjusting the microphone volume, go to the Enhancements section. Activate the settings as needed, and don't forget to turn on the Urgent Mode to listen to the changes live.
- After all changes , click on the “OK” so that all changes to the microphone settings are saved.
Impact of drivers on microphone visibility
In addition to hardware problems in the form of a bad connector or broken cable, there are also software problems with connecting the headset. They are often associated with driver malfunctions.
Drivers crash when an update fails or due to malware.
In order to update the drivers, you should go to the headphone manufacturer's website, find your model and download the program for your operating system. Then, following a simple algorithm, install new software, which should fix the problem. After restarting your computer, the problem should be resolved.
What to do if your computer or laptop does not see the microphone on Windows 7, 8/8.1, 10?
Many inexperienced users have encountered a similar problem. But in this situation there are two problems:
- Hardware
- Software
Reason and solution No. 1. The microphone is not connected correctly
Initially, it is important to make sure that the microphone is connected to the appropriate jack on your PC. As you know, there is a pink port for the microphone. But one way or another, the equipment must be connected according to the colors. For example, green to green, blue to blue, etc. This way, you will be sure that the microphone is connected correctly.
Reason and solution No. 2. Microphone is muted in the sound panel
If the first solution did not help you and your microphone is still not working, then the second method will definitely save you from this problem.
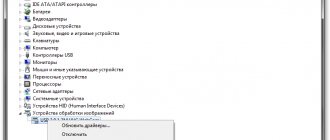
- Open the audio hardware panel, and right-click on an empty area. Then click on “Show disabled devices”.
- After this, you will see that your microphone, which previously seemed not to be visible to Windows, is simply disabled. Right-click on the microphone icon, and then click on the “Enable” button.
With this, we finished our article. We hope that the above methods helped solve your microphone problems.
Method 4: Troubleshoot hardware problems
Often the connected microphone does not function correctly due to hardware defects with it or the target computer. To identify these problems, follow these steps:
- Try connecting the microphone to another PC or laptop, preferably with the exact same version of Windows. If it still does not work, most likely the component is broken and requires replacement or repair.
- If the device is functioning properly on the second PC or laptop, check the connection ports (USB or line-out) on the main computer. Also, for desktop options, it is recommended to connect peripherals to the rear panel, since the front option in some cases may not work due to poor contact with the motherboard.