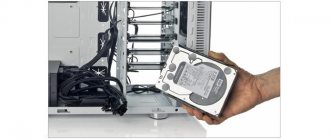
Sometimes a hard drive on a computer that is already in use begins to require initialization. The "Unknown, Not Initialized" condition can occur on both external and internal drives in all versions of Windows.
The disk is not initialized, how to recover
The disk is not initialized, what is this error?
The drive status "Unknown, Not Initialized, Unllocated" appears when an unused hard drive is first connected to the computer.
The new disk is initialized, partitioned and formatted using Windows tools.
Typically, the "Not Initialized" status of the disk in use can be caused by:
- virus attack;
- damage to sectors;
- loss of a disk partition;
- damage to the PC file system;
- damage to the master boot record, etc.
When this happens, the hard drive shows unallocated space in Disk Management and the information residing on the drive becomes inaccessible.
A non-initialized hard drive shows an unallocated area in Disk Management, the information therein becomes inaccessible
It is also possible that a disk does not display disk space.
Uninitialized disk does not show disk space
Initializing a disk, like formatting it, erases the data on the hard disk.
For the problem of an unknown, uninitialized drive, if the cause of the situation is unknown, the most acceptable option is to initialize the drive and use software to recover erased files from it.
What to do if your WD external USB drive is not detected
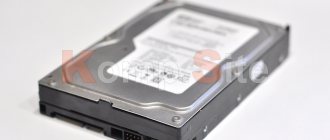
Portable hard drives are very convenient storage media. This is a regular hard drive inside a beautiful box that connects to your computer via USB. They are larger in volume than flash drives, so they are actively used for storing and transferring large amounts of information.
All hard drive manufacturers produce their own models. Hard drives themselves are reliable storage media. But portable models are more likely to be dropped and simply connected and disconnected from the computer more often. Therefore, in addition to standard faults, there are also those specific to portable USB devices.
External drive not detected
When a client comes to us and says that their external drive has stopped working, the first advice is to try a different cable. There are different reasons, maybe the wire itself is faulty or too long, and then there is not enough power for the hard drive. In any case, this is a simple step, so the first thing to do is try a different wire.
The next step is to try connecting the drive to another computer. There may be a problem with the USB ports or drivers on your computer. If the computer sees the disc, great. And if neither replacing the wire nor checking on another computer helped, then we recommend taking the hard drive out of the box and connecting it directly to the computer.
Inside the beautiful box, as a rule, is a regular SATA drive. And a separate adapter board from SATA to USB. Since external drives are often connected and disconnected, these boards sometimes fail. Even if the drive clicks, it may not be a physical problem but a problem with the controller on the adapter board that is supplying the wrong voltage to the drive. This has already happened in our practice. Therefore, we take the disk out of the box and connect the disk directly via the SATA interface to check the operation of the disk.
Real Western Digital USB Drives
Owners of Trancsend external drives may be surprised to see a Samsung hard drive inside the case. Owners of WD Elements or WD My Passport Ultra may be even more surprised when, when they take the drive out of the box, they find a USB drive inside.
If you open the box and inside is a WD10JMVW or WD5000BMVW, congratulations, you have a real USB drive. Modern external WD models have a USB connector soldered directly to the external electronics board and do not have the usual SATA to USB adapter for other manufacturers. But to recover data, you first need to adapt the USB connector to SATA.
Model WD Volume, GB Box model Number of plates Number of heads Family
| wd2500bmvu | 250 | No | 2 | 3 | Venus |
| wd3200bmvu | 320 | No | 2 | 4 | Venus |
| wd5000bmvu | 500 | No | 2 | 4 | Dolphin |
| wd5000bmvv | 500 | wdbabv5000abk-00 | 2 | 4 | Zephyr |
| wd5000bmvw | 500 | wdbadb5000abk-u1 | 2 | 3 | Lite/Firebird/Zephyr |
| wd10jmvw | 1000 | wdbuzg0010bbk-004 | 2 | 4 | Lite/Firebird |
| wd5000kmvv | 500 | No | 3 | 4 | Shasta 3D |
| wd6400kmvv | 640 | No | 3 | 5 | Shasta 3D |
| wd5000kmvw | 500 | wdbpck5000abk-01 | 3 | 5 | Helios |
| wd7500kmvw | 750 | wdbpck7500adbk-01 | 3 | 5 | Helios |
| wd5000lmvw | 500 | No | 1 | 2 | Hubble LT/Hubble |
| wd15nmvw | 1500 | No | 4 | 7 | Shrek LT / Shrek |
| wd20nmvw | 2000 | wdbnfv0020bbl-u5 | 4 | 8 | Shrek LT / Shrek |
| wd30nmvw | 3000 | wdbnfv0030bwt-u5 | 5 | 10 | Pebbleb |
| wd10tmvv | 1000 | No | 3 | 6 | Helios/Shasta 3D |
| wd10tmvw | 1000 | wdbgys0010bbk-u0 | 3 | 6 | Helios/Shasta 3D |
| wd3200bmvv | 320 | No | 1 | 2 | Jamaica 4K |
| wd3200bmvw | 320 | No | 2 | 2 | Zephyr |
| wd7500kmvv | 750 | No | 3 | 6 | Shasta 3D |
If you found your drive in this table, then you have a drive with a USB connector directly on the board. And if your wd5000bmvw is not detected or the wd10jmvw is not initialized, then to diagnose and restore data, you first need to connect the drive via SATA.
The user-friendly USB interface is completely unsuitable for data recovery work. It does not allow you to send ATA commands to the disk and work with hardware-faulty hard drives in special technological modes.
In data recovery companies, in order to convert a wd10tmvw, wd20nmvw or any drive from the table to a regular standard SATA connector, they solder the wires directly onto the board. We also did this before, but now we use a more reliable method by replacing the board with the controller and the entire ROM.
One of our advantages as the largest data recovery center in Russia is our own stock of spare parts for all models of WD drives. And the second advantage, especially if your drive is new and under warranty, is that we are an official partner of the hard drive manufacturer Western Digital in the field of data recovery. All WD drives opened in our laboratory do not void their warranty.
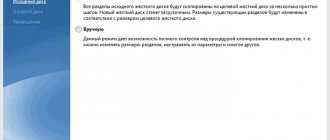
The disk is unknown, not initialized, not allocated. Initialization process
To begin initializing your hard drive, you need to open Windows Disk Management.
Step 1. Press “Win+R”.
Press the “Win+R” keys simultaneously
Step 2: Type “diskmgmt.msc” and click OK.
Type “diskmgmt.msc” and click “OK”
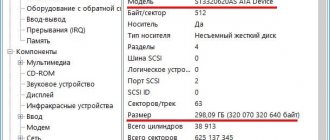
Find the uninitialized disk in Disk Management. If its capacity is indicated, this means that the operating system recognized the disk, but for some reason the disk has a lost partition or a damaged MBR.
Important! Initializing the disk may result in the loss of all stored data on it. If the data on the disk is important, this solution is not optimal.
Step 3. If there are no important files saved on the disk, right-click on it and select the “Initialize disk” function.
Right-click on the uninitialized disk and select the “Initialize disk” function.
Step 4. Select MBR if the disk size is less than 2 TB, and GPT if more. Click "OK".
Select the MBR style if the disk size is less than 2 TB, or GPT if more, click “OK”
Step 5. Right-click on the disk and select “Create simple volume...”.
Right-click on the disk and select “Create simple volume...”
Step 6. Click “Next”.
Click “Next”
Step 7. Leave the data as is and click Next.
Leave the default data and click “Next”
Step 8. Select the drive letter in the OS and click “Next”.
Select the drive letter in the OS and click “Next”
Step 9. Select the NTFS system and click “Next”.
Select the NTFS system, o and click “Next”
Step 10. Click “Done”.
Click “Finish”
The drive will appear in My Computer Explorer.
The initialized disk will appear in My Computer Explorer
How to set up a new hard drive in Windows 10
Setting up a new hard drive in the Windows 10 operating system is quite simple. If it is detected correctly, you must do the following to make the drive available for data storage:
- Right-click on the Start icon in the lower left corner of the screen, and select Disk Management from the drop-down menu.
- Select a drive that is not configured (it will appear black in the drives panel). Right-click on it and select “Create simple volume...”.
- Next, a menu will open in which you need to specify the volume size - select the maximum size if the hard drive is required for storing data, and not for specific purposes (such as installing a second operating system). After selecting the simple volume size, click “Next”.
- At this step, you have the opportunity to select a drive letter - select any that is not already taken.
- In the last paragraph you will be asked to format the hard drive - this procedure is required when installing new media. Select the desired file system (we recommend NTFS for data storage) and click “Next”, after which the disk will be formatted and the “Finish” button will appear.
- This completes the disk setup, and it will appear in the “This PC” menu on Windows 10.
If you plan to regularly use a new hard drive, be sure to ensure that the HDD does not turn off spontaneously during operation, otherwise the drive will quickly become unusable. If you wish, after the initial settings, you can always return to the Disk Management menu and create a new volume on your hard drive, format it for a different file system, or change the drive letter.
( 427 votes, average: 4.63 out of 5)
Video card artifacts: software and hardware reasons
Three ways to remove Microsoft Edge and disable system access to the program
Related Posts
Recover MBR
MBR is the master boot record located at the beginning of the hard drive. The MBR can become corrupted due to malware, random power failure, etc.
If the MBR is damaged, the operating system cannot access the data on the disk, producing the information “disk unknown, not initialized.” In such a situation, it is necessary to rebuild the MBR.
To fix a corrupted MBR, you can use the free EaseUS Partition Master software.
Step 1. Go to URL: https://www.easeus.com/partition-manager/ and click “Free Trial”.
Go to the URL, click “Free Trial”
Step 2. Launch the installation of the program by double clicking the mouse.
We start the installation of the program by double clicking the mouse
Step 3: Select a language and click OK.
Select the language and click “OK”
Step 4. Click “Accept”.
Click “Accept”
Step 5. Click “Next” in the next window, checking the items as in the picture.
Click “Next”, marking the items as in the picture
Step 6 . Uncheck additional software and click “Next”.
Uncheck additional software and click “Next”
Step 7. Oh, uncheck the “Install SHAREit” option, click “Next”.
Oh, uncheck the “Install SHAREit” option, click “Next”
Step 8. Oh, click on “Next”.
Oh, click on “Next”
Step 9. To receive newsletters from developers, you can enter your email address, if you don’t want to, just click “Next”.
Click “Next”
Step 10. Click “Finish”, leaving a checkmark on the option to automatically launch the utility after installation.
Click “Finish”, leaving a checkmark on the option to automatically launch the utility after installation
Step 11. After starting the program, select the hard drive with the right mouse button and left-click “Rebuild MBR”.
Right-click the hard drive and left-click “Rebuild MBR”
Step 12: Click “Execute 1 Operation” to perform the pending boot record repair operation.
Click “Execute 1 Operation”
Check and fix bad sectors and disk errors
Step 1. In “Partition Master”, right-click on the partition you want to check and select “Check File System”.
In “Partition Master”, right-click on the partition you want to check and select “Check File System”
Step 2. Leave the “Try to fix errors...” option selected and click “Start”.
Leave the “Try to fix errors...” option selected and click “Start”
The software will begin checking the file system of the disk partition.
Step 3. When the operation is complete, click “Finish”.
Click “Finish”
Find out more detailed information on how to recover bad sectors on your hard drive from our new article.
If the system does not boot: checking the status from the command line
To check any type of hard drive, if the system does not want to boot, you can offer the option of booting from circuit media using utilities like LiveCD or even a Windows installation distribution that has a boot sector that allows you to boot from external media instead of the HDD.
If you use a Windows distribution, during the startup process you need to press Alt + F10 or select the recovery console with the “R” button. Next, you need to enter sfc /scannow on the command line (at least for starters). In the advanced version, it is worth using the boot record recovery commands:
- Bootrec.exe /FixMbr.
- Bootrec.exe /FixBoot.
- Bootrec.exe /RebuildBcd.
The last command to use is not mandatory and is used only to overwrite the boot area (sectors).
Recovering a disk partition
Fixing the MBR does not always solve the hard drive initialization problem. If the disk still has unallocated space in Disk Management, you need to perform a partition recovery.
Important! Hard disks, both MBR and GPT, that have an initialization problem appear in the Partition Wizard as an MBR disk. A GPT disk that appears as MBR must be converted to GPT before the partition can be restored, otherwise it may fail.
Step 1. Click on “Partition Recovery” in the program at the top of the main window.
Click on “Partition Recovery” in the program
Step 2. Select the drive and click “Scan” to search for lost partitions.
Select the disk and click “Scan”
The program will scan in two modes: “Quick Scan” and “Deep Scan” to find all lost partitions and data.
Note! " Quick Scan" finds the last deleted partition, and "Deep Scan" finds previously deleted partitions.
Step 3. Wait for the scan to complete.
Scanning process, waiting for completion
Step 4. Select the lost partition marked as “Deleted” with previous labels, capacity, etc. and click “Proceed”.
Select the lost partition, marked as “Deleted”, click “Proceed”
Step 5. Click “Recover Now”.
Click “Recover Now”
Step 6: Click “Execute 1 Operation” and click “Apply” to resuscitate the partition.
Click “Execute 1 Operation”, click “Apply”
And finally
If the drive was purchased less than a year ago, it is still under warranty. If you still cannot solve the problem on your own, be sure to contact the place where you purchased the external hard drive. Your device must be accepted under warranty and diagnostics performed, based on the results of which the device must be repaired.
Unfortunately, the statistics are as follows: modern hard drives wear out very quickly, and very few devices can work correctly for more than two years.
If an uninitialized disk does not have a specified size
If Disk Management doesn't have any hard drive information, it doesn't show capacity, or you can't perform operations in Disk Management with an I/O error, there might be a problem with the drive itself or the external hard drive container.
If it is an external hard drive, replace its container.
If the external hard drive is not initialized, change its container
If it is an internal drive, follow these steps.
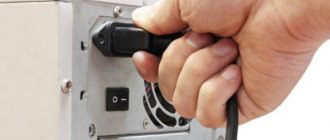
Step 1. Turn off the computer, disconnect all wires from it, remembering the order in which they were disconnected. Remove the battery if it is a portable device.
Removing the laptop battery
Step 2. Remove the cover of the PC system unit by unscrewing the screws securing it.
Remove the cover of the system unit by unscrewing the screws securing it
Step 3: Disconnect the data and power cables from the problematic hard drive.
Disconnect the data and power cables from the problematic hard drive
Step 4: Remove the CMOS battery located on the PC motherboard for ten minutes, resetting the BIOS settings. Reinsert the battery.
Remove the CMOS battery on the computer motherboard for 10 minutes
Removing the CMOS battery on a laptop
Step 5. Connect the data and power cables to the drive.
Connecting data and power cables to the drive
Step 6. Reassemble the computer in the reverse order of shutdown and turn it on.
We assemble the computer in the reverse order of shutdown and turn it on
Step 7. Go to Windows Disk Management and see if the hard drive shows its size by right-clicking on the “This PC” icon and clicking on the “Manage” line. Then select the “Disk Management” subsection and look at the disk status. If there is no disk, move on to the next solution.
Right-click on the “This PC” icon and click on the “Manage” line
Left-click on the “Disk Management” subsection
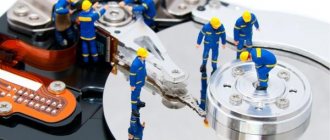
How to recover a disk
We have selected several solutions that will tell you what points should be checked first in case of an initialization error.
Cables and power
If the hard drive was removed from the computer, then perhaps not all cables are connected. Sometimes, even if they fit tightly, the contacts do not touch, which will naturally cause a bug. It is recommended to re-disconnect all elements to reconnect again . You can lightly wipe the contacts with alcohol. To check, try installing the hard drive from another PC. This way you can identify the true problem.
Internal BIOS parameters rarely go wrong, but you still need to check. If you lack knowledge in this area, simply restart. The easiest way is to disconnect the battery on the motherboard and remove the battery if you have a laptop.
You can go into the BIOS and find the Exit item. There, among several commands there will be “Load Default Settings” . By activating it, a backup will be made to the factory settings.
Breaking
The most characteristic sign of a breakdown is sound. Winchester began to publish something new, then, most likely, it is on the verge of failure. There's nothing you can do about it. It is better to immediately go to the store for an alternative hard drive. Failures in the PC itself also affect the hard drive. Try replacing some elements: cables, RAM, connectors. In general, you need to find a non-working element that affects the reading of data.
Utility
We resort to the help of a utility for reviving partitions. Alternatively, it could be Acronis Recovery Expert , HDDScan or something like them. Only an experienced user can perform such complex tasks. Inexperienced users should refrain from any manipulations. As a last resort, Google it.
Trojans
Removing them is an important step towards solving “The disk is not initialized.” If you can carry out this operation, then be sure to scan everything for viruses. Although it's unlikely, hackers never stand still, and neither does their technology.
Uninitialized HDD partition
There are often times when the system is unable to determine the free area of the hard drive and assign it a specific value. In such cases, third-party utilities are used for diagnosis and correction. Here is a video instruction on how to use the TestDisk .
Other solutions
- reinstall your Windows, update drivers, or switch to the official top ten;
- regular formatting via ACRONIS will solve minor virtual bugs.