How to make blur in Photoshop
Detailed lesson, instructions about blur in Photoshop. You will learn how to create blur of any objects and images.
The group blur filters has existed in Adobe Photoshop for a long time, since early versions, the group includes many options for blur - Gaussian Blur, Motion Blur, Surface Blur and many others , this group of filters is located in the Filter - Blur menu . Starting from version CS6, new types of blur have appeared, with a wider range of settings; you can open a subgroup with new filters by going to the Filter -Gallery Blur .
In this lesson we will get acquainted with the most popular type of blur, Gaussian Blur, and use an example to learn how to make blur in Photoshop.
Gaussian Blur gives a blurry effect throughout the entire image; you can access this filter through the Filter -Blur- Gaussian Blur menu.
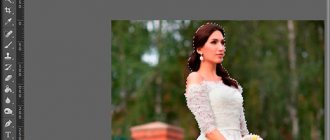
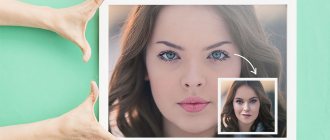
Let's open a photo with a girl (https://cloud.mail.ru/public/C9Q6/jDda1wyej), the background and the girl in this image have the same degree of clarity, which is why the girl gets lost in the background. According to one of the rules of aerial perspective, the main object should be clearer and more contrasting, then our eye will immediately catch where in the composition the main things are and where the secondary ones are. File- Open :
Duplicate the layer ( Ctrl + J ) or double-click on the layer in the layers panel - Create a duplicate layer (Duplicate Layer). Open the filter Gaussian Blur, Filter-Blur - Gaussian Blur. The following window will open:
radius directly depends on the size and resolution of the image, as well as the desired result. Let's choose a radius of 5 pixels - this will make the effect clearly visible. For this image, this value for the blur radius is a bit too much, but we chose it to make the difference more obvious.
a layer mask to the blur layer , click on the layer mask in the layers panel:
Select Brush tool , hotkey for calling tool B (in the English layout):
Foreground color black :
Making sure that layer mask is active, use a black brush on the layer mask . If you accidentally erased the excess, change the color of the brush to white and return the deleted fragment. Black color on the layer mask erases, white color restores the visibility of the image.
This is what layer mask after applying a black brush :
And the image as a whole:
Using layer mask has one negative point - a halo appears at the junction of the main object and the background; this can be easily avoided if, before blurring, use the Clone Stamp Tool , the Content-Aware Fill function , or any other convenient The tool allows you to clone the background at the junction with the object, inside the object itself. In the case of our photo, it looks like this (may this sweet girl forgive me!):
Briefly about the operation the Clone Stamp Tool .
tool is S. Using the tool, you can clone parts of an image to other areas. In order to select a sample for transfer, click the left mouse button while holding down the Alt key , then release Alt and transfer a piece of the selected image to the desired area, click the left mouse button - and the piece “takes root” in the new place.
I repeat, at the junction of the object and the background, we take a sample from the background and transfer it to the object, and so on along the entire contour of the main object.
And here’s what the image looks like if you blur not the original layer, but the one processed along the contour with the Clone Stamp Tool and then erase the blur from the girl the layer mask
There is no halo, the boundaries are clear, the emphasis is on the girl, the background does not distract attention.
So we learned how to make blur in Photoshop.
Lesson author: Olga Maksimchuk (Princypessa)
Archive brush
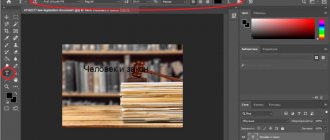
The easiest way to do this is to use the familiar History Brush tool. But first, let's open the image in Photoshop where we want to blur the background. I chose a photo of a girl on Red Square.
- From the main menu at the top, select Filters, then select Blur, and from the next drop-down menu select Gaussian Blur. This is a special filter that blurs the entire image.
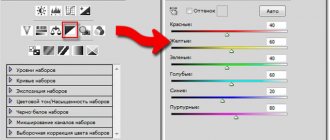
- You will now have a filter properties window where you can increase or decrease the blur mode. I decided to blur the entire image by 6 pixels. Now click OK and see what happened to the image.
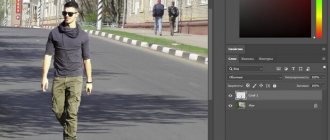
- But now we take the familiar “History Brush” tool, press the right mouse button and select the brush hardness (50 percent) and the brush size (see here to make it convenient for you to paint over the girl), and begin to carefully paint over the girl without touching the background itself. It turns out that we are returning it to its original state.
Do it carefully. If you suddenly touch something too much, you can always go back one or more steps. But don't do everything in one click. It’s better to release the mouse periodically so that in case of an error you don’t have to go back to the beginning.
Well, that seems to be all. It looks beautiful. But let's look at a couple of other ways to broaden your horizons.
Blurring the Background in Photoshop
First, let's open the image we want to process. We chose for work a photo of the charming actress - Cobie Smulders.
We will blur the entire background in the photo, i.e. everything outside the window.
Select and copy the background of the photo
See also the lesson: “How to cut out an object in Photoshop”
Let's start separating the part of the image that we won't touch from the area that we'll blur later.
- In the toolbar, select the “Quick Mask” tool:
- In the color palette, be sure to set the main color to “Black”, and select “White” as the background color.
- Then take the Brush tool
and paint over the part that we don’t want to blur (the painted part is the one that is painted with a red tint).
If you don’t know how to work with a brush, then we have a separate lesson: The Brush Tool in Photoshop
- Then, after selecting the required area, click on “Quick Mask” on the toolbar again. This way the program will create a selection of the area that NOT painted red:
- All that remains is to use the hotkey combination CTRL+J , thereby copying the selected area (background) to a separate layer:
See also the lesson: “How to select an object in Photoshop by contour and more”