- 18shared
- 0Facebook
- 15Twitter
- 3VKontakte
- 0Odnoklassniki
Many experienced car enthusiasts remember well the times when the presence of a CD radio in a car almost served as a status of financial well-being for the owner of a vehicle. Today, car CD players are available to everyone, they are cheap, easy to use and at the same time quite reliable. In general, you have a car radio, all you have to do is burn the music onto discs and you can hit the road to the accompaniment of your favorite tunes.
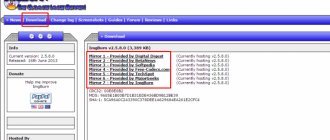
True, a question may arise here, and not even one, but several. What type of discs should I use for this, in what format should I record music onto a disc, do I need any special programs for this, and in general, how is this done? You can find the answers to the first two questions in the technical specifications of your radio. Take, for example, the Pioneer DEH-X2900UI model. As can be seen from the screenshots attached below, the car radio has a USB port and a CD drive, supports CD-R/RW optical discs and MP3/WMA formats.
There are car radios that support audio playback from DVDs, and there are also those that do not have an optical drive at all, suggesting the use of USB flash drives and memory cards instead. The same goes for formats. For example, the once popular CDA format used in older generation car radios is now considered obsolete and is not supported by many new models. As for the CD-R and CD-RW types, see for yourself. Discs of the first type are cheaper, but they cannot be re-recorded; the second are more expensive, but they can be erased and new music recorded on them.
Music on round media
Basic moments:
- Audio formats
- Disc formats
- Recording music in the car
- Recording music using Windows
- Record music using Windows Media
- Writing music - Nero program
- Recording music - Ashampoo program
Audio formats
Music is usually recorded in three formats: Audio CD, Mp3 and Flac. There are, of course, other formats, but in this issue we will consider only these three. So, how do these music formats differ from each other?
Audio CD - its history began in the last century, back in 1969. The first Audio CD (compact disc) was released in 1980 by Philips and Sony. And two years later the first CD player appeared.
It holds from 15 to 20 songs in good quality (stereo), recording duration is up to 80 minutes. Most often, such discs are listened to in cars, stereo systems and other players. They were also often used in discos and recording studios.
Mp3 - the format itself appeared in 1994, it was developed at the Fraunhofer Institute. Literally a year later the first MP3 player appeared. This format can record up to 10 times more songs than an Audio CD, depending on the sound quality and the codec being compressed.
An ordinary person probably won’t be able to tell the difference between the sound of Mp3 and Audio CD. The Mp3 format is widespread almost everywhere and is supported by most players. It is divided into three versions: Mpeg-1, Mpeg2 and Mpeg-2.5. The patent for Mp3 belongs to Alcatel-Lucent and expires in 2020.
Flac - appeared quite recently, not many people have heard or know about it. Personally, I came across it by accident about a year ago. For true music connoisseurs, I can recommend listening to audio recordings in Flac format, also called Lossless. There are almost no losses and the sound quality is much higher than in Audio CD and Mp3. The average size of one such file is several times larger than Mp3.
Sound quality on average ranges from 700 to 1500 Kbps. In the same Mp3, a maximum of 320 Kbit/s, most often 192 Kbit/s. Listen to the song in the first two regular formats, then in the Flac format. I'm sure the difference will be obvious. If you like calm music, then check out my second music blog, Chillout.
I got a little carried away with these audio formats. If you want to learn more about formats, you can always turn to the Internet or Wikipedia for help. Let's proceed directly to the process of recording music to disk.
To do this, you must have several CDs or DVDs ready, depending on the amount of information you want to burn to the disc. And several so that if one disk deteriorates (burning fails), you can use the second one - a spare one.
Disc formats
I completely forgot to tell you what kind of discs there are. Currently, the most commonly used disk formats are:
- CD-R, CD-RW - capacity of information 700 MB
- DVD-R/+R, DVD-RW/+RW, DVD-R DL/ DVD+R DL - information volume 4.7 - 8.5 GB
- DVD-RAM can be rewritten up to 100,000 times, unlike its brother DVD-RW/+RW, which has a resource of up to 1000 rewrites. In most cases, it has a protective casing and holds 2.6 - 9.4 GB
- BD-R/-RE/-RE DL - Blu-ray discs, information volume 25 - 500 GB
- Also, all of the above discs have smaller brothers Mini-CD, Mini-DVD and Mini-BD, which hold a little less information than their older brothers
The abbreviation -R- means single-use, -RW- reusable, and -DL- multi-layer disc.
Recording process
To start recording music onto a CD or DVD, you will need a computer or laptop with a burner drive. You should insert the disc there, holding it by the edges, and launch the burning program. For convenience, you should place the audio files that you want to save on CD in one folder. Then you need to drop the music from it into the recorder program window, arranging the tracks in the required order, or use the opening dialog.
When burning a CD-DA, you must select as many files as will fit on the media. To do this, follow the scale or software prompts. To create an MP3 disc, the CDFS (ISO 9660) file system is selected and the recording speed is set to 8x. In this case, mistakes will be avoided. After this, the start button is pressed.
Depending on the selected speed, the process may take several minutes. CD writing speed is faster than DVD. Immediately after burning and ejecting from the drive, the media may be hot due to the laser. The data surface will be purple. If, after inserting media into the radio, it cannot be read even if you are using a compatible file system, then the parts of the player are worn out or dirty. You should use a cleaning disc.
If you want to update the contents of a rewritable CD-RW disc, you must first erase it and then write new files. In all cases, before installing a disc into a car radio, you must check it for readability and file order using a music center or a portable radio with a CD drive. It is worth considering that the number of write and erase cycles of this media is limited. After this, the data is no longer saved.
We burn music to a disc in the car
In order to burn music to a disc in your car, you need to decide on the supported formats of your radio. Usually they are written on the car radio itself. If they are not there, then look at the instructions for the radio itself, if any remain.
If not, then write down the brand, name of the radio and look up information on the Internet on supported media and audio formats.
Old radios support CD - Audio and WMA. It is necessary to record music in these formats; others will not be played.
Old radios with CD support - MP3, Audio and WMA. Here you can already write melodies on discs in empatri format.
Radios supported CD and DVD - it is possible to record songs on both CD and DVD media, see supported formats.
The latest radios support CD, DVD, USB-Flesh (flash drives), Bluetooth, phone support and directly from the Internet.
There are car radios on Android that support FLAC (lossless) - the sound quality is much better than MP3, but to evaluate it, a good audio system must be installed, preferably with a sound amplifier.
Multifunctional utility for recording devices
This program was named after Emperor Nero, who, according to famous legend, set fire to Rome. The English translation of the title sounds like “Nero, who burned Rome” or, in a slightly different way, “Nero, burning a (CD-)ROM”. Here's a play on words. But Nero does not burn, but burns, that is, writes optical media.
Nero simplifies working with
CDs and DVDs , video and audio, and also has a backup function and performs cover layout. Recently, Nero has been recording both Blu-ray and HD formats.
So, in this article we will look at the process of burning discs with this utility. Step-by-step instructions will help you understand all the intricacies and solve any problems.
Recording music using Windows
The first way we will learn how to burn music to a disc using standard Windows tools.
We turn on our computer, insert a blank disk into the drive, it should be 100% free and go to my computer.
Let's go to this blank disk.
The How do you plan to burn this disc window appears.
We come up with a name for our disc (for example, My Music).
Choose how you plan to use this disk.
Personally, I rarely use this method and always choose With a CD/DVD player.
You can also click on the blue text What format should I use?
If you have any questions or difficulties, you can use this hint and click Next.
We insert or drag the necessary files music, photos, videos and so on onto it.
The files we add will be transparent - this means that they are ready to be written, but have not yet been written.
If you don’t know what hidden files are, then I recommend that you read the article on how to show or hide files and folders on your computer.
Move the mouse to the free unoccupied space and right-click on it, in the menu that appears, select Burn to disk.
Here you can name our disk, if you haven’t given it any name before, or you can leave it unchanged.
Let's move on to Recording Speed, here I recommend everyone to record at a low speed from 12x to 16x, personally I always choose 12x.
There is an option to Close the wizard after finishing recording files.
You can use this feature if you want to close the Burn Wizard after the disc has been burned.
Click Next and wait for some time, usually 5-10 minutes (possibly longer), depending on the amount of data being recorded.
After burning is completed, click the Finish button.
In the end I got it the way it turned out for you, I don’t know, everyone will have different files.
After recording is complete, you can enjoy your new music. If the recording was not successful, then you need to perform all the same steps, only with a new disc.
How to burn music to disk using Windows 7 | Moicom.ru
How to burn a CD with music
Several programs are used for burning. Each of them has its own unique functions. Some utilities have great potential. Any program is suitable for recording a disc in MP3 format in a car, DVD/CD player, or for listening on a computer.
Standard system tools
You can burn music from your computer to disk using standard Windows tools. To do this you need to follow these steps:
- Insert optical media into the drive.
- Click on it in Windows Explorer.
- A menu will open where the system will ask how the disk will be used, as USB drive or with a player . You must select the first option and click on the “ Next ” button. Then the user will be able to add files.
- Move tracks to the window that opens from the folder in which they are located.
- Files being transparent means they have not yet been written. You need to select them and right-click (RMB). In the menu that opens, click on the “ Burn to disk ” item.
- Now you can give the device a name and indicate the speed at which the burning procedure will be carried out. The lower the speed , the better. The burn tracks will last longer and will not be erased over time.
- Click on the “ Next ” button.
- The recording time will be displayed on the screen . All that remains is to wait.
- After the procedure is completed, click the “ Finish ” button.
Best TeamViewer Alternatives
The burning will be completed.
Windows Media
You can also record songs or music using a regular built-in Windows Media player:
- Click on the “ Start ” button. Select Windows Media Player from the drop-down menu.
- Find the Recording in the top right corner of the player window next to Playback.
- Now you need to drag the music files into the data list, which opens under the “ Record ” tab.
- Go to “ Advanced parameters ” and set your own settings for burning.
- When the user has set his settings, he can click the “ Start Recording ” button.
- All you have to do is wait for the burning to finish .
MakeCD
You can burn music in mp3 format to a disc from your computer using the MakeCD utility. It can only be used to record music files . Now you need to do the following:
- Copy MP3 tracks to a special folder. Put the exe file with the program there.
- Run the copied file. The utility will scan the tracks in the directory and open them for burning.
- Click “ Next ”.
- In the window that appears, set the speed , select the drive on which burning will be performed, and click “ Burn ”.
All that remains is to wait for the burning to finish.
BurnAware Free
To work with the BurnAware Free utility you should:
- Download, install and run the program .
- Find the MP 3 disc and go into it.
- Select the drive on which the user will record tracks.
- Copy the required files to the open window.
- Click on the red circle .
Wait for the recording to finish.
Attention! If the user wants to burn MP3 tracks to a DVD disc, they should click on “ Data disc ”.
CDBurnerXP
CDBurnerXP will help you burn music onto a CD. Thanks to this utility, you can copy disks not only to XP, but also to Windows 7, 8 and 10:
- Download, install and run the utility .
- In the window that appears, select “ Data disk ”.
- Drag files to the location where the program requires.
- Click on the green checkmark or the “ Record ” button.
- Burning will begin . All you have to do is wait for it to finish and remove the music media from the drive.
How to use Rufus
Astroburn Lite
The procedure in this utility is as follows:
- Download and install Astroburn Lite.
- Open the utility.
- Click on “ Add files ” and drag the desired tracks into the window that opens. In addition to general drag and drop, you can create additional folders and put tracks in them.
- The program also allows you to rename files as needed by the user or delete them.
- After the preparation process is completed, the user presses the button to start the burning process and waits for it to finish.
Nero
A utility that allows you to not only copy music to disk. It helps the user make covers for boxes, burn a picture of a recorded album onto discs, edit video files, and copy Blue-ray discs.
You can cut mp3 in Nero as follows:
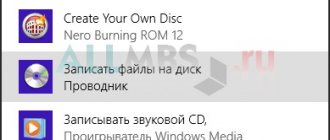
- Open Nero Express.
- Select Data DVD Data CD .
- Drag and drop the required files into the panel that appears on the screen .
- Click “ Next ”.
- Select the media to which you will copy. Select burning speed. And click on the “ Record ” button.
Ashampoo Burning rom
To properly transfer music to disk, you need to download and install Ashampoo Burning Rom, then:
- Open the utility.
- On the left side of the window, click on “ Write files ”. On the right - on “ Create a new CD with data ”.
- In the window that opens, click on the “ Add ” button. Select the required files in the dialog box and click on “ Add ”, then click the “ Finish ” button.
- The tracks will go into the burning window. The user will see how much disk space will be occupied and whether more files need to be added. Then you need to click on “ Next ”.
- All you have to do is click on the Record button and the burning process will begin.
Record music using Windows Media
I will demonstrate the second way to burn music to disk using Windows Media Player. It is present (built-in) in the standard software package of Microsoft operating systems.
The first step is to enable our Windows Media Player.
After it opens, you need to go to the Recording tab, which is located in the upper right corner between Playback and Synchronization.
An Audio CD should appear. It said 702 MB of 702 MB left.
In order to add the necessary elements, they must be transferred to the Recording List.
After this, you can go to Recording Options.
Additional recording parameters... set all the necessary settings, if, of course, you consider it necessary to do so.
I almost never go there, although no, you need to choose the recording speed - the lower the better. You can set it to medium or low.
After all the settings have been made, click Start recording and wait for the final result, but while you wait, expand your knowledge and read the article on how to enable the task manager.
There is also the option of Copying music from a CD. Quite a handy tool if you need to copy music from an Audio CD. Most programs won't be able to do this. I have only seen and used this option in two programs - Windows Media and Winamp (my favorite music player).
How to Burn Music to a Disc - Windows Media Player | Moicom.ru
Preparing files
It is necessary to convert the audio files to the required format before cutting the music onto a disc for the radio. If you are using MP3 or WMA format, you should select a constant bitrate. The smaller it is, the more files can be recorded. It is not recommended to use files with variable bitrate, because... The playback time may not be displayed correctly, and rewinding may not work correctly.
The next stage of preparing files is recording tags containing the song title and album, artist name and other information. If they are in Russian, it is recommended to rewrite them in English letters by transliteration, using a media player or tag editor. This will help avoid problems with displaying information on the display of a car radio that does not support the Cyrillic alphabet.
The file name length must not exceed 16 characters. Otherwise, some tracks may be ignored and the information on the display may not be fully displayed. Converting and preparing files for recording on a Digital Audio CD is carried out by a program that writes music to the media. If tracks in WAV format are used, they will be recorded directly.
Writing music - Nero program
In most cases, when I need to burn any disc, I most often use the Nero disc burning program. Surely most of you are familiar with this program, if not, I recommend that you get acquainted with it. It has extensive capabilities for recording music onto a disc and a lot of additional features (settings and bells and whistles).
With it you can copy discs, create images, record your own clips and movies, make presentations, your own slide shows and much more. You can download this program on the Internet; on the official website of the program, different versions cost differently, but not for free, so search on the Internet.
Let's start recording music to disk in the third way, using the Nero program.
We launch the Nero program, I use version 7, it is proven and the most reliable, at least for me. Perhaps someone has a different version, the interface will be slightly different, but the essence of the program does not change - recording discs and everything connected with it.
Let's go to Nero StartSmart, your name may be a little different. At the top center you can immediately select the recording media type CD, DVD, Blu-ray or two in one CD/DVD.
Go to the note - Sound tab.
We select the project we need and click on it Make Audio CD, Create JukeBox CD (Mp3, Mp4, WMA) and so on.
You can also go to the data tab and burn a regular data disc. If you just need an Audio CD, then select Make an audio CD. You need Mp3 - select Create JukeBox CD, or Create CD with data.
If you have a lot of information, you can burn discs to DVDs, everything is the same.
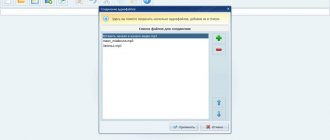
After selecting the project, the Nero Express window appears in which we need to add our files.
You can click on the green plus button Add, or drag and drop data into an empty window. You can also use the clipboard and hot buttons Ctrl+X, Ctrl+C, Ctrl+V.
The Add File(s) window will appear with two green bars.
After the information has been added to the disk, you can double-check everything and click Next.
A Compatibility Warning appears (may not appear). We are asked to Disable multisession? If we don’t write anything else to it, then click yes. If you want to add data to it in the future, then click no, and the Final Recording Settings window will appear in front of us.
Here you can write the disk name.
Select the current recording recorder (if you have multiple drives).
Set the number of copies that will be recorded.
It is possible to check the box Check data after writing to disk - this function is useful if you are recording important information and want to make sure that it was recorded without any errors. It is also sometimes called Data Verification, that is, comparing a copy with the original.
You can also set Allow adding files (multi-session).
Then click Record (the burning match near the disk) and wait. You can go smoke, drink tea or coffee, or do something else for 20 minutes, sometimes more, for example
- subscribe to receive new articles from my blog,
- read the article on how to find out the characteristics of a computer
- Kaspersky Yandex version.
When the burning process is complete, the following window should appear: Burning completed successfully, click OK. After this, the Save Project window will appear. We will be asked - Do you want to save the project? I always click No, if you want to save the project, then click Yes.
You can also check the Don’t show this message again checkbox if you don’t want it to constantly appear after each disk burn. If burning fails, this also happens, you need to insert a new disk and try again.
You can enjoy your music or other recorded data.
How to Burn Music to a Disc - Nero 7 | Moicom.ru
How to burn data to a CD/DVD using Nero?
I think every computer user sooner or later is faced with the need to write information onto a CD or DVD. And there are quite a lot of reasons for this today. For example: backing up important data, creating bootable disks, creating databases with music, photos, films, documents. In addition, with the advent of CD-RW and DVD-RW discs, it became possible to reuse one disc multiple times, i.e. rewrite, and accordingly use it as a regular storage medium.
But before you record information, you need to decide on which CD or DVD, CD-R or CD-RW, DVD-R or DVD-RW you should record the information on. In addition, you need to know whether it is possible to write or read the corresponding disc, i.e. for example, you can’t write anything on a CD-ROM drive; this device is only used for reading CDs. You won't be able to burn a DVD on a CD-RW drive, etc. Modern read/write devices, of course, already allow you to read and write all disk formats.
Let's take a quick look at the main disc formats for recording information. 1. CD-R disc.
This is the simplest and cheapest disk format available today.
If you need to record up to 700 MB of information, then use this particular disc format. You can record information on a CD-R disc in portions, the so-called multisession, i.e. until the total amount of information reaches 700 MB. 2. CD-RW disk.
Use this disk format to temporarily store information up to 700 MB.
These discs can be rewritten many times, overwriting old information. For example, I use this disc format to listen to music in the car. When I get bored, I record new music on the same disc, or to watch movies on my home DVD player (the size of regular AVI movies is just within 700MB), I recorded it from the computer, watched it on DVD, wiped it, recorded a new one, etc. 3. DVD-R disc.
Use this disc format if you need to record up to 4.7 GB of information when using a single-layer disc or up to 8.5 GB of information when using a dual-layer disc.
On a DVD-R, just like on a CD-R disc, you can record information in portions, i.e. until the total amount of information reaches 4.7GB or 8.5GB, respectively. It is this disk format that is currently used to create data archives. 4. DVD-RW disc.
Use this disk format to temporarily store 4.7GB of information on single-layer disks or 8.5GB on dual-layer disks. These discs can be rewritten many times, overwriting old information. There is one more parameter that differs between disc formats - the recording speed. The fastest recording speed is on CD-R, the slowest on DVD-RW.
Now let’s talk about how to burn discs using the Nero program. I want to say right away that burning discs is not the only feature of the program. In addition, Nero has other very useful features. This includes processing audio, video, graphics, creating copies of hard drives, etc. But we’ll talk about them in other articles.
So. Now step by step what you need to do to burn a disc. #1.
Select disc format: CD/DVD, CD or DVD.
#2.
In this lesson we will look at the possibility of recording data such as documents, pictures, mp3 files, video files, documents, programs, etc. In a word, DATA. For these purposes, you must select the appropriate item. If you are going to burn a CD-R or CD-RW disc, then select “Create CD with data”. If the disc is DVD-R or DVD-RW, then select “Create DVD with data”.
#3.
Let’s say you selected “Create DVD with data”. After this, the subroutine for burning discs “Nero Burning ROM” opens.
#4.
Now, using columns 3 and 4 - computer navigation, we find the data we need and drag it with the mouse into one of the left columns 1 or 2. In columns 1 and 2 you can create folders by clicking the RIGHT mouse button. In addition, you can delete files and folders from columns 1 and 2, if you mistakenly placed them there or simply changed your mind about writing these particular files or folders, the real files and folders will not be deleted. But deleting files from the right columns 3 or 4 will lead to actual deletion of files from the computer, so be careful! Right columns 3 and 4 work exactly the same as EXPLORER, i.e. here you can use the same techniques for selecting files, for example!
As you drag and drop files, make sure that the amount of data you want to write to the disk does not exceed the size of the disk itself. The volume scale located at the bottom of the window informs you about this. If you are using a dual-layer disc, switch the volume mode from DVD5 to DVD9. This can be done using the drop-down list in the lower right corner of the window.
If you want to burn a file, such as a movie, larger than 2GB, then you need to change the disc recording standard from ISO to UDF or UDF/ISO. To do this, you need to close the current project (second from the top, cross on the right or the “File - Close” menu), go to the “File - New” menu or LEFT-click on the picture with a piece of paper (upper left corner), select at the very bottom of the list the desired standard and click the “NEW” button.
If you accidentally closed the right navigation panels to easily drag and drop files, don't worry - you can restore it. To do this, go to the “VIEW – View” menu. files".
#5. When all the data is prepared for recording, you can insert the disc into the drive and start recording. To start recording a project, you need to click on the picture with a disk and a match at the top of the toolbar or select the menu “Recorder – Record Project”.
Next, you need to select the optimal recording speed (if the data is important, then I recommend choosing the average recording speed) and click the “Burn” button. After this, disc recording will begin directly.
If you want to write information to a CD-RW or DVD-RW disc that already has information on it, then before writing new information, you must delete the old one. To do this, go to the “Recorder” menu and select the “Erase rewritable disc” menu item. Next, do not change anything in the settings and click the “Erase” button. Share this with your friends:
Results
In this article, how to burn music to a disc, we learned what audio formats are, how they differ, and talked a little about disc formats.
We also recorded music onto discs in four different ways: using Windows, using Windows Media Player, using the Nero program and resorting to the help of Ashampoo. We consolidated all our knowledge by watching 4 video lessons for each program.
If you want to use my article and publish it somewhere, I don’t mind, you can do it, but to do this you must put an active open link to my blog with the article! If you don’t do this, I will punish you! I hope for your understanding.
Perhaps you still have or have questions related to recording discs, you can ask them below in the comments to this article, and also use the feedback form with me.
Thank you for following me on Twitter.
Stay connected - my You Tube channel.
If the above information was useful to you, then I recommend subscribing to my blog updates to always be aware of fresh and relevant information on setting up and repairing your computer.
Sincerely, Dmitry Sergeev January 19, 2013
Blog navigation
You can share your opinion, or you have something to add, be sure to leave your comment.
Please share links on social networks.
How to burn an CD in Nero?
There are two types of CDs: Audio CD and MP3. Let's look at how to burn music to a disc using Nero in Audio CD format.
- We insert a blank disc into the drive and launch Nero Burning Rom.
- The program prompts you to select the type of information to be recorded: data, music, etc. Select the “Music” tab and the Audio CD recording type.
- A window appears where you can add musical compositions that will be recorded. Click on the “Add” button located on the right.
- A window opens showing the folders and files on your computer. Select the desired compositions and click “Add”.
- At the same time, make sure that the CD capacity does not overflow. Its fullness is reflected in a special line below. As the CD fills with music, the bar turns green. On its right side there is a red limiter; as soon as the green stripe crosses it, its color changes to red. This means that our CD is full, some song turned out to be superfluous - we delete it.
- When the disk being used is full, click on the “Next” button. The program will display a final setup window, after which it will begin directly recording the song to disk. If desired, fill in the line with the name and check the box “Allow adding files.”
- Click on the “Record” button in the lower right corner and wait for the cutting to complete, then click the OK button that appears and the “Next” button.
- Close Nero and remove the burned CD from the drive.