Free email Rambler was launched in 2000. Over 90 million user emails pass through the service every day. During its existence, the project changed 4 designs. For the convenience of users, there are mobile applications for Android and iOS operating systems.
The review will provide detailed instructions for registering a Rambler email account. We will also tell you in detail about its settings, capabilities and installation of the mobile version.
How to register on Rambler?
In order to use Rambler mail, you will need to create an account. On the main page, in the authorization form at the bottom, follow the “Registration” link.
Registration
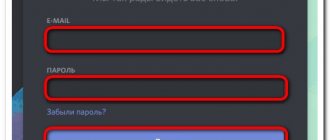
In the form that opens, you need to enter the following data:
- Select a name for your mailbox.
- Set a strong password consisting of Latin letters of different case and numbers. The code length must be at least 8 units, but no more than 32. Repeat the entry below in the line.
- Select a security question option and answer it.
- Confirm that you are not a robot.
At the next stage you will need to provide personal information about yourself:
- Last name and first name. They will appear as a signature in emails.
- Select gender.
- Date of birth.
- Indicate the locality.
All of the above information must be entered into the form accurately, as they will be useful when restoring access to the Rambler mailbox.
Reference! The project changed its design four times. Login to the old version is closed.
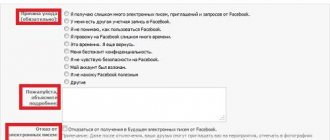
Social network integration
In the registration form you can connect your page on a social network. In this case, you will not need to provide a password each time you log in. To do this, select the appropriate icon on the right side and click on it. You will need to enter your login and access code from the selected page to be identified.
Account confirmation via SMS
Currently, you do not need to provide your phone number when creating an account. Therefore, it does not receive SMS messages to confirm the mobile phone attached to the Rambler mailbox.
But in the settings of a ready-made Rambler mailbox, you can specify your cell phone. It will serve to receive notifications about incoming correspondence, and will also be useful when restoring access.
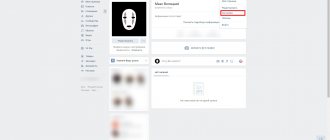
After logging in to the system, at the top right, click on your name and go to the “My Profile” section.
A page with your personal data will open. Find the “Password and Profile Security” section. In it you need to click on the link “Indicate a phone number to restore access.”
In the form that opens at the top, enter your cell phone number and request that the code be sent. You will receive a call on your phone that you do not need to answer. You need to indicate the last 6 digits of the calling number on the bottom line.
Reference! If for some reason you cannot currently receive calls, then click on the link “Receive code via SMS” under the button.
Account page interface
So, after Rambler mail registration is completed and you have logged into your account, you need to familiarize yourself with the structure of this service.
On the left you will see the names of the folders used - these are the standard “Inbox”, “Sent Items”, “Drafts” (to save unsent letters), “Trash”, and “Spam” (where would we be without it).
And at the very end of the list is a useful link with which you can link third-party mailboxes to my Rambler page.
Click “Add other mailboxes” and automatically find yourself in the mail settings. Both the most popular services and, in principle, any other email address that you already use are available.
It is possible to download into this mailbox all the letters that are in the new connected one, as well as leave copies of the letters on the server.
If we already went to “Settings”, let’s see what additional features are present here:
"Basic". Here the data is corrected independently - that is, there are no preparations, you choose what the name will be in the letters you send, enter your return address (you can set up forwarding), come up with your signature, adjust the need for auto-saving of outgoing ones.
You edit hotkeys, design themes, and also monitor the fullness of the mailbox memory as a percentage - up to 2000 MB in total.
"Folders". Here you can find information about the folders already presented; in addition, you can create an unlimited number of additional ones, naming them at your discretion.
Data about letter storages contains the spent size of each of them, as well as the quantity.
Filters for incoming messages are configured right away. To do this, you need to enter a condition - this could be a specific address of the sender, recipient, the subject of the letter, its size, or the possibility that it is a copy.
Next is the action that will need to be taken if the condition is met, for example, mark as read or move to a specific folder.
If necessary, leave a note below and save the result.
"Answering machine." You can turn this function on and off at your own discretion, using the text that is entered in the corresponding field.
You can customize the subject line for the letter as desired, as well as send an automatic reply only to recipients from your contact book.
One of the conditions is that if you send more than one letter, such a response will come with a certain frequency until you are able to respond personally.
"Forwarding letters." If, for example, it is more convenient for you to receive incoming messages to your work address or somewhere else for various reasons, you can set up forwarding to one of the mailboxes.
You yourself choose the additional function of saving copies of letters and addresses of all recipients.
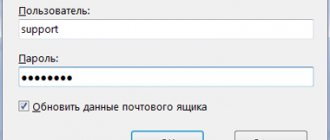
"Mail programs." If it is more convenient for you to view your mail not on the site itself, but through mail agents, this option is provided.
For this purpose, POP3 and IMAP protocols are provided, general settings of which can be made on the page help.rambler.ru/mail/mail-pochtovye-klienty/1275, more detailed information can be found here - help.rambler.ru/mail/mail-pochtovye- clienty.
"Sounds". If you like sound notifications, you will like this item - however, there is no choice, but there are preparations for incoming and sent letters, as well as in case of a failure.
Access to “Settings” is located at the bottom of the list of available folders, and there are also options for the appearance of messages – in a list or table.
At the top of the interface you will see the main control buttons - on the left are creating a new letter and accessing the address book.
Contacts can be imported from other email services you use. In this folder, under the categories, there are addresses of “Group contacts”, “Your contacts”, as well as those that are saved automatically.
There is a convenient search for contacts and a button for creating new ones.
So, they sent you a letter. You'll see it in your Inbox as a list with the sender, subject, size, and date received.
What’s convenient is that you can mark any letter unread (the blue dot next to it will indicate this), if there is such a need, and the alert signal will not keep you waiting.
Open the letter - click on the line and get it in expanded form. In the upper part - from whom, to whom, the exact date of receipt, on the right there are icons - quick printing of the letter and additional information in the form of a code.
At the very end of the letter there is a line for a quick reply, or select the necessary icons on the top panel.
The first icon is a return to the general view of mail, the next one is necessary if you do not want to receive such letters and consider them spam, and then the trash can to delete unnecessary ones.
The next icon is for moving the message to a folder (or create an appropriate filter for the received message, this will simplify interaction in the future).
What else can you do? Mark a letter as read or unread, important - there is also an asterisk on the left for this. Well, and standard controls with which you will scroll through messages.
In the line on the right there is “search by letters” - a convenient tool, although considering that the available space is only 2 GB, such a function may not be useful.
Emails placed in the Trash and Spam folders are automatically deleted within 30 days.
You can see all the account features in detail in the video above.
Rambler mail - login to my page
In order to log into Rambler mail, you need to enter your email address on the main page on the right in the authorization form and click on the arrow next to it. If you are logging in from your home computer, check the “Remember me” box at the bottom. In this case, during subsequent logins you will not need to enter your login and password again.
Login to your personal account
At the next step, enter the access code from your page on the Rambler website to authorize by email.
If there are no letters in the mailbox, then you will remain on the same page, but with the mail window active. If you need to enter it, you just need to click on the internal field.
Rambler mail password recovery
Have you lost your access code? Don't worry, as it can be restored. To do this, in the authorization form below, click on the line “Forgot your password?”.
Password recovery
Next, enter your Rambler email address. This is one of the stages of identifying the user's identity.
Subsequent actions will depend on what you specified in the settings of your email account for data recovery. If it is a security question, then the answer to it should be the same as you entered it. That is, respect the letter case and keyboard layout (Cyrillic, Latin). Below, come up with a new password and duplicate it. In this case, you cannot use the previous options. At the end, check the “I’m not a robot” box.
Attention! If you linked a mobile number to the page, but did not set a security question, then you will receive an SMS with a short code. It is one-time use and when logging into the Rambler mailbox, you must set a new password.
If you are interested in the question of how to change your password, then you should go to the “My Profile” section by clicking on your name in the upper right corner. On the page that opens, find the “Password and profile security” block. In it you need to click on the line “Change password” and enter new data.
How to delete an account?
If you do not use Rambler mail and have finally decided to delete your account, you will need to enter the “My Profile” section. To do this, click on your name in the upper right corner and follow the appropriate link. A page will open on which you need to go to the very bottom. there is a link “Delete my profile and all data”. follow it to deactivate your personal account.
I do not remember the password
Compared to the largest email services, Rambler has a simplified password recovery procedure, which results in the security of your account suffering. To gain access to your personal profile, follow these steps:
- Under the form for entering data for authorization, click “Remember password”.
- In the next window, enter the email address to which you want to restore access.
- Check the box “I’m not a robot” and solve the proposed problem.
- Select or enter the security question specified during registration in the system and enter the answer to it.
- Afterwards, you will be able to set a new password to protect your login - set it in the two fields below and save it somewhere else to avoid such cases.
- We go through verification again and save the updated information.
Rambler email settings
You can customize your Rambler mail to suit your preferences. To do this, in the top line on the right, click on the “Settings” button. A page will open with tabs in the top menu. You can click on them to set up notifications, information display, and more.
By default, we see the “Basic Settings” section. In it you can perform the following actions:
- Indicate your name, which will appear at the end of each letter.
- Set a signature option for your correspondence. For example, Sincerely, Maria Petrovna.
- Set the theme of your page.
- On the right, you can set up a sound alert, display news, and see how loaded the memory of the Rambler mailbox is.
In the “Mail collection” tab, you can attach the address of another mailbox, which is considered your main one. In this case, correspondence sent to Rambler will automatically appear in other mail. If you do not find a suitable option in the list, then click on the last icon “Connect another mailbox”.
The “Folders” tab allows us to track how much memory certain Rambler mail folders occupy and, if possible, clear them of spam. And here you can create your own storage and give it a name.
The “Filters” tab will help you configure filtering of incoming correspondence. It is necessary to set certain parameters by which the system will sort your mail.
You can set up an automatic response to all incoming emails. For example, with the following text: “Thank you very much for your letter. I will try to read it and answer you soon.”
Key Features
The new mail service Rambler is not just an electronic mailbox for letters, but also a single profile on the website of the same name. That is, a single registration makes it possible to use all Rambler projects: poster, newspaper, mail, Lenta.Ru, LiveJournal, Dating, Championship.com, Quto.Ru, Ferra, etc.
Of course, the main function of the box is to receive and send correspondence. In the settings you can improve the work with the resource:
- setting notifications on your cell phone;
- by integrating several mailboxes from different sites to collect correspondence;
- use the filter settings to filter out spam;
- by setting an autoresponder and email signature.
How to check incoming letters on Rambler?
Incoming emails are displayed on the left side of the page menu. All received correspondence is visible in the “Inbox” folder. If there is a number opposite it, it means that that number of letters have not yet been read by you.
Attention! If you are waiting for an important letter, but it is not in your inbox, then check your spam. It's possible that it got there by mistake. .
Mobile application Rambler mail - download for free
Do you always want to know what letters arrive at Rambler mail? Then install the mobile application on your phone or tablet. The program is developed for the iOS operating system.
Working on the platform is easy, as it has a clear interface. The design does not distract from the process of searching for letters and writing them. View images quickly with one touch, moving them left or right.
Login via mobile version
After installing the mobile application, log into your mail in the same way as on the Rambler web resource. That is, you need to specify the mailbox address and password. And if you do not yet have your own page on this resource, then you can register. It is identical to what we described above for creating a profile on the Rambler website.
To summarize, we can say that Russian mail Rambler is easy to use. Registering on the website or mobile application is easy. And if you have several mailboxes on different resources, then you can combine them and receive correspondence on Ramblere. But the main advantage of the service is that it is now unified with other resource projects. By registering your email, you automatically gain access to all services and can use them without restrictions.
Have you already created an email account on Rambler? Then we ask you to share your experience and talk about the pros and cons of the service. Your opinion will allow us to learn more about the benefits of the resource.
4 / 5 ( 2 voices)
Registration
Note. You can register on the site for free.
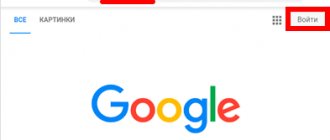
1. Type rambler.ru in the address bar of your web browser.
2. Open the form in one of the following ways:
No. 1 click “Login”;
in the login panel, click the “Registration” link;
No. 2, under the line for search queries, click the “Mail” section;
On the new page, click the “Registration” button at the bottom.
3. Enter your first and last name.
4. Create a login using Latin letters and numbers; you can also use the “_” symbol. This will also be your email address. It cannot be changed.
5. In the next two lines, enter a complex password.
6. In the drop-down lists, indicate the day, month, year of your birth.
7. Similarly, set the gender in the block (male, female).
8. Enter your region.
9. In the “Mobile phone” line, select your country code from the list and dial the number.
10. Click get code.
11. Enter the code (after a while it will arrive via SMS).
12. Click “Register”.
13. Follow further instructions from the service.