Description and features
First, so that you know what you'll be dealing with, we've prepared a short overview of the application. Let's look at the list of basic and additional functions of the program. Their list can be characterized as follows:
- Supports displaying information from various computer sensors.
- Flexible customization of any widgets on the Windows 10 desktop.
- Changing application skins.
- A set of many themes, each of which the owner can install for free.
- The program's capabilities can be easily expanded by installing one or more plugins.
In the screenshot above you see only a basic interface that can be configured, limited only by your own imagination.
Download and Install Rainmeter
You can download and install from the official website https://www.rainmeter.net. Usually there are two versions - a beta and a working final version. To download the program, you need to click on the “ D ownload ” button. You should be transferred to the GitHub service. If downloading using the button fails, download from the mirror, below there will be a “Mirror” link.
- After launching the installer, a window will appear asking you to select a language.
- At the next stage, you need to choose one of two options - standard installation or installation of the portable version. It is recommended to select the first option if the system Visual C++ and .NET 2.0 components
- If you have a 64-bit system , be sure to check the box next to the appropriate item. Now click the “ Install ” button.
- We are waiting for the installation process to complete.
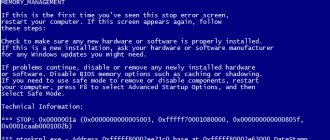
What is PhysX and what is it for? Possible problems and their solutions
After launch, the program will run in the background . It doesn't require much from the computer. Judging by the system requirements, it takes up about 10 MB of disk space, and the cost of RAM is about 4 MB.
How to use
So, we've got the theory figured out, so let's get down to business and see how to download the program for your computer for free. In the second section of the instructions, we will also look at how to use Rainmeter on Windows 10.
Download and Install
To download the latest version of the program in Russian for free, follow these short step-by-step instructions:
- We scroll the contents of the page to the very bottom and find a button there that will allow you to download the archive with our application. Accordingly, unpack it and run the executable file. As soon as the small window appears, select the Russian language and move on to the next step.
Also watching: CursorFX 2.16 full version
- Here we will be asked to select the installation type. If you have never worked with this program before, leave the trigger in the position in which we installed it. After making changes, proceed to the next step by clicking “Next”.
- Now select the path where the program will be installed. We also activate or, conversely, disable the installation of the 64-bit version, and then start the installation.
- Copying files to their workspaces will begin. The process will only take a few seconds. We are waiting for its completion.
Now that the program is installed, we can move on to working with it. This point will also be discussed in detail.
Operating instructions
So, we installed the application, after which it should have started automatically. If this does not happen, open the Windows 10 Start menu, and then click on the icon that appears there. All settings of the program we are talking about today are available after clicking on the icon in the system tray. As a result, a context menu will be displayed in which you will find functions for adding new widgets, editing them and other settings.
Installing and using Rainmeter
You can download it from the official website, the application is distributed free of charge. After opening the archive, you need to select the installation type - it’s better to choose standard, indicate the location where the program will be located, the version (it is separate for Windows x64).
Immediately after installation, the utility will launch for the first time, and you will be able to study it in more detail. The menu consists of sections “Skins”, “Themes” and “Settings”.
We are directly interested in how to install the Rainmeter skin. There are two options - downloading it as a *.rmskin file or as a separate archive.
So, if you downloaded the document immediately in *.rmskin format, then all that is required of you is to click on the file and confirm its installation with the Install button. After downloading, it will appear in the general list of the program section of the same name.
To add a skin from the archive to the service, you need to unpack it to the address:
- For the XP system - C:/Documents and Settings/UserName/My Documents/Rainmeter/Skins.
- For Windows 7, Vista, 8, 10 systems - C:/Users/UserName/My Documents/Rainmeter/Skins.
Update or restart the service, after which the skin will appear in the general list of the corresponding section.
Note that the application has an editor where you can change skins, and you can also add files you created yourself to the utility. But this is already a job for more advanced users. Even without this, there are numerous different types of desktop designs on the Internet.
Individual elements of the theme can be deleted at your discretion directly from the screen - just right-click on the unnecessary window and select “Close skin” in the context menu.
Rainmeter will become a very useful tool on your computer, because it will provide data about important processes occurring on it in real time. In addition to being informative, it also has a pleasant appearance, which can be customized completely at your discretion, and make your desktop aesthetically attractive. And over time, perhaps you will be able to create your own themes, customizing the background completely to suit you.
Advantages and disadvantages
Just like we do with other programs, let's look at a set of positive and also negative features of Rainmeter.
Pros:
- The main positive feature of the application is the flexibility of its configuration. In principle, we can configure the appearance of the desktop in any way convenient for us.
- There are many indicators that make it possible to constantly monitor the parameters of a particular hardware.
- There is a set of third-party skins, as well as themes. This allows you to set a successful configuration for the appearance of the OS desktop in just a few clicks.
- The functionality of the application can be easily expanded by installing add-ons.
Minuses:
- The list of settings is quite extensive. An inexperienced user can easily get confused when working with them.
To prevent you from encountering such a problem, just scroll the page a little lower and start the training video. In just a few minutes, the author clearly explains how to use this software.
Rainmeter and third party software
There are themes, and there are desktop experiences. Another great aspect of Rainmeter is that it works well in tandem with other programs. Take the following for example.
The differences between our Rainmeter example and the example above are as follows:
- Background - This may be hard to make out, but the background is actually a quickly rendered
video cinegraph implemented through the Steam wallpaper engine. Wallpaper Engine creates wallpapers from images, GIFs and videos (with or without audio). - Launch Key - When it comes to launching apps, I prefer a subtle approach.
Launchy provides a comprehensive and easily customizable keypad launcher. You can also create your own app launcher within Rainmeter as well. - Earth Point Cloud - The optional spinning earth model doesn't actually require third party software.
It's called Hologram, and you can even create your own point cloud model using a 3D model file of your choice! If you think the skin is confusing, here is an article to guide you.
While examples like the ones above can be achieved within minutes, combining Rainmeter with third-party apps seamlessly will take a little longer than using Rainmeter. How long it takes and how deep you are willing to go is entirely up to you.
Download
Now you can proceed directly to downloading the application discussed in the article.
| Version: | 4.3.1 build 3321 |
| Developer: | Rainy |
| Release year: | 2020 |
| Name: | Rainmeter |
| Platform: | Microsoft Windows 10 |
| Language: | Russian |
| License: | For free |
| Archive password: | bestsoft.club |
Download Rainmeter
| Name of the program (utility): | Rainmeter |
| Manufacturer (author): | Kimmo 'Rainy' Pekkola |
| Status: | For free |
| Category: | Interface |
| Installer (archive) size: | 2.3 MB |
| OS support: | Windows 7,8,10 |
| Interface language: | English, Russian + 30 more languages |
| Safety: | No viruses |
| Similar programs: | Winstep Nexus |
| Link to installer/website: |
…
…
Design with Rainmeter
Typically, after launch, some widgets are activated that the user may not need. If desired, you can remove them by right-clicking on the element and selecting the “ Close skin ” option. It is possible to move program elements around the desktop the way you want.
Let's look at what the program interface is:
- The window has several tabs. The very first “ Skins ” - displays the widgets available by default. Everything is placed in folders. The first directory usually contains a theme containing all the skins. To place a skin on your desktop, you need to select a file with the extension “.ini” (for example, Google.ini) and click the “ Upload ” button. An easier way is to double click on the file. There are also parameters that configure the widget.
- Themes tab contains the corresponding elements that install the theme on the OS. Many different topics can be found freely available on the Internet.
- The next tab is “ Settings ”. Here you can set the language, check for updates, reset statistics and configure saving logs to a file.
As an example, let's consider adding a ready-made widget. From the “ Skins ” tab, select any element of interest and double-click on the file with the “.ini” extension. A widget window with some information will immediately appear. In this window, the user has access to parameters for changing the coordinates of the widget, in other words, its position on the desktop. There are many other parameters that control appearance, such as transparency.
The program has a built-in skin editor . By opening the file through the editor (by clicking on the “Edit” button), you can change some parameters, for example, color. If you don't know which lines do what, it's better not to touch them.
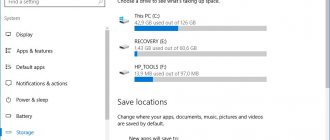
What is Recycle.bin and Recycler on a computer