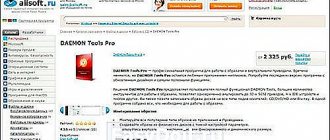
How to use Ultra ISO: data extraction
First of all, let's look at the simplest operations that are associated with extracting data from images. It is no secret that on many official websites of software developers or on the same torrent trackers, applications or games are posted either in the form of archives or in the form of images. The first ones are inconvenient because such distributions cannot be used in games that require the original disc in the drive.
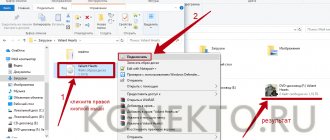
All that remains is to download the images and extract data from them (creating virtual drives will be discussed separately). How to use Ultra ISO in such a situation? It's simple. By default, the application is configured to support almost all known image formats (there are about thirty of them). Thus, to extract information, you simply need to open files in the application, then press the F4 key (or use the context menu) and specify the folder, drive or partition in which the data will be saved. In some ways, it's similar to working with archivers.
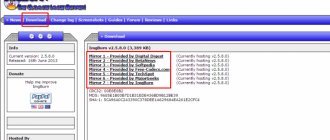
DriveDroid
DriveDroid . A small application for emulating a flash drive connected to a computer, on which the .iso or .img disk image of your choice is recorded. Simply put, if you don’t have a CD/DVD disk or a free flash drive, but you need to boot your computer from an image, this is the right thing. To operate the application, you need a smartphone with Android version 2.2, root access, a USB cable and firmware that supports UMS (USB Mass Storage Support).
What images are suitable?
On some devices/kernels, full CD drive emulation has already been introduced and tested; any image should run with it. If you do not have this emulation option, then almost all images with a hybrid bootloader will still work (these are mostly recent images of Linux distributions). If you want to run the installation of Win 7, WinXP, download some live windows-based distributions, or run any non-hybrid image, use the method described below.
How to use DriveDroid?
1. Download an ISO or IMG image to your phone (you can also download it from the list in the application itself, there are mostly linux-based distributions there). 2. In DriveDroid, select the desired image. 3. Connect your smartphone to your computer (You do NOT need to connect a USB drive, see the picture).
4. Select boot from your smartphone in the BIOS.
Record and run almost any image.
1. In DriveDroid, create an empty image slightly larger than the target image. If the directory with images is located in a FAT32 partition, the size of the image should not exceed 4 GB. The larger the image size, the longer it will take to create. 2. Connect the smartphone to the computer, select the created image in DriveDroid, mount it in read-write mode. The phone will offer to connect in USB storage mode, and the computer will prompt you to format the connected drive. We refuse both offers. 3. Open the target image in UltraISO, select “Boot - Burn hard disk image.” In the menu that appears, select our disk, USB-HDD+ recording method and click burn. 4. Next, follow the instructions above, connect the phone to the computer and boot from the target image.
download the DriveDroid application for Android for free using the link below.
Developer: Softwarebakery Platform: Android (Depends on the device) Interface language: English, Russian (RUS) Root: Needed Status: Free (Free), PRO
DOWNLOAD:
| DriveDroid PRO v0.10.43 (PRO) (Russian) | [File size - 3.99 Mb] | 2017-05-26 01:41 |
| DriveDroid Free - v0.10.50 (FREE) (English) | [File size - 3.96 Mb] | 2019-04-16 16:00 |
| DriveDroid | 2017-05-26 01:34 |
How to use Ultra ISO for Windows 7: creating images
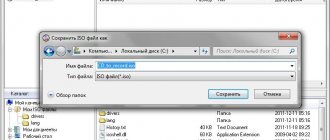
It's another matter when you need to do the opposite and create an image and save it on a hard drive or record it on optical media. In the first case, the question of how to use Ultra ISO comes down to first adding the necessary files through the file menu, and then using the standard save command specifying the directory.
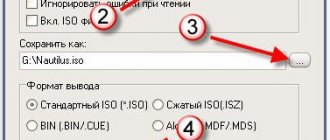
When you need to create an image of an original optical disk by saving it to a hard drive, use the CD image creation command, indicate the final location of the file to be created in the preparation window, select the drive with the inserted disk and click the “Make” button. Naturally, you can choose the format of the created image.
Burning discs
Now a few words about how to use Ultra ISO in terms of recording images on optical media. We assume that the image has been created and saved on the hard drive.
As before, we first add the necessary files and folders, and then use the command to burn a CD image. In the new window, you will need to specify the burner drive (if there are several of them), select the recording method and speed, and then click the “Burn” button. Note: Pay attention to the small window at the top right, which indicates the media capacity in percentage and in megabytes. As is already clear, the maximum volume cannot be exceeded, otherwise you will get an error.
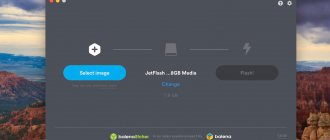
Instructions for USB media
First, you need to insert the USB flash drive into your computer and run UltraIso. In the program window that opens, you need to open the .iso image file (File - Open) with Windows XP.
After this, you need to select the “Boot” item in the main menu, and then “Burn hard disk image”.
- In the window that opens, you need to select a drive, in this case it is a flash drive on which to record (Disc Driver). Then you select the recording method, to do this you need to press USB-HDD+. Next, you click the “Record” button and wait for the recording process to complete.
In order to use the created bootable flash drive and install Windows XP, you need to select (after restarting the PC) USB-HDD (or a similar item with the name of your flash drive) as the priority boot drive.
Working with virtual drives
For some games, it is extremely important that the original disc is used to start, since a minimum set of components can be installed into the system, and the main files are located on optical media.
But what to do if you took the original disc to use for a couple of days, but you still want to play? And there shouldn’t be any special problems here. Again, first a disk image is created, after which the virtual drive mount line is selected in the tools menu, the location of the image file is indicated, and the start operation button is pressed.
Sometimes, to simplify actions, you can use special integration commands through the options and settings sections, where you simply check the required image formats. Now, after double-clicking in any file manager, the game or its installer will be launched. If there are no such files in the image, the contents of the image file will be opened.
Creating bootable media
Finally, another look at how to use Ultra ISO. You can write information to a flash drive in such a form that the media will become bootable. We are talking about operating system distributions and some disk utilities (driver sets, antiviruses, etc.), which can start even before the main OS loads.
To record an image, first select the command to open the image in the file menu and specify the path to it. After that, in the boot section, the hard disk image entry is selected and the desired media is selected (in our case, it is a USB flash drive). Next, a message will appear in the application indicating that all data has been deleted from the device. We agree. After cleaning, recording starts automatically. The time depends on the amount of information being recorded and the characteristics of the device itself (reading and writing speed).
This option using USB devices in many cases turns out to be more effective, since optical disks are quite often subject to mechanical damage, which is why the data on them may simply not be readable.
Features of creating a bootable USB flash drive using the UltraISO application
After installing the UltraISO program, the user can begin creating a bootable USB flash drive. This process will not cause difficulties even for beginners. The developer of the software product has done everything possible to make it clear how to create a bootable USB flash drive using UltraISO. For clarity, we will provide detailed instructions.
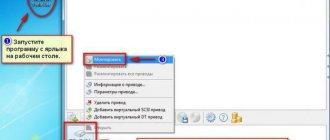
First, you need to run the application for the flash drive directly as an administrator.
After completing this operation, use the Ctrl + O keys, or selecting File – Open, to open the Windows installation file image. We open exactly the image that needs to be mounted.
The next step is to specify the folder where the Windows image is located. To carry out this operation, select the image and click Open.
As a result, the following image should appear before the user’s eyes.
If everything is displayed correctly, then you can start recording the flash drive. You need to start this operation from the Bootstrap – Burn hard disk image option. The next screenshot shows everything.
Please note that when recording from a USB flash drive in automatic mode, information will be deleted. If the data is important, it should be saved first. At this stage, the operation looks like this – USB-HDD + and click Write.
The Ultra ISO software will issue a warning that the information will be erased. If the data is not important or the user has already saved it, then click Yes.
Then everything depends on the technical characteristics of the computer equipment and HDD. The recording process usually takes a few minutes. When finished, the program will notify the user that the operation is complete.