This budget smartphone has a compact polycarbonate body in one of the bright colors. In addition, it boasts the latest version of the Flyme OS 6 shell. At the same time, the modest hardware, designed for most everyday tasks, is compensated by the affordable price of the device. Vesti.Hi-tech found out all the pros and cons of the Meizu M5c.
In our review “Buyer’s Guide: Android smartphone no more than 10 thousand rubles,” we noted with regret that none of the Meizu smartphones falls into such a popular price category. It seems that the company was also concerned about this issue. One way or another, in the fifth generation of the M line, not only the most compact, but also the most affordable model appeared - Meizu M5c, the price of which at the start of sales was even slightly less than 9 thousand rubles.
Meizu M5c review: technical specifications
- Model: M5c (M710H)
- OS: Android 6.0 (Marshmallow) with Flyme OS 6.0.2.0G shell
- Processor: 64-bit MediaTek MT6737, ARMv8 architecture, 4 cores ARM Cortex-A53, 1.3 GHz
- Graphics coprocessor: ARM Mali-T720 MP2
- RAM: 2 GB, LPDDR3
- Storage memory: 16 GB, supports microSD/HC/XC memory cards (up to 128 GB)
- Interfaces: Wi-Fi 802.11 b/g/n (2.4 GHz), Bluetooth 4.1 (LE), microUSB (USB 2.0, OTG) for charging/synchronization, 3.5 mm connector for audio headset
- Screen: capacitive touch, IPS matrix, GFF (full lamination), 5-inch diagonal, resolution 1280x720 pixels, pixel density per inch 294 ppi, brightness 400 cd/sq. m, contrast 1000:1
- Main camera: 8 MP, 4-element lens, f/2.0 aperture, phase detection autofocus, dual-tone LED flash
- Front camera: 5 MP, 4-element lens, f/2.2 aperture
- Network: GSM/GPRS/EDGE, WCDMA/HSPA+, 4G FDD-LTE b1, b3, b5, b7, b8, b20; 4G TD-LTE b38, b40; LTE Cat.4 (150/50 Mbps)
- SIM card format: nanoSIM (4FF)
- Slot tray configuration: nanoSIM + nanoSIM, or nanoSIM + microSD/HD/XC
- Navigation: GPS
- Sensors: gyroscope, digital compass, light and proximity sensors
- Battery: non-removable, 3,000 mAh
- Colors: black, red, blue, pink, gold
- Dimensions: 144x70.51x8.3 mm
- Weight: 135 grams
Meizu Pro 5 review
Meizu Pro 5 is a flagship smartphone with advanced technical characteristics. There is a massive display, and the device also has excellent sound. The announcement of the gadget took place in September 2020.
Appearance and ergonomics
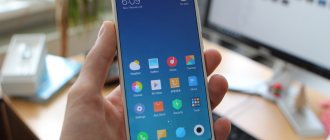
Meizu Pro 5 looks extremely solid and stylish. The manufacturer used repeated three-dimensional polishing to make the aluminum case as thin and reliable as possible. Special diamond knives made the metal very smooth and pleasant to the touch. Among the features, it is worth highlighting the sloping edges of the spectacular 2.5D glass. At the same time, the sides of the case are rounded, so the smartphone is really comfortable to hold in your hand, and for a long time. Although the surface is particularly smooth, due to the matte coating the device does not tend to slip out of the palm every time. Under the screen there is a mechanical mTouch 2.1 button with a built-in fingerprint scanner, well known to fans of this brand. The bottom edge received a multimedia speaker, microphone and USB Type-C connector. At the top end there is not only an additional microphone, but also an audio jack. The assembly of the device is very high quality, as there are no cracks or creaks. There is a 3050 mAh battery with mCharge 2.0 fast charging function. Available colors: gray, gold, silver. Dimensions: height - 156.7 mm, thickness - 7.5 mm, width - 78 mm, weight - 168 g.
Display
The flagship Pro 5 is equipped with a 5.7-inch AMOLED screen. This is an energy-saving matrix with excellent characteristics. The high resolution of this FHD display provides good detail. The maximum brightness level is medium. But an effective anti-reflective layer allows you to use the gadget without any problems even on sunny days. Precise color balance is complemented by a high-quality oleophobic coating. The viewing angles are very large, and without changing colors when tilted. It is necessary to highlight the rich black color. In this case, the color temperature can be adjusted. The display is covered with Gorilla Glass 3 protective glass on top.
Hardware and performance
The Pro 5 smartphone has a fast eight-core Exynos 7420 processor with a maximum frequency of 2100 MHz. It is supported by the Mali-T760 graphics accelerator. The version of the device with 3 GB of LPDDR4 RAM received 32 GB of free space, and the modification with 4 GB of RAM has 64 GB of file storage. At the same time, the memory is expandable up to 128 GB using microSD cards. The device is based on Android 5.1 OS with the Flyme 5 shell. The smartphone scores more than 80,000 points in the AnTuTu test, which at the time of its release seemed to be one of the best results. Even now the performance is sufficient for most tasks.
Communication and sound
Meizu Pro 5 is equipped with a premium ES9018K2M DAC along with a professional OPA1612 amplifier, which guarantees excellent sound. The powerful main speaker sounds loud and confident. As for the conversational speaker, it is distinguished by a clear transmission of the interlocutor’s voice.
Camera
For Meizu Pro 5, the manufacturer has prepared a 21.16-megapixel SONY IMX 230 camera with a laser focusing system and a bright two-color flash. The module is covered with high-quality sapphire crystal. There is also a front 5-megapixel camera with Face After Effects technology and aperture ratio 2.0.
conclusions
The Pro 5 appears to be a very powerful smartphone with great sound. The user will be pleased with the large and rich display, as well as support for advanced technologies. Contents: metal clip, Type-C cable, charger, documentation and the phone itself.
Meizu M5c review: design, ergonomics
As you know, for inexpensive smartphones, appearance is perhaps even more significant than for devices in the highest price category, since you can’t expect much “intelligence” from budget devices. So we have to use the usual phrase that the Meizu M5c, made in the classic style of the M line, looks more expensive than it actually costs. However, these words are largely true. Note that the new product can be painted black (dark gray), red, blue, gold or pink.
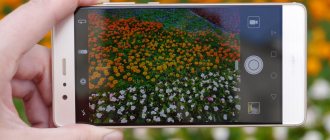
We received the device in the latest color for testing (we don’t have blondes in our team, so, alas, we were not able to appreciate the pink color). After a fleeting glance at the smartphone from the “back,” a thought flashed through – it looks very much like metal. But the first impression, as often happens, turned out to be wrong. The smooth curves and smooth surface of the body are due to the mechanical processing of impact-resistant polycarbonate and the subsequent spraying of a special coating. So the Meizu M5c, at least in pink, skillfully pretends to be “metallic”.
Fingerprints left on the back panel can, of course, be seen, but they are not collected so actively that the smartphone always looks unkempt. Purely subjectively, the design of the new product seems more interesting than, for example, that of its “classmate” – Xiaomi Redmi 4A. At the same time, in terms of weight and thickness they correlate as follows - (135 g versus 132 g) and (8.3 mm versus 8.5 mm).
The entire front surface of the M5c, including the 5-inch screen, is covered with a nameless protective glass. Of course, we are not talking about any 2.5D effect. The frames on the sides of the display can hardly be called thin (contrary to the official description).
Above the screen there is a cutout for the “talk” speaker, surrounded by light and proximity sensors (right), as well as the front camera lens (left). Using the Light Flow application, we were able to detect an “invisible” LED indicator with a blue-white glow on the white panel (to the right of the speaker).
Below the screen there is a touch-mechanical mBack key. By definition, it lacks a fingerprint scanner. The touch surface of this key emulates only the control panel. Thus, a regular touch (tap) activates the “Back” function, and a short press with a hardware “click” returns to the main screen (“Home”). In turn, pressing and holding locks the screen and turns off the backlight (the “Recent Apps” button is replaced by a swipe up from the bottom edge of the display).
The volume rocker and power/lock button remain on the right edge. They can be distinguished by touch only by their different lengths (a textured surface is not provided).
On the left edge there is a closed slot with a double tray, where subscriber identification modules of the nanoSIM format are located, and a microSD memory expansion card also claims to take the place of the second of them.
Unlike Meizu M5, the 3.5 mm audio headset connector (CTIA) has again moved to the top end.
At the bottom end, the microUSB connector between two mounting screws is now framed by two decorative grilles, under the left of which (viewed from the side of the screen) a “conversational” microphone is hidden, and under the right is a “multimedia” speaker.
The back panel is decorated with the Meizu logo, just above which there is a place for the main camera lens and a 2-tone LED flash, made flush with the surface.
From the inscription at the bottom of the panel you can find out the company name, country of production and model number.
The compact body of the Meizu M5c fits comfortably in the palm of your hand and fits into almost any pocket. There are no complaints about the assembly of the device.
Meizu M5c review: screen
For the Meizu M5c screen, we opted for a 5-inch IPS matrix with HD resolution (1280x720 pixels), which provided a pixel density per inch of 294 ppi. GFF full lamination technology eliminates the air gap between the display layers, which is the basis for good anti-glare properties and reduces the effect of reflection. The contrast according to the passport reaches 1000:1, and the maximum brightness is 400 cd/sq.m.
The brightness level can be adjusted manually or automatically (the “Auto-Brightness” option). In complete darkness, it is easy to reduce the backlight to a comfortable level, but in sunny conditions it would be nice to add more brightness. Multi-touch technology allows you to recognize up to ten simultaneous clicks on the capacitive screen, which is confirmed by the results of the AntTuTu Tester program. Adjusting the color temperature allows you to make the colors on the screen warmer, or vice versa, cooler. The protective glass has an oleophobic coating applied. In general, the screen is very good for a budget device.
Let's talk about the display
The Meizu M5c 2 GB/16 GB screen has a diagonal of 5 inches. The matrix is standard – IPS. Resolution – HD. Density – 293 ppi. Unfortunately, the display can hardly be called ideal, but the picture is displayed clearly and of quite high quality. The brightness is enough for comfortable work both in the sun and in complete darkness. The surface of the screen is glossy, but the glass has a special anti-reflective layer, so even outdoors the information remains readable.
Among the advantages, users include the oleophobic coating, which copes well with the tasks. Fingerprints, however, remain, but they are easily erased. There is also an automatic brightness adjustment mode. There are no special comments about his work. There is no air gap, which has a positive effect on the quality of the picture display. It is impossible not to notice that the developers have provided multi-touch for 10 touches. But as usual, there were some drawbacks. All users included a rather thick frame, which reaches about 4 mm on the sides, and increases to 15 mm in the upper and lower parts.
Meizu M5c review: cameras
The main photo module of the M5c was equipped with an 8-megapixel sensor, as well as a two-color LED flash. The lens with 4-element optics has an f/2.0 aperture and fast phase detection autofocus. The maximum image resolution is achieved with an aspect ratio of 4:3 and is 3264x2448 pixels (8 MP).
The front camera has a 5-megapixel sensor complemented by a wide-angle 4-lens lens with f/2.2 aperture. But autofocus and flash are missing here. With support for shooting algorithms from ArcSoft and Face AE Light Boost technology, the manufacturer has taken care of selfie lovers. The maximum image size in the classic aspect ratio (4:3) is 2560x1920 pixels (5 MP).
The main camera records video in HD quality (1280x720 pixels) at 30 fps, and the front camera is limited to a resolution of 640x480 pixels with the same frame rate. For shooting time-lapses (“Single Frame” mode), intervals of 0.5 are provided; 1; 2; 4 and 8 seconds. All content is saved in MP4 container files (MPEG-4 Visual - video, AAC - audio).
The interface of the Camera application is extremely laconic. Three main (“Auto”, “Video”, “Portrait”) and five additional (“Frame by Frame”, “Panorama”, “Scanner”, GIF, “Manual”) modes are available. Let us remind you that the “Scanner” allows you to recognize QR codes. But in manual mode, you can independently set ISO, exposure compensation, saturation, contrast and white balance. From the main screen, you can activate the HDR mode, decide on the flash, go to selecting a filter (to give the desired effect to the image) or go through the settings where you can enable the display of the grid and level in the viewfinder. To release the shutter, in addition to the special icon, the volume rocker (both up and down) is also useful. You can call the Camera application by double-clicking the mBack touch-mechanical key.
Hardly anyone expects highly artistic photography from a budget device. In addition, the main camera, in general, copes with its task in sufficient lighting conditions. Sometimes (even not on purpose) we get some pretty interesting shots. Examples of photos can be seen here.
Meizu M5c review: sound
We didn’t expect miracles from the “multimedia” speaker Meizu M5c; its “voice,” frankly speaking, is not so hot - the volume reserve is relatively small, high-pitched speakers have a lisp. But I liked the sound in the headphones, where you can use a 5-band equalizer with presets and manual settings, much more. In addition, standard smartphone tools allow you to listen to audio tracks (SQ quality) created by codecs for compressing audio data without loss of quality (up to 192 kHz, 24 bits) and stored, for example, in FLAC files. Using the Voice Recorder application, you can record monophonic conversations into MP3 files (44.1 kHz) through a conversational microphone. Note that there is only one microphone in Meizu M5c. So you have to forget about noise reduction. There is no FM tuner in the smartphone.
How to reflash meizu m3 via computer
How to flash meiza from a computer? To get started, you should familiarize yourself with some recommendations:
- Clearing data—it is highly advisable to activate the “Clear Data” option. This way the device will get rid of unnecessary “tails” from the previous firmware. The option is required to be enabled when installing firmware with a lower version than the current one (version downgrade procedure).
- During the installation process, turning off the device or rebooting it is unacceptable!
Let's get started on how to flash meza via a laptop or PC. Installing the firmware in this way will work on any model, including Meiza m5, m5 note, m6, u10 or u20. Instructions for action:
- The firmware is downloaded as an “update.zip” file. Let's keep it ready.
- Let's start putting the phone into recovery mode. First, let's turn it off.
- Turn it on while holding down not only the start button, but also the volume up button.
- As soon as the Meizu icon is displayed, release the power button while continuing to hold the volume key.
- The recovery menu will open. Now we connect the smartphone to the computer.
- A new drive called “Recovery” will become available in the PC, with a memory capacity of approximately 1.23 GB - just enough to upload the firmware there. This is exactly what we do - copy the “update.zip” file there.
- Upon completion, disconnect the smartphone from the computer.
- Check the “Firmware upgrade” checkbox and, if necessary, “Clear Data”.
- Using the “Start” button we start the update procedure.
- We are waiting for completion.
“update.zip” can be downloaded to your smartphone in advance - to do this, place the file in the root of the internal memory. After this action, you can start flashing immediately after entering Recovery.
If you have any questions, please let us know Ask a Question
Meizu M5c review: hardware, performance
The MediaTek MT6737 system-on-chip was chosen as the base platform for the Meizu M5c, in which a quartet of cores with ARM Cortex-A53 architecture, made in compliance with 28 nm design standards, is clocked at a frequency of up to 1.3 GHz. Graphics operations are handled by the ARM Mali-T720 MP2 accelerator with two execution units. The chip can work with two SIM cards and includes modules for Wi-Fi, Bluetooth and GPS, while the 4G modem supports the LTE Cat mobile terminal category. 4. Meizu 5c has 2 GB of RAM associated with a single-channel controller.
Testing Meizu M5c. Results in the AnTuTu benchmark
Testing Meizu M5c. Results in the GeekBench benchmark
Testing Meizu M5c. Results in the 3DMark benchmark
Testing Meizu M5c. Results in the Epic Citadel visual test
The manufacturer positions the MT6737 for low-budget smartphones, which is fully confirmed by the results of the tests. The power reserve for “heavy” games is enough, perhaps, for minimum settings, and it’s also unlikely to do without “brakes”. So in this regard, Meizu M5c is not original among state employees.
After turning on the smartphone for the first time, there was approximately 8.8 GB of free internal memory out of the installed 16 GB (10.7 GB available). As they say, there is nowhere to turn around. To expand such poor storage, it is possible to install a microSD/HC/XC memory card with a maximum capacity of up to 128 GB. It is worth recalling that the place where the memory card is inserted is also occupied by a second nanoSIM. Support for USB-OTG technology allows you to connect an external USB drive.
Two nanoSIM (4FF) format subscriber identification modules operate in DSDS (Dual SIM Dual Standby) mode. At the same time, the 4G LTE modem network (Cat. 4, up to 150 Mbit/s) supports the required LTE-FDD frequency bands: b3 (1,800 MHz), b7 (2,600 MHz), b20 (800 MHz), as well as LTE-TDD (2600 MHz). Wireless communications also include Bluetooth 4.1 (LE) and Wi-Fi 802.11 b/g/n (2.4 GHz). It is regrettable that there is no less busy 5 GHz band, which is available, for example, in . In addition, without the NFC interface, working with the Android Pay service will be impossible.
GPS satellites are used to determine location and navigation. The AndroiTS GPS Test and GPS Test programs did not detect the declared support for GLONASS.
The capacity of the non-removable battery installed in Meizu M5c is 3,000 mAh. This is quite enough to successfully survive at least one working day without recharging. However, the manufacturer promises up to two days of active use of the smartphone. The device we tested included a power adapter with output parameters of 5 V and 2 A. So it will take at least an hour and a half to fill a completely discharged battery 100%.
The AnTuTu Tester battery test showed a result slightly above average - 8,809 points. A set of videos in MP4 format (hardware decoding) and HD quality at full brightness played continuously for almost 9 hours.
The settings in the “Battery” section suggest either staying at maximum performance, or preferring a balance between performance and autonomy. In addition to the usual energy saving option, you can select a super mode, which reduces consumption to the minimum possible (in direct proportion to the loss of smartphone functionality).
Procedure for gaining access to Superuser rights
Access to root rights allows the smartphone to be updated in the established mode.
Without them, flashing programs will not work properly or will not be able to use all their capabilities to the fullest.
To obtain Root rights to Meizu M5S, the owner of the smartphone must perform the following steps:
- log in to your Flyme account;
- in the settings of your mobile device, go to the “Security” section;
- in the window that appears, click on the “Device” tab and select “Root rights” from the list presented;
- read the rules, confirm this and give your consent to activate the Superuser account by checking the box and clicking on the “OK” button;
- after the request appears, enter the key for your Fly account and click on “OK”;
- wait until the mobile device automatically reboots.
After this, the owner of the smartphone can reflash the mobile phone. There is no need to log out of your Flym account.
You can also access root rights for the M5S through a computer. To do this, you should download and install the King Root program on your PC. To work with it, the user will need to connect the mobile phone to the computer and follow the instructions that appear on the screen. During the procedure, the smartphone can be blocked.
After connecting the gadget, you need to click on the Start to Root button and wait for the procedure to complete.
It can take some time. The words “100%” and “Successfully Gained Root” will appear on the screen of your PC and phone, respectively. After this, you can exit the program and disconnect your mobile phone from the computer.
Meizu M5c review: software features
The Meizu M5c smartphone runs on the Android 6.0 (Marshmallow) operating system, the interface of which is replaced by the latest version of the proprietary Flyme OS 6.0.2.0G shell.
It should be noted that Meizu smartphones require independent installation of Google services, and this “trick” is delicately hushed up in the accompanying documentation. Of course, such a simple procedure does not bother more or less experienced users at all, but for “dummies”, who make up a considerable part of promising buyers, you still need to be a little more lenient.
The task manager is launched by swiping from the bottom and/or right edge of the screen (selected in the settings). At the same time, the list of open applications became horizontal, and the “Close All” button moved to the bottom of the display. There are now more shortcut icons on the notification shade, and long-pressing one of them opens the corresponding settings screen. Among these icons, an icon of a screen recording button has appeared, with which screencasts are created.
For each application, you can see the amount of used memory in the task manager. A running program (swiping down on its preview opens a menu) can be protected from closing, the contents of its screen can be hidden when scrolling, or (if possible) opened in one of the two windows into which the screen is divided. In the "Special" section capabilities” collected gestures on the switched off screen to quickly wake up the smartphone, as well as “smart” gestures for the SmartTouch ring with adjustable transparency.
In the new version of Flyme OS, we haven’t forgotten about easy, children’s and game modes.
Meizu's built-in keyboard promises to protect entered passwords from compromise. For a known Wi-Fi network, a menu opens with a QR code for connection, where it is also proposed to measure the exchange speed. In the "Gallery" you can now edit videos - trim, apply a filter, apply a ready-made theme with sound design.
By simultaneously pressing and holding the power button and the volume rocker (decrease/increase), you can not only take a “long” screenshot, but also immediately edit the screenshot.
We return the smartphone to its original state
In this section, I will talk about ways to return your smartphone to clean stock, no matter what state it is in. These instructions can be used both to unbrick your smartphone and to remove traces of rooting and flashing. Unfortunately, I can’t talk about all possible models, so I’ll focus on the four most popular flagships: Nexus 5 (I call this sample the control one), Galaxy S5, LG G2 and Sony Xperia Z2.
Nexus 5 and other Google phones
Restoring Nexus devices to their original state is easier than any other smartphone or tablet. In fact, it is so simple that there is not even anything to talk about. In fact, all you need to do is install the ADB/fastboot drivers (on Linux you don’t even need them), download the archive with the firmware and run the script. The whole operation looks like this step by step:
- Download and install ADB Driver Installer from here.
- Download and install Android SDK.
- Download the archive with the firmware for the desired device from the Google website.
- Turn off the device, turn it on with the volume buttons pressed (both) and connect using a USB cable.
- Unpack the archive with the firmware and run the flash-all.bat (Windows) or flash-all.sh (Linux) script and wait for the operation to complete.
- We launch the command line, go to the directory with the Android SDK, then platfrom-tools and execute the fastboot oem lock command to lock the bootloader.
For those who are interested in what the script does, here is a list of commands:
fastboot flash bootloader bootloader-DEVICE-NAME-VERSION.img fastboot reboot-bootloader fastboot flash radio radio-DEVICE-NAME-VERSION.img fastboot reboot-bootloader fastboot flash system system.img fastboot reboot-bootloader fastboot flash userdata userdata.img fastboot flash recovery recovery.img fastboot flash boot boot.img fastboot erase cache fastboot flash cache cache.img
Galaxy S5
With the Galaxy S5 smartphone everything is a little more complicated, but overall quite simple. This time you will need the Samsung Odin application, which will be used to flash the smartphone’s firmware. Sequencing:
- Reset your smartphone to factory settings.
- Download and install the latest version of Samsung USB drivers from here.
- Download and install the latest version of Odin from here.
- Go to the website samfirmware.com, enter the SM-G900F model in the search, find the firmware marked Russia, download and unpack.
- Turn off the smartphone and turn it on with the Volume Down and Home buttons pressed, wait five seconds until a warning message appears.
- Press the volume up button to put the smartphone into Odin mode.
- We connect the smartphone using a USB cable.
- Launch Odin, press the PDA button and select the file with the extension tar.md5 inside the directory with the unpacked firmware.
- Click the Start button in Odin and wait until the firmware process is completed.
As I already said, this operation will return the smartphone to its original state, but will not reset the trigger installed by the Knox system (if it was in the standard firmware). Therefore, the service center may refuse to repair.
Odin himself
Odin is even available in mobile version
LG G2
Restoring the LG G2 to its factory state will also not cause any problems. The number of steps in this process is somewhat larger, but they themselves do not require special preparation and knowledge. So, what to do to return the G2 to factory firmware:
- Download and install ADB Driver Installer from here.
- Download the official firmware (Europe Open 32G or Europe Open) from here.
- Download and install LG Mobile Support Tool, as well as FlashTool (goo.gl/NE26IQ).
- Turn off the smartphone, hold down the volume up button and insert the USB cable.
- Expand the FlashTool archive and run the UpTestEX.exe file.
- In the window that opens, select Select Type -> 3GQCT, Phone Mode -> DIAG, in the Select KDZ file option select the firmware downloaded in the second step.
- Click the CSE Flash button at the bottom of the screen.
- In the window that opens, click Start.
- In the next window, select the country and language and click Ok.
- We wait for the firmware to finish, and then turn off and turn on the smartphone.
This is all. But keep in mind that, as in the case of Samsung, the smartphone will still have Rooted status, and this cannot be fixed.
Sony Xperia Z2
Now about how to return the Sony Xperia Z2 smartphone to its factory state. As in the previous two cases, this will require stock firmware and the official firmware utility. You launch the utility on your PC, connect your smartphone using a USB cable and start the update process. Step by step it all looks like this:
- Download and install ADB Driver Installer from here.
- Reset your smartphone to factory settings.
- Download and install the Flash Tool from the official Sony website and the latest firmware from here.
- Copy the firmware file to the C:/Flashtool/Firmwares directory.
- Turn off the smartphone and turn it on while holding down the Volume Down and Home keys.
- We connect the smartphone to the PC using a USB cable and launch the Flash Tool.
- Click the button with the lightning icon in the Flash Tool. In the window that opens, select Flashmode, double-click on the firmware in the list that opens.