Once you have downloaded the Studio One program, you need to understand the main aspects of its sections. Studio One is a sequencer that includes three main pages: Start, Song, and Project. Each page is accessible at any time, and each provides controls for performing specific tasks. In this chapter, we will discuss the general layout of the interface elements of each page.
Start page
When you launch Studio One, the Start page is displayed by default. This page contains tools for managing recently active and saved documents (Recent Files), configuration options for MIDI and audio devices (Setup), tools for creating your own profile (Artist Profile), Presonus newsletter service (News Feed), and links to demo and training material (Demos and Tutorials). Let's take a closer look at the options on the Start page.
Options-links of main tasks
At the top of the Start page there are three link options: Create a New Song, Create a New Project, and Open an Existing Song or Project. In Presonus terminology, Song is an environment where you can record, edit, arrange, and mix audio and MIDI data. Project is a mastering environment.
Recent Files List
The Recent Files list will contain links to the most recently used documents. Clicking on any of these documents will open the corresponding Song or Project. To clear the list, [Right-click]/[ Control ]+click in the list and select the Clear Recent Files .
Setup section
This section of the Start page reflects the currently selected audio device and contains links to access configuration options for audio devices, external devices, a link to a program update resource, and a link to general information about Studio One.
Configure Audio Device Option
When you first launch Studio One, it automatically selects an audio card driver from the list of devices installed on your computer to configure the audio input and output ports. If you want to select another device or edit the selected one, click on the Configure Audio Device link. For more information about audio device configuration options, see Setting Up Studio One.
Configure External Devices
Clicking the Configure External Devices link opens a list of connected (installed) External Devices. In Presonus terminology, External Devices mean MIDI keyboards, hardware synthesizers, and hardware mixer controllers. Studio One can send and receive MIDI data from any MIDI device connected to your computer. For more information about installing External Devices, see the “ Studio One Setup ” article.
Artist Profile Section
Here you can define specific meta information that will be used to tag your Songs, including graphic image (photo), your name,
the musical style in which you work and a link to your site. To add a graphic, simply drag it onto the image symbol from anywhere on your computer.
Option configure external devices, Links to update check for updates, Option about studio one
Artist profile section
- Image
- Text
Option
Configure External Devices
Clicking on the Configure External Devices link opens a list of connected (installed) External Devices
devices. In Presonus terminology, External Devices mean MIDI keyboards,
hardware synthesizers and hardware mixer controllers. Studio One can send and receive MIDI
data from any MIDI device connected to your computer. More information about installing External
devices, see chapter "
Installation of External Devices
«
.
Links to update
Check for Updates
Click this link to check for the Studio One update.
The option is available only to registered users
users!
Option
About Studio One
Clicking the About Studio One link allows you to check your current license as well as information about your current
version and the Studio One development team.
Section
Artist Profile
Here you can define specific meta information,
which will be used to tag your Songs,
including a graphic image (photo), your name,
the musical style in which you work and a link to your site.
To add a graphic, simply drag and drop it
to the image symbol from any location of yours
computer.
General overview of the program
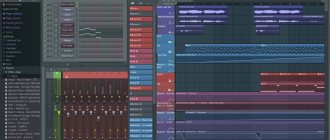
When you create a new Song or upload an existing one, the Song Page opens - a complete multi-track music production environment. Here you can record, edit and arrange (rearrange) any number of audio and MIDI tracks. You can use any number of audio effects, virtual instruments, built-in effects and instruments. Almost any parameter can be automated using automation tracks. The integrated Browser makes searching easier and includes functions for importing audio and MIDI files, VST/AU audio effects, and VST/AU virtual instruments. Imported audio files can be automatically stretched ( Timestratching ) to synchronize with the current tempo of the arrangement. Virtual instruments can be easily dragged from the Browser directly into the Song.
When you create a new Project or load an existing one, the Project page opens - a specialized integrated environment that contains tools for mastering and publishing recorded material. Here you can cut standard audio CDs in Red Book format and create high-quality MP3 albums. You can apply effects both to individual tracks and to the overall master track. The integrated Browser makes it easy to import Songs, audio files and audio effects. High quality analyzers ( Spectrum, Peak/RMS, and Phase ) are available throughout. As mentioned above, Songs can be imported directly into Projects, without the need to export first. After importing a Song into a Project, you can return to the Song mixing environment and make the necessary changes, and the Project will update automatically. For more information about the Project page, see the corresponding chapter.
Quickly switch between documents
In Studio One Pro, you can keep as many Songs and Projects open as you like, and quickly switch between them. The fastest way to switch between any open Song or Project is to use the [Ctrl] + [ Tab ] combination. A pop-up menu will display a list of all open documents. To navigate to the document you want, hold down the [Ctrl] key and press the [ Tab ] key. When you have selected the desired document, release the [Ctrl] key.
News feed tab, demos and tutorials tab
Page 5
- Image
- Text
Tab
News Feed
Presonus Newsletter includes useful Studio One related information and updates
automatically if your computer is connected to the Internet.
Tab
Demos and Tutorials
This list will show any installed demos or tutorials,
which can be launched by clicking on their name.
When you create a new Song or upload an existing one, the Song Page opens - a full-fledged one
multi-track environment for music production. Here you can record, edit and
arrange (rearrange) any number of audio and MIDI tracks. Any quantity can be used
audio effects, virtual instruments, built-in effects and instruments. Almost any
a parameter can be automated using automation tracks. Integrated Browser makes it easy
search and includes functions for importing audio and MIDI files, VST/AU audio effects, virtual
instruments in VST/AU format. Imported audio files can be automatically stretched (Timestretching function
)
to sync with the current arrangement tempo. Virtual instruments are easy
drag from the Browser directly into the Song.
Editing in Studio One
Almost any action in Studio One can be undone and restored. Even editing in the Mixer can be undone using the Trash Bin option. The number of undo and restore steps is unlimited. If the action cannot be undone or restored, a warning dialog box is displayed.
Precision mixer engine
Studio One includes a state-of-the-art precision Mixer with 32/64-bit floating point processing. This means that the audio engine can automatically switch between 32-bit and 64-bit representation on the fly, depending on the format of the plugin inserted into the signal chain. In the menu Studio One/Options/Audio Setup; Mac OS X: Preferences/Options/Audio Setup, set Process Precision to Double (64-bit) to enable 64-bit processing. Otherwise, all processing will be done in 32-bit representation.
Automatic delay compensation
Studio One automatically compensates for the latency that occurs with some VST and AU plugins, eliminating the need to manually adjust latency compensation and allowing track playback to be accurately synchronized, regardless of the number of virtual plugins and effects connected. The automatic latency compensation feature can be disabled in the Transport menu by checking the Ignore Plug-in Latency option.
64-bit processing
Studio One Pro includes a built-in 32/64-bit effects suite, where each effect can process audio material using 64-bit floating point processing. Therefore, if you only use the built-in effects package for processing, you can use 64-bit processing throughout the signal path - from event to final mastering.
When you first launch Studio One, it automatically selects...
Page 8
- Image
- Text
When Studio One initially starts, it automatically selects the audio card driver from the list of devices,
installed on your computer to configure audio input and output ports. If you want to
select another device or edit the selected one, on the Start page click on the Configure Audio Device link
or from any page, go to the Studio One Options menu and select the Audio Setup tab;
Mac OS X: Preferences/Options/Audio Setup.
Follow the instructions below:
From the Audio Device menu, select the audio device driver
1.
If you want to modify the parameters of your audio card, click on the Control Panel button next to
2.
menu and make the necessary changes.
The Device Block Size parameter is the buffer size that changes automatically when the value changes
3.
Latency
in the parameters of your audio card and which directly affects its functionality.
In Studio One for the Windows platform, the Internal Block Size setting can be fixed by checking the checkbox
4.
Lock
(checked by default). The Internal Block Size parameter is the size of the program's internal buffer,
which directly affects the functionality of the system and the functionality of Studio One. If the checkbox is removed,
The internal buffer size value can be selected from the drop-down menu. If you are not sure about
If this parameter is assigned correctly, leave the checkbox checked. When connecting hardware
effects and plugins such as TC Electronic Powercore
and
Universal
Audio UAD cards, fixing the Internal Block Size parameter
is critical for the correct functioning of the program.
By default, the processing precision parameter ( process
) Studio One installed in
5.
Single value ( 32-bit)
, but you can choose double precision (
64-bit
) from
Process Precision drop-down menu
.
If your computer has a multi-core processor, the Enable Multi-Processing
will
6.
checked by default. It is recommended to leave this checkbox checked. If you encounter any
playback problems using third-party virtual instruments or effects in which
has its own multiprocessor support (for example, Native Instruments Kontakt and Image-
Line FL Studio), it is recommended to disable multiprocessor support in these plugins. In this case, Studio
One will manage this parameter itself.
Device support, Resource consumption monitoring, Audio i/o setup menu
Page 9
- Image
- Text
Device support
Studio One supports most audio devices on ASIO, Core
Audio (Mac OS X),
Direct Sound
(Windows XP), and Windows
Audio Session API (Windows Vista and Windows 7). WASAPI mode includes
Exclusive modes
and
Shared
.
In Exclusive
, the delay time (
Latency
) can be reduced, but others
applications (eg Windows Media Player) will not be able to use the audio card driver at the same time.
Monitoring resource consumption
When configuring the parameters of your audio card, especially affecting
Internal Block Size or Device block size parameters, or by selecting
Single or Double processing accuracy mode - can be tracked
consumption of your computer's resources. To open Monitor
resource consumption (Performance Monitor), select
option of the same name from the View menu, or click on the word “P erformance
«
on the Transport panel. Monitor dynamic
reflects the current state of processor load and hard drive operation
disk, as well as the functioning of tools and parameters
automation. When the indicators approach or reach
peak levels of its range, you need to review your audio device settings, or
change the Song or Project settings to avoid clicks and dropouts of reports or possible
program freezing. Typically, in such situations, the size of the Internal Block Size parameter buffers is reduced.
or Device block size.
Most programs for recording audio tracks use directly the channels of your audio card. IN
Studio One has a kind of layer of software I/O channels between the audio card channels and yours
tracks. This approach provides additional advantages over traditional routing. For example,
Let's say you're working on a Song in the studio using a multi-channel interface, then bring your
song file to another studio that uses a different audio interface. All you need to do is
connect the I/O channels of the hardware audio device in another studio with the correct I/O channels of the program.
Upon returning to your studio, your original Song I/O channel configuration will be loaded
automatically, as if you never left. You can do the same by opening your Song on
laptop using its built-in audio card. This happens due to the fact that Studio One stores
configuration of the I/O channels of your Song, taking into account your computer and your audio card driver,
guaranteeing the stability of playback of your Song when changing audio devices.
Audio I/O Setup Menu