By admin Share
Error 0x00000116 indicates a serious problem with the graphics card. Accordingly, the problem appears more often when processing such data, in games or when watching movies. Moreover, there is usually no periodic pattern, that is, the error can appear immediately or after a certain period of time.
1. Video driver errors. Delete/Update!
This is the most common cause of the "stop 0x00000116" problem code. In the event that when a “blue screen” appears, at the bottom of the screen there is a link to the file nvlddmkm.sys or atikmpag.sys, dxgkrnl. sys , then there is almost certainly a problem with the video driver. If there is no such link, the probability is lower, but still high enough to follow the recommendations described below.
The first step is to download a working driver for subsequent installation - go to the website of the video card manufacturer (or the website of the laptop manufacturer) and look there for drivers for our video card and our system, paying attention to the bit depth. We download it to our computer and begin to deal with error 0x00000116.
Resolving error 0x00000116 Windows 7.
First you need to remove the problematic driver.
If, due to error 0x00000116, it is not possible to load Windows correctly, then you need to boot into safe mode and perform all subsequent manipulations there.
To remove the driver, right-click on “My Computer” on the desktop, and in the context menu that opens, select “Manage” (1). On the left, select “Device Manager” (2). A list of your devices appears on the right, among them you need to find “video adapters” (3), and click on the triangle to the left of the inscription. In the menu that opens, right-click on the problematic device and select properties, then go to the “Driver” tab (4), and click “delete” (5). In the warning window that appears, check the box (6) and click “OK” (7).
After this reboot. The image may not be clear because... standard Microsoft drivers for the video adapter are used. After this, install the previously downloaded driver and reboot. In general, this will help solve the problem.
Additionally, you can disable the monitor's sleep function. In some cases this is effective. To do this, press start and go to the “control panel”, in the upper right part we change the viewing mode from “Category” to “Small icons” (1). Find the “Power Supplies” section (2).
Next, opposite the plan you have installed (“Balanced” or “High Performance”), click on “Set up power plan”.
In the window that opens, set “never” in the “Turn off the display” and “Put the computer into sleep mode” items. Don't forget to save the changes.
If this does not help, then the next step in resolving it is to update/reinstall DirectX. You can find it on the official Microsoft website.
Resolving error 0x00000116 Windows 8, 10.
To remove the driver, right-click on the Start icon and select “Device Manager” from the context menu that opens.
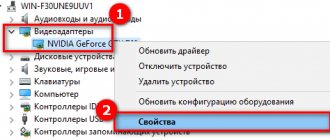
Find “video adapters” on the left and click on the triangle on the left. In the menu that opens, right-click on the problematic device (1), and select properties, then go to the “Driver” tab (2), and click “Remove device” (3). In the warning window that appears, check the box (4) and click “Delete” (5).
Additionally, you can disable the monitor's sleep function. In some cases this is effective. To do this, right-click on Start and select the “Power Options” section.
Next, set the screen off time and the Sleep parameter to “Never”.
If this does not help, then the next step in resolving it is to update/reinstall DirectX. You can find it on the official Microsoft website. (or download the online installer from the link: https://www.microsoft.com/ru-ru/Download/confirmation.aspx?id=35)
Installing new video card drivers
As further steps that can prevent the appearance of a blue screen with error 116, we can advise you to install the original drivers and related software, which are located on the removable media supplied when purchasing a video card or computer. The option to download them from the manufacturer’s official website also looks good. A more advanced method is to use automated applications like Driver Booster, which, however, require a stable Internet connection to work.
In the case of installing the control OP through special utilities from the manufacturer itself, it is advisable to perform a “clean” installation.
2. Incorrect software. Let's reinstall!
In some cases, this error may be caused by some software. There have been cases where the culprit was the following programs: “ Zune”, “ Avast”, “ Chrome” . In general, this can happen if product versions for a different bit depth are installed.
Fixing error 0x00000116 in problematic software.
Works for Windows 7, 8.1, 8, 10.
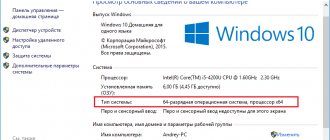
It is recommended to remove the faulty software, download the correct version from the manufacturer’s website and install it. You can find out the bitness of your system by right-clicking on “My Computer” and selecting “properties”.
Driver rollback
It happens that the stop 0x00000116 error with the atikmpag sys file appears after an unsuccessful video card driver update. In this case, rolling them back will help.
How to do this on Windows 10 and 7:
- Call “Device Manager”, expand the “Video adapters” section, right-click on the video device and go to “Properties”.
- Move to the “Driver” tab and click on the “Roll Back” button.
- We confirm the operation.
After completing the procedure, reboot the PC.
3.Virus. Let's treat!
Works for Windows 7, 8.1, 8, 10.
If the first 2 options did not help, then you need to check the system for viruses and traces of their activity. To do this, run an antivirus through the entire system and eliminate the infection. To do this, we use a product from Kaspersky; you can use the antivirus that you have installed, or choose a suitable one based on our recommendation.
Virus check
Do not forget about the possible infection of the system with viruses. As you know, they not only steal or delete important data, but also replace it with malicious data. Which entails the appearance of various failures.
Therefore, to fix the atikmpag sys error, you need to scan your laptop or PC for threats. It is recommended to do this even if a comprehensive antivirus is installed. After all, no security measure can protect a device 100%.
Using additional antivirus programs will improve your PC's security significantly.
4.Damage to the registry. How to fix?
Works for Windows 7, 8.1, 8, 10.
To restore the registry, you can use special utilities, for example, CCleaner. Using it is quite simple, after installation, go to the “Registry” section and first select “search for problems”, then “fix selected”.
Important! When the Program prompts you to make a backup copy of the registry, agree. In a certain situation, this can greatly simplify life.
5. System file errors. Recovery method.
Works for Windows 7, 8.1, 8, 10.
Such errors can occur in case of damage to system files as a result of virus activity, hard drive errors, or situations with a sudden power outage (stock up on Uninterruptible Power Supplies).
Recovering system files.
In order to restore the integrity of the files, you need to click “start” -> “all programs” -> “Accessories” -> right-click on “Command Prompt” and select “Run as administrator”. In the window that opens, enter the command “ sfc / scannow” (without quotes) .
After detecting and fixing system files, you will need to reboot.
Checking the system unit
Errors of this type, as well as some other types, can occur as a result of computer contamination.
Dust deposits quite often cause failures in the operation of hardware components.
This is especially likely for laptops.
Therefore, you first need to check the system unit for contamination.
To do this, disconnect the system unit from the network , disconnect the speakers, monitor and other equipment from it, unscrew the connecting screws from the outside of the case and remove the protective plastic casing.
After this, clean all the “internals” of your device from dust.
If the contamination is very strong, then it is possible that there is a need to replace the cooling system, as well as thermal paste.
The cooler may not function normally.
This is quite difficult, and it is better to entrust this process to professionals.
Important! In some cases, if the contamination is very significant, it may even be necessary to replace the video card.
If we are talking about a laptop, then the process can be much more complicated.
This is due to the peculiarities of the arrangement of components in the device body.
Since the initial priority when designing any laptop is compactness, all components in them are small in size and located close to each other:
- Unplug your devices and turn it off;
- Remove the battery if the design provides for it;
- Prepare technical documentation for the device in order to understand exactly where this or that component is located;
- Close the device and turn it upside down;
- Unscrew the screws securing the cover and remove it;
- Clean visible areas of the system from dust;
- If you are confident in your abilities and knowledge, then, guided by the technical documentation, one by one disconnect and clean all system components from dust, and then connect them back.
When it comes to laptops, it is not recommended to try to fix the problem yourself .
<Fig. 3 Pollution>
6. Errors of the hard drive, flash drive. Repair tools.
The proposed method works on Win7-10.
If system file recovery is unsuccessful, there is a possibility that the hard drive is damaged, or the external disk drive is damaged.
We check and try to fix the hard drive.
To scan and correct errors, you must complete the previous paragraph before entering the command. Instead of " sfc / scannow" we will enter " chkdsk / f / r" .
When checking a flash drive or other external media, you must indicate its letter, i.e. if our flash drive is designated in “my computer” as drive “F”, you should write the command like this: “ chkdsk F: / f / r”
Most likely, during the scanning process, or before it starts, you will be asked to reboot and continue scanning after that. We agree, because this is required to check the disk and files that are currently in use by the system. After completing the check, you must repeat step No. 5 and reboot.
Nvkddmkm.sys
The reasons for this error code 116, as a rule, can be:
- outdated or broken drivers;
- presence of virus software;
- registry damage.
To “treat” or update drivers, just use the DriverPack Solution utility. Virus files can be detected and removed through any antivirus that you trust. If you are not very familiar with antivirus programs, you can use the topics on our website, where we reviewed the most popular ones.
Registry corruption is a more delicate issue. Typically, this happens if you often install or uninstall various programs and games incorrectly. Because of this, registry entries may be duplicated or overwritten incorrectly. To fix this, you need to use the built-in tool that allows you to restore system files.
To do this, you need to open a command line in which you need to run the command chkdsk /c (instead of the last letter you need to enter the name of the drive where the operating system is installed on the computer).
After checking and repairing the damaged areas, there is a high probability that the nvlddmkm sys blue screen error 0x00000116 on your laptop or computer will disappear.
7.Problems with RAM. How to determine?
The “bsod 0x00000116” error occurs when the RAM on the computer is faulty. As a rule, this is expressed in the mention of “cid_handle_creation” on the blue screen, this is actually an accurate marker indicating a problem with RAM.
We test our memory and draw conclusions.
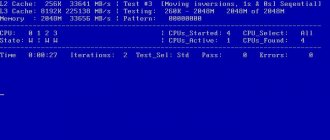
The most correct way to check the health of the RAM is to use a boot disk with installed software, such as Memtest86. When checking
Let's look at several ways to check it, the simplest and most obvious is to replace it and look at the result. If you have several RAM sticks, then it is best to test each one separately, in different slots. Remove all RAM sticks except one, and for several hours in PC testing programs, or for a day or two in normal operation, monitor the occurrence of error 0x00000116. If failures begin to appear again on some strip, you can blow out the connection connector and wipe the contact pads on the strip with alcohol. With some degree of probability this may help. Otherwise, all that remains is to purchase a new RAM stick.
We hope this article helped you cope with the problem 0x00000116.
