Welcome to fast-walker.ru! Sometimes, for example, after cloning a hard drive (or other repair procedures), the letters of the hard drive partitions change to others. For example, before the repair my Yandex Disk was on partition D; and after the reboot, it suddenly turned out that now the partition on which the Yandex download folder is located is assigned the letter E. Now all programs using this folder will have to be reconfigured and the paths rewritten.
This is unacceptable if other users on the local network also use this folder. The settings on their PC haven’t changed... But maybe it’s easier to get the drive letters back? Depending on the situation, the volume letter can be assigned in different ways, and in today's episode we will look at some of them.
How to change the system drive letter in Windows when installing the system using Acronis?
When installing Windows on a new hard drive or reinstalling the system again, it is easier and faster to assign a volume letter in advance using special programs. For example, a new disk still needs to be initialized first; otherwise the operating system will not see it. In such cases, I usually use Acronis for these purposes. Here you can download the installation image.
We write the image to a flash drive (or CD-DVD disk) and boot from it. After starting the program, you can select the desired volume and change the letter:
In order to avoid accidentally mixing up partitions later when installing Windows, I additionally change the volume labels. I usually call the system partition System, and the logical partition DATA.
When installing Windows from a flash drive, we can now easily understand which drive is system and which is logical. After all, the system usually numbers disks and partitions with numbers, which is inconvenient, but after adding an adequate label, everything becomes clear:
How to rename a drive in Windows 7 - local, partitions, letter
In some cases, you may need to rename the drive in Windows 7. This is usually done for more comfortable PC management, for example, you can set a label indicating that the drive is intended for archival copies of important data.
Important! In Windows 7, you can also change the letter of non-system partitions, but before performing these actions, you must consider the possible risks.
Changing the volume label
Users treat their PCs differently. Some are quite satisfied with the default parameters offered by the system, others prefer to “customize” the system for themselves, achieving the most comfortable conditions for using the computer.
After installation, all partitions on the hard drive are often named “Local Disk,” but it is much more convenient to designate the space allocated for movies, photos, or backups more clearly. This is especially true if the PC is used by several users.
A volume label is a descriptive name for a partition on a hard drive; it is necessary only for user convenience and does not affect the operation of the OS.
Let's look at the main ways to change the volume label:
- use of a graphical interface;
- label command.
HDD
Most users are not used to working with command-based systems. For them, changing the volume label using a GUI is much more suitable.
Here is the procedure for changing the volume label:
- open “My Computer”;
- right-click to open the menu on the desired drive;
- select “Rename”;
- enter a new name;
- press Enter.
My Computer Windows 7
Before changing the volume label, you need to know the basic requirements for it, because otherwise proper operation may be disrupted, consider them:
- maximum label length is 11 characters for FAT or 32 for NTFS;
- spaces are allowed;
- It is prohibited to use a tab character in a label;
- The label of a disk formatted in FAT cannot contain the following characters: * ? /\| . , ; : + = [ ] ".
Hard drives have usually been formatted in NTFS for many years now; other drives may still be formatted in the older FAT file system.
It is more convenient for experienced users to change the volume label using the command line and the label command.
Let's look at how to change the label from the command line:
- open a command prompt with administrator rights;
- enter the command label drive letter;
- press Enter;
- specify a new label and confirm the entry using the Enter key.
Please note that the old label will be erased without displaying an additional warning.
Windows 7 command line
If you just need to remove the volume label, you need to do the following:
- run command line with administrator rights;
- type the command label drive letter and press Enter;
- when prompted, leave the input field blank and press Enter;
- Confirm deleting the mark by pressing Y.
Possible problems
Sometimes Windows 7 users cannot change the drive name. This is due to the big changes that have occurred in this version of the OS. Often on computers with Vista and XP, to prevent infection by certain viruses, an autorun.inf file was created in the root of the disk. In Windows 7 there is no point in creating it, but this file may be hidden.
Control Panel
Let's look at how to enable the display of hidden files:
- open “Control Panel”;
- go to the “Folder Options” section;
- on the “View” tab, check the box next to “Show hidden files and folders”;
- Click Ok.
You can now delete the autorun.inf file and restart the computer, after which you can change the volume label.
Changing the drive letter
The drive letter is a pointer directly to the logical partition of the hard drive; it is also found in removable drives, CD/DVD drives, and virtual disks. Sometimes you may need to change it for greater convenience or to correctly transfer programs to the installed new drive.
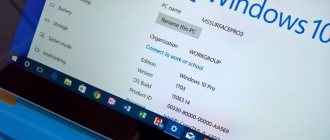
Changing the system drive letter in Windows 10 to the letter D via Disk Management
If you do not need to reinstall the system, then the easiest way to change the volume letter is through the Disk Management snap-in. You can call it with the command diskmgmt.msc through the “Run” menu:
Let’s say you don’t like to remember commands, then through the “Control Panel” go to “Computer Management”, here you will find the “Disk Management” snap-in. Now you need to change the system drive letter. I have the letter D: already assigned to the logical one, it turns out that it is already occupied. Therefore, it is necessary to “free” her. First, let's rename section D to some other free letter:
For example, from D: to W, select the desired one from the drop-down list:
Then you need to change the system drive letter to D in the same way. Sometimes you cannot change the volume letter through Disk Management. Then we try other ways.
Changing the drive letter in Windows 10 Disk Management
One of the easiest ways to change the drive letter in Windows 10 is to use the built-in system utility Disk Management (about other such tools: Built-in Windows Utilities Many Don't Know About).
The steps to change the drive letter will be as follows:
- Press the Win+R keys (Win is the Windows logo key) on your keyboard, type diskmgmt.msc into the Run window and press Enter.
- Right-click on the drive (disk partition) whose letter you want to change and select “Change drive letter or drive path.” The context menu can be called up both in the list of disks at the top of Disk Management, and at the bottom, where there is a graphical representation of the partitions on the disk.
- In the next window, select the current drive letter and click the Change button.
- Specify the desired new drive letter and click OK.
- Confirm the letter change (several warnings will appear indicating that changing the drive letter may cause problems with programs starting).
In case you need to change the letters between two drives, for example, change D to E, and E to D (similarly for other letters and devices):
- Delete the drive letter E (in disk management, select “Change drive letter or drive path”, select the letter, click “Delete”).
- Assign drive D to E.
- Assign the drive without a letter (which was E) to D.
Usually, this method of changing the drive letter is enough, but there is another way: all this can be done using the command line.
How to change the drive letter through the registry?
Through the registry, I sometimes change the letters that the system assigns to removable media such as flash drives and memory cards. Using the Win + R key, open the “Run” menu and use the regedit command to open the registry editor:
We are looking for the required branch HKEY_LOCAL_MACHINE\SYSTEM\MountedDevices
All that remains is to rename the letter to the desired one, also paying attention to whether it is already occupied. We rename only the letter in the line up to the colon:
Rename drive on command line
1.
Open Command Prompt as an administrator: one way is to right-click on the Start menu and select “Command Prompt (Administrator)” from the menu that opens.
2. Write the command label C: Disk after changing the one highlighted in red to yours and press the Enter key. C" in the command to the letter of the drive whose label you want to change. Change " Disk" to the name you want to name the disk.
Change the drive letter via the command line using the diskpart utility
The most exotic way to rename volume letters. In difficult situations, it can be used when it is not possible to boot Windows. After loading in command line mode, type the command DISKPART and press the “ENTER” key
We will sequentially get to the desired volume. The operating procedure is as follows: enter the next command and press ENTER. First, we get information about all volumes using the List Volume in one list:
The volume we need is number seven. Now you need to select it using the select volume (my volume number is 7, you can set yours):
Now you can perform a variety of operations with this volume - from formatting to deleting. But we need to change the volume letter. There is a command called assign letter for this . I change the drive letter from I to W. Before changing, make sure that the selected letter is not already occupied and enter the command as in the figure:
The result is displayed after the command is executed. After you restart your computer, the changes will take effect. So there is nothing complicated in this procedure. Good luck to you, see you on the blog!
Author of the publication
offline for 5 days
Windows 10 Command Prompt
You can also change the Windows drive letter using the command line. Here we will show with an example how to do this using the command line. And also read the article on how to launch the command line in Windows 10, since our option may not suit you.
- Press Win+X and select Command Prompt (Administrator) .
- The first command is to use DiskPart to launch the disk management utility.
- Next, use the List volume to view all disks on the computer. Here you need to turn to the volume of the disk you need.
- Now we execute the command select volume 3 if you want to change Volume 3. Instead of 3, set the number of your volume, the letter of which you want to change.
- The last command will change the letter of your local drive, namely assign letter= L , where you need to specify the desired letter.
After executing the last command, you should receive a message indicating that the assignment of the drive name or mount point was successful.
conclusions
In this article, we figured out how to change the drive letter in Windows 10. All the methods we proposed work both in the latest versions of the Windows 10 operating system and in previous Windows operating systems.
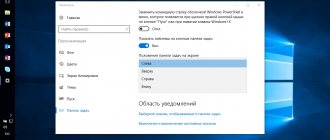
Rename drive in PowerShell
1. Open PowerShell: one way is to type powershell in the search bar, right-click on “Windows PowerShell” and select “Run as administrator”.
2. Enter the command Set-Volume -DriveLetter C -NewFileSystemLabel “System”, replacing the one highlighted in red with yours and press the Enter key. C in the command to the letter of the drive whose label you want to change. Change the System to the name you want to name the disk.
That's all for today, if you know other ways or have any additions - write a comment! Good luck to you