Almost all system folders in the Windows operating system are hidden. This is done so that the user does not inadvertently delete some necessary components, as well as so that many folders unnecessary for the average PC user do not clutter up his space on the computer. However, many games, programs and utilities require changing these folders for full installation. The most common hidden folder to search for is called appdata, which stores temporary files for some games. To install a patch or add-on, you will need to access it. In this article, we will search for a hidden folder using appdata as an example; you can search for any other folder, since the methods are universal.
How to Find Hidden Folders Using the Command Prompt
A very fast and simple method, but it is more suitable for those users who encounter such a task very rarely. For this step, you will not need to configure the visibility of folders or, in general, search for them yourself; the work will take place entirely in a special Windows window.
- Press the key combination CTRL and R on the English layout, or CTRL and K on the Russian one.
This is the combination to open the search bar window. From here you can directly navigate to any folder, even the system one. The search goes like this:
- enter the name of the folder you are looking for, with a small letter;
- On the sides of the name, place percent signs “%” without spaces;
- Click “OK” or press Enter.
Now wait for the system to respond.
- All is ready. You have entered a hidden system folder. In this case, it is called appdata. You can also use this method to search for regular folders that take too long to open.
Search using the command line
One of the rather unusual and at the same time effective ways to search for hidden folders on a computer is the “DIR” command, which can be executed from the Windows 10 command line.
To use this method, you need to open the Windows 10 command line. This can be done in different ways, the easiest option is to press the Win-R key combination and execute the “CMD” command.
After executing the “CMD” command, a command line will appear in front of you. In this window you need to enter the following command:
- DIR Path /A:DH /S
Where:
- Path is the full path to the folder you want to search. If you want to find all hidden files on a drive, then simply enter the drive letter and a colon (for example, D:). But, you need to keep in mind that searching for all hidden folders on the entire disk can take a lot of time.
- /A:DH – parameter indicating that you need to search only folders (D – Directory) and only hidden ones (H – Hide).
- /S – parameter that allows searching in subfolders.
For example, if you need to find all hidden folders on drive D, then the search command would look like this:
- DIR D: /A:DH /S
If you want to find hidden folders inside a specific directory (for example, D:\TMP\), then the command will look like this:
- DIR D:\TMP\ /A:DH /S
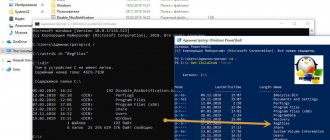
To demonstrate how the DIR command works, we created a folder D:\TMP\ with several regular and hidden folders. In order to find these hidden folders, open the Windows 10 command line and enter the command “DIR D:\TMP\ /A:DH /S”.
After entering this command into the command line, a detailed report will be displayed. This will indicate where the hidden directories are and what they are called.
When searching for hidden folders on your computer, you may come across a large number of system directories. To exclude them, you need to add the -S attribute to the /A parameter. In this case, the search command will look like “DIR D:\ /A:DH-S /S”.
Once hidden folders are found, you can open them by simply entering their address in any Explorer window, or make them visible using the Attrib command.
For example, in order to make visible all hidden directories and files in a specific directory, you need to enter “attrib -s -hd:\tmp\* /s /d”.
How to set the visibility of hidden folders
If you often work with hidden folders, or you need to open several of them at once, try setting the visibility of all hidden folders and files in the system. This method has a big advantage - you can always see the folder, open it, change it, everything will happen exactly the same as with regular user folders. However, the downside is that the space is cluttered. You will constantly encounter system files that do not carry any information for the average PC user. Which method to use is up to you, try both, because everything can be returned.
- Let's see exactly how the folder appears using appdata as an example. Typically, it is located at “Drive C” - “Users” - “Username”. As you can see, it is not in the screenshot.
- Now go to “Control Panel” through Start in Computer Explorer.
- Choose to show options by category. Find the line “Design and Personalization”, click directly on its name.
- Now you need to go to the “Folder Options” section, which is highlighted in green.
- A special window with settings will open in front of you. First, go to the View tab at the top of the window.
- Scroll the list all the way down. As soon as you see the line “Hidden folders and files”, pay attention to the sub-items. You need to check the box next to the words “Show hidden files, folders and drives.” Click “Apply” and then “Ok”.
- Look in the directory where the system folder is located. Now you can see the hidden appdata folder, it is highlighted in gray and a little faded. This will happen to all system folders that were hidden. At any moment you can turn everything back.
Thus, we can conclude that the first method is suitable for those users who rarely need access to hidden folders. The second method configures the visibility of system folders for your further long-term work with them. If you are not a confident PC user, then it is better to bypass the second method so as not to mistakenly delete or change important system files, because this can lead to a complete system failure.
They complain about not understanding how to display hidden files in this OS. There may be several solutions to this problem, and in this article I would like to discuss this issue in more detail and determine options for eliminating this problem. So, let's deal with the question of how to show hidden files in Windows 7 quickly and without much effort.
Viewing protected system objects
The second way to solve the problem is also quite simple. After entering “Start”, you need to call up “Control Panel”. Clicking on the “Categories” option will open a drop-down menu in which you should check the item of the same name. Then you need to sequentially go to “Appearance and Personalization” and “Folder Options”.
A new window will open in which you go to the “View” tab . After this, you need to scroll down the list of items and click on the “Apply” button. If you then uncheck the “Hide protected system objects” checkbox, a warning window will appear. It will close after clicking “Yes” and “OK”.
All the necessary settings have been made and now hidden directories and files will be displayed.
Option 2: design and personalization
In principle, this method is almost identical to the previous one, but there are still differences. Go to the start menu, then to “Control Panel”, and then to “”.
To activate the function to show hidden folders in Windows 7, find the corresponding option in this menu. Next, the “Folder Options” window will open, and then do everything in the same way as was written in option 1.
First stage - “Control Panel”
With the left mouse button you need to click on the “Start” button, after which a directory consisting of 2 parts will open. One with a white background, the second with a blue background fill (there may be other colors).
The next step is to find the “Control Panel” section on the colored part of the directory and click on it. After which the “Settings” window will open.
Opposite the window there is a drop-down menu called “View”. In it, select the “Small icons” item.
As a result, the files contained in the directory will become small in size and there will be more of them. Now find the “Folder Options” section and click on it.
After this, a new window with the same name will open. This contains various settings.
Option 3: File Manager
There is also another option to open hidden folders in Windows 7 - use a file manager. This can be any application, I will choose Total Commander as an example. But before you turn it on, you need to first go to the settings and do this: look for the “Configuration” menu, then “Settings”. After that, find the “Panel Contents” tab and make the “Show hidden/system files” line active.
That's all, click "OK" and view your hidden files. By the way, it’s better to use Total Commander, it’s a really useful program. It will also come in handy if you often deal with external media, especially foreign ones.
For example, a virus, and more than one, may be disguised in a colleague’s flash drive, but with this program it will immediately become visible.
I think after reading this article you will be able to quickly find your hidden folders. The article describes three ways to do this, so try it and choose the one that appeals to you most.
How to open hidden folders in Windows 10
I decided to tell you about three ways to open hidden folders and files in Windows 10 (although it will work perfectly for any other Microsoft OS). In this regard, Ten has gone far ahead and it is possible to show the necessary files in a couple of clicks, without wandering through the system settings.
How to show hidden folders in Windows 10 through Explorer
The shortest way to get what you want is to use a small tweak in the standard and beloved Windows Explorer. Find the "View" tab and make sure you have o. That's all - the system will show you hidden files and folders.
There is also a useful parameter “File name extensions” if you suddenly want to see the document type (exe, jpg, bak and others)
Hidden files and folders in Windows 10 through Folder and Search Options
If the method above appeared only with Windows 8... then the second option has probably been around since the very first versions (at least in Windows 98 it was there, but before that I didn’t even have a computer).
Click on the “File” tab and select “Change folder and search options” from the drop-down menu.
In the window that opens, go to the “View” tab and click “Apply”
This is how we enabled the display of hidden folders in Windows 10 - as you can see, everything is simply outrageous.
How to open hidden folders on Windows 10? - Control Panel
If the two previous methods seemed too simple to you, then meet the longest and most inconvenient option with displaying hidden files in Windows 10 (for those who like to complicate things).
You can enable showing hidden files through the Control Panel. In fact, we use the second method with setting up Explorer, but we do this not from the program interface, but from the global system settings.
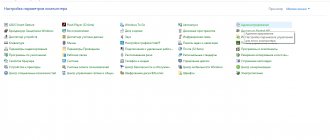
Go to the Control Panel and for easier searching, change the view to “Small icons” and find the “File Explorer Options” item.
On the View tab, click the Apply button. From now on you will be able to see hidden files.
You will most likely be warned that showing hidden files is not entirely safe - edit them wisely and know what you are doing... (if you want to show system files, then uncheck “Hide protected system files”)
Video to help
As you know, Windows is configured by default so that some folders are hidden from the user's eyes. As a rule, these are folders containing various service files. Since all users have different operating systems (hereinafter referred to as OS) installed on their computers, we will consider this process from the very beginning - from the search for information. Let's look at the process of finding such folders using Windows7 as an example. In the article, the pictures usually do not show the entire page, but only the necessary part of it - so that it is better visible.
First we'll need Windows Help. In all operating systems it is located in different places, but is always visible. It is usually located in the Start menu:
Click to open the Help page:
Fig.2 At the top there is a search window. Enter our request “Hidden folders” there and click the “Search in Help” button (magnifying glass icon, right arrow). The results page opens.
You can read the information presented there, or you can come back to it later. We need to make sure that the hidden folder is visible, and for this we need to change its properties. Click on the line “Change folder properties”, the page of the same name opens:
If we now click on the line “Click here...” (shown by the arrow), then we will see a dialog box:
We need the “View” tab (located at the top, shown with an arrow). Let's click on it:
We need to work in the “Advanced Settings” window. We lower the scroll bar slider down and see the settings elements that interest us:
We need to click on the radio button (circle) “Show hidden files, folders and drives” and the “Apply” button will immediately activate (it will become bright, compare with the following picture):
Fig.8
Click on the “Apply” button, it will again become inactive. Now you need to click on the OK button.
Fig.9
If you now look at the liver of folders located in the User folder, you will see that we have new folders, for example, AppData, which are shown more faintly than others - this shows that the folder was previously hidden. If you click on it, you will see all its contents, i.e. it behaves like a regular folder.
Now in this folder you can find the necessary folders and files and work with them.
PS Where do you buy household appliances? At the nearest store? I used to do this too, and still do sometimes. But I now buy most of it in online stores. I can suggest one interesting online store for household appliances. It's called BTVdom.ru and it simply has a huge variety of products.
If you do not live in Moscow, you can buy equipment there that does not require installation by specialists, i.e. everything except, for example, hobs, washing machines, etc.
Actually, you can also buy them there, but first ask in your city about installation prices.
The Windows operating system supports so-called hiding of folders and files. This was done for several reasons. Firstly, in this way the operating system manufacturer hides important system files that the user can inadvertently delete. And secondly, with the help of this function the user himself can hide the files he needs from prying eyes. In general, the function is very convenient and very popular.
Suppose you are using the PC of your relative, who, for example, hid photographs from you, and you would really like to look at them. And you know for sure that they are on the computer, but after looking through all the folders, you couldn’t find the photos. It is quite possible that they are in one of the hidden folders. Let's try to find her.
Hidden and system files of Windows
Today we will talk about hidden and system files in Windows, as well as ways to work with them. For example, let's take the pagefile.sys page file. We know for sure that it should be located in the root of the system drive C, but if we open Windows Explorer, we will not see this file there.
The fact is that the operating system hides some important system files, protecting them from overly curious users. For comparison, this is what Explorer looks like with the display of hidden\system objects turned on.
Attributes
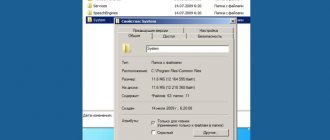
Special metadata - attributes . Here is a description of some of them:
H - hidden. Hides a file, making it invisible in Windows Explorer; S - system. Tells the OS to treat the file as a system file; R - read-only. Protects the file from modification, making it read-only; A - archive. Indicates that the file has been modified since the last backup, used by backup systems; I - indexed. Indicates that the contents of the file should not be indexed; D - directory. Indicates that the object is a directory; L - link. Indicates that the object is a reference.
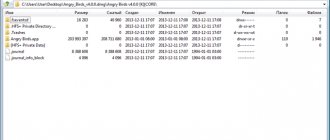
Explorer can show file attributes just like any other properties (type, size, etc.). To do this, right-click on the column name and select the “Attributes” item in the context menu.
As you can see, all hidden files have H or HS attributes. It is these attributes that affect whether the file will be displayed in Explorer or not. Accordingly, you can see hidden files in two ways - by turning on their display in Explorer (or another file manager) or by removing these attributes.
Enabling showing hidden files
Settings for displaying hidden files and folders in Windows Explorer are located in the Folder options control panel snap-in. You can quickly open the snap-in by pressing Win+R and entering the command control folders .
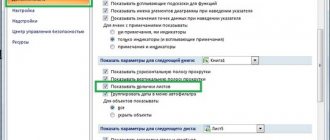
To show hidden files/folders (H attribute), on the “View” tab, in the “Hidden files and folders” field, set the switch to the “Show hidden files, folders and drives” position. To display hidden system files (having HS attributes), you must additionally uncheck the “Hide protected system files” checkbox.
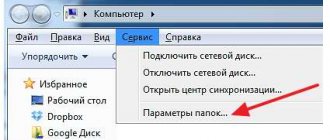
You can also open the Folder Options snap-in directly from File Explorer. In Windows XP and Windows 7 (as well as Windows Server 2003\2008\2008R2), to do this, select “Folder Options” from the “Tools” menu.
Note. In Windows 7, the menu is hidden; to appear, you need to press the Alt .
In Windows 8\Server 2012, a ribbon (Ribbon) appeared in Explorer, which contains the most necessary options. You can quickly enable the display of hidden files by going to the “View” tab, and you can open the main snap-in with the “Options” button.
For those who are not looking for easy ways
