Ways to allow entries to be deleted
There are several methods by which you can remove an account on Windows 10:
- demolition of the operating system. The most effective method to permanently erase your previous account. However, the procedure for reinstalling OS Windows 10 can take a lot of time, especially if an untrained person does it;
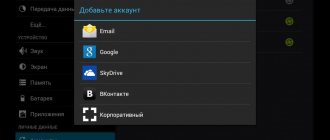
- via Windows Settings. This is a Windows 10 system tool that allows you to customize the operation of the operating system at the user’s own discretion by adjusting some parameters;
Account icon in Windows 10
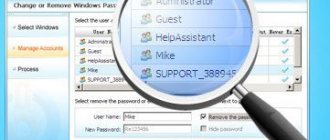
- through the Windows control panel. One of the fastest and most effective ways to accomplish the task, which requires compliance with a certain algorithm;
- using a Windows PowerShell application. This Microsoft tool resembles the Windows command line, but has distinctive features. The application is intended for system administration;
- use of third-party utilities, software downloaded from the Internet. This method is used last, as it has certain risks. For example, a person can infect their computer with malware.
Many of the methods presented above will be described in detail in the following sections of the article.
Windows 10 Command Prompt
Disable an account using the command line
To disable an account using the command line, run it as an administrator
On the command line, write the following command: net user Oleg /active:no and press Enter
After completing the above procedure, you should see something like:
In this article we discussed the topic: How to delete a user in Windows 10 , if you have any questions, write to me in the comments and don’t forget to subscribe to the newsletter, thank you and good luck!
Using Windows Settings
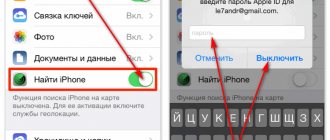
How to set up email on iPhone and create an account
To completely delete someone else’s account through a standard operating system application, you need to perform a few simple manipulations:
- Press the “WIN + I” keys on your keyboard to launch the settings window. This procedure can also be carried out through “Start”.
- In the list of parameters, find “Accounts” and click on this line.
- Tap on the line “Family and other people” to display the next settings window.
- From the list presented, select the current operating system account and right-click on it.
- In the context menu, click the “Delete” button.
- A system notification window will appear. Here the user needs to agree to the notification and confirm the uninstallation by pressing the appropriate key.
Important! These actions will erase all user information from the computer. To avoid such a misunderstanding, it is recommended to save all important information to an external drive.
Deleting an account through the “User Accounts” section
You can use another removal method.
Call the “Run” window by pointing the cursor over the “Start” button, right-clicking and when the menu appears, click on the “Run” line.
In the Run window, add the command control userpasswords2 and click OK.
The “User Accounts” window opens. Click on the desired account, and then click on the “Delete” button.
Confirm deleting the “account” by clicking “Yes”.
How to remove a Microsoft account in Windows 10 from your computer via Control Panel
How to create a new user on Windows 7 - instructions
Another method that allows you to uninstall an unnecessary Windows 10 account. It involves the following actions:
- Press the “WIN + X” buttons on the keyboard to open the context menu.
- In the list of parameters, select “Control Panel” by clicking on the corresponding line.
- Set the display of elements in the form of small icons to make it easier to find the desired parameter.
- Find the “User Accounts” element and click on it.
- In the window that opens, find the line “Manage another account” and click on it.
- Select the desired account and get rid of it by clicking on the “Uninstall” line in the context menu.
Control panel on Windows 10 OS
Note! Before deleting your account through the control panel, the system will prompt you to save all important information to avoid losing it.
Remote Desktop
In Windows 10, you can create a remote desktop for multiple users. To implement this action, you must follow the instructions below:
- Press Win + E to open the Explorer window.
- Right-click on the “This PC” icon and select “Properties” from the list of options that appear.
- In the left part of the dialog box that opens, select the “Remote access setup” hyperlink.
- In the “System Properties” window that appears, check the box in the “Remote Access” tab next to the “Allow remote connection to the computer” option.
- To connect to another computer or laptop, you need to find out the IP address of the device. To do this, hold down Win + R and enter the “cmd” key without quotes.
- In the console, enter the command “ipconfig” without quotes and press Enter.
- Remember the IPv4 address of the computer, which looks something like this: 192.169.1.0 (you can copy the information into Notepad).
- Press the Win + R combination again and enter the mstsc.exe key, or find the “Remote Desktop Connection” section in the “Control Panel” menu.
- A corresponding dialog box will appear on the monitor, into which you need to insert the computer’s IP, then enter the username and password, and click “OK”.
- In the next dialog box, click on the “Yes” button: after this, the user will be able to connect to the Windows 10 remote desktop.
Note! There are special programs for remote access, such as Team Viewer, Chrome Remote Desktop, AnyDesk, Remote Utilities, UltraVNC or TightVNC. Thus, each PC user will be able to choose a software solution to suit their own needs.
How to delete a user in Windows 10 using the Netplwiz system utility
Resetting your password in Windows 8 - how to do it via the command line
A simple and effective method. To delete a Windows account using this application, the user will need to do the following:
- Launch the “Run” window by pressing the “WIN + R” buttons on the PC keyboard.
- In the “Open” line, enter the name “netplwiz” and tap “Ok”.
- In the next window, switch to the “Users” section.
- Select the required account and click on “Delete”.
- Read the system notification information and agree to the information provided by clicking “Yes.”
Important! After uninstalling the Microsoft entry, it is recommended that you restart your PC to permanently apply the changes made.
Solving the problem You are logged in with a temporary profile in Windows 10 and 8.1
One of the problems that Windows users periodically encounter is a message that they are supposedly logged in with a temporary profile. It appears in both Windows 10 and Windows 8.1 with additional text stating: “You cannot access your files, and files created in this profile will be deleted when you log off.” With the help of these instructions, you can understand how to solve the problem You are signed in with a temporary profile in Windows 10 and 8.1 .
This problem often appears when users rename or delete the Windows user profile folder. But there are other reasons why it occurs. It is worth noting that these instructions are intended for ordinary Windows 8.1 and 10 users whose computers are not in a domain. If you are managing Active Directory accounts in Windows Server, this instruction will not help you in any way. The only thing we can suggest to you is to try to understand the login script or delete the profile on the computer and log into the domain again.
Removing a Windows 10 user via the command line
You can also cope with the task via the command line. More detailed information can be found in the following algorithm:
- Launch the classic application. This task can be dealt with in several ways. The simplest and most effective is to type the name of the classic application into the Start menu, and then click on it with the left key of the manipulator.
- In the window that appears, write the command “net user “Username”/delete“. Instead of the name, you need to enter the name of your account “Microsoft”.
- Click on the “Enter” key on your keyboard.
- Restart the laptop and make sure that the selected entry was able to be deleted.
Windows 10 Settings Window
For your information! To view the name of your account, you need to hold down the “Ctrl + Alt + Delete” buttons on your keyboard. Next, select “Change user” and study the information provided.
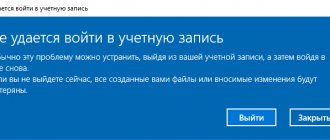
Changing the local administrator account
To change the local administrator in Windows 10, you first need to create a new one and then delete the old one. So let's go to Control Panel . Start menu icon and selecting the item we need in the context menu that appears.
In the launched Panel, go to the accounts section and select the “ Change account type ” link there.
In the window that appears, you will see the old administrator account, in our case the name “User”. At the bottom of this window there is a button to add a new user , clicking on which will take us to the OS settings section.
In this section you can add a new admin and remove the old one. To add it, click the “ Add a user for this computer ” button. This action will take us to the New User Creation Wizard.
Since we are creating a local admin, we will therefore skip the email entry point by clicking on the “ I don’t have this person’s login information ” link. This action will take us to the window for creating an online account for Microsoft.
To skip the account creation process, click on the lowest link in the wizard window, which will take us to the local user creation window.
As an example, write down the name “New Admin” and continue the wizard. After these steps, a new local account will be created.
Now let's go to our users and select the name "New Admin".
In the next window we need to select “ Change account type ”. This is necessary in order to change our account type from regular to administrator.
Therefore, feel free to go to this point and change the user type.
Having made our user an admin, we can now proceed to directly deleting the old user . Now you need to change users . Therefore, let’s log into the system under the admin, whose name is “New Admin”, and go to the list of our admins, selecting “User”. Now, to remove the old user, select the “ Delete account ” item.
After selecting this item, the system will offer us to delete all user data or save it. Therefore, be careful, if there is important information there, then save it.
We select one of the options in which we can delete or save files. After confirmation, the old admin will be permanently erased from the system.
From the example it is clear that creating a new and deleting an old admin is not at all difficult, although you will have to tinker a little.
How to uninstall your current Microsoft account and replace it with a local account
To complete this task, you can use the following instructions:
- Open the operating system settings using the method discussed above.
- In the window that appears, find the line “Login to the second instead with a local entry” and click on it.
- If necessary, enter your account password. If a password is set on the account, the system will ask the user to enter it to perform further operations.
- Next, another menu will appear in which the user will need to fill in the fields for a local account. To create a new account, you will need to enter characters in the “Username” and “Password” fields. However, you can refuse to enter a code to protect your account from unauthorized access and do this later, if necessary, through the control panel.
- Finish the account creation procedure by clicking on the “Finish” button.
- For your own peace of mind, restart the computer and log into the local account.
Creating a local entry on Windows ten
Deleting a user
You can delete a user from any account that has administrator rights. This can be done through the Control Panel:
Restart your PC to correctly save changes to the registry. However, if you try to delete the admin account in this way, you will not succeed. The required button simply will not be in the list of available operations.
How to switch to another clean account
In Windows operating systems, it is possible to create several accounts: two, three, etc. You can switch from one to another as follows:
- Simultaneously hold down the “Ctrl + Alt + Delete” buttons on your PC keyboard.
- A window with system parameters will appear. Here the user can enter the task manager of the operating system, block the operation of his PC or change the user. The last option is interesting here.
- After clicking on the “Change user” option, a menu will appear with all previously created accounts.
- To switch, you need to select the account you are interested in and tap on its name.
Note! Each Windows account has its own settings and programs. The location of folders and files on the desktop will also differ.
Removing a Microsoft profile using the built-in Windows PowerShell utility
As mentioned above, Windows PowerShell is a kind of command line for the Windows 10 OS. You can also uninstall an unnecessary account through it.
PowerShell console on Windows 10
To understand how to cope with the task, you can use simple instructions:
- Write the name of the console in the Start menu search.
- Launch Windows PowerShell. For this purpose, you need to right-click on the software shortcut and select the appropriate item in the context menu.
- Enter the command “Remove-LocalUser -Name” in the available line. Instead of username, enter the specific name of your Microsoft account. This process is in many ways similar to the command line method.
- After writing the required characters, press the “Enter” button and wait for the uninstallation procedure to complete, which may take several seconds. However, the duration of removal also depends on the speed of the operating system and the technical characteristics of the computer.
For your information! The PowerShell console can also be used to solve a wide range of tasks related to configuring Windows 10 OS settings, as well as to check its status.
User Accounts window in Windows Control Panel
How to disable temporary profile in Windows 10 or Windows 8
The situation in Windows 10 and Windows 8 with temporary profiles is approximately similar to the situation in Windows 7. That is, when the computer boots, the user receives a message in the list of notifications that the system was logged in using a temporary profile. Sometimes the situation is aggravated by the fact that a second error also appears, in which it says “The standard application has been reset.” The troubleshooting process is not much more complicated than the option described above for Windows 7.
To disable the automatic launch of a temporary profile when logging into Windows 10 and Windows 7, you must:
- Use an administrator account. If the problem in question occurs in the Administrator profile, you can continue to use it because the changes you make to the registry will be saved. In a situation where it is not possible to launch the main administrator profile, you can use the “Hidden Administrator Account” feature built into Windows. To activate it:
- Run Command Prompt as Administrator;
- Enter the command net user administrator /active:yes in the window that opens and press Enter. Please note that if you are using the English version of the operating system, instead of “Administrator” you must write “Administrator”;
- After this, you can log out of the current profile, and the secret Administrator account will appear in the list of users.
- When the situation with the account is resolved, press Windows + R on the keyboard to bring up the “Run” line and launch the registry editor with the regedit command;
- Next, you need to expand the menu on the left side to the section:
- In the designated section, find the folder that ends with .bak and select it;
- Next, on the right side of the window, find an object called ProfileImagePath and pay attention to its value. Next, you need to act depending on what you find there.
Option A: The Value column says C:Users, and the username is the same as the one listed in C:Users running through Explorer. In this case, follow these steps:
- On the left side of the window there is a section with the same name that was selected above, but without the .bak ending. You need to select it, right-click on it and delete it.
- After this, you can restart the computer and log in under the problematic profile, and the registry will automatically recreate the deleted files.
Option B: In the "Value" column, the user name does not match the user name of the folder in C:Users. In this case, you must proceed as follows:
- Double-click on the ProfileImagePath file with the left mouse button and change its value in the window that opens so that it matches the name of the user’s folder;
- Next, on the left side of the menu, select the section that is identical to the one in which the value was just changed, but does not have the .bat at the end, and delete it;
- When the partition is deleted, go back to the partition with .bak (in which the file value was changed), and rename this partition by removing “.bak”, that is, making its name identical to the one that was just deleted;
- After this, restart your computer and you can start the profile with which you were having problems.
Most often, a temporary profile in Windows is automatically activated due to a system error or a virus that renames the user's folder. It must be remembered that you cannot simply change its name, and you must act strictly according to the appropriate instructions to change the name of the user folder.
Why delete your account?
This circumstance has the following reasons:
- no need for an account. It often happens that one or another “Microsoft” record is no longer needed, i.e. they don't use it. In this case, it is better to uninstall the extra account. This circumstance will have a positive effect on the overall performance of the computer;
- to restore system functionality. If the user has forgotten the password for his account, it can be hacked by performing special actions using third-party programs. However, it is better to perform this procedure at a service center to avoid unpleasant consequences;
- to remove unnecessary information. If there is a lot of information on the computer that is unimportant for the user, then it is better to delete the entire account at once rather than delete each file separately;
- preparing your computer for sale. If the user is going to sell his PC, then the operating system needs to be cleaned. In this case, you need to know how to delete a Windows 10 user and create a new account by performing the simple steps described above.
Note! A new account is created in a similar way, for example, through the control panel or through the Windows OS settings window.
Windows 10 Installer Window
Thus, in order to uninstall a Microsoft Windows account, it is not necessary to have serious technical knowledge in the field of IT technologies. Even a beginner can cope with this task in no time. If you follow the instructions on how to delete an account on Windows 10, everything will work out the first time.
Account recovery
To restore a deleted Windows 10 user or to return information about a particular user profile that was lost after another unsuccessful Windows update, just perform the following manipulations:
- Specify SID – a special account identifier that can be found using the cmd tool. To open the “Command Prompt” console, just hold down the special combination Win + R at the same time, and after the “Run” window appears, enter the command “cmd” without quotes. In Windows 10, it is better to launch the PowerShell console as an administrator through the start menu (right-click on the Windows icon in the lower left corner of the monitor and select PowerShell as administrator).
- In the window that opens, enter the code combination preserving punctuation, but without external quotes: “wmic useraccount where name='test_user' get sid.” Then click on the Enter key.
- If you need to find out the SID of the active user, then just enter the key “whoami / user” without quotes and press Enter.
- You can also enter the following combinations in the PowerShell menu: “$objUser_=_New-Object_System.Security.Principal.NTAccount(“LOCAL_USER_NAME”)”, where instead of the “_” sign you need to put a space (with the exception of the “LOCAL_USER_NAME” key). The second script is “$strSID = $objUser.Translate([System.Security.Principal.SecurityIdentifier])” and the third is “$strSID.Value”.
- As a result of entering the data, the SID key should appear on the screen, which looks like this: “S-2-7-31-1137502296-1316126944-203142454-1023”. You need to copy the SID using the Ctrl + M (“Select”) and Ctrl + C (“Copy”) commands.
- Paste information into notepad using Ctrl + V.
- Now you need to open the Registry editor window: hold down the Win + R combination, then enter the special command “regedit” without quotes.
- Registry editor must be launched as Administrator: otherwise further editing of the registry will be impossible.
- At the top of the “Registry Editor” window that opens there is an address bar into which you need to copy the following path: “Computer\HKEY_LOCAL_MACHINE\SOFTWARE\Microsoft\Windows NT\CurrentVersion\ProfileList”.
- A directory with a special name – “ProfileList” will appear on the left side of the screen.
- To destroy a duplicate folder with a SID, you need to uninstall the entry without the “.bak” extension. This action will help both delete the old user on Windows 10 and solve the problem with access to the current account. To perform this manipulation, just right-click on the folder with the LED located on the left side of the Registry Editor window and select the “Delete” option in the list of commands that opens. This algorithm of actions is suitable for PC users who are faced with the problem of duplicating the account SID data.
- In the event that the user encounters problems with damage to his profile without duplicates (with or without the “.bak” extension), then it is enough to rename the folder with the “.bak” extension: hover over the folder with the desired SID number, select the option to change file name and manually destroy the “.bak” annotation. Tap the Enter button to make adjustments.
- You can also double-click with the left button on the SID number of the damaged account and select the ProfileImagePath option. In the “Value data” field, manually enter the path to the user profile and click on the “OK” option.
- Select the “State” option and change the value in the “Value data” field from 1 (in fact, this field can contain different numbers) to 0, then tap “OK”.
- To determine the exact path to the profile, just hold down the Win + R combination, enter the C:\Users key and tap the Enter key.
- After completing all the necessary manipulations, you need to close the registry editor window and reboot the PC, then try to log in using the restored account.
If you are unable to recover a deleted Windows 10 user account using the registry, you can use the recovery tool. To do this you need to follow the instructions:
- Enter the “Recovery” key in the Windows search bar and press Enter.
- Follow the hyperlink “Recovery Settings...”, tap on the “Restore” button and follow the prompts that appear on the monitor.
Note! Before restoring the system from a recovery point, you must save all important information from your computer, incl. saved photos, program settings in the appdata folder and other key information to removable media (or use an available cloud service).