The maximum effect from working in 1C programs is achieved if they take into account the features and specifics of the enterprise’s business processes. For these purposes, technical capabilities are provided that allow you to adapt the software to any needs of the company. Configuring 1C programs should be performed immediately after installation. It is required for any configuration. Proper configuration will make the 1C product convenient, productive and meet all the requirements of the end user. The likelihood of errors during future operation will be minimized.
How to configure product configurations for 1C: Enterprise?
This process may include the following work:
- Setting up 1C 8. It is performed for an enterprise that is just starting to work with the software. Thus, accounting parameters and accounting policies are configured, users are registered, directories are filled out, balances are entered, classifiers are loaded, etc.
- Debugging a computer (server). To speed up the program, you need to diagnose your PC, fix Windows errors and clean the registry, remove viruses, configure the network and replace components. If the enterprise operates in client-server mode, it is also necessary to debug the server. To do this, a configuration is selected, the required equipment is connected, routine tasks are configured, regular backups are organized, and a fault-tolerant cluster with load balancing is created.
- Setting up the user interface in 1C 8. At this stage, the appearance of the software is created, the location of windows, buttons and functional blocks is determined. The interface is customized for each user group or role. At the same time, the necessary functionality should always be at hand so as not to perform unnecessary actions.
- Setting up user roles (access rights) in the 1C program. The larger the organization, the more employees work with the software. Each of them has clear responsibilities, so some users should have more access rights than others. For example, a storekeeper should see warehouse documentation and relevant background information, but not the chief accountant’s reports. The requirements for each user group must be taken into account.
- Setting up data synchronization in 1C 8. If an enterprise has several different configurations, you need to organize exchange between them. This will eliminate repeated manual entry of information. For most configurations, a ready-made information exchange solution is provided. However, sometimes it is necessary to change the standard rules or create them from scratch.
Why configure Windows 10 manually
One of the main points of pride in Windows 10 is the complete automation of everything possible, including setting up and optimizing the operating system itself . The idealized version of preparing Windows 10 for use, as Microsoft sees it, is extremely simple:
- You are installing Windows 10.
- The system starts, downloads all drivers and updates, configures itself and restarts.
- Windows 10 is ready to go.
In principle, this scheme works quite well, at least in most cases. And if you have a relatively good computer and you do not experience discomfort after automatically setting up Windows 10 , you can leave everything as is.
Now let’s list the disadvantages of automatic tuning:
- Microsoft has a lot of low-quality programs and games that need to be promoted somehow - some of them will be installed automatically on your computer;
- Microsoft wants you to pay or watch ads, or better yet, all at once;
- automatic setup of Windows 10 does not take into account outdated and weak hardware;
- Windows 10 is the most spying operating system in history, and it collects information using the resources of your computer;
- a huge number of minor services that run in the background and eat up RAM;
- automatic system updates that can take you by surprise;
- application updates, service updates and updating everything just to eat up as many resources and traffic as possible;
- Not everything works perfectly and failures are possible, and the system will not show it.
Roughly speaking, without manual configuration, your computer will be used not only by you, but also by completely unnecessary services that fully fit the definition of a virus.
At the same time, Windows 10 is a surprisingly good and very productive system that actually does a lot of good things automatically. Windows 10 can give you , without turning the system into a log along the way, you will have to spend a little time and do manual configuration. It will take you two hours, but in the end you will get the best system available, and for free.
Instructions for initial setup of 1C 8.3
Let's look at the configuration features using the example of 1C: Accounting 3.0. This configuration automates tax and accounting and allows you to prepare regulated reporting for the enterprise. It is one of the most popular products.
Setting up 1C 8 functionality
The configuration has broad functionality, but most businesses do not need all the program's capabilities. For this reason, it is recommended to enable only the features that you use, and disable those that are not used until you need them. The user will not be distracted by unnecessary blocks and will be able to quickly find the required information. To do this, go to the “Main” - “Settings” - “Functionality” section.
While working with the program, you can continue to change the functionality - add new or delete unused blocks. It is important to note that you cannot remove what has already been used. To do this, you will have to delete all documents for such a block.
Entering organization details
This information is required for filling out documents and exchanging information with regulatory authorities. It is registered when the information base is launched for the first time. In this case, manual and automatic filling of details is possible. In the first case, you will have to independently indicate the name, INN, KPP, OGRN, registration date, address, phone number, bank account, statistics codes, and so on. Details for the tax service, social insurance fund and pension fund are also prescribed.
In the second case, you need to connect to the 1C:ITS portal. Here you will need registration data from the site - login and password. Then you need to enter the organization's TIN. Basic details will be filled in automatically.
Irina Pronina Head of Technical Support Department
Need specialist help? Professional consultation FREE
To get a consultation
Setting up accounting policies
Accounting policies in 1C: Accounting are set for a certain period, usually 1 year. At the same time, the program allows the use of common parameters for accounting and tax accounting in order to bring them closer together. The configuration supports OSN, simplified tax system, UTII and PSN.
You need to choose a legal form (LLC or individual entrepreneur) and taxation regime (OSN, simplified tax system or another). Depending on this, certain accounting policy parameters will become available for completion. For example, an LLC needs to fill out information for accounting and tax accounting, while an individual entrepreneur needs to fill out information only for tax purposes.
Setting up a chart of accounts in 1C
The chart of accounts is part of the accounting policy. It is the same for all enterprises in the information base. If the parameters for organizations differ, maintaining records for them in one IS is impossible.
To add a new account, you will have to set its properties - analytical, tax, currency, quantitative accounting and accounting by division, account characteristics.
Personal and additional settings 1C 8.3
In the “Personal Settings” section, you can enter values for automatic substitution in document details.
Additional program features can be found in the “Administration” section. For example, here users are entered and their rights are configured, a bank classifier, an address classifier, and so on are loaded.
To work effectively with the software, it is recommended to configure accounting settings.
You can also customize printing forms, reports and processing.
How to run the msconfig utility?
The msconfig tool is a system utility that is used to change the system configuration. Before understanding in detail how to use msconfig correctly, you need to familiarize yourself with all the options for launching this program. After all, if you don’t learn how to call an assistant, you won’t be able to change settings with it.
Method No. 1
The most popular method of launching the utility is using the “ ” menu. This option can be used on any version of the operating system. For it, you just need to expand the Start menu and enter msconfig in the search bar. Then press Enter. There will be only one option in the search results, titled "System Configuration". Click on this cell to launch the tool.
Method number 2
There is another simple option for msconfig Windows 10, how to enter this program. You just need to follow the instructions:
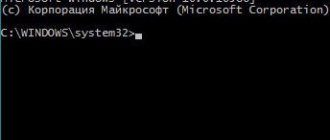
- go to “Start” and use the search bar to find Command Prompt;
- run it as administrator using the right mouse button;
- A window will appear in front of you in which you need to register msconfig;
- Press Enter and msconfig will begin loading.
A system configuration window will open in front of you, close the Command Line and work with it directly. This launch option can be used in all versions of operating systems, and not just in the tenth modification.
Method number 3
The next option is similar to the previous one, but you need to enter the msconfig command in the Run window. It can be found in the list of utilities in the Start menu or opened with the hot keys Win + R. This combination works in all OS versions.
Method number 4
And the last way for msconfig Windows 7 to enter this program is to use “Explorer” and the system folder in it. To use it, use the instructions:
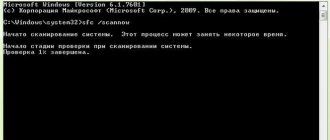
- open Explorer and enter C:\Windows\System32 in the address bar;
- in this folder you will find many files, among them special utilities and other tools for system performance are collected;
- you need to find msconfig.exe approximately in the middle of the list;
- double click on this file to run.
This method is quite complicated for beginners, but it works on all versions of the OS, starting with XP. The main problem is that you need to scroll through a long list of files and it is difficult to find the one you need among them - there are many similar names.
How can I use msconfig?
After you have launched the utility to configure the system configuration, you need to understand what modes it operates in and what msconfig provides. Experienced users use this tool to perform various tasks; we will tell you about the main ones.
System testing
This feature helps you know how the application will behave with certain resources. Here are some examples:
- Let's say your computer has a quad-core processor, and you want to test the performance of applications with two active cores.
- Also, using this feature, you can simulate the operation of programs with less RAM.
Ordinary users do not need these features, since they rarely simulate such situations. It is useful for developers and those who are modifying their computer or want to see how the program will behave on a weak machine.
Finding problems and debugging them
This is a more useful feature because it is used when problems arise with the use of the machine. It should be used when the following symptoms appear:
- system errors (spontaneous reboot, blue screen, etc.);
- program malfunctions;
- braking and frequent freezing.
The problem may arise from the hardware or the operating system itself. Unlike third-party programs, you do not need to download msconfig; it is already built-in by the developers into all versions of the operating system, starting with XP.
If you want to check Windows, then you need to open the “General” tab in the configurator and boot into diagnostic mode (it supports basic drivers and runs system services). Then you need to use the computer as usual, trying to create a situation in which the operating system malfunctions.
If problems persist in this mode, it means problems with drivers or system files. If the problem could not be detected, then you should look for the cause of the problem in system services. In this case, you need to go to the services tab and do the following:
- leave all Microsoft services enabled;
- disable and enable all other processes one by one;
- After activating each of the services, you need to reboot.
By checking in this way, you will find the process that is to blame for the computer problems. If this testing option does not bring results, then you need to enable startup and add applications to it one by one. This way you can find the program that is causing problems with your computer use.
As for startup, all the applications located in it need to be known and used regularly. The smaller the list, the better. You shouldn't add something to your startup list that you don't use.
Preventative work
This feature of msconfig Windows 10 (and other versions of the OS) is to monitor the processes that are consuming your computer's resources. Users should check the “Services” and “Startup” tabs more often to ensure that unrelated applications do not appear in them. It is especially important to carry out prevention for those who regularly install third-party software into their PC memory. System optimization and prevention operations should be carried out regularly so that you do not have to reinstall the OS soon.
What system settings can be changed using msconfig?
Now let's look at the tabs that are available in the System Configuration tool. The program itself is a small window with five tabs. Each of them has its own practical application. Let's look at msconfig, how to properly configure system parameters for stable operation.
General Tab
In this tab you can switch to a special operating system startup mode. It is used to find problems with the operating system. Let's look at when to use each option:
- Normal – used for standard computer work, by default. In this option, all drivers, system services and programs from the startup list are loaded.
- Diagnostic – used to check the system; in this mode, only basic system services and drivers necessary for operation are launched.
- Custom – In this mode, you can tell the system which parameters to run. To do this, you just need to place markers next to the lines you need. If you change anything in the "Download" tab, the checkbox next to the "Use original configuration" line will become active so that you can return to the original settings.
It is best to use only the normal and diagnostic (as needed) modes. With selective, you will have the opportunity to remove markers near the main services, which will disrupt the system and lead to errors.
Download tab
This tab allows you to fine-tune the system boot. It is useful in cases where you have several shells installed and need to choose the one that will work by default. This tab also helps in cases when you need to start the OS in safe mode or test its operation with other hardware configurations.
In the first option, under the window with a list of operating systems, you need to place a checkbox next to the “Safe Mode” line and select additional boot options (for example, support for the network or other shells). If testing is necessary, you need to click on the “Advanced parameters” button and set the number of processors or the amount of RAM. Do not touch the PCI blocking and debugging items, they are intended for developers. It is better not to touch these parameters unless absolutely necessary.
Also in the main window of this tab you can: set a timeout during which the list of available operating systems will be displayed; remove the logo from the loading screen using “no GUI”. In the lower right corner, you can make the boot options you specified permanent by placing a checkmark next to the appropriate line.
Services Tab
In this tab, in order not to damage the system, you must immediately set the checkbox next to the line “Do not display Microsoft services.” At the same time, the list of active services will be reduced to a minimum. All you have to do is analyze it and remove markers next to unnecessary processes activated by third-party programs that you do not use. Services for updating applications and others may appear here. You should not remove only processes associated with antivirus utilities.
In this msconfig tab, the setting will allow you to speed up the loading of the operating system. To do this, you need to exclude from startup all applications that you do not use (by removing the markers next to them). Developers often add the ability to run hidden in a variety of programs, which loads the operating system at startup. Only the components responsible for sound, graphics and modem operation (if you use a special application to establish a connection) should be left in startup.
Service tab
This is an auxiliary tab that contains links to system administration tools. With its help you can launch utilities to manage the OS. To do this, just select the auxiliary program and click on the “Launch” button. Next to the program name is a brief description of it.
This is the only tab that will not cause you to see a window to reboot the system. In other cases, after adjusting the settings, you will see a dialog asking you to restart for the changes to take effect.
What should I do if, after changing the msconfig settings, the system no longer works stably?
Most often, changing the settings causes the operating system to stop loading and shut down spontaneously. Most often, this result can be achieved if you change the configuration of the use of cores and RAM in the “Loading” tab. Most often they try to do this to overclock the computer, but in reality everything turns out differently.
If you encounter such a problem, then you need to start the system. If it does not start in normal mode, then in the start menu select the secure boot option with command line support. Launch Command Prompt (in the tenth version of the OS as an administrator), and then do the following:
- enter bcdedit/deletevalue {default} numproc and press Enter on the keyboard;
- then enter the second command bcdedit/deletevalue {default} truncatememory and confirm your actions again with the Enter button.
If you have problems booting the system, you can call the start menu with the F 8 button; this key will help you in cases where the OS does not boot and you cannot get to its start menu in other ways.
Now you know what msconfig can configure. Without special need, you should not change the system startup options. Inexperienced users are best limited to checking startup and running services. If you have any questions, you can ask them in the comments. Share this article with your friends so that they can also change system settings and maintain its performance.
"System configuration"
is a special application for configuring some boot, startup and service management settings in Windows. In this article we will look at ways to launch it in the “seven”.
There are several options for launching this application. Variability here is needed in order to be able to access settings in various emergency situations.
To access you can use the “Control Panel”
, system search,
Command Line
and other tools. Below we will talk about all the options.
Method 1: "Control Panel"
Method 2: System Search
Using this tool, you can go to various resources and launch applications, including the one we need. Go to the start menu and enter the word in the search field
With this command we tell the system that we need to show the executable file msconfig.exe
, which opens the
“Configurations”
(you just need to click on it in the search results).
Method 3: Run line
"Run" line
or
“Run”
Windows
key combination , a button from the
Start
(if its display was enabled in the settings) or another method described in the article below.
You can launch the required application using the command already familiar to us and clicking OK
.
Method 4: "Command Line"
"Command line"
saves us in situations where it is not possible (or necessary) to use the system’s graphical interface or requires remote administration.
This tool opens in various ways - through the Start
, from the search or the
Run
.
Command to run "Configuration"
still the same:
Method 5: System Folder
Another opening option is to directly launch the application executable file, which is located along the path:
C:\Windows\System32
The executable is called msconfig.exe
.
Please note that the system drive letter (for us it is “C”
) may be different.
We've looked at five options for launching the System Configuration application.
in Windows 7 OS. They differ in the set of necessary tools, which helps to get to the parameters in different situations.
msconfig
is a utility for configuring the Windows operating system. The main purpose of this program is to search and isolate OS problems. msconfig is an additional tool for identifying problems that may prevent Windows from starting normally. Using the utility, you can disable regular services and automatically downloaded programs, and then enable them one by one. If a problem occurs after you enable a particular service, that service may be the source of the problem.
msconfig utility window in Windows
What to do after setting the 1C parameters?
Upon completion of this process, they begin to maintain records, enter documentation, fill out directories, generate reports, and so on. Of course, in the future you can adjust and supplement the settings. In order not to return to this issue and not be distracted from more important tasks, it is worth immediately giving it due time and attention.
You also need to monitor software updates. They correct errors of previous versions, add functionality and make changes in accordance with changed legislation. After major updates, you also need to configure 1C:Enterprise. To avoid data loss, it is recommended to make a backup copy of the infobase in advance.
Who can you trust to set up 1C 8.3?
Any mistake made at one of the stages can lead to the loss of important information. Outwardly, this process will not be noticeable, but after some time problems will begin to appear. The program may also be slow or require too many additional steps. This will cause employees to waste their time. There is no need to try to configure the 1C: Enterprise configuration yourself - only professionals should do this!
Configuration Settings
The system configuration menu contains several tabs with settings. We will tell you about these settings in the next part of the article. Once you understand these settings, you can easily customize the configuration to suit your needs. Let's take a closer look at each of the tabs.
Are common
This tab contains settings for loading the operating system. It offers the user the following modes:
- normal launch
. Everything here can be understood by the name - this is the normal Windows boot mode. It includes loading all startup items, drivers, system services, and so on. Your OS always starts in this mode by default, unless you change anything in the settings; - diagnostic start
. This startup mode is mostly used for system testing and troubleshooting. It often happens that some programs cause problems with the system and prevent its full functioning (or even make it impossible for the OS to boot). Diagnostic startup mode loads only the most important services and system components. In this mode, it is best to clean your computer from various malware; - selective launch
. This mode is used for a more detailed study of problems that have arisen in the system. In essence, a diagnostic launch is a selective launch in which not a single box is ticked. In this mode, you can choose for yourself which elements to load and which not. For more accurate diagnostics, it is recommended to turn on the elements one by one until the system problem that bothers you normally occurs. This will help you determine which service you are running is causing the problem, which will help you get closer to solving it.
After selecting the mode you need, click “Apply”
. After the first reboot, your computer will boot in the selected mode.
If more than one is installed on your computer, then you can configure the order in which they are loaded in this tab. “Download” also provides the user with the opportunity to set additional download options.
This menu has the following parameters that can be activated by checking the box:
- "Safe mode"
. By activating Safe Mode, you will run your OS with limited capabilities, which is useful for diagnosing system errors; - "No GUI"
. Activating this option will reduce the time it takes to boot the system when you turn on the computer, as it will disable the boot animation. Windows is designed in such a way that until the animation is completely played, it will not load, even if all drivers and system services have already loaded; - "Download Log"
. This option allows you to create a special text file that will display information about the order of loaded drivers during system boot after turning on the computer; - "Basic Video"
. Enabling this option will replace the discrete video card driver with a standard VGA driver; - "OS Information"
. If you enable this mode, the next time Windows boots up you will be able to see information about the drivers being loaded.
Services
This tab lists all system services that are enabled after the system boots. The settings provided in this tab can also be used for diagnostic purposes without resorting to activating the security mode.
For example, if an error occurs, you can disable services one by one until the error disappears. This will help you find out which system service is causing this problem. To deactivate a service:
Probably everyone has at least once encountered an unpleasant situation when you download an application, but it begins to constantly load when you turn on the computer, slowing down the download in general. This happens due to the fact that some applications are registered in . In this tab, you can enable or disable such applications by checking the boxes.
Service
This section is intended for downloading additional utilities. If you don't know what their function is, you can check the short description on the right. To launch the desired utility, select it with the left click and click “Run”
. Restarting the computer, as in previous cases, is not necessary here.
Grub recovery
If you have Linux running on your computer at the same time, then after installing Windows 10 you will be in for a not very pleasant surprise: when you turn on your computer, you will no longer see the Grub operating system selection menu - instead, Windows will start loading immediately. The fact is that Windows 10 uses its own bootloader, which is automatically installed along with the system itself and completely overwrites Grub.
You can still bring back Grub the standard way using a LiveCD, but in the case of Windows 10, everything can be done much easier through the command line.
- Using Windows Search, find Command Prompt and run it as an administrator.
Using Windows Search, find Command Prompt and run it as administrator
- Type and execute the command “cdedit /set {bootmgr} path \EFI\ubuntu\grubx64.efi” (without quotes). After this, Grub will be restored.
Type and execute the command “cdedit /set {bootmgr} path \EFI\ubuntu\grubx64.efi”