Replacing the express panel
You can also save pages in the bookmarks bar, so it can be considered a kind of alternative. The advantage is that here you have the right to choose what will be shown and what will not. How to enable it?
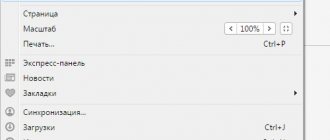
1.Open the menu by clicking on the icon with three stripes and select “Settings”.
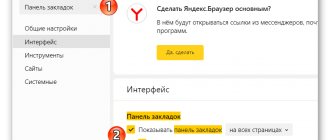
2.In the “Appearance” block o. Now an additional line will appear under the navigation bar, in which the links you save will be placed in the future.
3.To add an address, go to the site and click on the star icon. Select the “Bookmarks Bar” option in the drop-down menu. The bookmark will be immediately added to the top of the browser.
The number of bookmarks is unlimited. Since not all bookmarks can fit in a row, only eight bookmarks will be visible. You will need to click on the arrow located on the right side of the line to open the entire list of saved pages.
How to add a new tab to the express panel
The panel automatically displays the sites that the user visits most often. You can remove them and create your own panel from your favorite pages. Algorithm for adding a website to the express panel:
- Open a new tab. To do this, click the plus sign, which is located in the tab line, or press the key combination Ctrl + T.
- Click "Add Bookmark" under the website image tile.
- Click on the rectangle with the desired site in the “Popular” or “Recently Visited” sections. If the site you need is not there, start entering the resource address in the field and use the hints if the Internet page is determined by the extension to full entry.
- The suggested site will be added to the quick bookmarks bar.
You can move bookmarks among themselves by simply dragging them with the mouse.
Yandex browser panel
Those who are used to having freedom of action will choose this option for Google Chrome. The extension is available in the browser store itself. How to get there?
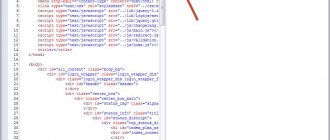
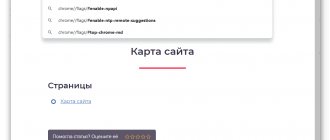
1.Enter the address: chrome://extensions/.
2. Scroll to the bottom of the page and click on the words “More extensions”. You will be taken to the add-ons catalog in Google Chrome.
3.Find the “Visual Bookmarks” extension in the store. What you need is “Yandex Elements”.
4.Click on “Install”.
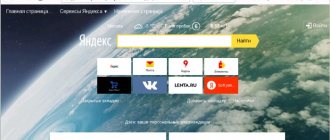
After successful installation, restart your browser and after opening you will see that the new express panel can already be used. It is logical that the search string will no longer be Google, but Yandex.
The tab table can be customized to suit you. To do this, you just need to click on the “Settings” button, which is located at the bottom right.
Select the required number of bookmarks. It can be reduced or increased - it all depends on your desire. The maximum number of cells is 48. You can also decide on the background image of the browser's home page: choose from the available options or upload your own. Check the box to the left of “Show bookmarks bar” if necessary.
If you want to delete a bookmark, click on the cross in the upper right corner of the cell with the site thumbnail.
Setting up the panel as a start page
The Express Panel may not be set as the start page, so additional changes are required.
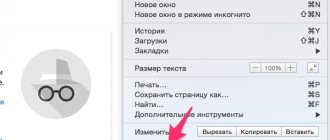
- Click on the button with three dots, which is located in the upper right corner.
- Select "Settings" from the context menu.
- Scroll down to the "Start Chrome" section.
- Check the “New Tab” box and check that it is controlled by the installed extension.
Now, after loading the web browser or clicking on the add tab button in Google Chrome, a panel will open for quick access to sites.
The Express panel is a convenient tool implemented in all popular browsers. The quick access tab allows you to store useful and frequently used sites on the main page and access them in one click.
Help from Speed Dial 2
This is a worthy alternative to the Yandex express panel, but from a different developer. It can also be installed through the online extension store.
1.Go to the extension store using the method indicated above.
2.Type Speed Dial 2 into the search bar to quickly find the add-on among numerous applications.
3.Click on “Free” or “Install”.
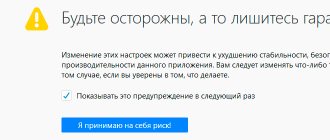
4.Since the extension to be installed requires confirmation, click on “Add”. Then after a while a notification will appear that Speed Dial 2 has been added.
5.The following notification will pop up in the new tab:
6.Click on “Continue” to see the options or “Skip greeting”. You can register for the service, but this is not required.
7.The empty quick access panel looks like this:
The user has yet to create his own taskbar.
8.To add a page, click on the plus sign and write the address. Next, click on “Save”.
In this express panel, to delete a bookmark, you need to right-click on the cell and select “Delete” in the context menu.
To delete the entire table with windows, you need to go to the list of extensions and simply disable the Speed Dial 2 add-on by moving to o.
Bookmarks bar in the Google Chrome browser.
I remember how, many years ago, I first came across such a concept as the “Internet” and the Internet itself.
My advanced colleagues installed a program on my computer - the Netscape Navigator browser (netscape navigator), which at that time occupied a leading position among Internet browser programs.
They typed, it seems, www.rambler.ru in the address bar, showed me how to use the Internet search for information and... let me sail freely across the boundless seas and oceans of the Internet.
I caught all this, “at random”, quite quickly - how and where to dig. But then a problem arose for me, or rather an inconvenience, which poisoned me “digging” on the Internet.
I wrote down the sites and pages on the Internet that I liked, or rather their addresses, in a notebook so that I could then type in the address bar and return to the site or page of the site I needed. And it was long, inconvenient and very annoying.
After my next swearing, my colleagues took pity on me and showed me a tool for automating this very Internet navigation - the bookmarks bar .
The bookmarks bar is present in all browser programs in one form or another. The differences are minor, but the principle of operation is the same for all.
I want to tell you and show you how to work with the bookmarks bar of the Google Chrome browser (Google Chrome). Why Google Chrome browser? Firstly, because I like him the most. Secondly, it is a very popular browser. And thirdly, this browser continues to gain popularity.
I will, of course, give a brief overview of the bookmark bars of various browsers, but I want to show in detail using Google Chrome as an example.
All. Enough of the lyrics. So the Google Chrome bookmarks bar.
Open the browser. Right-click on the “Google Chrome” shortcut. Then move the mouse pointer to the “Open” menu item and click on it with the left mouse button.
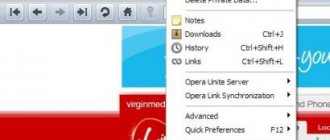
A Google Chrome browser window will open. Move the mouse pointer to the “wrench”, which in Russian means “Settings” and click on it with the left mouse button. In the menu that opens, move the mouse pointer to the “Bookmarks” menu item. Another menu should open (if it doesn’t open, then left-click on the “Bookmarks” menu item).
In the menu that opens, move the mouse pointer to the menu item “Show bookmarks bar” and click on it with the left mouse button.
A gray bar will appear at the top below the address bar field, which is actually the bookmarks bar. If you have just installed the Google Chrome browser, then this bar will look the same as you see in the screenshot.
Now we can add bookmarks to this panel, which we will do now. Let's add a bookmark to the site we are currently on, i.e. https://www.google.ru
To do this, move the mouse pointer to the “star” and click on it with the left mouse button. We get a menu that tells us that a bookmark has been added with the name “Google” and saved in the “Bookmarks Toolbar” folder. If we wish, we can change both the bookmark name and folder, but for now there is no need to do this (this can be done at any time).
Let's now type another site in the address bar, for example https://www.yandex.ru and add this site to the bookmarks bar in exactly the same way.
Thus, for our example, I placed 10 bookmarks for different sites in the bookmarks bar to show you what will happen.
Note. In the visible part of the bookmarks bar I only had 7 bookmarks, the rest are not visible. To see other bookmarks, you need to move the mouse pointer to the “>>” icon as shown in the figure and click on it with the left mouse button. In the drop-down list we will see the rest of the bookmarks that we made while surfing the Internet (in my example there are 3 sites).
So here it is. Now, I can at any time go to that site or resource on the Internet that is saved in my bookmarks bar. Simply move the mouse pointer to the desired inscription and click on it with the left mouse button.
For example, if I move the mouse pointer to the inscription “@MAIL.RU: mail, p...” and left-click on it, I will immediately go to the site https://www.mail.ru. And if I move the mouse pointer to the inscription “Google” and left-click on it, then I will immediately go to the site https://www.google.ru.
You can also perform various actions on all saved bookmarks. And this is done in the bookmark manager .
To get to the bookmark manager, follow these steps:
Move the mouse pointer to the “wrench” and click on it with the left mouse button. In the menu that opens, move the mouse pointer to the “Bookmarks” menu item and click on it with the left mouse button. In the menu that opens, move the mouse pointer to the “Bookmarks Manager” menu item and click on it with the left mouse button.
The “Bookmark Manager” window will open, in which we see all the saved bookmarks in the “Bookmarks Panel” folder with their relatively complete description.
There's a lot you can do here. But in this part of the article I want to show you how you can “sort” bookmarks based on the degree to which we need them at the moment.
Let me explain. For example, I want the first place in bookmarks to be not Google, but mail.ru.
What am I doing. I move the mouse pointer to the line “@MAIL.RU: mail, Internet search, news, work, entertainment. Mail @Mail.Ru - free mail No. 1,” I press the left mouse button and, while holding down the left mouse button, “drag” this inscription upward, just above the “Google” inscription.
Release the left mouse button. Now in the first place in the list and in the first place in the bookmarks bar of our browser is the mail.ru bookmark.
In this way, you can “resort” the order of bookmarks, depending on which bookmarks are relevant to you for a given period of time.
In principle, this could be the end of the article about the bookmarks bar of the Google Chrome browser , since this method of working with bookmarks may last a year and a half to two years if you have 20 to 50 bookmarks.
If there are more bookmarks, it will be quite inconvenient to search for the site we need in this list.
To do this, you can organize your bookmarks by topic. Then navigating through these bookmarks will become very convenient.
I will talk about this in the second part of the article “Google Chrome Bookmarks Bar”. That’s all. Good luck and creative success to everyone.