How to make a drawing from a photo
For these purposes, you can find many applications in the Google Play store. But which one should you choose? We want to help you understand this issue and offer an overview of the 5 best tools designed to convert photos into graphics using various built-in filters.
RECOMMENDED: How to make a portrait from a photo in an old art style
Most of these apps are free to download, but you may need to pay a small fee to access the advanced features.
How to draw a portrait in Photoshop in Art style
In this section we will try to make a portrait in Art style. Upload a photo, make a copy of it, and use the “ magnetic lasso ” to trace the outline of the figure.
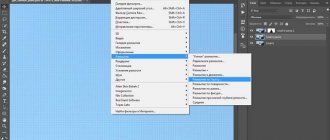
Then click “ refine edge ” and in the window that opens, set the parameters approximately as follows: it is better to select the “ on a white background ” view, check the “ smart radius ” checkbox and set it to about 3.
We will have a layer with a layer mask. The next step is to create a new layer under this layer by clicking on the icon in the “ layers palette ”. Then select a gray color and fill a new layer with it.
Next, right-click on the layer mask and select “ Apply layer mask ” from the menu that opens.
It will disappear and the cut out figure will remain on a gray background (I have a girl with pigtails, I didn’t cut out the color inside them, if you have a similar photo, then these places will need to be cut out in the same way).
Now we duplicate this layer and turn off its visibility, and then go to the layer below and apply to it “ Image ” - “ Correction ” - “ Threshold ”.
In the window that opens, select values such that you get a contrasting black and white image.
Settings may vary for each photo. Now we make the previously disabled layer visible and set its opacity to about 50-60%.
The next step is to apply a threshold to the included layer, enhancing the gray shadows. Here everything also depends on the picture and on what shadows are needed and on the final goal of the project.
the CTRL+E key combination to merge these two layers. Then we tint the corresponding areas with black and gray. After that, merge all the remaining layers and create a new adjustment layer “ Gradient Map ”.
A new window will open, where in the strip of colors (it’s black here), by clicking on it, we call up the “ gradient window ”. Here we select any three-color gradient.
Using control points, we create the desired option. If you double-click on these points, you can select other colors. If you don’t like the result, you can go back to the moment when you set the gray shadows using the “Threshold” item and set them differently.
This completes the creation of a portrait in the Art style.
Deep Art Effects
This application is incredibly easy to use. All you need to do is upload any image and start the conversion process. In a few seconds you will get a beautiful bright drawing. Artificial intelligence is used to edit photos, so you can be sure of the accuracy and thoroughness of the sketch. It is not necessary to perform a complete conversion; it is enough to experiment with one or more filters. There are also buttons for all major social networks, and you can share the results with your friends.
The application allows you to convert photos into real works of art in the styles of Van Gogh, Monet, Leonardo da Vinci, Michelangelo, Picasso, Raphael, Rembrandt, Dali and some others, since the range of filters here is quite wide.
Deep Art Effects: an application for creating a drawing from a photo
It should be noted that images undergoing conversion are not transferred to third parties, so you can be confident in the security of your privacy. When using the application for free, photos are converted into pictures with HD resolution, and the Pro version makes it possible to receive pictures with Full HD resolution.
There are some other benefits to getting a full license that are definitely worth the money spent. But we suggest trying the Free version first, and then, if necessary, purchasing Pro. The free version of the application, of course, has advertising.
You can download the Deep Art Effects application from the Google Play store.
Photo Cartoon Camera
This app has been rated as the best in several countries, which is a testament to its excellent features. The tool is simple and pleasant to use; you won't need much time to learn how to work with it. You can transform photos into pop art, caricature, painting and other art forms. There are several thematic filters for creating greeting cards for various holidays. Some of the features present here are similar to those found in Prisma, another widely popular photo editing app.
Photo Cartoon Camera: an application for creating a drawing from a photo
The developers are constantly adding new sets of filters, which makes Photo Cartoon Camera truly versatile. Considering the number of opportunities available here, we dare to assume that you are unlikely to get bored anytime soon. You can use the built-in selfie feature to see what your photo will look like after the conversion. The app is free to download, although there are ads. Purchasing a license will help you get rid of pop-up ads and gain access to several additional options. The application works on mobile devices with Android 4.0 and higher. It has been downloaded almost 50 million times, which shows its incredible popularity.
You can download the Photo Cartoon Camera app from the Google Play store.
Adjusting color and texture
See also: “How to make a glass effect in Photoshop: tools, filters”
Now we have come to the final stage of photo processing. Here we need to “play” a little with the settings to remove excessive brightness and color saturation.
- Click on the special icon in the Palette to create an adjustment layer.
- In the list that opens, select the “Hue/Saturation” item.
- In the settings that appear:
- remove saturation;
- make the color tone slightly warmer.
- We're almost done. But there is one more nuance - you need to apply a canvas texture.
- The texture is easy to find on the Internet using the appropriate search query. Find and download the image file to your computer.
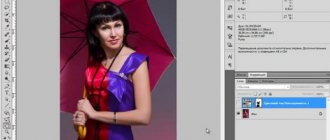
- Open the image with the downloaded texture in the program. Press Ctrl+A to select it. Then, selecting the “Move” tool, holding down the left mouse button, drag the selected image onto the tab with our photo.
- When the program switches us to the tab with the photo of the actress, without releasing the mouse button, drag the image onto the working canvas.
- We stretch (or compress) the moved image to the size of the original photo.
- In the Palette, change the blending mode to “Soft Light”.
- Most likely, the texture will be too obvious.
- To slightly reduce the visibility of the texture, you can reduce the layer opacity to your liking.
- At this point we can say that the processing of the photo is complete, and we were able to make a drawing from it.
Note: As we previously mentioned, you can only fully enjoy the result obtained at 100% scale. Unfortunately, it won’t be possible to demonstrate this on the website, but you can appreciate part of the drawing in its original size.
MomentCam Cartoons & Stickers
This application will undoubtedly appeal to active users of social networks. With it, you can create caricature drawings from photographs, and then set them as avatars on your pages. In addition, you can make animated emoticons and share them with your friends. Collections of backgrounds and filters are updated daily, which gives enormous scope for flight of imagination.
MomentCam Cartoons & Stickers: an app for creating drawings from photos
MomentCam has been downloaded almost 100 million times on the Play Store, proving its high demand. This is also evidenced by the huge number of positive reviews. It's free to download, but like any other similar app, there are ads and the ability to make purchases. You don't have to worry about the app compatibility with your mobile gadget as it works perfectly on almost all Android smartphones and tablets.
You can download the MomentCam Cartoons & Stickers app from the Google Play store.
ArtistaCartoon & Sketch Cam
This is a classic image converter app with some interesting additions. However, unlike other similar tools, ArtistA has a distinctive artistic approach. The developers took care to give users a sense of reality of the graphics or painting being created. The filters imitate the works of famous artists, which makes this application considered unique in its own way.
ArtistaCartoon & Sketch Cam: an application for creating a drawing from a photo
Of course, you can share the results with friends using the built-in social media buttons. This application has one significant drawback - too many pop-up ads. Unfortunately, there is nothing you can do about this as there are no paid features. The application is completely free and compatible with devices running Android 4.1 and higher.
You can download the ArtistaCartoon & Sketch Cam app from the Google Play store.
Drawing skin
In order to draw realistic skin, you need to add some pores to the base. Once again we're using Dan's .
This time – Texture brush . I usually use a radius of 130 px, but this depends solely on the size of your work (my standard work is 100 x 80 cm - 150 dpi).
Create two new layers above the face/body layer and use a texture brush with white on one layer and dark/brown on the second. Just cover everything with a lot of dots as you see in the picture.
Why keep pores on a separate layer? Because it will be better for us. Let's assume that we wanted to correct something on our face, let's say, make it darker. We will not darken even the dots. It will look simply terrible! 
Now go through the eraser in the same way as we did when erasing thin hairs of curls. Use a large, soft brush with medium opacity and pressure. Wash until you are satisfied with the result and the skin looks realistic. You can also try using the blending mode settings for the layer with pores, for example, Soft Light (Soft light) or Overlay (Overlay).
Now we need to create extra large pores and moles on the skin. Again, on a new layer, draw large dots of different sizes. Once you think there are enough dots, erase them again!
If you compare this image to the previous one, you will notice small light spots on it that make the skin look realistic.
The face is finished.