How to change user in Windows 8 operating system
Despite the fact that Windows 8 has a more convenient and practical interface, many still ask various questions regarding the launch of a particular management service, as well as the use of the operating system.
One of these issues is changing the user in Windows 8. Here's the thing. Despite the fact that this OS, although convenient, still has significant differences from the previous version, to which everyone is already so accustomed. Because of these differences, certain difficulties arise. Before moving directly to the instructions for changing profiles, let's look at what they are and why they are needed.
What is an account and why is it needed?
This is a kind of separate system for each user. For example, at home, several family members work on one computer, each of whom wants to customize Windows for themselves and organize the desktop at their own discretion. This is precisely why different profiles are needed, which allow you to create a separate desktop for each.
Moreover, changing the user in OS Windows 8 allows you to customize the OS for yourself, installing different applications, design, and so on. In this case, each user uses personal data and passwords that are not available to others. In other words, in each browser profile you can safely save keys and other important information, since it cannot be seen or learned from another account.
How to change Windows 8 user: Video
Account Types
There are only three types of users in Windows 8, and there is no limit to the number of accounts you can create. This is important to know, since each of these types has different rights to manage and use the PC.
It is worth noting that Windows 8 creates two accounts automatically at the time of installation and disables them independently, allowing the computer owner to create his own account. These are the three types:
- An administrator is an account created automatically. It provides full rights and access to all controls without restrictions. Moreover, if you go to this profile, you get the opportunity to manage all other accounts and make absolutely any changes. It is the administrator who can create other accounts. But other users are not able to create an administrator profile. Because of this, this desktop is created automatically. It is worth noting that by default this account is disabled. That is, it cannot be opened. In order to enter it, you must first activate it.
- Standard profile - created by the user when Windows is first loaded. From this account you can also change system settings, but only those that do not affect other desktops. The difference from the first one is that with standard rights, you will need administrator rights to make any settings. In other words, in order to change PC settings, you will need to run services as an administrator.
- Guest profile – required for temporary users. However, while in a guest account, you cannot make any changes or install software. At the same time, it is possible to use what has already been installed by the administrator - applications and services for accessing the Internet.
To manage other desktops, you must be logged in as an administrator. So we come to the question of how to change the user in Windows 8.
Changing the name of the user directory
To rename the user directory, you will need to perform the following steps:
- In the section called “Accounts”, create an additional administrator profile. You can get to it through the “Change PC settings” menu, and how to get there is described in the previous instructions above;
- Then launch the “PU” (the launch description is given above - in “Method 1”);
- Log in to the “User Accounts” section;
- Select the additionally created profile and click “Change account type”;
- Put o;
- Log in to the system with extended privileges and expand the contents of the “Users” directory, which lies on the system volume marked with the letter “C” and give a new name to the target user’s directory (to rename a folder, just open its context and click “Rename”).
Note: Sometimes on computers and laptops with Windows 8 and 8.1 it is not possible to perform renaming using the method described above. In this case, it is recommended to boot the PC in safe mode and follow the steps described:
- In the “Run” menu, insert “regedit”;
- Click “Enter”;
- Expand the contents of "HKEY_LOCAL_MACHINE";
- Open the directory called “SOFTWARE”;
- Enter the “Microsoft” subdirectory;
- Go to the “Windows NT” directory;
- Next, in the “CurrentVersion” subdirectory, find “ProfileList”, where to expand the user’s pack;
- Open context from "ProfileImagePath";
- Click “Change”;
- Show the folder location and click “Ok”;
- Exit Registry Editor;
- In “Run” insert the word “netplwiz”;
- Click "Enter";
- Click on the user and then on “Properties”;
- Enter a new name;
- In the accounts window, check the box “Require username and password” for the user being adjusted;
- Click “Apply”;
- Click “Ok”;
- Restart the PC after exiting system master mode;
- Ready.
How to delete an account in Windows 8: Video
How to change profile
Now you know the types of desktops and their capabilities, but how to change your account in Windows 8? The developers have slightly changed this procedure, thereby confusing users a little. To do this, you will have to go to the start menu (enter the tiled menu - Metro).
Here in the upper right corner you will see an icon displaying the name of the current profile. To exit it, simply click on the icon and you will see several options for further actions. All you have to do is select the account you need or log out and log into another one.
It is worth noting that if you immediately switch to another profile, the previous system will remain open. It’s more correct to do this: first log out of your current account, and only after that log into the desired one. Now you know how to change your account in Windows 8. As you can see, everything is extremely simple.
Run Service in Windows 8: Video
Change account on the official Microsoft website
In addition to the above methods, you can change your username on the official Microsoft website (). To do this, follow the link and log into your account using your registered email and password.
Next, on the “overview” page, you need to select “Change name” and enter the first name and last name that you want to use in the future. After that, click “save”. Close all windows and reboot the system.
A reboot is necessary because the new account name is displayed on the site immediately, but Windows 8 needs a reboot to synchronize. You will then see your new name when you log in.
These are three main methods that are available to everyone and do not require special knowledge. Which one to use is up to you.
How to change, rename and delete a user in Windows 8
Windows accounts are a very useful feature for personal computers that are used by several people. For each user, you can create a personal account and a personal folder in which his files and configurations will be stored. The account remembers all desktop settings, some programs, keyboard layouts and much more. This article provides a detailed guide on how to work with accounts: change the username, delete unnecessary ones and log out of Windows 8 without shutting down the computer.
Shutting down and changing the active account
The first thing you should learn when working with accounts is how to change the current user. To do this you will need to shut down Windows:
- Move your cursor to the bottom left corner of the screen and click on the icon that appears to bring up the Start menu. A similar action will occur if you press the Windows button on the keyboard.
- Now you need to click on the user's image at the top of the screen.
- Select "Log Out" from the drop-down menu.
- Thus, you have completed the current session. To change the active account, click on the "Back" button.
- Press the Control+Alt+Delete key combination at the same time.
- Select the desired account for authorization.
How to rename a user profile including the profile folder name in Windows 7 and Windows 8?
a).Log in to the system under a different account with administrator rights. b).Renaming an account in Windows Go to the "Start" menu, right-click "Computer", select "Manage", the "Computer Management" window will open, on the left side of the window, expand Local Groups and Users, open the "Users" folder ", right-click on the account you want to rename, select "Rename", enter the desired account name (Example: MyUser), press Enter on your keyboard. Close the Computer Management window. c).Rename the account to display when logging into Windows. Go to the "Start" menu, click "Control Panel", in the "User Accounts and Family Safety" category, click "Add or Remove User Accounts", select the account you want to rename by clicking on it, select "Change" from the list account name", enter the desired account name (Example: MyUser), click the "Rename" button, close the "Control Panel". d).Renaming the Windows account folder. Go to the "Start" menu, open "Computer", open "Local Disk (C:)", open the "Users" folder, right-click on the user folder you want to rename, select "Rename", enter the desired account name ( Example: MyUser), press the Enter key on your keyboard. e).Change the Windows account folder path. Go to the “Start” menu, in the “Search programs and files” field, enter: regedit The regedit program will be displayed at the top, right-click on it, select “Run as administrator”, allow the program to make changes on the computer, a window will open “ Registry Editor. Expand the hive HKEY_LOCAL_MACHINE\SOFTWARE\Microsoft\Windows NT\CurrentVersion\ProfileList In the list of folders S-1-5-21~, etc., look at the value of the name ProfileImagePath, it indicates the path to the account in Windows, find the path to the folder user you want to rename, click on the ProfileImagePath name, select “Edit...”, change the destination folder to the desired one (as in the desired account name Example: MyUser), click the “OK” button, close the registry editor. Log out of the system and log in to the renamed account; when you log in, the account settings will be performed, and all data and settings will be saved.
Attention! You do all the actions described above at your own peril and risk.
How to rename an account
In order to rename an account, you need to launch the Windows settings menu:
- Move your cursor to the right side of the desktop to bring up the Settings menu.
- Here you need to select “Change computer settings”.
- In the list of sections located on the left side of the window, you need to open the “Users” tab.
- If you want to change the name of your current account, follow the "More online options" link.
- Open the "Edit data" section.
- The name will appear here. Click "Change" and set a new value.
It is strongly recommended not to use this method if one of the regular users changes. This may lead to some inconveniences: for example, it will be difficult for a person to find his folder.
Renaming a user folder for a new member is much more difficult than changing the account name or creating a new one.
It is much easier to delete an extra account and create a new one.
Editing on a personal computer
The second method of changing your account is a little simpler, and there is no need to switch to a Microsoft service to complete it. The operating system will automatically connect to your profile.
- Open the start screen of the Metro interface.
- The account under which you are logged into Windows is displayed in the upper right corner. Right-click on the avatar and select “Change avatar”.
- In the new window, click on “Advanced online account settings.”
- The operating system connects to the profile via the Internet and displays the “Account details (password, addresses, time zone)” window.
- Change the necessary data and click on “OK” to save the changes.
Here you can change the photo for your avatar.
Removal
To delete an account, you will need to go to the control panel and find the account management menu in it. In it you need to open the “Manage another record” section. Now you need to select the desired item and click “Delete account” at the bottom of the list.
Additionally, you can erase a folder with various configurations specified by the owner. It is located on the system hard drive in the “Users” directory.
Account Management in Windows
And first, let's look at where account management occurs on a computer. Go to the Windows 8 control panel. And open the “Accounts and Family Safety” section.
And then go to the first subsection “Accounts”.
Here I want to give a hint. If, for example, you have the Control Panel pinned to the Taskbar, just right-click and immediately go to the item you are looking for in the drop-down menu. So, we find ourselves in a window where the administrator account and a list of available functions will be displayed. From here we will make changes to user accounts.
How to change username and folder in Windows 8.1
Usually, you need to change the username in Windows 8.1 when it suddenly turns out that the name in Cyrillic and the same user folder lead to the fact that some programs and games do not start or do not work as they should (but there are other situations). It is expected that when you change the username, the user's folder name will also change, but this is not the case - this will require other steps. See also: How to rename a Windows 10 user folder.
This step-by-step guide will show you how to change your local account name as well as your Microsoft account name in Windows 8.1, and then go into detail on how to rename your user folder if you need to.
Note: the fastest and easiest way to do both actions in one step (because, for example, changing the user folder name manually may seem difficult for a beginner) is to create a new user (assign as administrator, and delete the old one if not needed). To do this, in Windows 8.1, in the right panel, select “Settings” - “Change computer settings” - “Accounts” - “Other accounts” and add a new one with the required name (the folder name for the new user will match the one specified).
Easy way to change folder or user name
Some programs may not start for a trivial reason - the account name is in Cyrillic. This is especially true for games and applications without Russian localization. To fix it, you will have to not only rename the user in Windows 8, but also change the name of the folder (service folder, with all the user data).
The first task is not difficult, but the second one will have to tinker. Although, with the help of our step-by-step instructions, the entire procedure will take you no more than half an hour. The fastest way to solve the problem is to create a completely new user with a “Latin” name. But this option has disadvantages - setting up the system for yourself again and reinstalling many programs.
When following further instructions, the settings will remain unchanged, and “incorrect” applications will launch without problems. Procedure:
- Rename the account.
- Change the name of the profile folder.
Changing the local account name
Changing your username if you're using a local account in Windows 8.1 is easy and can be done in several ways, the most obvious first.
First of all, go to the Control Panel and open the “User Accounts” item.
Then simply select Change your account name, enter your new name, and click Rename. Ready. Also, as a computer administrator, you can change the names of other accounts (Item “Manage another account” in “User Accounts”).
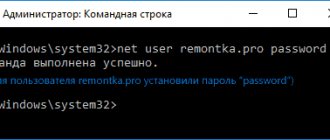
Changing the local user name is also possible on the command line:
- Run Command Prompt as Administrator.
- Enter the command wmic useraccount where name=”Old Name” rename “New Name”
- Press Enter and look at the result of the command.
Changing the profile name in the Windows 8 operating system
The process of changing your name can be divided into the following options:
- The name changes, but in the system storage it remains the same. This option is very common, but you should not give it preference, as some problems will remain unresolved. For example, you will still not be able to install a certain program that you could not install before, due to the fact that the characters from the Russian language have not been corrected to Latin.
- Absolutely all data about you changes, and there will be no further difficulties with incorrect names of user folders. This way of solving the problem is more complex and may require certain knowledge.
Now you need to take a closer look at each method of changing the name for different options.
Method 1: Microsoft main site
If you are registered on the official website, then this option is just for you. The process will take a certain period of time due to the need to synchronize your device and account. To get started, follow these steps:
- Launch the official Microsoft website and open your account.
In the window that appears on the right side of the screen, opposite your nickname, click on the “Change name” line.
Using Latin characters, enter the desired name and click “Save” to complete the process.
Method 2: Control Panel
Thanks to this option, you can change the name on the screen when you turn it on and in several other elements. But in the repository the name will remain the same. If you are satisfied with this change option, then follow these steps:
- Open Start and select Control Panel from the pop-up window.
- Opposite the “View” line in the upper right corner, select “Categories”.
- In the list that appears, go to the “User Accounts” section. And then open the same section again.
From the options provided, find “Change my account name.”
In the context menu, specify the nickname you would like to leave. Click the “Rename” button. The name has already been changed, you can continue working further.
A very common situation is when there are several accounts on the computer at once. If you need to change the name of one of the entries, but you are logged into the system under a different profile, then this will also not cause any difficulties. The main condition is the availability of administration rights. In this case, you can easily make any changes to the records of other users on your computer. To do this you need:
- The initial steps are similar to the steps in the previous method.
- After you have reached point number four, instead of the proposed option, go to the line “Manage another account”.
As soon as a window with all users appears in front of you, select the desired account whose name you would like to change.
In the proposed list of actions, select the line “Change account name”.
You will need to enter a new nickname in the empty field and press the “Rename” button. The process has been successfully completed, and you can continue to work under a different name.
Changing the name in your Microsoft account
If you need to change the name in your online Microsoft account in Windows 8.1, you can do it as follows:
- Open the Charms panel on the right - Settings - Change PC settings - Accounts.
- Under your account name, click More online account options.
- This will open a browser to configure your account settings (authenticate if necessary), where you can, among other things, change your display name.
That's it, now your name is different.
Changing your account via Outlook
In most cases, logging into Windows 8 is done using an account on one of the Microsoft services. Most often this is Outlook. To change your name, go to the service at mail.live.com and edit your profile.
- Open the Outlook service.
- Click on the “gear” in the right corner of the window. The settings menu will open.
- Click on the “Other mail settings” item.
- In the new window, click on “Account Management” and go to the “Account Data (password, addresses, time zone)” tab.
- We change the first name, last name, nickname.
- Save the entered data by clicking on the “OK” button.
The new name or alias will appear after you restart the operating system.
How to change user folder name Windows 8.1
As I wrote above, the easiest way to change the user folder name is by creating a new account with the desired name, for which all the necessary folders will be automatically created.
If you still need to rename a folder for an existing user, here are the steps to help you do this:
- You will need another local administrator account on your computer. If there is none, add it through “Change computer settings” - “Accounts”. Choose to create a local account. Then, after it is created, go to Control Panel - User Accounts - Manage another account. Select the user you created, then click Change Account Type and set it to Administrator.
- Log in under an administrator account different from the one for which the folder name will change (if you created it as described in step 1, then under the newly created one).
- Open the C:Users folder and rename the folder whose name you want to change (right-click - rename. If the renaming does not work, do the same in safe mode).
- Launch the registry editor (press Win+R, type regedit, press Enter).
- In the registry editor, open the HKEY_LOCAL_MACHINE SOFTWARE Microsoft Windows NT CurrentVersion ProfileList section and find the subkey there that corresponds to the user whose folder name we are changing.
- Right-click on the “ProfileImagePath” parameter, select “Edit” and specify a new folder name, click “OK”.
- Close Registry Editor.
- Press Win+R, type netplwiz and press Enter. Select the user (the one you are changing), click “Properties” and change his name if necessary and if you did not do this at the beginning of this instruction. It is also desirable that there be o.
- Apply the changes, log out of the administrator account in which this was done and, without logging into the account being changed, restart the computer.
When, after rebooting, you log into your “old account” in Windows 8.1, it will already use the folder with the new name and the new username, without any side effects (although the design settings may be reset). If you no longer need the administrator account created specifically for these changes, you can delete it through Control Panel - Accounts - Manage another account - Delete an account (or by running netplwiz).
Procedure to change user folder name Windows 8.1
System names of user folders are created automatically, but when replacing the user name they do not change. Therefore, to complete what you started, you will have to perform several additional actions:
- creating an account in Windows 8, if you do not have an additional one with administrator rights;
- change the account in Windows 8 and boot into safe mode;
- rename the folder manually;
- edit the registry.
Let's look at each point in order. To add an account to Windows, go through the right sidebar to “Change computer settings.” Select “Add User” as in the image below.
How to add an account?
Let's assume that someone else is using the computer besides you. Agree, it’s not very convenient when every “user” adds shortcuts to the programs that he needs for work or entertainment to his “Desktop”. Perhaps you don't like the screensaver your colleague or relative chose. In general, there are a lot of inconveniences. That is why, before learning how to change the username in Windows 8, it is recommended that you learn how to create a separate account for each “user”.
So, move your mouse pointer to the right area of the screen to bring up the Charms panel. Now head to Settings and then go to Control Panel. Here you are interested in the subsection with accounts. After going to it, go to the “Manage another account” item and at the bottom click “Add a new user”.
How to open a service to change account settings
There are many ways to launch this service. Which one to choose depends on you and the goals you are pursuing. So, let's look at all the methods in detail.
The first way to change the account name in Windows 8 is to launch the service through the Control Panel. To do this, go to your desktop and move your mouse cursor to the upper right corner. A pop-up menu will appear in which you should launch “Options”. After this, you need to open the “control panel”.
In the window that appears, you need to select the “Accounts and Family Safety” section, after which you just need to open “Accounts”. In the menu that opens, you will see the account that is currently in use. Click manage another account and select the one that needs to be renamed - in my case it is “Alexander”. Read this article on how to create other accounts. As a rule, the system creates three accounts in total:
- Administrator.
- Guest.
- User account.
The first two are systemic. They are automatically created and disabled. Of course, you can enable them, but usually this is not necessary. In this case, the first account provides full rights, without restrictions. In other words, you can perform any action.
You should only use it if you know your PC well. The second is a guest account, which is enabled only if the computer is used by non-regular users, for example, in offices and public purposes.
The last option is a user account, which is created when the operating system first boots. So, in the window that opens, you need to click “manage another account.” Here you should select your entry and in the window that appears, click “change name”.
As you can see, everything is extremely simple. You just need to know some rules and key combinations that can always be found on the Internet. The developers have really created a new, even more convenient operating system that provides quick access to all management services. Moreover, Windows 8 has synchronization with a shared server, so other users can find you using the data you provided when registering.
In addition, there is another way to change the username in Windows 8.
How to change username in Windows 8?
In fact, giving a different name to an “account” in Windows 8 is not as difficult as it seems. Of course, the algorithm of actions will differ from the same “seven” or Windows XP, but even a novice “user” should not have any difficulties.
So, in Windows 8, the following sequence of steps will help you change your username:
Open “PU” and go to the “Accounts” section.
Select the “Change name” option.
Write your new name in the space provided.
The last step is to click the “Rename” button.
You have learned how to change your username on this operating system. Agree, it’s very easy. The whole process will only take you a few minutes.
By the way, the “Control Panel” can be opened not through the Charms Bar, but in a slightly different way. Call the “Run” utility and enter the phrase “control panel” there.
You can also use the search bar located on the Home screen. In this case, write in Russian – “control panel”.
Changing username in Windows 8: Video
Changing your account name using the Run service
First, let's start the required service. You can do this in three ways:
- Using the key combination Win+R;
- Using search;
- Through Windows 8 Explorer.
So, we launch the service and write “lusrmgr.msc” in it. Press "Enter". So you start a service to manage accounts. All accounts are displayed here and you can manage them all. The same service can be opened in Explorer by right-clicking on my computer and selecting “manage”.
In the window displaying all system accounts, select the one that needs to be renamed and right-click. Next, select “rename” and enter the desired name. Press “Enter” and close all windows. It is worth noting that this is the simplest and fastest method on how to rename a user in Windows 8.
However, you should be aware that the first method only changes the full name of the account. However, the login remains the same.
In other words, the login name remains the same as it was - only the name that is displayed on the welcome screen changes. Therefore, you need to choose one method or another depending on what goals you are pursuing. Now you know two methods on how to change your username in Windows 8.
How to add an account?
Let's assume that someone else is using the computer besides you. Agree, it’s not very convenient when every “user” adds shortcuts to the programs that he needs for work or entertainment to his “Desktop”. Perhaps you don't like the screensaver your colleague or relative chose. In general, there are a lot of inconveniences. That is why, before learning how to change the username in Windows 8, it is recommended that you learn how to create a separate account for each “user”.
So, move your mouse pointer to the right area of the screen to bring up the Charms panel. Now head to Settings and then go to Control Panel. Here you are interested in the subsection with accounts. After going to it, go to the “Manage another account” item and at the bottom click “Add a new user”.
Now click the “Add account” button and go through all the registration steps one by one. This process should not cause any difficulties.
How to add accounts in Windows 8
If you want not everyone to be able to log into the PC, but certain users, then you need to add new accounts for them.
To do this, open the section “Changing an account in the Computer Settings window.” And I’ll immediately note that you can open PC Settings not only from the control panel, but also from the start screen by clicking the gear icon.
So, look at the screenshot and select the “Other accounts” section. And then click “+” and add a new one.
After this, a window will open with fields for filling in data. And here, pay attention to the choice. If the new user already has an email address to sign in to Microsoft, enter it. And if not, or he forgot it, then we register a new one.
To register a new address, click the link under the empty line. And let's move on to filling out the fields. Enter your first and last name. E-mail address. This is outlook, or another mailbox (to do this, click the link below). Create a complex password and repeat it. Select a country. And click the Next button.
The procedure does not end there. Enter your date of birth and indicate your gender. And write down a valid phone number. This is required as a confirmation code will be sent to it. In the last field, you can optionally enter a backup email address. Useful in case of password recovery if you lose your password.
Now all that remains is to enter the captcha. We proceed in the same way. In the next window, click “send code” under the phone number. Enter it and click “Finish”.
Once registration is completed, the new account will appear in the list. It can be found in the future both in PC Settings and through the Windows Control Panel.
How to change username in Windows 8?
In fact, giving a different name to an “account” in Windows 8 is not as difficult as it seems. Of course, the algorithm of actions will differ from the same “seven” or Windows XP, but even a novice “user” should not have any difficulties.
So, in Windows 8, the following sequence of steps will help you change your username:
Open “PU” and go to the “Accounts” section.
Select the “Change name” option.
Write your new name in the space provided.
The last step is to click the “Rename” button.
You have learned how to change your username on this operating system. Agree, it’s very easy. The whole process will only take you a few minutes.
By the way, the “Control Panel” can be opened not through the Charms Bar, but in a slightly different way. Call the “Run” utility and enter the phrase “control panel” there.
You can also use the search bar located on the Home screen. In this case, write in Russian – “control panel”.
How to change account in windows 8.1
When learning the new interface, users of the Windows 8 operating system encounter many different problems. For example, some cannot rename an operating system user. In this article, we will close this knowledge gap by talking about how to change your username in Windows 8.
Changing your username in Windows 8 is as easy as changing your username in Windows 7. The first thing you need to do is open Control Panel. In the Windows 8 operating system, you can open the Control Panel in several ways.
Method number 1. You can open the control panel by right-clicking in the lower left corner of the screen. If you have Windows 8.1, then right-click on the Start button, which is located in the same lower left corner of the screen.
After this click, a menu will open in front of you, with which you can access the main functions of the operating system, including the Control Panel.
Method #2: You can open Control Panel by searching on the Start screen. Open the Windows 8 Start screen and type “Control Panel.”
Method #3: You can open Control Panel using the Run menu. Use the CTRL+R key combination to bring up the Run menu. After that, type the command “Control Panel” and press enter.
Once you have opened the Control Panel, you can start changing your username in the Windows 8 operating system. To do this, open the “Accounts and Family Safety” section.
Next you need to open the “User Accounts” section.
In the window that opens, click on the “Change your account name” link.
In the window that opens, you can change the Windows 8 username.
To do this, just enter a new username and click on the “Rename” button. In order for the username change to take effect, you need to restart the computer.
An account in the Windows operating system is nothing more than a way to identify users, thanks to which the operating system can apply specific settings for each user. An account for Windows is the same as your full name and passport number for you. Anyone who uses Windows OS is under an account, since the system does not accept work without it.
Based on the authorization method, two groups can be distinguished:
- local account;
- a network account, for authorization under which you need to connect to a remote Microsoft server.
The peculiarity of network recordings is that by using them, you get all the capabilities of the new operating system, as well as access to all services.
The only problem with these entries: if there is no connection to the Microsoft authorization server, then logging into the computer will not be completed. As for local records, they have limited access to the system’s network services, but are more than self-sufficient for full-fledged operation.
All user accounts can also be divided...
by type of rights and opportunities provided:
- administrators;
- users;
- "Guest" account.
- Administrators are those who can completely and without restrictions make changes to the settings and functionality of the computer.
They have no barriers, since this is one of the key accounts. The administrator account is present on any computer running the Windows operating system. - Users - they are slightly limited in access and configuration rights, but they can easily install and configure programs and components specifically for themselves.
The parameters and settings of each user are stored separately, so no one interferes with anyone. - Guest is an account so that anyone can come in and just see what you have.
Most often, this account is disabled by the system (security policy). Enabled by administrator. The guest can only view permitted files and folders and access the network. This is where its functionality ends.
Change user name, password, user account type in Windows 8.1
In order to make changes to accounts, you must have administrator rights, since having these rights will make it possible to manipulate accounts.
It should be noted right away that you cannot remove the only administrator, as well as transfer him to the category of users, as this will lead to uncontrollability of the computer.
An administrator can manage any account, even without a password.
Change account type
In order to change the account type, you need to open the “Control Panel”, switch the display mode to “Category”
then select the “Account and Family Safety” section.
After this, you should click on the “Change account type” link. Next, you need to select the desired account and change its type using the menu that appears.
Next, select the account role (administrator or standard user).
Changing your password and username
Changing the password can also be done from the control panel, then “Account and Family Safety”, then “Change account type” (This will help display all users at once).
We select the desired user, and then change the necessary data.
The password is changed by the administrator without saving the previous one. To change your name or password, use the menu items. Then confirm the changes by clicking the button.
The username changes in the same way.
Removing a Microsoft Windows 8.1 account by creating a new account
The first method involves creating a new administrator account on your computer and then deleting the account associated with Microsoft. If you just want to “unlink” your existing account from your Microsoft account (that is, turn it into a local one), you can go straight to the second method.
First, you will need to create a new account, for which go to the panel on the right (Charms) - Settings - Change computer settings - Accounts - Other accounts.
Click “Add an account” and create a local account (if you are disconnected from the Internet at this time, a local account will be created by default).
How to Delete a Microsoft Account in Windows 8.1-0
After that, in the list of available accounts, click on the newly created one and click the “Change” button, then select “Administrator” as the account type.
How to Delete a Microsoft Account in Windows 8.1-03
Close the Change PC settings window, and then sign out of your Microsoft account (you can do this from the Windows 8.1 Start screen). Then log in again, but under the created Administrator account.
Source: https://sekretypk.ru/windows-8/kak-smenit-uchyotnuyu-zapis-v-windows-8-1.html

