Hello, friends! The PDF format has long been widely accepted; we see how the number of these documents is gradually growing - we receive them and send them by mail in the form of electronic copies. Many, having received such a necessary document, would like to edit it, take tabular or text material from it for processing.
Well, at least in order to avoid typing the required text manually and not wasting precious time on it. Standard, free PDF viewers do not allow you to do this... Is it possible in principle to edit PDF documents? Yes, you can. I offer three options for review.
Video tutorial: Editing scanned documents
Learn how to convert a scanned document into an editable PDF file in one step using Acrobat.
Video (02:32) | Author: Matthew Pizzi (train simple)
OCR software allows you to convert photographed or scanned documents directly into sentences.
The fact is that the text in the image is presented in the form of a raster, a set of dots. The mentioned software converts a set of dots into full-fledged text, available for editing and saving.
Letter recognition is designed to optimize the process of digitizing printed or handwritten books and documents.
This digitization method is orders of magnitude faster than the speed of manual typing from an image. Widely used in the digitization of libraries and archives. Next, we will consider the five best representatives of the family of similar programs.
Working with a document in FineReader
FineReader is the most current program for automatic recognition of a scanned document; it was created by Russian programmers. Its main advantages can be considered the ability to support a large number of languages, including even the most ancient ones.
In addition, this program allows batch processing of multi-page text.
Its advantages can also be called:
- recognition of text typed in various fonts, including handwriting;
- correct recognition of pictures and tables in a file;
- recognition of low-quality texts;
- Convenient translation of document text into a Word file.
The trial version of this program can be downloaded from the official website; its only drawback is that there is a limitation there. You can process no more than fifty scanned pages of text for free.
The full version of the program costs about fifty dollars, and there is no such limitation.
Download and Scan
The very first step in working in FineReader is downloading and scanning the file.
To start the process:
- in the menu you need to select the “Scanning” window;
- after some time, the program will process the document and transfer it to the program screen as an image;
- Next, you will need to decipher the scanned text;
- transfer it to Word file format and then save it.
This program will automatically select document fragments, pictures and tables, and, if necessary, rotate the scanned text in the desired direction. After scanning is completed, this program requires you to select a language to transcribe what is written. You can select it in the “Document language” drop-down window; if the downloaded scan is written in several foreign languages, you should select automatic mode.
Remove formatting from a document
Now we will look in more detail at how you can edit a scanned document in FineReader. In the presented image, tables, pictures and texts will differ in different colors.
These areas are decrypted automatically depending on their type. In the future, you can work with them in this program using a section called “Check Areas”; it is located in the right window of FineReader.
To remove any area from the document, you must select the “Delete area” button in the drop-down menu, and then you can click on the fragments that should be deleted.
It is allowed to destroy all pictures and tables, you can leave only the text necessary for recognition and further saving.
Video: How to convert an image into Microsoft Word
Editing
To select an area you need to do the following:
- click on the “Select Text Area” button;
- Press the left button to draw a frame around the borders of the text block.
And to select a picture or table you will need:
- select the “Select Image area” or “Select Table area” button;
- In the same way, circle the boundaries of the block with the left mouse button.
Many users are interested in whether it is possible to change the size of the selected fragment in the FineReader program. This is quite possible, you just need to click on the desired fragment and move the cursor over its border until a special italic appears.
It is on this that you need to click with the left mouse button and, holding it, change the size by moving the mouse up or down.
Convert to Word format
Once all areas have been selected and edited as needed, you can begin to recognize the written document and save it in Word format. To carry out such a procedure, click the “Convert” button in the program menu.
The user will need to wait a certain amount of time, after which he will be able to view the results of the work done. To save text, you must enter a file name, select a location and format for saving it.
To create a file in Microsoft Word format, you need to select “Rich Text Format (*.rtf)” in the window.
ABBYY FineReader 10
FineReader is the undisputed leader among all programs that recognize text in images. In particular, there is no software that processes the Cyrillic alphabet more clearly. In general, FineReader has 179 languages, the text in which is recognized extremely successfully.
The only thing that may disappoint users is that the program is paid. Only a 15-day trial version is available for free. During this period, scanning of 50 pages is allowed.
You will then have to pay to use the program. FineReader easily “eats” any image of more or less high quality. The source is completely unimportant. Be it a photograph, a scan of a page or any picture with letters.
- accurate recognition;
- a huge number of reading languages;
- tolerance to the quality of the source image.
- trial version for 15 days.
Instructions on how to scan documents from a printer to a computer in Word format
You can convert a scanned document into Word format using one of the methods described in this manual. But first, the document must be scanned using a printer and scanner (MFP) onto a computer as an image or into a PDF file. And only then recognize it in the text, so that in the future it will be possible to partially change or edit it.
Finereader
If the task is to scan a sheet of text and then change it, then most likely users use the popular Finereader program. She can do the first and second task in minutes. If working with the utility causes difficulties, then follow these instructions:
- Get ready for work. Check whether the scanner is visible in the settings and whether its model is indicated correctly. Go to the "Tools" section in the main menu. At the end of the list, click on “Options”. Among the bookmarks, activate “Scanner” and select your model.
- Place the required documents in the scanner, and on your computer in the program, find the “Scan” button. You can scan just one page or several at once.
- Wait for the device to finish operating. The images should appear in the left column.
- Now select each sheet in turn with the mouse. On a larger scale it will appear on the right.
- Use the toolbar between the columns to highlight areas of different formats: text, table, drawing.
- Activate the desired mode and hold down the left mouse button to select areas of the document.
- The next step is text recognition. First you need to select the desired language. At the top, immediately below the main menu in the toolbar, find the corresponding section.
- Let's move on to the text recognition process. Click the “Recognize” button and wait for the program to do its job.
- Now, to convert the scanned text into Word, use the “Save” button. Inside, select “Save Wizard”, and in the list of programs “Word”.
- Please note the important option in the last window. You can save all or only selected pages.
Setting Scan Settings
Before scanning text, you can and should, for a higher quality result, customize the process for the current task. You can do this in the “View” menu. Follow these steps:
- Go to the “Scan” menu, and in it click on “Scan to Word”.
- Specify the scanner and go to the operation settings.
- Click on the “View” button. In a few seconds you will see what the scan result will be.
- If you are not satisfied with it, then proceed to changing the scanning options.
Options that can be changed:
- Formatting.
- Exact copy . The external appearance remains virtually unchanged. The possibilities for change are minimal.
- Editable copy . The scanned result may differ from the original, but the user has the ability to edit it.
- Rich text . Text fonts, paragraph breakdown, and font size remain the same. The document can be edited without problems.
- Simple text. Selecting this option means keeping only the paragraph breaks. The text is reduced to the same size and font.
- Recognition language . Indicates what language the text in the document is written in. This will help the program “understand” it more accurately. If several are used, then it is worth setting this parameter properly by specifying several options.
- Save images . Allows you to automatically save pictures if they are in the document and needed in the final Word file.
The software can also save headers and page numbers in the document, if required. Separately, the insertion of images in text is additionally configured. Finereader has a built-in Image Preprocessing Settings menu.
You can change the settings several times until the desired result is achieved.
Other scanning utilities
Above, work in FineReader is shown using version 6.0 as an example, although the 14th release is already available. The thing is that the software is not free.
You can use the program during the trial period, but with restrictions. As an alternative, you can consider the following popular analogues: CuneiForm, SimpleOCR, Free OCR, Readiris.
Handling them is no different. There may be a difference in design, but not in algorithms.
Loading a file from your hard drive
We can also use FineReader to convert previously scanned documents into Word files. They can be stored in JPEG or PDF format. Often, it is in this form that the necessary information is downloaded from the Internet or sent by e-mail.
First of all, let's open a new project in the program. Then you can drag one or more files with the mouse into the Fine Reader window or, through the “File, Open” menu, upload a “pdf” file or picture. We have already described further actions earlier in the first section of the article.
We select areas (text, tables, pictures), recognize them, and save them as a “doc” file.
Trying to paste as a Microsoft Image Viewer object
If the scanned image turns out to be of high quality, then you can use the tools of the Word program itself to insert the desired fragment and then edit it. We are talking about Microsoft Image Viewer technology. If this component is not installed, you need to add it through the control panel or using the Office installation package.
If you have not scanned the document yet, save it with the “tiff” extension. When ready-made scans in other formats are available, you can convert them to the desired one using the standard Windows program - Paint. Now the file can be opened in the Image Viewer utility. Select all or part of the text to paste into a Word document.
What opportunities are there to edit directly in the program?
In the left window of the program, parts of the document are displayed as areas. This can be text, a picture or a table. They can be deleted entirely or errors in the text of the document can be corrected directly in the program before saving. Select the desired fragment and right-click to open the context menu. Select the desired item from the list.
Part of the text will be available for editing in the right window. Here you can remove unnecessary ones or correct errors.
How to open a scanned document in Word in the online service from ABBY
There are often cases when it is not possible to download and install the required program. Poor Internet, installation of software is prohibited on a PC, recognition is needed very rarely, and others.
An excellent solution would be to use the online service from ABBY. Go to https://finereaderonline.com/ru-ru/Tasks/Create.
Next, you should upload your file and specify only two options: the document language (you can specify several) and the format in which to save the result of the service.
ABBY Finereader Online has several disadvantages: forced registration for use, ten page limits. You can rent it for just $5 a month.
PDF scan
- Make sure that your file is saved in PDF format and can be opened in a document viewer by double-clicking.
- Right-click on it to open the context menu. Among the available options, select “Open with”, and then in the list of programs - Microsoft Word.
- After being prompted to convert the file, without changing anything, click “OK.”
- Word will begin to “translate” the PDF document into a text “doc”. This can take anywhere from a few seconds to minutes, depending on the size of the source.
- When the conversion is complete, the result will become available to you, but a yellow or red bar with an editing warning may appear at the top. Allow changes to be made using the button on it.
- Check the text for errors and other problems. If necessary, adjust to suit your requirements.
- Now you can save the document. Use the "File" tab in the main menu or the CTRL+S key combination on your keyboard. Specify the desired name and folder to save to disk.
Image
- Find a service for converting images to PDF files on the Internet. One of the best in this area is New OCR (https://www.newocr.com/).
- Open the website using the link above.
Click on the Browse button and select your scanned image. Wait for it to load and then click on “Preview”. See the preliminary result. - To get text that can be pasted into Word or another editor, click on the “OCR” button.
- You can convert PDF files to DOCX in the same way.
How to Scan via Smartphone Using Office Lens
- You can download the Office Lens application from the Play Market or Apps Store (depending on the type of OS on your smartphone). The installation is no different from installing other programs.
- After the first launch on a new phone, Office Lens asks you to allow access to files. Provide it.
- Now you can get to work. Click the "Document" button at the bottom of the window.
- Place a sheet of text on the table and point the camera at it so that it is completely on the smartphone screen.
- Take a photo with the button (round with a red rim and white inside).
- Confirm your consent to save by clicking on the checkbox. If you need to scan more pages, there is a “+” icon on the left.
- Now go to the “Save” application menu on the “Export to” tab. Look for it and click on the “Word” icon.
- Next, you will be asked to log in to the OneDrive service with your Microsoft account login and password.
- Go to your PC or laptop. Open Word, and in it click on the “Open” icon in the “File” menu or on the main toolbar.
- On the left in the list we look for the “OneDrive” drive, and our file is in it. Let's choose it.
- You can make changes if necessary.
As a sign of gratitude, tell your friends and acquaintances about the article on social networks. Use the buttons on the left or bottom of the page. It doesn't take more than 15 seconds. Thank you!
Source: https://printeru.info/poleznoe/kak-skanirovat-v-word
OCR CuneiForm
Free program for reading text information from images. The recognition accuracy is an order of magnitude lower than that of the previous program under consideration. But for a free utility, the functionality is still excellent.
Interesting!
CuneiForm recognizes blocks of text, graphics, and even various tables.
Moreover, even unlined tables can be read. To ensure accuracy, special dictionaries are connected to the recognition process, which replenish the vocabulary from scanned documents.
- free distribution;
- using dictionaries to check the correctness of the text;
- scanning text from poor quality photocopies.
- relatively low accuracy;
- small number of languages supported.
How to Edit Text in a Scanned PDF
We all work with documents in one way or another. Some people do this all day in the office, others “occasionally” or for study. Most often, documentation is exchanged in PDF format, as it is convenient to use and economical in traffic consumption. But often the sent PDF file turns out to be assembled from several scanned images. What to do if you need to make your own adjustments there? You can't do without a PDF editor.
You can edit PDF even from a scanned file
You can, of course, retype the text, but this method is only relevant for one or two pages of the document. And still it is very labor-intensive, not to mention a waste of a lot of time. And if we are dealing with a file of 50-100 pages, it will take forever to retype it. Third-party solutions for Mac and Windows come to the rescue, allowing you to edit the file, even if you have a PDF in graphic format.
If the file you are interested in contains scanned text that you need to make edits to, first you need to recognize this text. To do this, you can download the PDFelement 7 application from the Mac App Store or from the developer's website. We are interested in the OCR function - optical character recognition.
You can start optical recognition in one click
You open the required file and in the “Tools” section in the side menu, click on the “Run OCR” button. By the way, recognition in the program is carried out in a large number of languages, including Russian. It is worth noting that we were pleasantly surprised by the quality of how this program was able to recognize the text.
The process takes about a minute - it all depends on the file size
After OCR is performed, the document will be saved in the folder where you store documents by default. To continue working with the text, open the saved file in PDFelement 7 and start editing. You can do whatever you want with the document: edit text, add marks and notes, insert pictures, highlight certain areas, delete pages, insert headers and footers and much more.
The document has been successfully recognized, you can edit it
There are many advanced editing options
Conveniently, the resulting file can be exported to one of the popular formats (not only PDF, but also MS Office, text documents or graphic files). You can also send the fruits of your labors by email directly from the program. If you want to prevent the resulting PDF file from being edited, you can optionally protect it - for example, with a password or using a watermark.
OCR is not the only useful feature of this application. PDFelement 7 also supports automatic form field recognition and large data extraction. All this helps you improve your processing speed and work with PDFs like a pro.
Automatic recognition of form fields is useful when working with Excel
And this is all in addition to advanced PDF creation from scratch - from adding annotations in the form of geometric shapes, lines or arrows to signatures and merging multiple PDF files into one.
There are several ways to protect a document
To get familiar with the basic functionality of the PDFelement app, you can download a free trial version for Windows and Mac from the links below. If you realize that this program is vital for you, you can purchase the full version, which includes optical text recognition and other useful functions. By the way, in honor of Black Friday, the developers are holding a sale where you can save up to $50 on the purchase of the full version of the application.
Title: PDFelement 7 Publisher/Developer: Wondershare Price: Free / Subscription Compatibility: Windows, Mac Link: Install
WinScan2PDF
This is not even a full-fledged program, but a utility. No installation is required, and the executable file weighs only a few kilobytes. The recognition process is extremely fast, although the resulting documents are saved exclusively in PDF format.
In fact, the entire process is performed by pressing three buttons: selecting the source, destination and, in fact, launching the program.
The utility is designed for fast batch processing of many files. For the convenience of users, a large interface language package is provided.
- portability;
- fast work;
- ease of use.
- minimum size;
- the only output file format.
How to edit PDF files on a computer in Word or from a scanner for free?
Hello, friends! The PDF format has long been widely accepted; we see how the number of these documents is gradually growing - we receive them and send them by mail in the form of electronic copies. Many, having received such a necessary document, would like to edit it, take tabular or text material from it for processing.
Well, at least in order to avoid typing the required text manually and not wasting precious time on it. Standard, free PDF viewers do not allow you to do this... Is it possible in principle to edit PDF documents? Yes, you can. I offer three options for review.
SimpleOCR
An excellent small program for recognizing texts from images. It even supports reading manuscripts. The trouble is that Russian is neither included in the interface language pack nor in the list of languages supported for recognition.
However, if you need to scan English, Danish or French, then you won't find a better free option.
In its scope, the program provides accurate font decoding, noise removal and graphic image extraction. In addition, the program interface has a built-in text editor, almost identical to WordPad, which significantly increases the usability of the program.
- accurate text recognition;
- convenient text editor;
- removing noise from an image.
- complete absence of Russian language.
Afterword
The Office suite is a wide range of tools for solving a wide variety of problems. Each of the programs included in it has its own functionality, and they complement each other when performing office work. In particular, to edit scanned documents in Word you will need an OCR program, and this is included in the package. This “All-in-one” structure is very convenient, since you don’t have to think about where to find and how to install third-party software, you don’t need to understand the features of its interface: there are solutions made in the same style. Therefore, Office was and remains the de facto standard for office work.
As for the ability to insert an image directly into Word and edit it directly from there, this mode is not supported yet. However, given the trends towards combining programs within a package and going online (we mean Office365), we should expect this soon. Now you will need to install the required component (if it has not already been installed) and work exactly like that.
Using the FineReader program, you can easily convert text from paper into a Word file and edit it if necessary.
You can find out all the stages of this procedure in the presented article.
A large number of users who work with documents are often faced with the need to copy text from paper into Word. In this case, the best choice would be to scan the text and then edit it.
This can be done using the modern FineReader program; it successfully converts an ordinary photograph obtained from a scan into a meaningful set of words.
Freemore OCR
The program allows you to quickly extract text and graphics from images. The software supports working with multiple scanners without loss of performance. The extracted text can be saved in a text document or MS Office document format.
In addition, a multi-page recognition function is provided.
Freemore OCR is distributed free of charge, however, the interface is only in English. But this circumstance does not in any way affect the ease of use, because the controls are organized in an intuitive way.
- free distribution;
- ability to work with multiple scanners;
- recognition accuracy is decent.
- Lack of Russian language in the interface;
- The need to download the Russian language package for recognition.
How to edit a scanned PDF document?
A universal tool for all occasions is the ABBY Fine Reader . It can recognize text in PDF and translate it into any format. It can work directly with a scanner and, after receiving an image, recognizes text even if the image is not of very high quality.
If you want to gain real PDF document editing skills, this program contains a built-in PDF file editor. Which allows you to directly work with both text and images separately.
To do this, you need to open the received document in Abby Fine Reader and transfer the document to the “PDF editor”. But there are a whole bunch of other possibilities - for example, the same transfer to Word or, if you have Open Office, then you can do it in this format.
In short, a powerful program that is indispensable in some cases when the PDF document is quite complex and painstaking work is needed to edit it. At the end, watch a short visual video about how you can easily edit PDF documents.
OCR CuneiForm
OCR CuneiForm is a program for editing scanned documents that recognizes characters and imports text into text editors. This utility can work with any printing and typewritten fonts, but does not cope very well with handwritten texts. The OCR CuneiForm program will be the most successful option for translators and linguists - it supports recognition from more than 20 languages, including Russian, English, Polish, Ukrainian and others. To recognize text using OCR CuneiForm, you need to launch the program, open the file with the scanned text and select the recognition operation. After this, the user can save the resulting result in their preferred format and edit it according to their needs. An interesting feature of the utility is its self-learning technology based on adaptive character recognition. Based on testing results, the OCR scanned document editing program CuneiForm has been repeatedly recognized as the best among its competitors. The most important advantage of this program is the ability to recognize text from almost any image!
Editing scanned text in Word
When working with the Word word processor, users sometimes need to process not only the text they (or other people) typed, but also edit scanned fragments. For example, so as not to manually retype any text, letter or anything else scanned and received in this form.
Previously, before recognition systems, the so-called OCR, were in use, it was precisely this tedious work that had to be done. Today, you can simply use not only numerous third-party programs, but also built-in Windows tools and, in particular, Microsoft Office. This is even more convenient, because you don’t need to keep installed software on hand, be tied to one computer, etc.
And in the modern world this means quite a lot.
So, there is a scanned text and the task is to insert it into your own document so that this fragment can then be edited. There are two ways; Let's consider both.
First way
It consists of using the built-in tools of Microsoft Word. The fact is that if you insert a scanned fragment without additional actions, it will be just a picture. The main text will flow around it, and you can only edit the size and transparency.
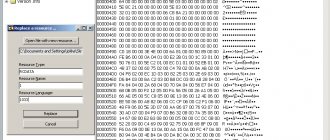
This is especially annoying when you only need to redo a couple of lines. But if you insert this scanned fragment as a Microsoft Image Viewer object into Word, then, in fact, it will be inserted as regular, editable text. To do this, you need to make sure that the file has the extension .
tiff, and if not, then use Paint, opening it and rewriting it in the desired format. After this, a special component of the Microsoft Office platform comes into play, which we mentioned just above. This is what you should open in the main menu.
If it is not there, then you will have to dig into the control panel.
Find the “Add or Remove Programs” item in it, find Office in the list that opens and proceed to selecting components. Among them you will find the Image Viewer we need to complete the task. Once installed, it will appear in the main menu.
So, after opening it, by drag'n'drop or through the window menu, open the scanned file in this program. You will need to wait a couple of minutes, as a progress bar will appear on the screen indicating the progress of recognition. Upon completion of the process, a window with the recognized text will actually open.
You can copy it to Word for further editing. Of course, you should take into account that recognition of text distorted by scanning may not be perfect, so it is worth carrying out the so-called “proofreading”, that is, editing it, correcting incorrectly recognized characters.
The situation is much worse with handwritten text; the likelihood that it can be edited strongly correlates with the color of the paper and ink, the quality of the scan and, of course, the legibility of the handwriting.
But such work is rarely carried out with handwritten text; usually we are talking about printed text.
Second way
Generally speaking, the second method is the same as the first, with the only difference that to enable text recognition mode and edit it, first third-party software is used, and then Word. An installed program is required.
It may even work better than Microsoft's solution, since such programs are developed and designed specifically for this task. The authors promise almost 100% accuracy when working with printed text and slightly more modest numbers when it comes to handwritten text.
But in order to separate marketing gimmicks from the true state of affairs, you will have to take the path of empirical verification.
In practice, it turns out that the gap is not so great. Yes, it may seem convenient to some that you do not need to enable text editing mode through the Microsoft Image Viewer - Microsoft Word combination, but for this you will have to use another combination of programs, and the accuracy of character recognition will be consistently high for printed documents.
Therefore, the reasons to pay more for one of these programs when there is a solution built into the Office suite are very vague. It's another matter if you are dealing with special cases. For example, you have a lot of documents scanned in poor quality that need to be digitized and prepared for editing mode.
Then highly specialized software, configured to work with noise and distortion in such images, will, of course, be predictably better. It will process the sheet with symbols more accurately, recognize them more correctly and transfer them to Word for further work. But there are not many such cases and, as a rule, the average user does not encounter them.
Therefore, this path is practically no longer used for typical tasks.
Afterword
The Office suite is a wide range of tools for solving a wide variety of problems. Each of the programs included in it has its own functionality, and they complement each other when performing office work.
In particular, to edit scanned documents in Word you will need an OCR program, and this is included in the package.
This “All-in-one” structure is very convenient, since you don’t have to think about where to find and how to install third-party software, you don’t need to understand the features of its interface: there are solutions made in the same style. Therefore, Office was and remains the de facto standard for office work.
As for the ability to insert an image directly into Word and edit it directly from there, this mode is not supported yet. However, given the trends towards combining programs within a package and going online (we mean Office365), we should expect this soon. Now you will need to install the required component (if it has not already been installed) and work exactly like that.
Source: https://nastroyvse.ru/programs/review/kak-redaktirovat-tekst-v-word.html
SimpleOCR
SimpleOCR is a functional utility with which you can recognize and edit scanned text. The user can change the recognized text directly in the program window or export it to the format of any popular text editor. The SimpleOCR application dictionary contains a huge number of words, and it can be updated with new words manually using the built-in text editor. If you wish, you can recognize not the entire text, but a selected area; it is also possible to preserve the formatting of the source file - leave the font, highlighting of characters, pictures, and so on. Another useful feature of the SimpleOCR program for editing scanned documents is the possibility of batch recognition - the user can upload several files at once for work.
Using the utility is quite easy - you just need to run it and load the file containing the text. This file will be displayed at the top of the window, and at the bottom the program will display the recognition result. Here you can edit the text at your discretion, print it or export it to another format. When using this program for the first time, difficulties may arise, since its interface has certain features.
The above applications are used to work with text, but sometimes users need to edit not the text, but the image. In this case, graphic editors, for example, Paint.NET, will come to the rescue. This program for editing scanned documents in Russian will provide a large selection of tools for working with images - cropping, rotating, mirroring, applying various effects, distorting, creating patterns, and so on. Paint.NET supports plugins, so even if the user does not find the desired option, tool or effect in the basic version of the program, he can always find and download it on the Internet. The utility recognizes most image formats, so when scanning it is enough to save the document with the extension .bmp, .jpg, .tiff so that it opens correctly in Paint.NET.
Recognizing text or changing an image when transferring from printed to digital format will not be a serious problem if the user has a program for editing scanned documents
. A large selection of free applications allows you to work with documents without any material costs.
Install an OCR application. Such programs can be included with the scanner or distributed separately. However, they have the same operating principle. Launch the text recognition application, place the desired document in the scanner with the text facing down, and scan. Click the “Recognize” button, wait until the program converts the graphics into text, export the file to text format, save the document. Next, open it in a text editor and make the necessary changes.
If you don't have the app you need, try another method. It is more creative compared to the first one. Scan the document, adjusting the settings to obtain a clear image without dark or overexposed areas. The higher the quality of your image, the less you will have to clean up the drawing. Save the scanned document.
How to scan a document in Word
- First of all, the document is scanned. For this case, it is better to choose the png or jpg format. The image size must also be impressive (from 400 dpi) so that there are no problems with recognition.
- The resulting images are saved in a specific location, after which the text recognition program itself will be required. It is best to choose Adobe FineReader. This is a universal software that does not cause any complaints in terms of the quality of its work. It is important to note that after installing this program, the corresponding tab should appear in MS Word, therefore, using the functionality is significantly simplified.
- Through Adobe FineReader, you need to select the “File” and “Open” menu item, select the necessary images. Next, the image processing menu will appear, we need to select the language that is used in the document, as well as some other options, including dictionaries and other settings (not so important for obtaining the result).
- Click the “Recognize” button and wait for the process to complete. It is likely that not everything is recognized, so those words that the program could not identify will be highlighted in a different color and can be edited directly in the program.
- If the text in the scanned document itself is slightly shifted, then in Adobe FineReader you need to select certain paragraphs of text using selection. This will ensure that the text is not missed during recognition.
- As a result, you need to click on the “Save” button, after which you will be able to choose where to save the document, as well as its format. Of course, in the case of MS Word you need to choose the doc or docx extension.
- If before saving it turns out that the document is divided into several columns, then you need to select the “Format” menu, then go to “Columns” and select “Single” so that the document looks simple and harmonious. Also in “Page Settings” there is the ability to customize margins, indents and fonts.
As a result, the document can be freely edited directly in the MS Office office suite. It is important to note that when recognizing a document directly in Word, formatting is even simpler, since the functionality is the same for both the source documents and the ones being recognized.
As for recognition from photographs or other materials, it is not so easy to obtain high quality recognition, since we are talking about displaced margins, indents and other details of documents, which will require a lot of time to correct.
When working with text documents, very often there is a need to type text from an already printed document. This kind of work is not very pleasant and takes a lot of time.
Fortunately, there are now programs that can significantly simplify and speed up the solution of such problems. Using these programs, you can quickly convert a scanned document into the Word text editor format and avoid the routine work of typing.
In this article we will demonstrate how this is done using the ABBY Finereader 12 Professional program as an example. If you do not have just such a program, then you can replace it with another version of ABBY Finereader or a completely different program from another developer. For example, you can use CuneiForm, Free OCR, Readiris Pro or SimpleOCR.
Step No. 1. Launch ABBY Finereader and open the scanned document.
The first step is to launch the ABBY Finereader program. After starting the program, you need to click on the “Open” button on the toolbar.
After this, a window will appear to open the scanned document. Select an image or several images and click the “Open” button.
Additionally, instead of using the Open button, you can simply drag and drop scanned images into ABBY Finereader.
Step No. 2. Wait for ABBY Finereader to analyze the selected image.
Next, you need to wait until the ABBY Finereader program analyzes the images you have selected and recognizes the text on them. The time required for analysis depends on the number of selected images and the performance of your computer.
When image analysis is complete, a message appears with a Close button.
Click on the “Close” button and proceed to the next step.
Step No. 3. Convert the scanned document to Word format.
Once the analysis is complete, the scanned document can be converted to Word format. To do this, ABBY Finereader has a “Save” button.
After clicking the “Save” button, a window will appear to save the scanned document in text format. In this case, you can choose one of many text formats (DOC, DOCX, RTF, ODT, PDF, HTM, TXT, XLS, XLSX, PPTX, CSV, FB2, EPUB, DJVU). In order to easily edit a document in the Word editor, select the “Microsoft Word Document 97-2003 (*.doc)” format or the “Microsoft Word Document (*.docx)” format.
After saving the document in Word format, a word processor will open and you can start editing the scanned document.
What to do if it is not possible to install the program?
If you do not have the opportunity to install the programs described above, then you can use online analogues. The most advanced online service of this kind is. This service allows you to convert a scanned document into Word format, as well as other popular text formats.
The disadvantages of ABBY Finereader Online include the fact that this online service requires registration and only processes 10 pages of scanned text for free. To process more pages, you need to buy a subscription, which costs from $5 per month.
16.02.2018
How to organize a move?
25.12.2017
How to install plastic windows with your own hands
06.09.2017
An electronic version of a paper document can be obtained by scanning it. The format of scanned documents can be different, but pdf is considered the most common. Files recorded in this format can be easily opened using any image editor, but the resulting document cannot be modified. scan a document to
pdf
using any office or professional device designed for converting paper copies into electronic form. As a rule, the default scanner settings require saving copies in this format. The resulting file is small in size and can easily be sent by email, recorded on a flash drive or CD.
Scanned document format
pdf: history of development
The format first appeared in 1993 and was not widely used at the initial stage. Programs that could be used to work with pdf documents were paid, as a result of which further development of the format was hampered. Over time, platforms appeared for free work with pdf files, and gradually the format managed to gain well-deserved recognition and distribution. Today, pdf format of scanned documents is the most common in the world.
Scan documents into Word: what to do when
pdf is not suitable
However, scanning a document into pdf is not always convenient. If you not only need to receive an electronic copy of a document for viewing, but also edit it or make changes and changes, this format is not suitable. In this case, it is much more convenient to scan a document into Word, a text editor with which you can easily perform all the necessary actions with the source code.
You can receive an electronic version of a paper document that can be edited in two steps:
- scan a document to pdf,
- Using special programs, convert the resulting file into Word.
This method is optimal and simple, it is what is most often used in copy centers when you need to scan a document into Word
.
How to convert a document from
pdf to Word
Currently, there are a number of online services for converting a document from pdf to word, but working with them is not always convenient, there are restrictions on the number of free operations, and there is a high percentage of errors in text recognition.
The best program option for converting files from pdf to word is the free stationary program FineReader. With its help, you can easily convert any scanned file into text format. However, despite the fact that this software product recognizes text well, the resulting document must be checked for possible errors.
Scanning large format documents at a copy center
Documents in A4 format can be converted into electronic form and then converted to doc format using a regular office scanner and computer. Drawings and design documents can only be scanned using special equipment in a copy center. Here you can also digitize drawings, as a result of which technical documents are translated into an editable format and changes can also be made to them. It also makes sense to contact a copy center if there are large volumes of scanning documents in standard A4 format. Our specialists will do everything quickly and without errors.
Before submitting documents for scanning to a copy center, they must be prepared: remove all paper clips, springs and other foreign objects that may interfere with scanning. If you don’t have time to do this yourself, you can order the appropriate service at a copy center.
You can scan not only black and white documents, but also color ones. At the same time, the quality of a professional scan will always be higher than that made using conventional office equipment.
At the copy center, the customer has access to a full range of printing and processing services for documents of any format.
Using the start window, you can create Word documents using a scanner or camera.
- On the Scan tab, click Scan to Microsoft Word.
- Select your device and set scanning options.
- Click the Preview button or anywhere in the scan area.
- Preview the resulting image, change the settings if necessary, and click Preview again.
- Specify the settings for the selected format. The appearance and properties of the resulting document will depend on the settings you select.
- Maintain formatting. The choice of formatting saving mode depends on how you will use the created document in the future:
- Exact copyThe ability to edit the output document is limited, but the appearance of the document is preserved as accurately as possible.
- Edited copyThe design of the output document may differ slightly from the original. The resulting document is easily edited.
- Formatted textOnly fonts, their sizes and style, and division into paragraphs are saved. The resulting document contains continuous text written in one column.
- Plain textOnly paragraph breaks are preserved. All text is formatted in the same font and placed in one column.
- Recognition languages—you must specify the document languages correctly. For more details, see “Recognition languages”.
- Save pictures—check this option if you want to save pictures in the received document.
- Save headers and page numbers - headers and page numbers will be saved in the resulting document.
- Image Preprocessing Settings... - You can set image file processing settings, including page orientation detection and automatic image processing. These settings can significantly improve the original image and produce more accurate conversion results. See "Image Processing Options" for details.
- Other settings... - allows you to open Format Settings on the DOC(X)/RTF/ODT tab of the Settings dialog (menu Tools > Settings...) and set additional settings.
- Click Scan to Microsoft Word.
- Once launched, a task progress bar will appear on the screen, containing a progress bar and hints.
- After scanning the current page is completed, a dialog for selecting further action will appear on the screen. Click Scan again to start scanning the next pages with the current settings, or Finish Scan to close the dialog.
- Specify the folder to save the received Word document.
When the task is completed, a Microsoft Word document will be created in the specified folder. In addition, all images will be added to the OCR editor and available for processing.
help.abbyy.com
Download and Scan
To start the process:
This program will automatically select document fragments, pictures and tables, and, if necessary, rotate the scanned text in the desired direction. After scanning is completed, in this program you need to select a language to transcribe what was written. You can select it in the “Document language” drop-down window; if the downloaded scan is written in several foreign languages, you should select the automatic mode.
Editing
Convert to Word format
compsch.com
Interface and available tasks
After starting the program, the computer monitor will display a menu logically arranged by commands. FineReader's main tasks include:
- saving the document in Word;
- converting images from PDF to doc format;
- just scan and save the image;
- create a searchable PDF document;
- moving photos to Word.
At this stage, the user can configure the color mode: color or monochrome, and recognition languages. The following languages are available for processing: English, Russian, Spanish, Italian, German. The user can also use a selection of artificially created languages: Esperanto, Interlingua, IDO.
If the user is faced with the task of scanning a document containing, for example, medical text, then the program will recognize the Latin font after the required checkbox is ticked. FineReader also sees formal languages. It successfully copes with the recognition of simple chemical formulas. A user who often works with documents in different languages can save his time by using the automatic settings feature.
Modifying and editing PDF documents
1) What is needed for work (software selection)
I will assume that you already have the PDF document (that you want to edit). Now you need to select software to change it. For a simple and quick solution to the task at hand (which we focused on in this article), Movavi PDF Editor is suitable.
Movavi PDF Editor
A very compact and convenient program that allows you to quickly edit PDF files! I would note the low system hardware requirements of this software, thanks to which you can open and edit PDF files in high quality (in high-resolution color) even on “weak” office computers.
- there are all the basic editing functions: adding/deleting pages, rotating pages 90-180 degrees, inserting signatures, pictures, merging/splitting documents, converting PDF to pictures (and the reverse operation);
- the program opens and allows you to change the vast majority of PDFs (even quite large ones, with high scanning resolution, which is important for the office (many other programs can simply freeze));
- low system requirements;
- intuitive interface (by the way, the program is entirely in Russian!);
- compatible with Windows 7, 8, 10 (32/64 bits).
Perhaps the only negative: the full version of the program costs 600 rubles. (however, there are 7 days for testing).
Below in the article I will show the main steps for working with the Movavi PDF editor.
2) Opening a document
I do not consider installing and launching the editor (they are standard). To open a PDF file, just click on the button of the same name in the first window of the program. (see screenshot below)
By the way, I note that the program keeps a history of previously opened files, which over time will allow you to quickly find documents that you often work with.
Open file (Movavi PDF Editor)
Next, specify the folder and file you want to open (in general, a standard Explorer window.).
Find the required document on the disk
The file should open in the editor. The program interface is generally standard: all pages of the document are presented on the left, and the document itself is in the center.
What an open document looks like in Movavi PDF Editor
Now you can move on to editing.
3) Rotate pages 90-180°
And so, it was not by chance that I opened my document: some pages in it were scanned in a horizontal position, but I need everything in a vertical position (note: the “crooked” specialized scanner software that came with the drivers automatically formats the document layout when saving in PDF ).
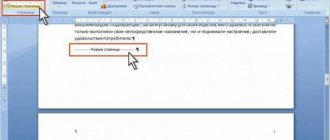
In order not to look for every “wrong” page in normal viewing mode, I recommend going to the overview of all pages (to do this, click on the “Pages” button, see screenshot below).
Pages (Movavi PDF Editor)
Next, simply right-click on the pages that you want to rotate and select the desired direction (left, right, 180 °).
Rotate pages / Clickable
Page rotation operations are performed very quickly: literally two or three clicks and all the sheets in my documents became vertical (see example below).
All pages are in vertical position
To return to normal mode of working with a document, click the “Back” button on the panel (see screenshot below).
Open the document overview
Please note that you can also rotate the page in the menu on the left (the only point: it’s not very convenient to “look for” them here.).
Alternative page rotation option
4) Removing and inserting pages, pictures
As for deleting a page, everything is simple: first, select the page in the menu on the left, then right-click on it and select “delete” in the menu (example below).
You can also use the Delete key.
As for inserting new pages (and pictures) into a document, this is somewhat more interesting. First you need to go to the “Pages” tab.
Next, click on the “Blank Page” button in the side menu on the right.
Please note that you will have one blank page at the end of the document. See screenshot below.
New page added
By dragging this empty page with the mouse, you can move it to the desired part of the document. For example, I inserted it in place of the first page (by the way, you can sort the entire document in the same way, swapping pages and moving them to the right place).
Move a page to the desired part of the document
To insert a picture (image): go to the desired page, in the top menu select the option “Add image”. Next, the Explorer menu will open, where you can select the one you need.
For example, I inserted a screenshot into the edited instructions on how to view the characteristics of a PC (HDD temperature in particular). Example below.
The picture is added to the document
5) Combining 2 documents into 1
Also a fairly typical task (especially unpleasant when one document consists of 3-4 or more PDF files). How to collect them all into one?
First, you need to open the first document (page) and go to the review mode for all pages (see screenshot below).
Pages (overview of the entire document)
Next, in the menu on the right, click on “Add files” and select the document that you want to add.
All pages of the added document will appear at the end of the open document (sorry for the tautology). Thus, we actually “glue” two documents into one.
All pages of another document are added to the end of the open one
By sequentially adding all the “small” documents, you will be able to assemble from them the one “big” one that you originally wanted.
This option is simpler. After launching the program, simply click on the “Combine files” button (on the start window on the right).
Next, you can add a dozen files at once to the window that appears: PDF, PNG, JPG. After combining them all into one file, all you have to do is arrange the pages in the desired order and save it.
All that remains is to add a few files
If your PDF document turns out to be too large (and this also happens from time to time), then you can compress it. In one of my previous articles I gave several options, I recommend - https://ocomp.info/kak-szhat-fayl-pdf.html
That's all for now. Additions are welcome.
An example of how to transfer a scanned document into Word
Let's consider the simplest problem. We have a document in Russian, scanned and saved on a flash drive. To transfer it to a Word document, you need to:
- Launch the Abby FineReader program.
- Insert the drive into the USB connector of the computer.
- Select the “File in Word” menu item.
- In the Explorer window that opens, specify the path to the image that needs to be converted.
- Double-right-click on the selected file.
How to scan in word 2010?
In this article we will take a closer look at how to scan in Word 2010 with the ability to subsequently edit text and images.
Performing a scan
- Open the scanner settings – Start – “Devices and Printers” – an icon with the connected scanning equipment.
- Place the document – text or photo – face down so that the edges do not extend beyond the scanner’s working area.
- Press the scanner lid tightly onto the document. This is done in order to prevent light from entering the scanned area.
- Set the resolution. Remember, the higher it is, the better the image quality. For photos and pictures you can set 600, for text documents 400-500 is enough. Click “Scan” and indicate the location where to save the finished file.
Saving scans in Word 2010
- Open a Word 2010 document. In the top menu, select the “Insert” function, the “Pictures” option.
- In the window that opens, select the folder where you saved the scanned document. Then select the file and click the Insert button.
Scanning with RiDoc program
This RiDoc software allows you to save a scanned file in Word 2010. Download and install the program on your computer. Open it and start scanning:
- In the top menu, click on the “Scanner” function and select the connected device.
- To save the document in Word, select the “MS Word” button.
- Now we merge the scanned images using the “Glue” function on the taskbar.
- Then click “PDF” and save the resulting document to your desktop or a convenient folder.
Scanning with Adobe FineReader.
The program is considered the most convenient for scanning and subsequent recognition of documents.
- Launch FineReader on your PC. Click “File”, then “Scan”. If you have a scanned image, then you can simply open it, recognize it, and then edit it.
- Select "Black and white drawing and text" if your priority is a text document.
- A scanned image will appear on the screen, where you need to select the required areas and indicate their type - text, picture or table.
- Next, click on the selected block and click “Recognize”. As a result, text will appear on the right that can be edited.
The article on how to scan in Word 2010 was written with the support of specialists from the copy center Printside.ru
printside.ru
Errors
It is clear that to the question of how to transfer a scanned document to Word, the answer turned out to be quite simple. But is everything always so rosy? Often the images are low resolution. And then FineReader gives an error instead of a finished file in doc format. But there is no reason to be upset. Many reasons that interfere with text recognition can be eliminated using the same FineReader. To do this, the program has a menu of “Edit” commands. By selecting it, the user has the opportunity to:
- change resolution;
- correct skewed scanned image;
- adjust brightness and contrast;
- crop, split and rotate a document and much more.
Solving a problem using online services
If you are interested in the answer to the question of how to edit a scanned document without installing special software applications, then use any online service that offers converting images to text. Usually all these resources work according to the same scheme. You just need to upload a scan of the document, having first saved it in PDF format, then follow the recommendation to select the desired task and click on something like “Convert” (it’s different everywhere). Then the service will give you the finished file in the form of a Word document.
- One of the most convenient and best services offering converting PDF to Word for the purpose of editing a scan is smallpdf.com. Its advantages include a simple interface, fast operation, excellent quality results, support for working with Dropbox and Google Drive, and a lot of additional functions. You can use it for free only twice an hour. If necessary, you can purchase a paid Pro account, as a result of which the list of functions will be significantly expanded.
- Zamzar.com is also a fairly convenient online conversion service. It features the ability to batch process files, a large number of conversion options, and is fast. Moreover, you can use this resource absolutely free. However, there are size restrictions - no more than 50 MB. To remove this limit, you will have to pay the corresponding tariff. In addition, the result can only be received by e-mail, which you will have to first enter before downloading the file.
Tip 2: How to change scanned text
Text scanned in order to convert it from “analog” format to digital. During this conversion process, errors often creep into the text. Consequently, the text occasionally needs to be edited. This can be done in several ways.
Instructions
1. The scanned text is an image in .tiff, .jpeg or .gif format, which is essentially not a standard text document. To convert an image with text into real text, various programs with the function of so-called text . One of these programs is the famous ABBYY product called Fine Reader. To recognize text with the support of this program, just open the image file, set the text and click the “Recognize” button. After some time, the program will generate a text document, one that can be changed. The Fine Reader program allows you to recognize documents in 186 languages and has a wide range of functions for working with original text documents of varying quality.
2. If you don’t want to shell out money for Fine Reader (the full version of which costs from 1,400 rubles), then you can use online tools text text recognition services on the Internet . The most powerful of them is Fine Reader Online (https://finereader.abbyyonline.com/ru/Account/Welcome), which allows you to recognize up to 5 files for free, as well as completely non-commercial solutions such as Free OCR (https://www.free -ocr.com/) and https://www.newocr.com/. To work with these services, simply upload files with scanned text, select the language and format of the text file, and receive text ready for editing.
3. To metamorphose the text, open the resulting file using a text editor (corresponding to the format of the received document) and edit it as usual. Later, you will save the file on your computer.
Note! Use online text recognition services if you need to recognize a small number of pages. If you are constantly engaged in scanning and text recognition, purchase a powerful paid program.
How to change text after scanning
To save electronic copies of original “paper” documents, they are scanned. Occasionally, duplicates obtained by this method are recognized with the support of OCR applications combined with scanning programs, and occasionally saved as an image. Often, after scanning, some metamorphoses are introduced into the initial document that need to be displayed in the electronic copy. You can edit the scan using several methods.
Instructions
1. If scanning was carried out in text recognition mode, then the contents of the resulting document can be changed even before it is saved - many programs prepared for scanning and recognition have built-in text editors. For example, in the FineReader program, famous among Russian-speaking scanner users, the entire page of a document scanned and converted into text format opens in a separate window with an editing menu, the functional capabilities of which are similar to those of an ordinary text editor. If the scanned and recognized text was saved to a file, then you can change it with a standard text editor. For this, use, say, Microsoft Word - this word processor can read many formats used to save texts with OCR programs.
2. If the scanned document was saved in image format, then you should use some kind of graphic editor to edit it. In some cases, the standard Paint application installed by default with the Windows operating system will be sufficient. Open a file in it containing an image of scanned text, select the area of the image that needs to be replaced, and fill it with a color that matches the background of the document. After that, select the size, color and font that matches the text, and print the new fragment on top of the filled area. However, in most cases, replacing text requires more careful work with the image - copying background areas and placing copies on top of the text in several layers, deforming the typed text in accordance with the state of the original document, copying and pasting individual letters and words of the text, etc. Therefore, a more advanced graphics editor - say, Adobe Photoshop - is much more suitable for this work.
3. There is another method for replacing a fragment of the initial text in a scanned document saved as an image. It can be used if there is a possibility of scanning a new fragment with edited text. The required text can be printed on the same (or the same) paper as the original document, therefore the appearance of the initial and corrected fragments will coincide to a greater extent than this can be achieved in a graphic editor. The scanned part of the text must then be superimposed on the document being edited using any graphic editor - such an operation is provided in virtually all applications of this kind.
Second way
Generally speaking, the second method is the same as the first, with the only difference that to enable text recognition mode and edit it, first third-party software is used, and then Word. An installed program is required. It may even work better than Microsoft's solution, since such programs are developed and designed specifically for this task. The authors promise almost 100% accuracy when working with printed text and slightly more modest numbers when it comes to handwritten text. But in order to separate marketing gimmicks from the true state of affairs, you will have to take the path of empirical verification.
In practice, it turns out that the gap is not so great. Yes, it may seem convenient to some that you do not need to enable text editing mode through the Microsoft Image Viewer - Microsoft Word combination, but for this you will have to use another combination of programs, and the accuracy of character recognition will be consistently high for printed documents. Therefore, the reasons to pay more for one of these programs when there is a solution built into the Office suite are very vague. It's another matter if you are dealing with special cases. For example, you have a lot of documents scanned in poor quality that need to be digitized and prepared for editing mode. Then highly specialized software, configured to work with noise and distortion in such images, will, of course, be predictably better. It will process the sheet with symbols more accurately, recognize them more correctly and transfer them to Word for further work. But there are not many such cases and, as a rule, the average user does not encounter them. Therefore, this path is practically no longer used for typical tasks.
Scan and edit a document
After scanning a document, you can open the document in Word to edit it. The method depends on what version of Office is installed on your computer.
Scan a document as a PDF and edit it in Word
Advice:
The conversion is best suited for documents that are primarily text.
Scan the document according to the scanner instructions and save it as a PDF file on your computer.
In Word, open the file
>
Open
.
Browse to the PDF file folder on your computer and click Open
.
A message appears indicating that Word is converting the PDF to an editable Word document. Click OK
.
There may not be a complete page-by-page match of the converted document with the original one. For example, line and page breaks may be in other places. For more information, see Open PDF files in Word.
additional information
The "from scanner or camera" option for scanning documents and pictures is not available in Word 2010. Instead, you can scan the document using a scanner and save the file on your computer.
Step 1: Install Microsoft Office Document Imaging
Microsoft Office Document Imaging has been removed from Office 2010, but you can install it on your computer using one of the options described in Install MODI for use with Microsoft Office 2010.
Step 2: Create a document that can be modified.
Scan the document following the instructions for your scanner.
Before you continue
Convert the file generated by the scanner to TIFF format. You can convert the file using Paint or another program.
Open Microsoft Office Document Imaging by searching for Microsoft Office Document Imaging
in the Windows Start menu.
In the File
select the
Open
.
Find the scanned document and click Open
.
After you launch Microsoft Office Document Imaging, press CTRL+A to select the entire document, and then press CTRL+C.
Launch Microsoft Word.
On the File
click the
Create
.
Double-click New Document
.
Press CTRL+V to paste the contents of the scanned document into a new file.
You now have a document that can be edited. Don't forget to save the new file so you don't lose your changes.
The "from scanner or camera" option for scanning documents and pictures is not available in Microsoft Office Word 2007. Instead, you can scan a document using a scanner and save the file on your computer.
Step 1: Install Microsoft Office Document Imaging
Quit all programs.
Advice:
We recommend that you print this section before closing all programs.
Open Control Panel: Right-click the Windows Start button and select Control Panel
or type
Control Panel
.