Personalization for activated Windows 10
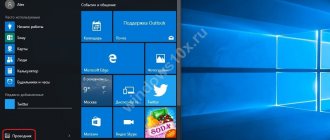
Changing the appearance of Windows 10 is done from the context menu in the “Personalization” section or from the main system menu (“Start → Settings → Personalization”).
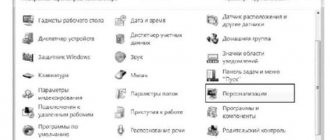
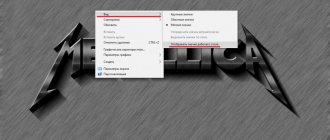
To enter personalization settings, right-click on the desktop and select “Personalization”
Setting appearance options
To change the desktop background image, you must go to the "Background" section of the "Personalization" console. After this, select a standard image or specify the location of the graphic file, the image of which will be used as the background. In the second option, you need to set one of the conditions for the selected image:
- filling;
- to size;
- stretch;
- pave;
- extension in the center.
You can set several images in slide show mode, specifying the frequency and order of their change.
Another option is to choose a background color without an image.
Select the "Background" menu item and adjust the background settings
Changing the color palette of the main menu, notification center, taskbar and other interface components occurs in the “Colors” tab. Color selection can be done automatically or manually. It is also possible to make all elements transparent.
Set color options for the main menu, taskbar, and action center
In the “Lock Screen” item, you can configure the screen saver that appears on the display when the PC is locked. There are three screensaver options:
- single photo;
- slide show;
- windows: interesting.
When you click on the “Advanced slide show options” link, you can get to the fine-tuning menu for this mode.
Select a single photo or a group of images (slideshow) as your lock screen background
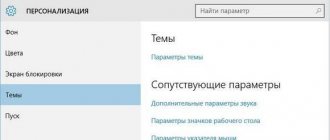
The “Themes” section contains settings for standard screen themes. Here you can select a theme, customize the sounds produced by the system when certain events occur, and also set the appearance of the desktop icons and mouse cursor.
Choose from pre-installed themes and customize sound settings, desktop icons, and mouse cursor settings
Downloading and installing new themes
Many users do not know that themes and desktop wallpapers can be found on the Microsoft website. To do this, go to the “Theme Options” section and follow the “Other themes on the Internet” link. After this, the “Personalization Gallery” will open, which has a large number of different themes. After launching the file via the link, the corresponding theme will be installed on the device and will appear in the “My Themes” tab.
To download the theme you like, select one of them and click “Download”
To delete an unnecessary topic, you need to hover your mouse over it, right-click and select “Delete topic”. This topic should not be active during deletion.
Where are the themes stored?
All installed themes can be found in the Web folder by following the path: C:\Windows\Web.
It contains several internal folders:
- 4K - the official system screensaver is located here;
- Screen - this folder contains background images of the lock screen;
- Wallpaper - The three official themes and their associated images are stored here.
Themes downloaded independently can be saved anywhere on the hard drive of the user's choosing.
CHANGING YOUR DESKTOP ICONS
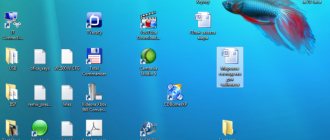
As you may have already noticed, by default, immediately after installation, the operating system displays only the Recycle Bin icon on the Desktop. It is not clear what the reason for this decision is, because the Computer and Network icons are used much more often in practice, and yet the developers decided not to display them. This kind of “disgrace” is very easy to fix. First of all, you need to launch the mechanism for working with icons, for which you use the Change desktop icons link on the left side of the window shown in Fig. 7.2. As a result, a window will open in which you will see a list of standard icons, as well as parameters that show their current state (Fig. 7.6). If you want the Computer and Network icons to be present on the Desktop, simply check the appropriate boxes in this window.
Figure 7.6. Customizing the appearance and display of icons As in previous operating systems, in Windows 7 you can change the icon by clicking the Change Icon button. As a result, a window will open containing a fairly large set of various icons. To return the standard icon image, click on the Normal icon button. If you want the desktop icons to change when you install a new desktop theme, check the Allow themes to change desktop icons checkbox. In this case, the icons may take on a more original appearance.
Unlocking personalization settings for non-activated Windows 10
If the Windows 10 operating system was installed for evaluation purposes only and no activation keys were entered during installation, then the personalization settings will be blocked. The rest of the functionality will be fully accessible, you can even use the Power Shell console without any problems.
To unlock personalization settings in a non-activated OS, you need to right-click on the “Network” icon, which is located in the lower right corner of the screen. After that, select “Network and Sharing Center” and follow the “Change adapter settings” link. Then select the modem and turn it off. Now all that remains is to restart your computer and the personalization options will be unlocked.
Once unlocked, you can make personalization settings in the same way as for activated Windows 10
WINDOW COLOR
The ability to customize the window color scheme has been carried over from the Windows XP operating system, without any changes. To use this mechanism, you need to click on the Window color link at the bottom of the window shown in Fig. 7.2. There are quite a lot of controls to choose from, the color scheme of which you can customize. Some of them apply only to the Aero theme, while most of them relate to the standard Desktop theme, as indicated by the inscription in the window that opens. Here, in addition to the actual color design of windows and its elements, you can also customize the display of inscriptions, specifying the font and size. For example, you can set a different font for the window title, define the spacing between icons, the color of hyperlinks, and much more.
SOUNDS
Sounds, that is, sound design, are directly involved in the perception of the Desktop, so it is only natural that the Windows 7 operating system allows you to customize them at your discretion. To switch to sound management mode, select the Sounds link in the window shown in Fig. 7.2. A similar configuration method existed in Windows Vista, and compared to this operating system in Windows 7, there were no significant changes in this regard. Controlling sounds is very easy. There are more than ten different sound schemes to choose from, which you can set using the Sound scheme list. Once the sound scheme is selected, you can proceed to manage the sounds responsible for various operating system events. In the central part of the window (Fig. 7.4) there is a list of all system events and sounds associated with these events. If the sound is installed, the speaker icon is displayed next to the corresponding event. Regardless of whether the sound is installed or not, you can change it or link it to an event, for which you use the Sounds list: having marked the desired event, expand the Sounds list and select from it one of 40 sounds at your discretion. If you don’t need any sound for the event at all, select No from this list.
Rice. 7.4. Changing the sound You can do the same with any system event. This will create a new sound scheme, which you can save using the Save As button, allowing you to select it at any time. If you are not satisfied with the set of system sounds, you can specify your sounds using the Browse button. By default, only WAV files can be selected. But is this a problem if there are a large number of programs with which you can easily convert any audio file to WAV?
SCREEN SCREEN
Because there are times when you are not at your computer, your operating system may display a splash screen when you enter power-saving mode. At the same time, in addition to saving energy, you get a pleasing picture. And in addition, you can make it so that exiting the screen saver mode will be possible only after entering the password. This means that the information on your screen can't be seen by anyone, especially people who don't need to see it in the first place. The mechanism for working with screensavers has remained virtually unchanged since its appearance in earlier versions of the operating system. Why change anything in a useful and, most importantly, properly working mechanism? To be able to manage screensavers, select the Screensaver link, which is located in the lower right part of the window shown in Fig. 7.2. In the window that appears (Fig. 7.5), you can select any screensaver you like from the Screensaver list. At the same time, a small copy of the screensaver is displayed on a small screen at the top of the window. If you click the View button, you can see its work “live”, in full screen mode.
Rice. 7.5. Setting up the screensaver Almost all screensavers have settings that can be customized. For example, if you select the Photos screensaver, as shown in Fig. 7.5, then after clicking the Options button you can specify the folder with your images that will participate in the slide show. You can also choose the speed at which these images change. If you want to exit screen saver mode only when you enter your password, select the Start at login screen check box. This opportunity is very often used by office workers, especially if one office is shared between several colleagues.
Programs for advanced personalization
For some PC users, the usual personalization settings are not enough, so they look for programs that can expand the possibilities in the design of the desktop interface.
One of the most powerful programs of this type is the Winaero Tweaker utility. After launching the installer, you need to select one of the installation options.
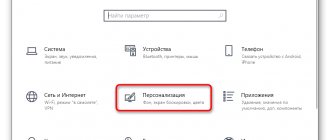
Choose standard installation mode, where the program is registered in the Programs and Features menu, or simply unpack the files into a specified folder
The Winaero Tweaker utility allows you to:
- Enable the hidden Aero Lite theme, change appearance options, use colored window titles, and influence the behavior of themes.
By selecting one of the design conditions, you can slow down the animation, change the colors of inactive windows, and enable or disable the dark theme of Windows 10
- Change font sizes, as well as select specific fonts and their styles (regular, italic, bold) for any screen element.
Set the settings for icons, fonts, the size of scroll bars, window borders, and if the desired result cannot be achieved, then reset the additional settings to their original state using the Reset Advanced Appearance Settings item
You can use the Start 10 utility to customize the Start menu.
Select the desired menu item to set the required settings
With its help, the font, color and animation mode can be changed. For quick setup, you can use ready-made themes.
You can choose a main menu style similar to Windows 7, leave the standard Windows 10 style, or modernize it to your liking
The WindowBlinds program is designed to change the appearance of windows, labels, buttons and other elements. It, like the Start 10 utility described above, allows you to radically change the appearance of the operating system in a few clicks.
To change the window design, you need to select one of the proposed styles
Themes
Themes are an integral part of your computer's design. To change the theme, click on the Start button and then select Control Panel. Once you have completed this operation, you need to click on the Appearance and Personalization tab and go to the Personalization section, where you can find a theme that suits your taste.