The concept of personalization first appeared in Windows Vista. This is a set of several mechanisms, united under one “roof”, with the help of which you can influence the appearance of the operating system interface. This mechanism was transferred to the new operating system practically unchanged, with some improvements in the interface and the use of additional effects. As before, the Personalization mechanism is located on the Control Panel (Fig. 7.1).
Rice. 7.1. Launch the Personalization component Using the Personalization mechanism, you have access to configure the following system interface parameters:
- Desktop themes
- desktop background
- window colors
- sounds
- screensavers
- desktop icons
- mouse pointers
- account picture
Let's briefly consider these parameters.
DESKTOP THEME
The visual design of the Desktop is the first thing that catches your eye after starting the operating system. As they say, “you are greeted by your clothes,” and it is this fact that affects whether you will be able to use the operating system with pleasure in the future or simply get used to it. It has long been proven that the visual perception of an object clearly affects its practical use. So, let's see what the new Windows 7 operating system offers us in terms of visual design. After launching the Personalization mechanism, you will see a window with the theme settings tab activated (Fig. 7.2). The Desktop Theme changes not only the Desktop background, but also sounds, window color and other parameters. However, once you select a Desktop theme, you can further change each of the components of the selected theme, including the background and sounds. How this is done is written below.
Rice. 7.2. Setting up a desktop theme The Windows 7 operating system in its standard configuration offers a choice of two theme options: Aero and standard basic themes. Users whose computer power meets the recommended requirements for installing the Windows 7 operating system are a little more fortunate, since instead of the standard theme, they can choose one of the Aero themes, which have much more visual effects. Other users can also install Aero themes, but as a result they will only get the appropriate Desktop background and sound scheme, but will not be able to enjoy most of the effects: window transparency, taskbar additions, visual effects when switching between windows, etc. Installing a theme happens quite quickly - you only need to select the topic you like from the list. As a result, you immediately see the result and can easily install the theme that best suits your mood and idea of how your desktop should look. Also note that at the top right of the list is a link to More Internet Topics. Clicking on it will take you to the Microsoft website, to the personalization section, which contains a wide variety of themes and desktop backgrounds that are not included in the standard set. By clicking the Download button and selecting the Open option in the window that appears, you simplify the process of installing the theme into the operating system as much as possible. All you have to do is wait for the download process to complete and allow the installation of the new theme. Any theme that is installed in a similar way, for example by downloading from the Internet, subsequently ends up in the My Themes section, located at the very top of the list of themes.
DIY desktop decor: posters
Speaking of posters, they are not only hung on walls, but also simply placed on shelves and other surfaces, both framed and unframed. If minimalism reigns in your workplace, but you want to dilute this asceticism with something simple and concise, take a closer look at the posters. In addition, you can change them at least every week and you will never get tired of the design of your table (by the way, we have already told you where to find interesting posters and even how to create your own).
DESKTOP BACKGROUND
The Desktop background, as part of the theme, can also be changed at any time. For example, do you like the sounds of the installed theme, but don't like the background used? No problem: changing your desktop background is as easy as changing the theme itself, so don't worry, just choose a different one. To change the background, click on the Desktop background link (see Figure 7.2). In the window that opens (Fig. 7.3) you will see a list of images that change depending on which location source is selected. For example, you can use images from an image library or select the most popular photos. If you don’t have enough of what you have, you can always click the Browse button and specify any folder with images. Just like the theme, the background image changes on the fly so you can see the results right away. If you don’t like it, choose any other image, especially since there are quite enough ways to do this. Now comes the fun part. The operating system allows you to set either one permanent image or set up a slide show of the images you select. Setting a “stable” image is very simple: select a suitable background and click the Save changes button. To set up an image slideshow, you need to do the following.
Rice. 7.3. Changing the desktop background 1. Mark the images that should be included in the slide show. In this case, it is most convenient to save the necessary images in one folder, and then specify it using the Browse button. You can then click the Select All button to select all images at once. You can also tag images using the Ctrl or Shift key. 2. Specify the position of the image by selecting one of the values Fill, Fit, Stretch, Tile, Center from the list of the same name. If the image is larger than the screen resolution, this will not lead to problems, you just need to select the Fill or Stretch option from the list. If the image resolution is lower and it becomes distorted when stretched, you can modify the Desktop background by choosing a color that complements the image. To do this, use the Change background color link at the bottom of the window. 3. Select the frequency of changing images using the Change images every list. There are options from 10 seconds to 1 day. The most optimal and “calm” option is to set the frequency to around 1 hour: it’s both pleasing to the eye and not boring. 4. Specify the method for changing images. By default, the images are rotated in order as shown in the list. If you want to add some variety to your slideshow, you can check the Shuffle box. To apply the changes you have made, click the Save Changes button.
WINDOW COLOR
The ability to customize the window color scheme has been carried over from the Windows XP operating system, without any changes. To use this mechanism, you need to click on the Window color link at the bottom of the window shown in Fig. 7.2. There are quite a lot of controls to choose from, the color scheme of which you can customize. Some of them apply only to the Aero theme, while most of them relate to the standard Desktop theme, as indicated by the inscription in the window that opens. Here, in addition to the actual color design of windows and its elements, you can also customize the display of inscriptions, specifying the font and size. For example, you can set a different font for the window title, define the spacing between icons, the color of hyperlinks, and much more.
SOUNDS
Sounds, that is, sound design, are directly involved in the perception of the Desktop, so it is only natural that the Windows 7 operating system allows you to customize them at your discretion. To switch to sound management mode, select the Sounds link in the window shown in Fig. 7.2. A similar configuration method existed in Windows Vista, and compared to this operating system in Windows 7, there were no significant changes in this regard. Controlling sounds is very easy. There are more than ten different sound schemes to choose from, which you can set using the Sound scheme list. Once the sound scheme is selected, you can proceed to manage the sounds responsible for various operating system events. In the central part of the window (Fig. 7.4) there is a list of all system events and sounds associated with these events. If the sound is installed, the speaker icon is displayed next to the corresponding event. Regardless of whether the sound is installed or not, you can change it or link it to an event, for which you use the Sounds list: having marked the desired event, expand the Sounds list and select from it one of 40 sounds at your discretion. If you don’t need any sound for the event at all, select No from this list.
Rice. 7.4. Changing the sound You can do the same with any system event. This will create a new sound scheme, which you can save using the Save As button, allowing you to select it at any time. If you are not satisfied with the set of system sounds, you can specify your sounds using the Browse button. By default, only WAV files can be selected. But is this a problem if there are a large number of programs with which you can easily convert any audio file to WAV?
SCREEN SCREEN
Because there are times when you are not at your computer, your operating system may display a splash screen when you enter power-saving mode. At the same time, in addition to saving energy, you get a pleasing picture. And in addition, you can make it so that exiting the screen saver mode will be possible only after entering the password. This means that the information on your screen can't be seen by anyone, especially people who don't need to see it in the first place. The mechanism for working with screensavers has remained virtually unchanged since its appearance in earlier versions of the operating system. Why change anything in a useful and, most importantly, properly working mechanism? To be able to manage screensavers, select the Screensaver link, which is located in the lower right part of the window shown in Fig. 7.2. In the window that appears (Fig. 7.5), you can select any screensaver you like from the Screensaver list. At the same time, a small copy of the screensaver is displayed on a small screen at the top of the window. If you click the View button, you can see its work “live”, in full screen mode.
Rice. 7.5. Setting up the screensaver Almost all screensavers have settings that can be customized. For example, if you select the Photos screensaver, as shown in Fig. 7.5, then after clicking the Options button you can specify the folder with your images that will participate in the slide show. You can also choose the speed at which these images change. If you want to exit screen saver mode only when you enter your password, select the Start at login screen check box. This opportunity is very often used by office workers, especially if one office is shared between several colleagues.
More personalization features in Windows 10
The Windows operating system allows you to use many useful functions.
Changing the mouse cursor
In the settings you can adjust the size and color of the pointer. To do this you should:
- Open Start.
- Go to "Control Panel".
- In the tab that opens, find “Special Features”.
- In the window, select “Change mouse settings.”
- Then “Make the mouse easier to use.” Now you can safely choose one of the proposed color and size options.
Installing gadgets
Desktop gadgets allowed the user to play mini-games or work in applications directly on the desktop. Windows used to support them in its operating systems, but over the course of circumstances it decided to abandon the function. To return a convenient option for work, you will need to choose any of the following methods:
- Windows Desktop Gadgets program. A free application, it has been operating for more than one year, weighs little, returns all gadgets. After installation, you need to open the application and your favorite icons will appear on the screen. They can be dragged and deleted with the right mouse button.
- 8GadgetPack is another option for “resurrecting” gadgets. The program is easy to use and takes up little memory. The workflow is the same - complete installation of the application. After the download is complete, simply open the program and drag and drop gadgets onto the workspace. The convenience is that the variety of widgets is much greater than in the first option.
Note! It is impossible to find the entire range of gadgets in the regular version of the application. To view the full set in the program, you need to go to the “Get more gadgets online” line.
Gadgets will help you decorate your table beautifully
CHANGING YOUR DESKTOP ICONS
As you may have already noticed, by default, immediately after installation, the operating system displays only the Recycle Bin icon on the Desktop. It is not clear what the reason for this decision is, because the Computer and Network icons are used much more often in practice, and yet the developers decided not to display them. This kind of “disgrace” is very easy to fix. First of all, you need to launch the mechanism for working with icons, for which you use the Change desktop icons link on the left side of the window shown in Fig. 7.2. As a result, a window will open in which you will see a list of standard icons, as well as parameters that show their current state (Fig. 7.6). If you want the Computer and Network icons to be present on the Desktop, simply check the appropriate boxes in this window.
Figure 7.6. Customizing the appearance and display of icons As in previous operating systems, in Windows 7 you can change the icon by clicking the Change Icon button. As a result, a window will open containing a fairly large set of various icons. To return the standard icon image, click on the Normal icon button. If you want the desktop icons to change when you install a new desktop theme, check the Allow themes to change desktop icons checkbox. In this case, the icons may take on a more original appearance.
Settings
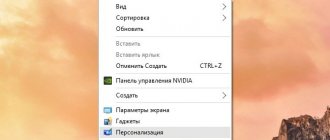
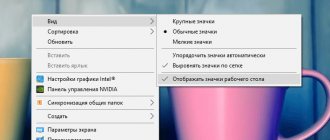
The first action is the same for all operating systems: you need to move the mouse cursor over a free part of the desktop, and press the right button and through the menu that appears we can configure parameters such as:
- screen resolution – the size of the image displayed on the monitor
- personalization - here we can customize the background, font size, etc.
The settings are slightly different for each operating system, so we will look at the settings for each separately.
If you don’t yet know what operating system you have installed, I recommend reading this article.
For Windows 7
In the menu that opens, select “Screen Resolution”
Next, opposite “Resolution”, click the mouse, opening the list of available values, and select the most suitable resolution for you and click “ok”
If the resolution you choose does not suit you, you can choose another one using this method.
Personalization
In the menu, click “Personalization”
In the window that opens we can configure the OS interface
As you can see in the screenshot, I deliberately divided the personalization window into areas for ease of study.
1 area
Here is a small menu with which we can configure the following elements:
Changing icons
By clicking on “Change desktop icons” a parameter window will appear where, by checking the boxes, we can display the folder data on the desktop.
In my case, these are “my computer” and “recycle bin”; the rest of the folders are unnecessary to me.
Also here you can change the icon for each folder. Select the icon and click “change icon”
Select and click “ok”
Changing mouse pointers
By clicking “change mouse pointers” a window will open in which you can select the pointer to your liking.
After selecting the settings, do not forget to click “apply”
Changing your account picture
After clicking on “Change account picture”, a new window will open where you can choose from ready-made pictures or upload your own.
After selecting, click “edit picture”
2 area
In the second area we are presented with various design themes. When you click on any theme icon, it is applied by the system automatically.
All you have to do is click, watch and choose the one you like best.
3 area
Here you can customize the background, window color, sounds and screensaver when your computer is idle.
Everything is simple here: select a parameter in the window that opens, make changes and remember, click save or apply.
By the way, you can make any drawing or photo as a background. You need to hover the mouse cursor over the picture, right-click and in the menu that appears, select the option “Set as desktop background image”
It's that simple.
4 area
Screen
After clicking “screen”, a window will open where you can adjust the size of elements and text on the screen. After selecting the parameters, save the changes by clicking on “apply”
We leave the next parameter “Taskbar and Start Menu” unchanged for now; we will look at it a little later.
The Ease of Access Center is designed to make using your computer easier. Personally, I don't use them, but you can certainly experiment.
For Windows 10
Point the mouse over a free part of the desktop and press the right button.
Screen Options
In the menu that appears, select screen options
In the window that opens, we are more interested in the scale of display of texts, pictures and other elements. As well as screen resolution.
I personally leave the “Night Light” and “Windows HD Color” settings unchanged. Since I practically don’t work at the computer at night, and my monitor does not support the HD Color function.
You can of course experiment. And I will be grateful if you leave feedback on the operation of these functions in the comments to this article.
Let's continue.
Scrolling down the screen will allow you to set up multiple displays if you choose to install them. And you can get into the “advanced display settings” and “graphics” settings. My display does not support these parameters.
In the same window on the left, you also have access to many settings; we will discuss them in other articles. So subscribe to updates and don’t miss new articles.
Personalization
Repeat the first step and select “Personalization” from the menu
In the settings window that opens, the first thing we do is set the background.
You can choose from those offered by the system itself or upload your own.
Next, select “Subject” in the left menu. System options are also presented here and can be selected and downloaded from the Microsoft Store app. Please note that you will have to pay for many of the topics here.
I described another way to add a background using any pictures on your PC in this article for Windows 7, you can scroll through the article a little higher and take a look.
CHANGING MOUSE POINTERS
The ability to customize mouse pointers existed in the earliest versions of the Windows operating system, so the developers of Windows 7 decided not to reinvent the wheel and use an already established mechanism. At the same time, they took it in the form in which it is present in Windows Vista. As before, the user has the ability to configure the following parameters. p Mouse buttons. You can adjust the double-click speed, enable or disable sticking, and reconfigure the button layout for left-handers. p Pointers. There are over 10 different signage designs to choose from. In this case, you can customize the appearance of the pointer for each mode and enable the display of shadows. It is also possible to allow or disable changes to pointers when installing new themes. p Pointer options. You can configure such pointer parameters as the speed of its movement, hiding from the screen when entering from the keyboard, setting the pointer to the default button, displaying the “tail”, etc. Wheel. The mouse wheel can also be customized, for example, you can specify the number of lines by which you want to scroll the contents of the window with one scroll of the wheel. If you have a mouse whose wheel can be tilted left and right, you can also use this feature for scrolling, for example, you can set the entire screen to scroll, which is convenient when reading e-books.
CHANGING YOUR ACCOUNT PICTURE
The account picture is what you see when you enter your login password or exit screensaver mode. Additionally, this graphic also appears at the top of the Start menu. Not everyone likes the icon chosen by the system, such as a bunny or a fish. The icon can be changed, and this is done very simply. First of all, you need to click on the link Change account picture, which is located on the left side of the window shown in Fig. 7.2. As a result, a window will open in which you will see a set of images, as well as the image that your account is currently using (Fig. 7.7). Any image present in the window can become a picture for your account; you just need to select it and click the Change picture button. You can also select your own picture. To do this, you just need to follow the Search for other pictures link and indicate its location on the disk. The main graphic file formats are supported.
Rice. 7.7. Changing the account picture In the same way, you can change the pictures for other accounts that are registered in the operating system. If you have administrator rights, of course...
Using and setting up gadgets
As mentioned earlier, unlike Windows Vista, in which gadgets could only be displayed in a special sidebar, in Windows 7 they can be placed anywhere on the Desktop (Fig. 9.1). In addition, it became possible to change the size of the gadget window.
Rice. 9.1. Example of gadgets on the Desktop The number of gadgets is increasing every day, and their quality is also increasing. Windows 7 has 9 standard gadgets. In addition, you can download new ones from the Microsoft website or from any other. Gadgets vary in purpose. The most interesting ones are those that work as web services. Examples of such gadgets are weather, currency, news, etc. informers, that is, those that display data from the Internet. There are also general-purpose gadgets, such as clocks, various mini-games, slide shows, etc. To manage gadgets, use the Control Panel item called Desktop Gadgets (Fig. 9.2). After launching it, a window will appear (Fig. 9.3).
Rice. 9.2. Launching the Desktop Gadgets mechanism
Rice. 9.3. List of available gadgets This window displays a list of gadgets that are currently installed on the system. Over time, as the number of gadgets increases, all of them do not fit in this window, so the list can be scrolled using the navigation bar in the upper left corner of the window. Each element of this list is provided with a short description, which appears when the desired gadget is selected. By default, this window is displayed in compact mode, so you will need to enlarge it to see the description. To do this, select the Show details link in the lower left corner of the window. As mentioned above, new gadgets can be downloaded from the Internet, in particular from the Microsoft website. To do this, use the Find gadgets on the Internet link in the lower right corner of the window. To add a gadget to your Desktop, simply drag it from the list to your Desktop. Or right-click on the gadget and select Add from the context menu that appears. For example, let's look at the use and configuration of a standard weather gadget (Fig. 9.4). Rice. 9.5. Example of a weather gadget The window size of almost any gadget can be changed. In this case, increasing the window size can add functionality. For example, if you drag a weather gadget onto the desktop, by default it will be displayed in a smaller version, which implies displaying only the weather forecast in the selected city at the current moment. If you enlarge it, it will show the weather forecast for four days and in more detail (Fig. 9.5). Rice. 9.5. Enlarged gadget window The window is enlarged as follows. If you move the pointer to the gadget, an additional panel with buttons appears, among which there is a Larger button. When pressed, the window size increases. On the same panel there is also a Settings button, which opens a window with gadget settings. In our case, if you click this button, the window shown in Fig. 9.6. There are only two parameters that affect the operation of the gadget - changing the type of temperature display and selecting the city in which the weather should be shown.
Rice. 9.6. Setting up the gadget To change the city to any other, for example, St. Petersburg, type part or all of the city name and click the search button. As a result, a list of matches will appear from which you must select the desired position. After that, click OK and enjoy the result.
Personalization feature on Windows 10
Those who want to create their own style for the main page of their computer usually have a question about how to decorate the Windows 10 desktop. To do this, you can use personalization. The innovation appeared not so long ago and in the new version it works without interruptions. There are two ways to access personalization settings:
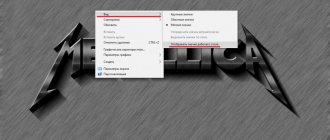
- Right-click on the desktop screen. After clicking, select “Personalization” from the list.
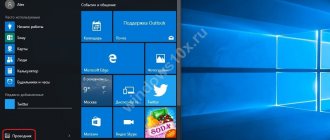
- By simply clicking on “Start”. Next, go to “Settings”, after “Windows Settings”. Select “Personalization” from the list that appears.
Personalization is a new feature on Windows 10
You can use any of the proposed methods - the result is the same. Personalization allows you to completely change your work area. A list will appear on the screen in which you can edit each section separately. Using the function, you can change the background, color, design of the lock screen, themes, taskbar and Start button.
